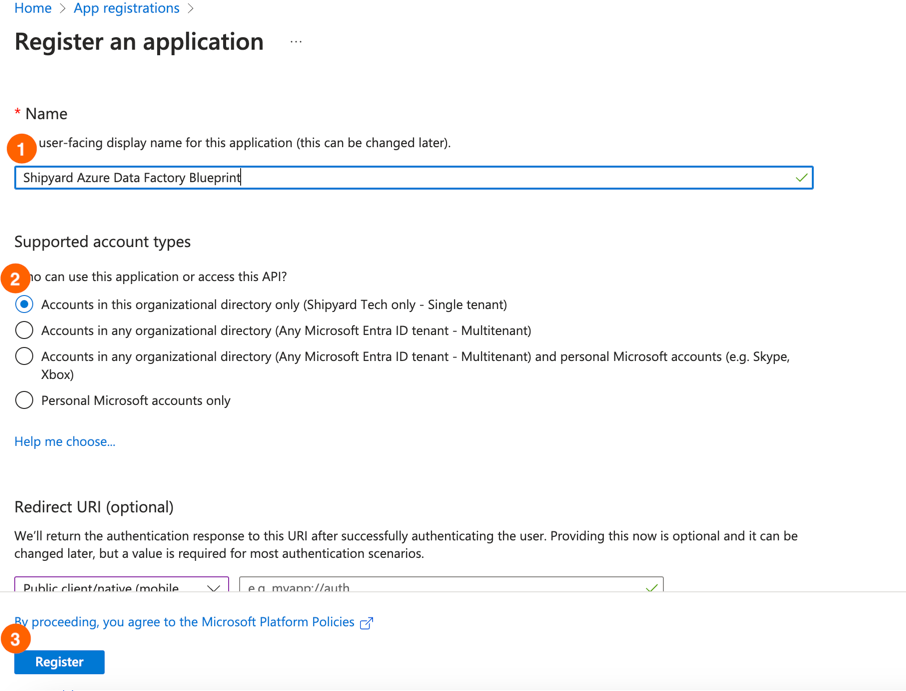
3. Click "New App Registration" 4. Fill out the form on the next page: - Name: Enter your app name. - Supported account types: Select "Single Tenant". - Click Register.
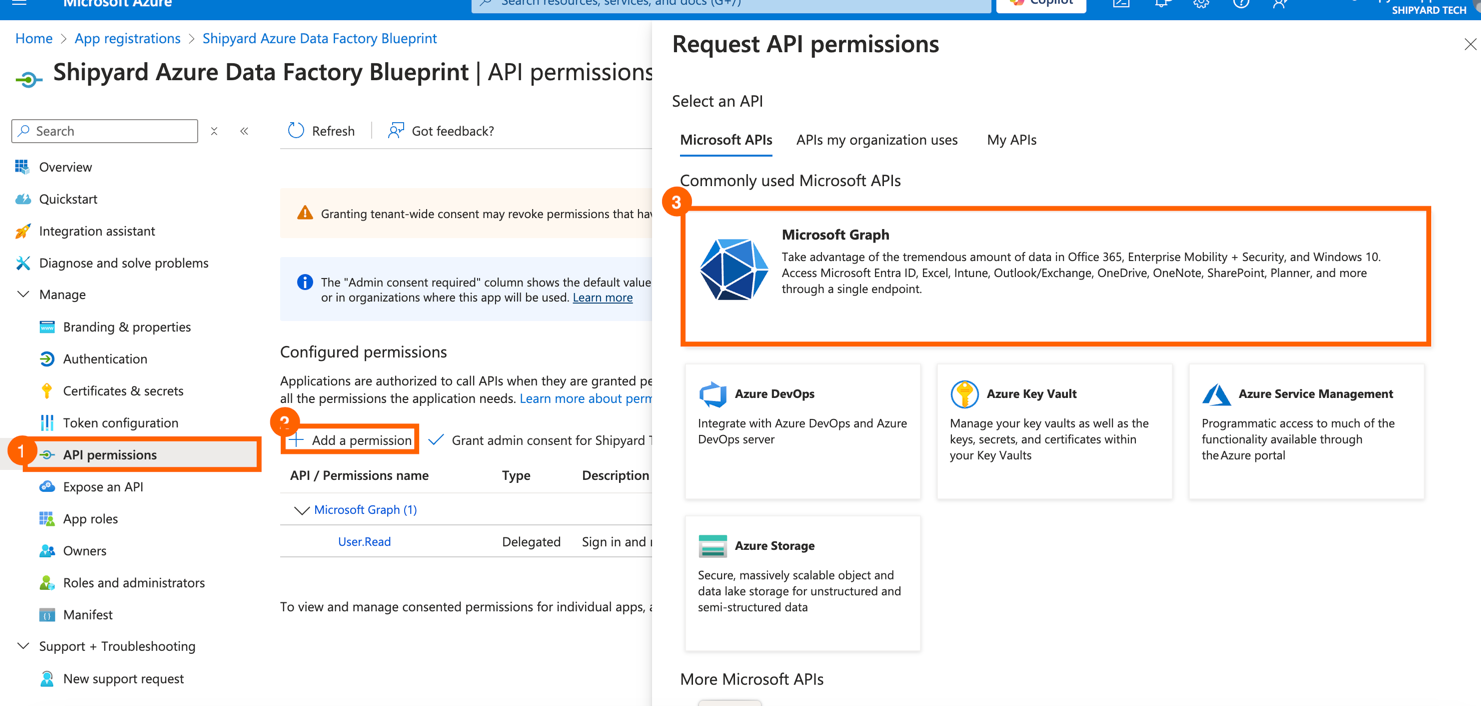
5. Note the following information: - Application (client) ID: For Client ID. - Directory (tenant) ID: For Tenant ID. 6. Set API Permissions: - Click API Permissions on the left pane. - Click Add a Permission > Microsoft Graph. - In the next window, click Application Permission. - Add the Application.ReadWrite.All permission. - Click Add Permission.
7. Grant Admin Consent: - Click Grant Admin Consent. - If you are not an admin, your admin will need to grant the permission. 8. Add a Client Secret: - Click Certificates and Secrets on the left pane. - Click New Client Secret. - Provide a description and select an expiration period. - Copy the generated value for Client Secret.
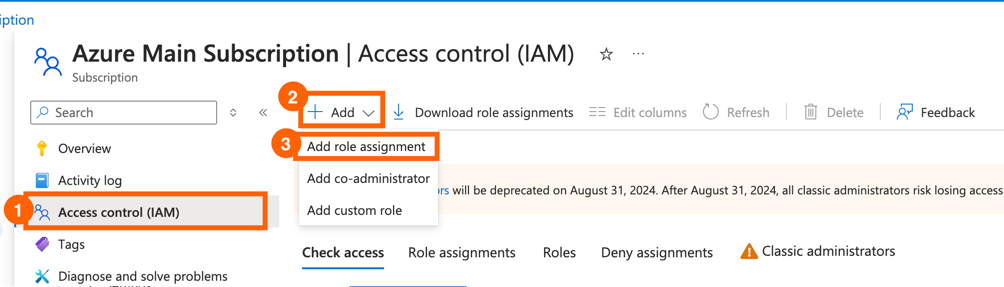
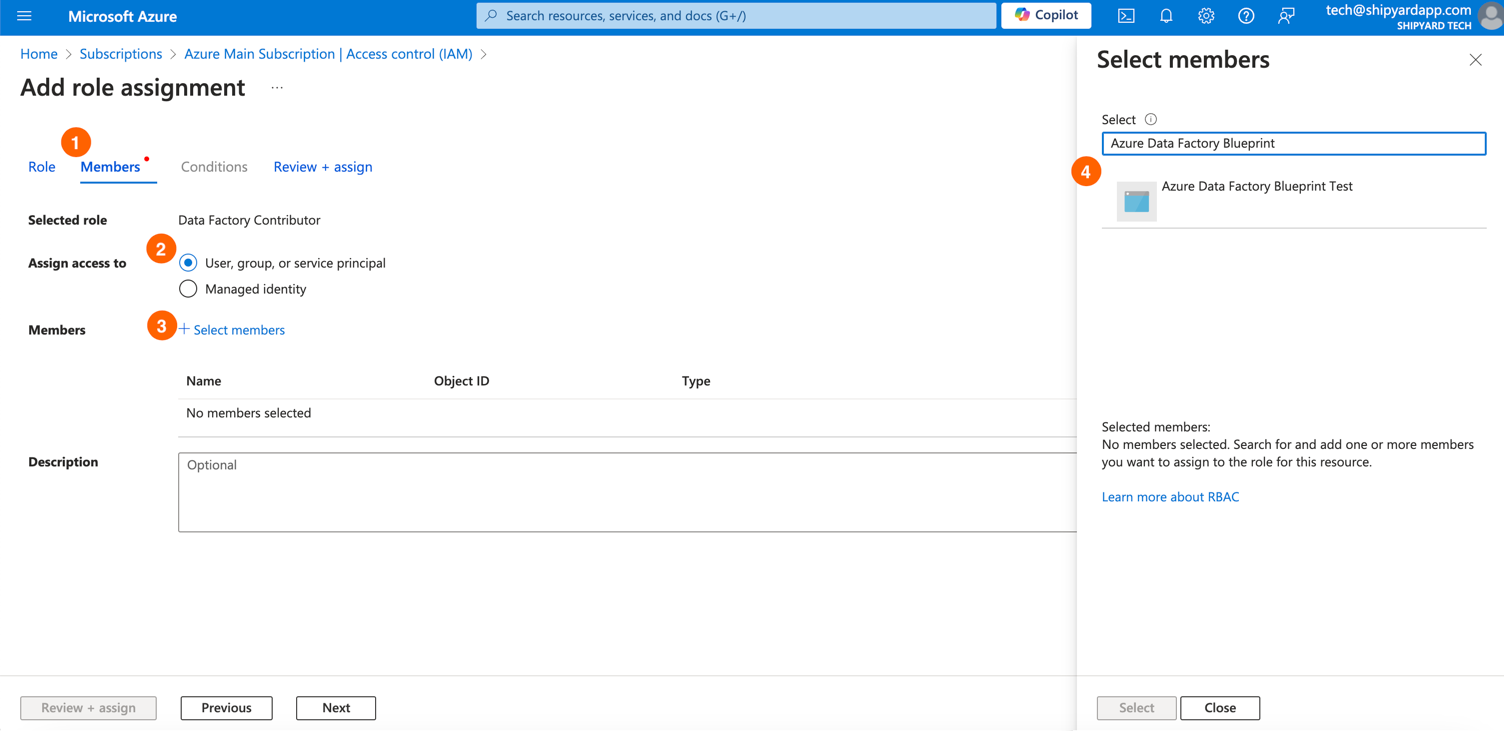
3. Note the Subscription ID for the Subscription ID field. 4. Select the subscription you want the app to have access to. 5. Set Role Assignment: - Go to Access Control (IAM). - Click Add > Add Role Assignment.
- Search for Data Factory Contributor. - Click Next. - Click Add Member. - Search for the app name. - Click Select. - Click Next.