Social Ad Trafficking - Campaign Shells - Set-Up Instructions
Step by step instructions are included below for how to onboard your client onto Social Ad Trafficking for Campaign Shells |
This example is for MIO/Trafficking sheets coming from Smartsheet
Reference Materials:
Example SAT MIO/Trafficking Sheet
Not all columns are required, depending on the objective & other specifics. Repetitive & consistent fields (like FB Account ID, Instagram ID, etc, can live in the Lookup Sheet)
Example Lookup Sheet
Pre-Requisites:
Good rules of thumb for MIO & Lookup sheet datasource setups
Both your MIO & Lookup Sheet should be set to
Replace(not Add & Update) to ensure there are no duplicates
Date columns should always come in as date timestamp data types (not strings aka
numbers and lettersin Alli Data)Budget columns should come in as
Numbers Onlydata typesID columns (like Account Id, Instagram Account ID, Campaign ID, etc) should come in as
Numbers and Lettersaka string data types
MIO/Trafficking Sheet Available in Alli Data
Must contain the following columns:
Campaign Name
Objective
(Campaign) Start Date / Some Date Column
Used later to filter to which campaigns should be created
Must be a date timestamp type in Alli Data
Budget
Must include budget $ value column
Must be a numeric column in Alli Data
If your campaigns use the same budget type (ie
Lifetime Campaign,Daily Campaign,Lifetime Ad SetorDaily Ad Set, then you do not need to include budget_type)If your campaigns change budget type, you mus include budget type column
Values: (
Lifetime Campaign,Daily Campaign,Lifetime Ad SetorDaily Ad Set)
SAT Lookup Sheet Available in Alli
Step 1: Set Up Your Alli Data View
Reference the
SAT Campaign Shell SQLdocumentation (also found in this folder) for copy/paste and easily adjustable SQL depending on your needs.Once your query is finished, navigate to the Alli Data Reporting section, and then Alli Data Explorer
Select
Create New Data Report, and for Report Type, selectCustom RedshiftName your view, copy/paste your SQL, and then remember to
Save&Publishyour new view
Step 2: Create Your Action
Navigate to Actions within Alli and select ‘Create Action’
Either using the Search feature, or scrolling through the available options, select the
Social Ad Trafficking - Create Campaign Shell
In the Configure setup, name your Action and select an appropriate user login for the authenticated account.
The authenticated account should be one that has access to the Facebook Ad Account that you are creating campaigns within
If you have no usable authenticated accounts, you can add a new one by clicking the 3 bubbles at the top right, Settings, and then add a new one there
In the Set Datasource section, select
Amazon S3In file, place
trafficking/+ client name (found on the top left of the page) +/social-trafficking-output.csvEx
trafficking/Client/social-trafficking-output.csv
In bucket, place
actionsprod-importsLeave
aws region,aws access key id, andaws secret access keyblankClick Save
Confirm the settings of your Action, and then click
PublishYour Action does not need a schedule as your Marketplace app will manage that
Copy the url to your Action and move on to Step 3, Creating Your Marketplace App
Step 3: Create Your Marketplace App
Navigate to the Marketplace within Alli and select ‘Discover’
Either using the Search feature, or scrolling through the available options, select
Social Ad Trafficking: customized asset placement aggregatorThe Set-Up instructions drop down will also contain instructions and tips for setup that mirror this page and can be used as a reference. Once you are confident, click
Install AppFollow the template input instructions:
In
slack_channel, place the name of the slack channel you want your alerts sent to (that a new campaign shell has been created)Remember, Alli must be invited to the channel to send messages!
You can leave
filenameblank, or replace it with your preferred filenameIf you replace the filename, you will need to go to your Action and adjust. Ex: If you make filename
sat_file, then your new action file would betrafficking/+ client name (found on the top left of the page) +/sat_file.csv
Place the view name you just created in Step 1 in the input for
bulksheet_relationSo if your view name is
social_ad_traffickingin the client (like in the example), you could placeclient.social_ad_trafficking
Leave
audiencemap_relationblank for now (not needed for campaign shell creationPlace the link you copied from the action you just set up in the
actions_link_urlFor
Traffickign LevelselectNew Campaign Shell
Last, before Saving your App, set up your Marketplace schedule. This will dictate the schedule for the entire process! We recommend (if you are using the above SQL) to run once/day at whatever time works best for your team.
Don’t set your schedule for more than once per day
Sending Slack Messages to PMGMoroch or PaidSocial slack spaces
In your Marketplace app, on the top right underneath
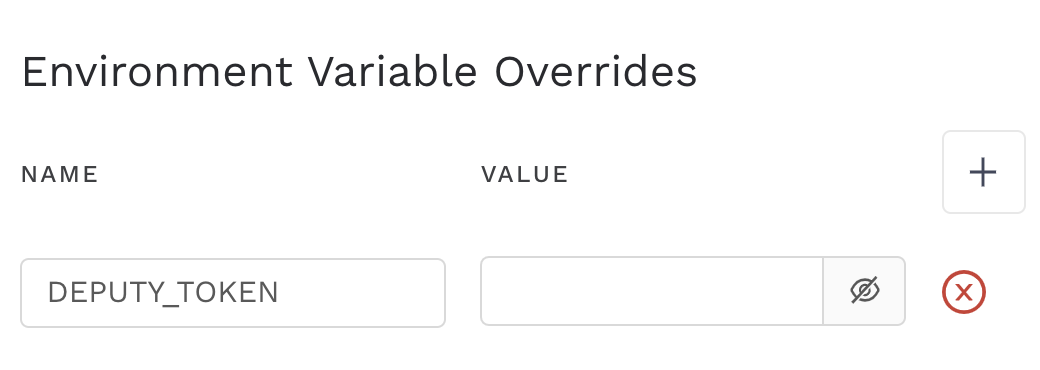
Environment Variablesclick the plus sign and addDEPUTY_TOKENin the name
For the value, follow the link for the appropriate slack space and copy/paste the value
Paid Social: https://pwpush.com/en/p/_pjxuw0_df84
PMGMoroch: https://pwpush.com/en/p/f_r-uf9oyw47htw
