
Definition
The Visual Editor or Workflow Builder allows you to add, edit, and remove Tasks and connections between Tasks. This editor was designed to be an intuitive drag-and-drop mechanism to visualize and create complex solutions all in the same location.
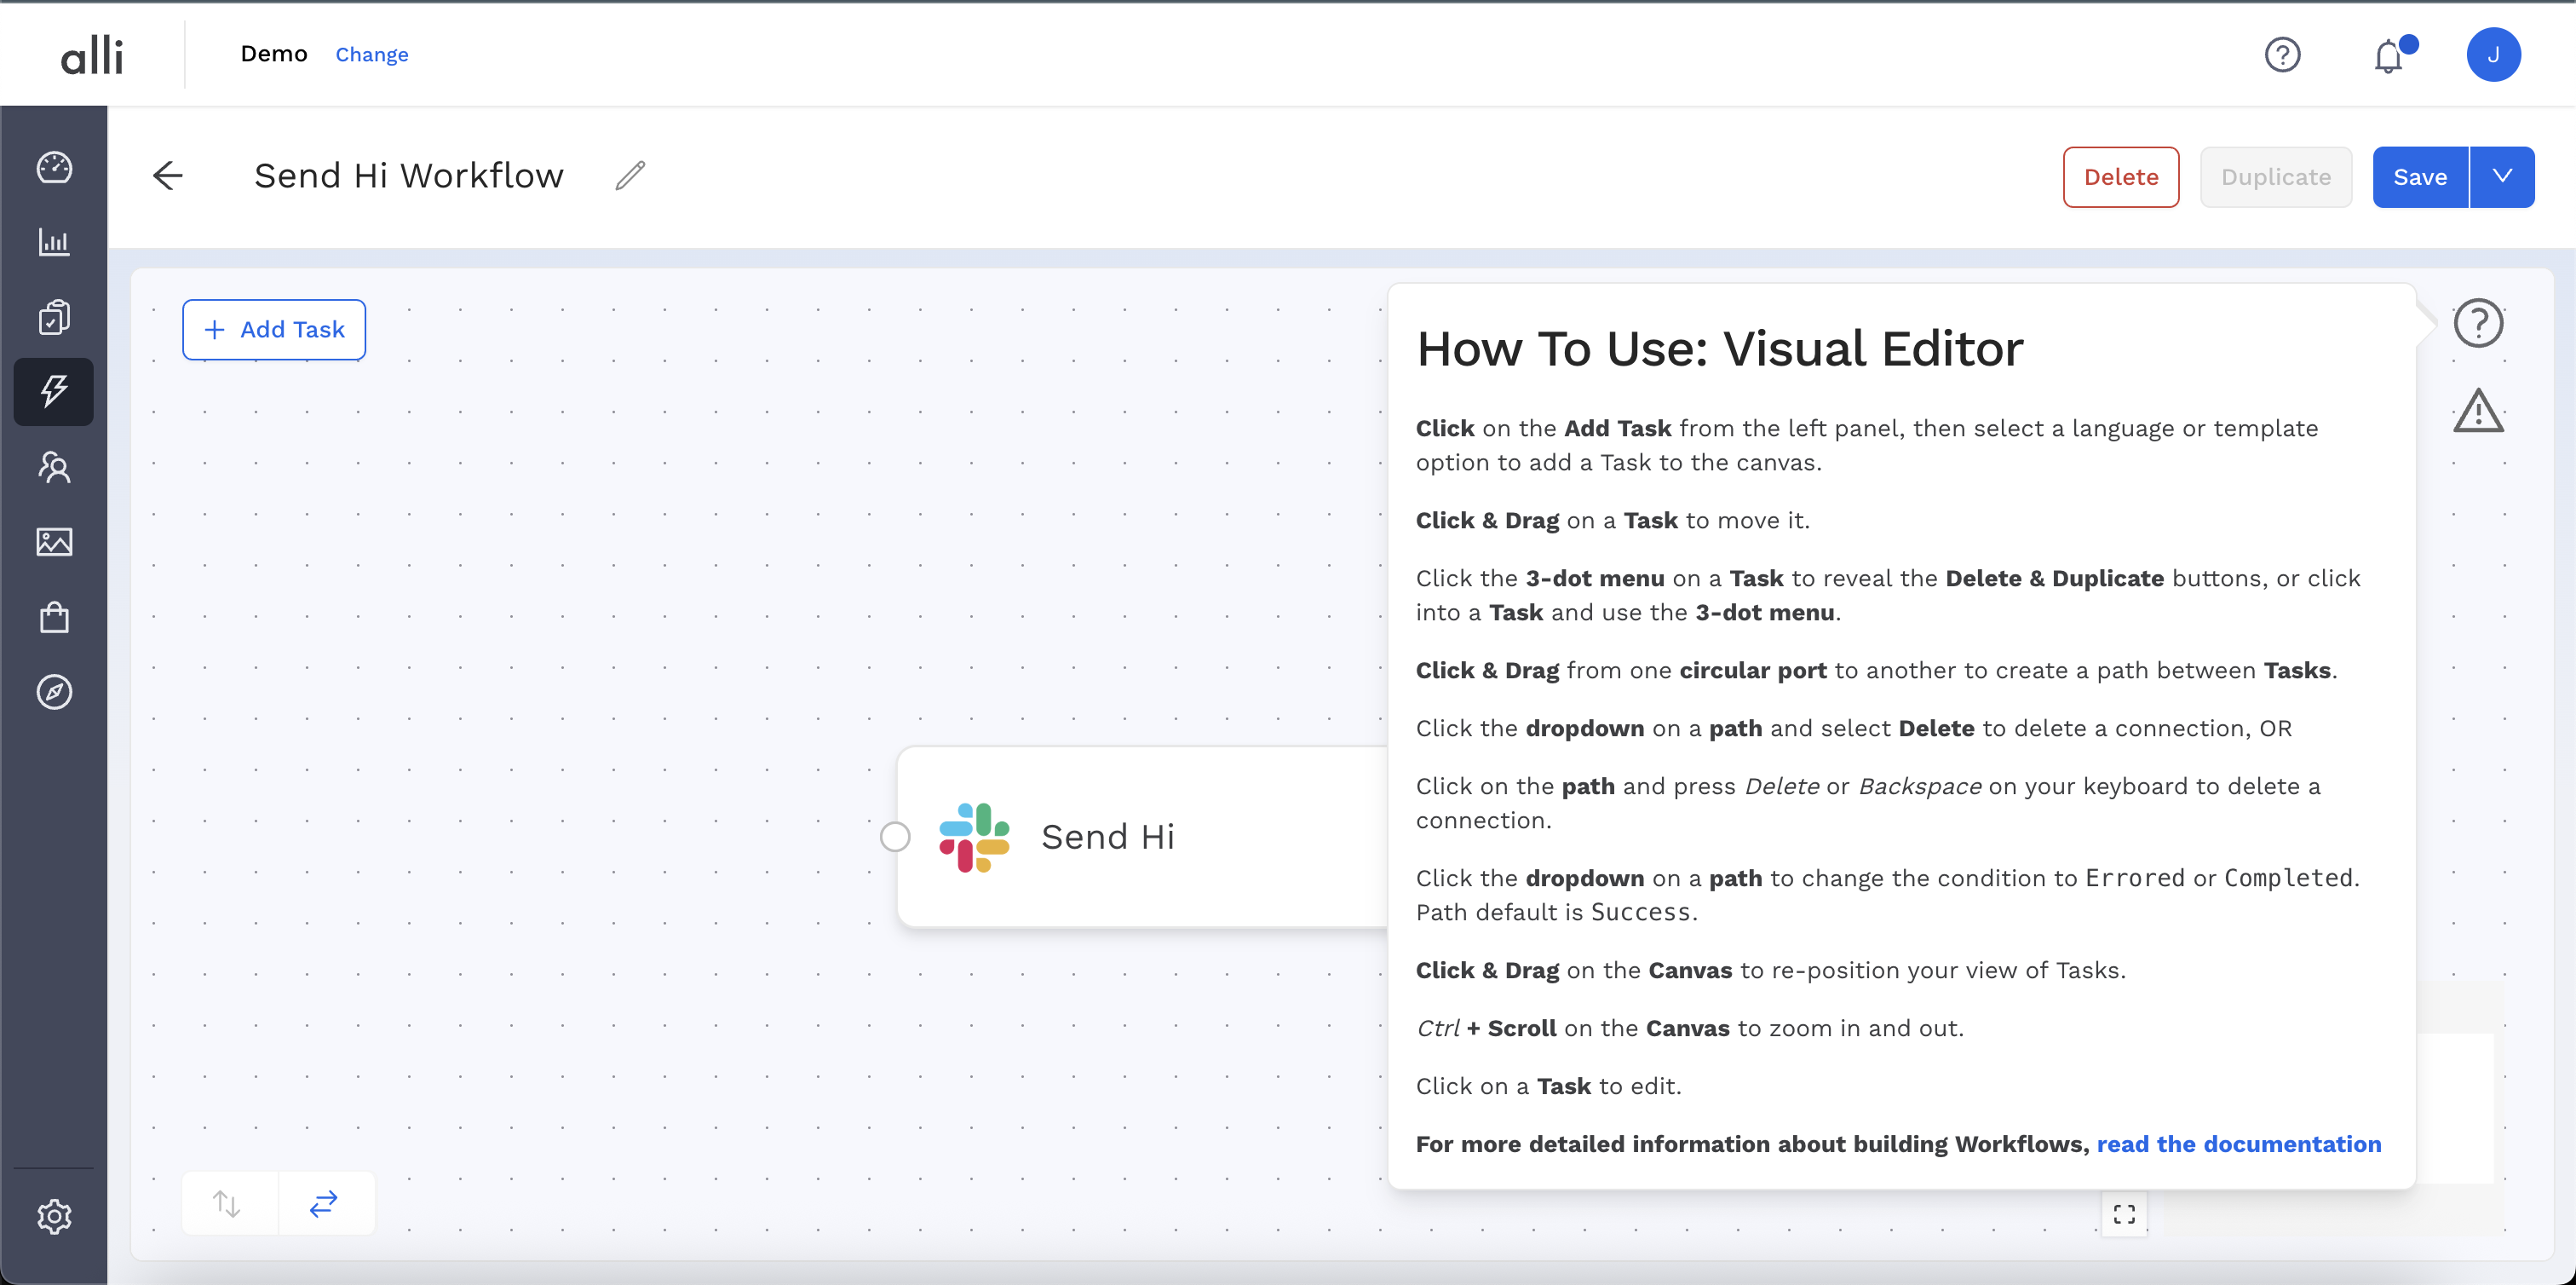
For information about how to use the visual editor, click the the question mark icon on the left sidebar.
Usage Instructions
-
Click on the Add Task from the left panel, then select a language or template option to add a Task to the canvas.
-
Click & Drag on a Task to move it.
-
Click the 3-dot menu on a Task to reveal the Delete & Duplicate buttons, or click into a Task and use the 3-dot menu.
-
Click & Drag from one circular port to another to create a path between Tasks.
-
Click the dropdown on a path and select Delete to delete a connection, OR
-
Click on the path and press Delete or Backspace on your keyboard to delete a connection.
-
Click the dropdown on a path to change the condition to
ErroredorCompleted. Path default isSuccess. -
Click & Drag on the Canvas to re-position your view of Tasks.
-
Ctrl + Scroll on the Canvas to zoom in and out.
-
Click on a Task to edit.
Adding Tasks
When you click on the canvas, or on the sidebar with the + icon, the left pane will update to show Templates and Languages that you can add/create Tasks with.
This section is split into 4 parts:
-
Code Tasks - which allow you to create a fully custom code task.
-
Library Templates - Jumpstart development with a library of pre-designed templates that can be customized to meet your specific needs. Templates are built by the technical teams at PMG and they are designed to:
-
Accomplish a single common action with a single platform (Like
Execute Query, orDownload Sheet to Workflow) -
Accomplish a complex series of tasks for a common marketing activity (like Social Consolidation, Anomaly Detection, and more)
-
Require no coding
-
-
Client Templates - Templates built and accessible only to that specific client
Clicking the Template/Language you want to use will result in a new Task being added to the canvas. Hovering over a Template/Language will give you more information about how it can be used.
You can always search for a specific Template using the search bar at the top. This will pre-filter the list to what you're looking for.
You can also duplicate Tasks by clicking on the 3-dot menu on the task itself and selecting Duplicate or by opening the Task and clicking the 3-dot menu within the task and selecting Duplicate.
Deleting Tasks
You can delete Tasks by clicking on the 3-dot menu on the task itself and selecting Delete or by opening the Task and clicking the 3-dot menu within the task and selecting Delete.
Editing Tasks
When you click on a Tasks, the left pane will update to show the contents of that Tasks.
Clicking on a panel will either expand or collapse its contents. Each panel can be edited independently, and you can switch between multiple panels or multiple Tasks.
During the process of making edits, if any panel's contents are invalid, the number of invalid inputs will be shown directly on the panel. You will also see an error message specifying which inputs need to be updated.
Any unresolved errors will be shown in the Error Bank. This feature shows you all of the fields that need to be updated across all of your Tasks before you will be able to save your Workflow. Each Task name in the Error Bank can be expanded for more details, and the Task name itself can be clicked to navigate directly to that Task.
All changes are "soft-saved" as you work in the Visual Editor. You can make as many edits as you'd like and these changes will be continue to be shown in the UI as long as you don't leave the Visual Editor tab or refresh the page. Once you're finished making all of your edits, you must click the Save button officially save all of your changes.
Navigating the Canvas
To help you manage larger workflows, the Visual Editor includes several tools in the bottom-right corner of the canvas:
-
Mini Map
A small overview of your entire workflow appears in the corner, giving you a bird’s-eye view. It shows your current view window and helps you quickly orient yourself within complex builds. -
Zoom Controls
In addition to using your mouse to zoom in and out, you can use the+and-buttons next to the mini map for more precise control. These are helpful if you prefer clicking over scrolling or are working on a trackpad. -
Center View (Frame) Button
If your workflow feels a little chaotic or you’ve lost sight of everything, click the frame icon to automatically center all visible tasks on the canvas. It’s a quick way to tidy up your view and get reoriented.