Here’s a step-by-step of how to connect AppsFlyer to Alli!
This set-up process has 3 main steps:
-
Creating an API connection app that will load each report into Alli Cloud Storage
-
Creating an Alli Cloud Storage datasource that grabs your report file
-
Creating a Force Sync app that refreshes the datasource each day (the automated equivalent of pressing the “Load Data” button)
To get started, what you’ll need is:
-
the AppsFlyer API token (contact your onboarding team or the PMG team member managing the account)
-
your client’s AppsFlyer App IDs (there should be two: one for iOS and one for Android)
-
confirmation of which AppsFlyer Raw Data Export reports to pull in (contact your onboarding & media teams to confirm)
-
for example, Fanatics pulls in User Acquisition Installs, User Acquisition In-App Events, Retargeting In-App Events, and Retargeting Installs (teams will refer to this as Retargeting Conversions)
-
1. Creating AppsFlyer API Apps
You’ll be creating one app per operating system per report (so, if you’re bringing in the “User Acquisition Installs” report, you’ll have 2 apps [one for iOS and one for Android])
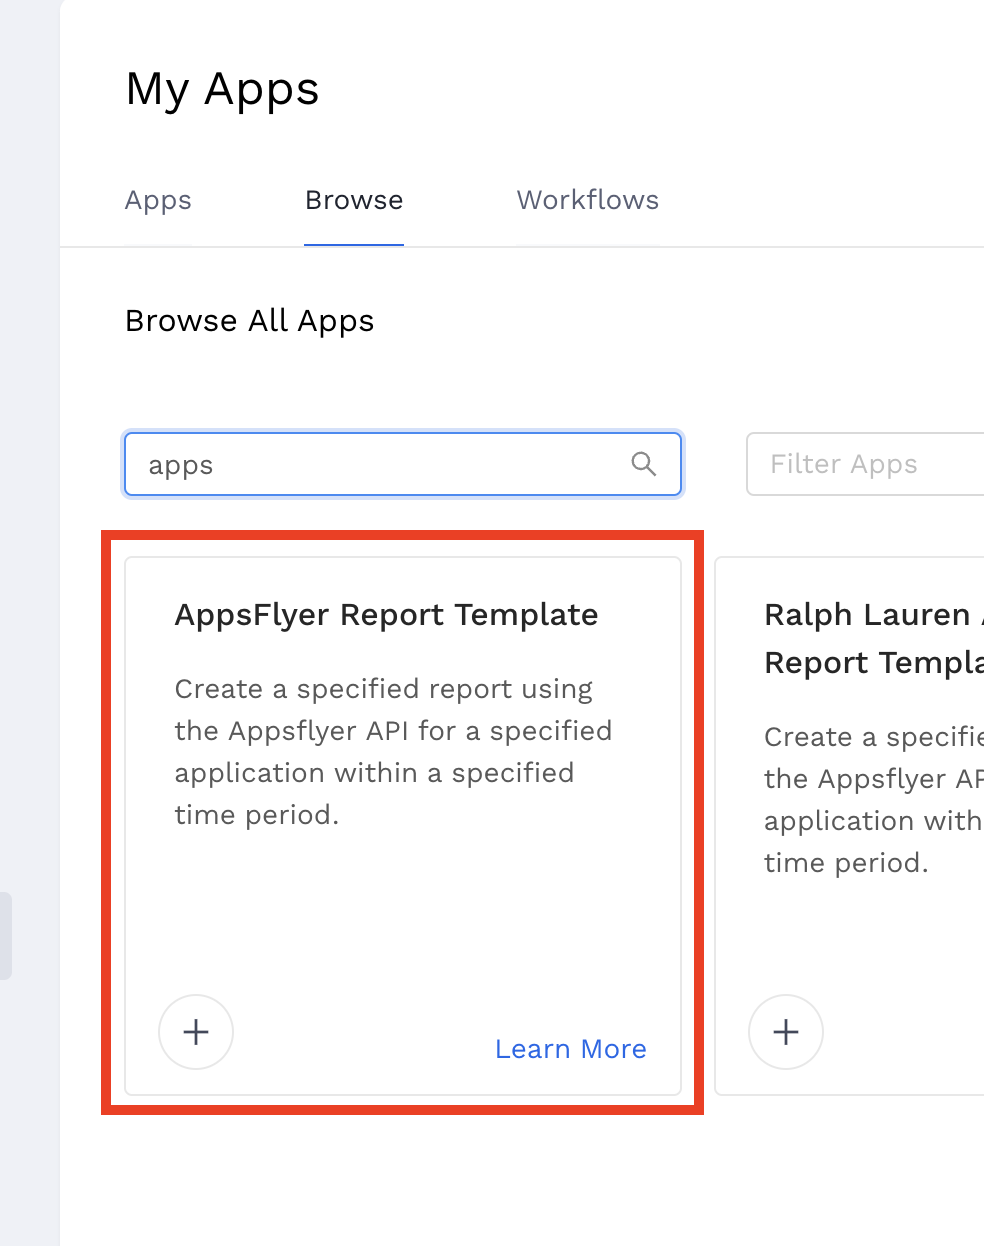
Go to Marketplace & select “AppsFlyer Report Template”
You’ll input your App ID & designate which report you’re pulling (and give it a daily schedule!)
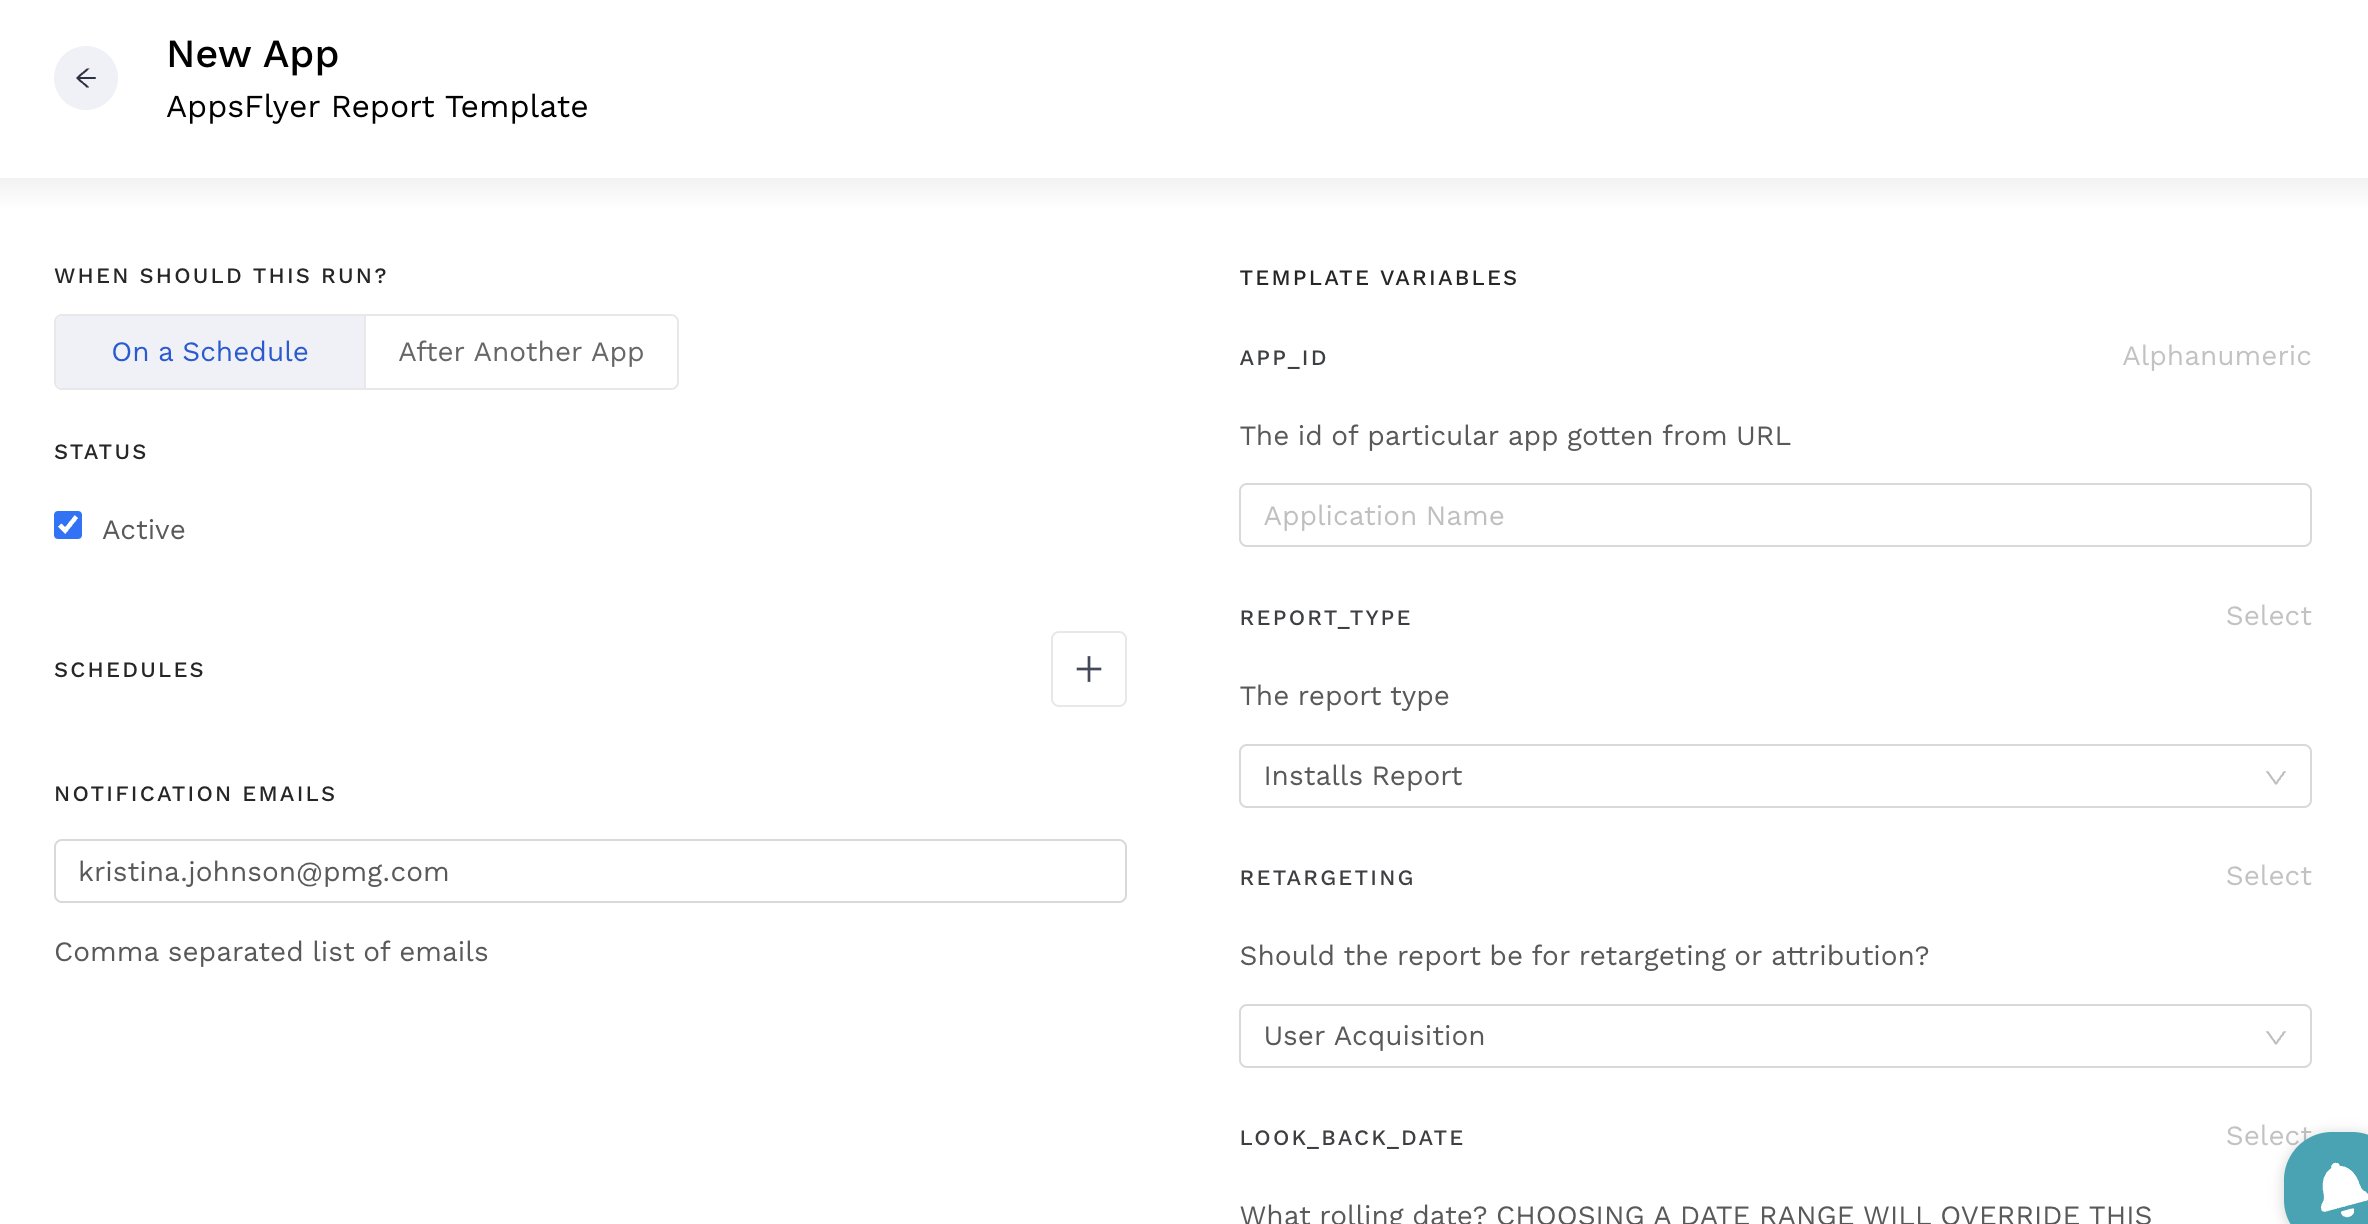
There are two In-App Event Reports, In-App Events Report returns data for only Order Completed events while Full In-App Events Report returns data for all events.
Once your app is set up and has run successfully, go to Executions, open up the most recent one, and copy the file name
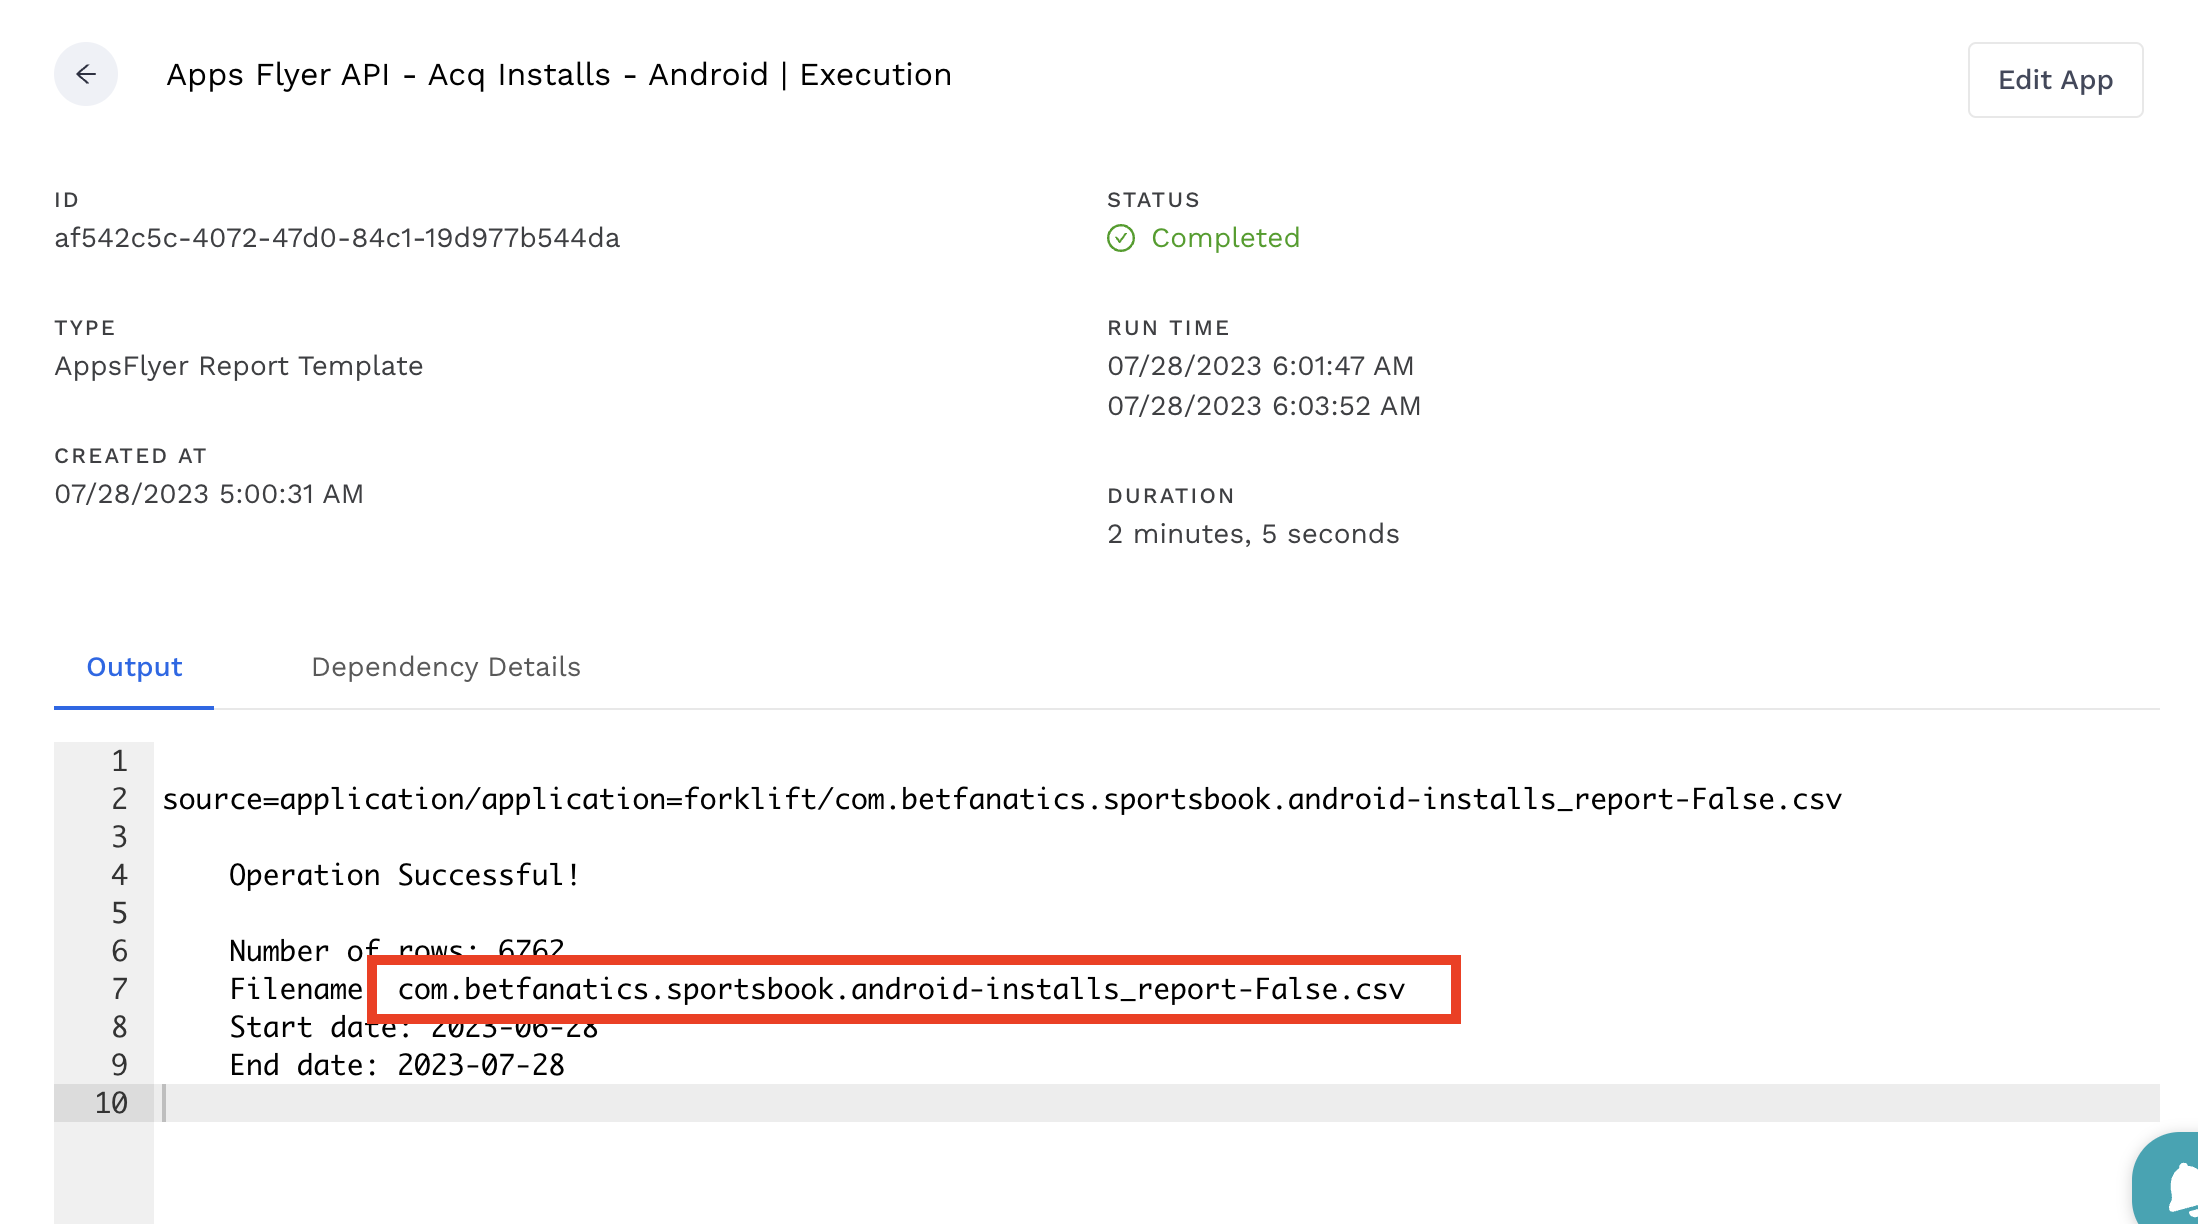
2. Creating Alli Cloud Storage Datasources
Next you’ll create a new Alli Cloud Storage datasource
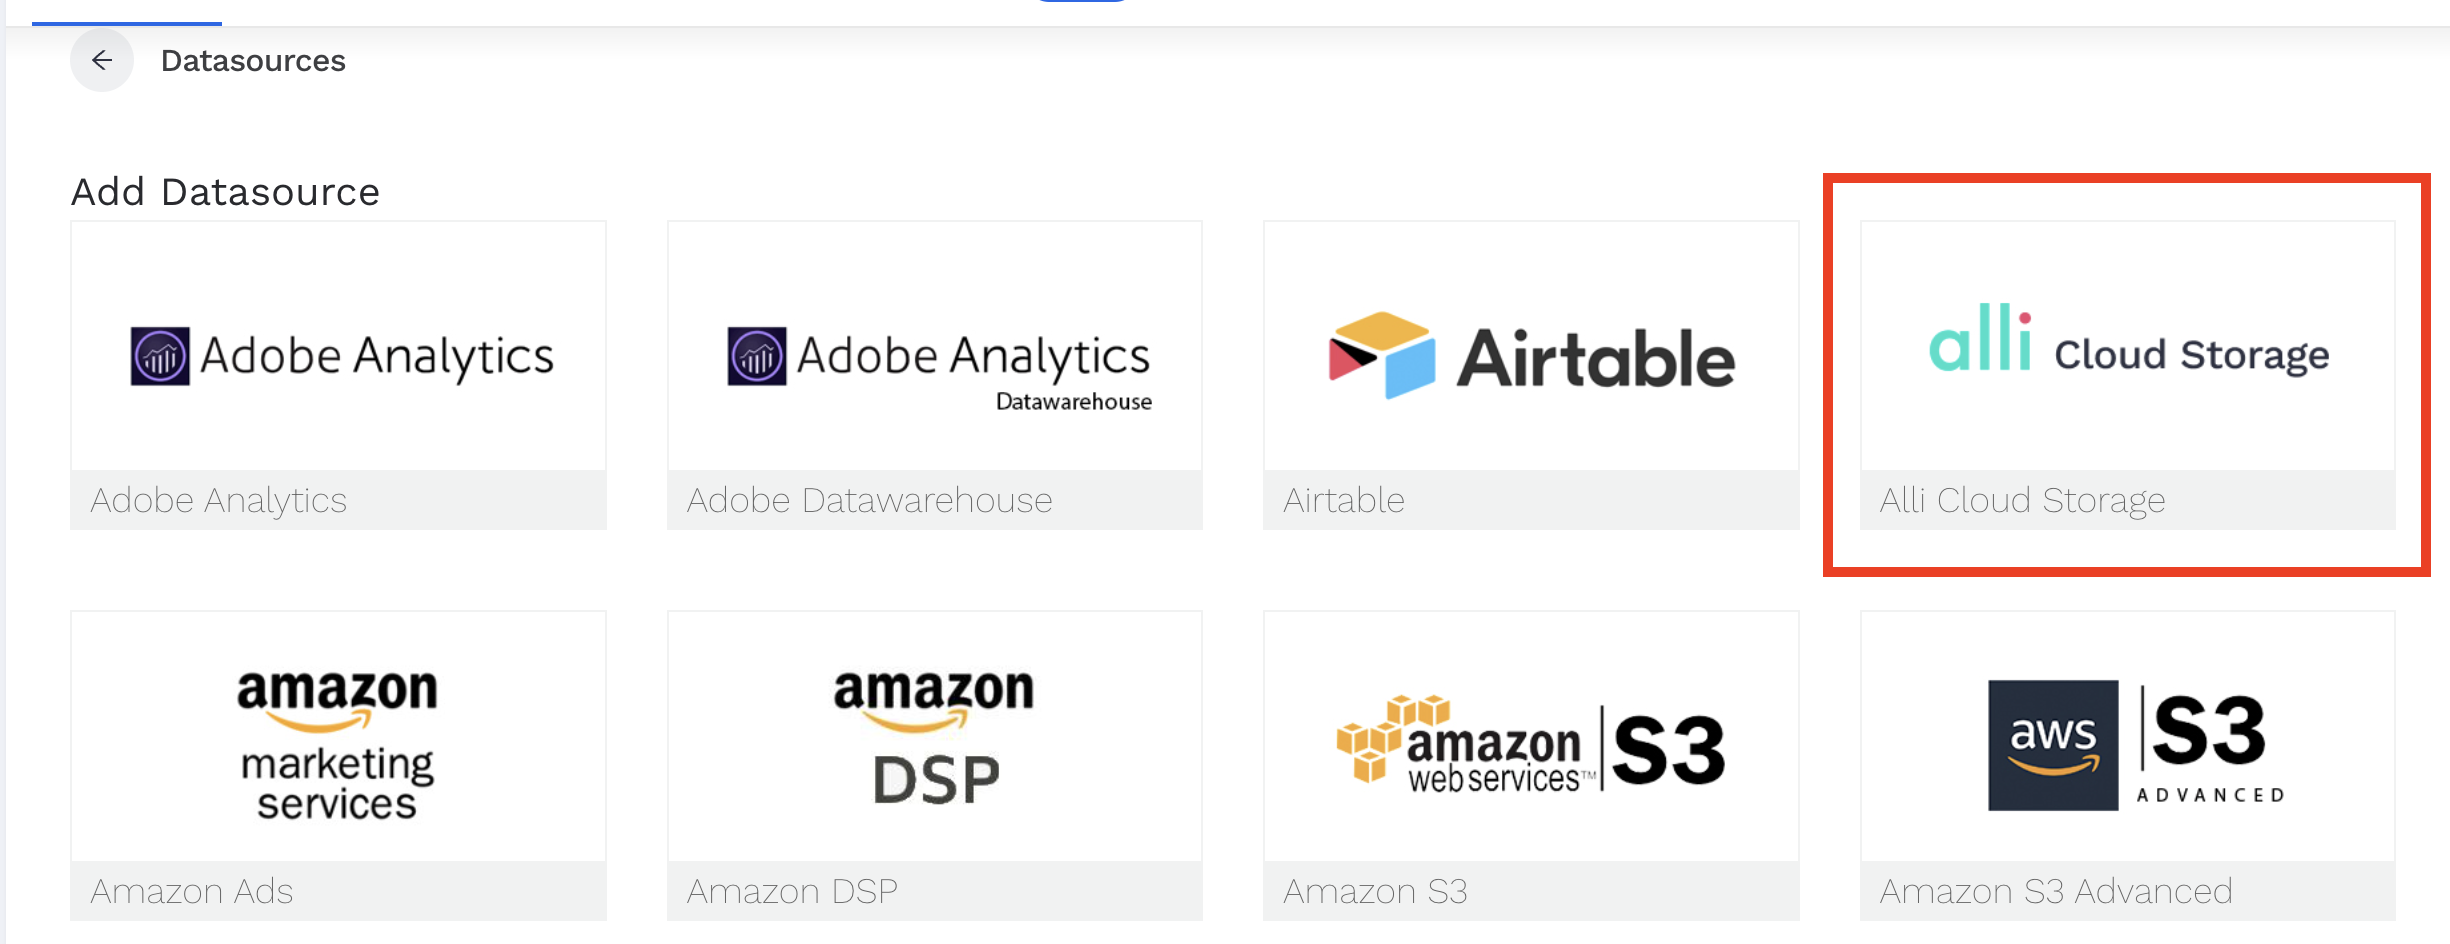
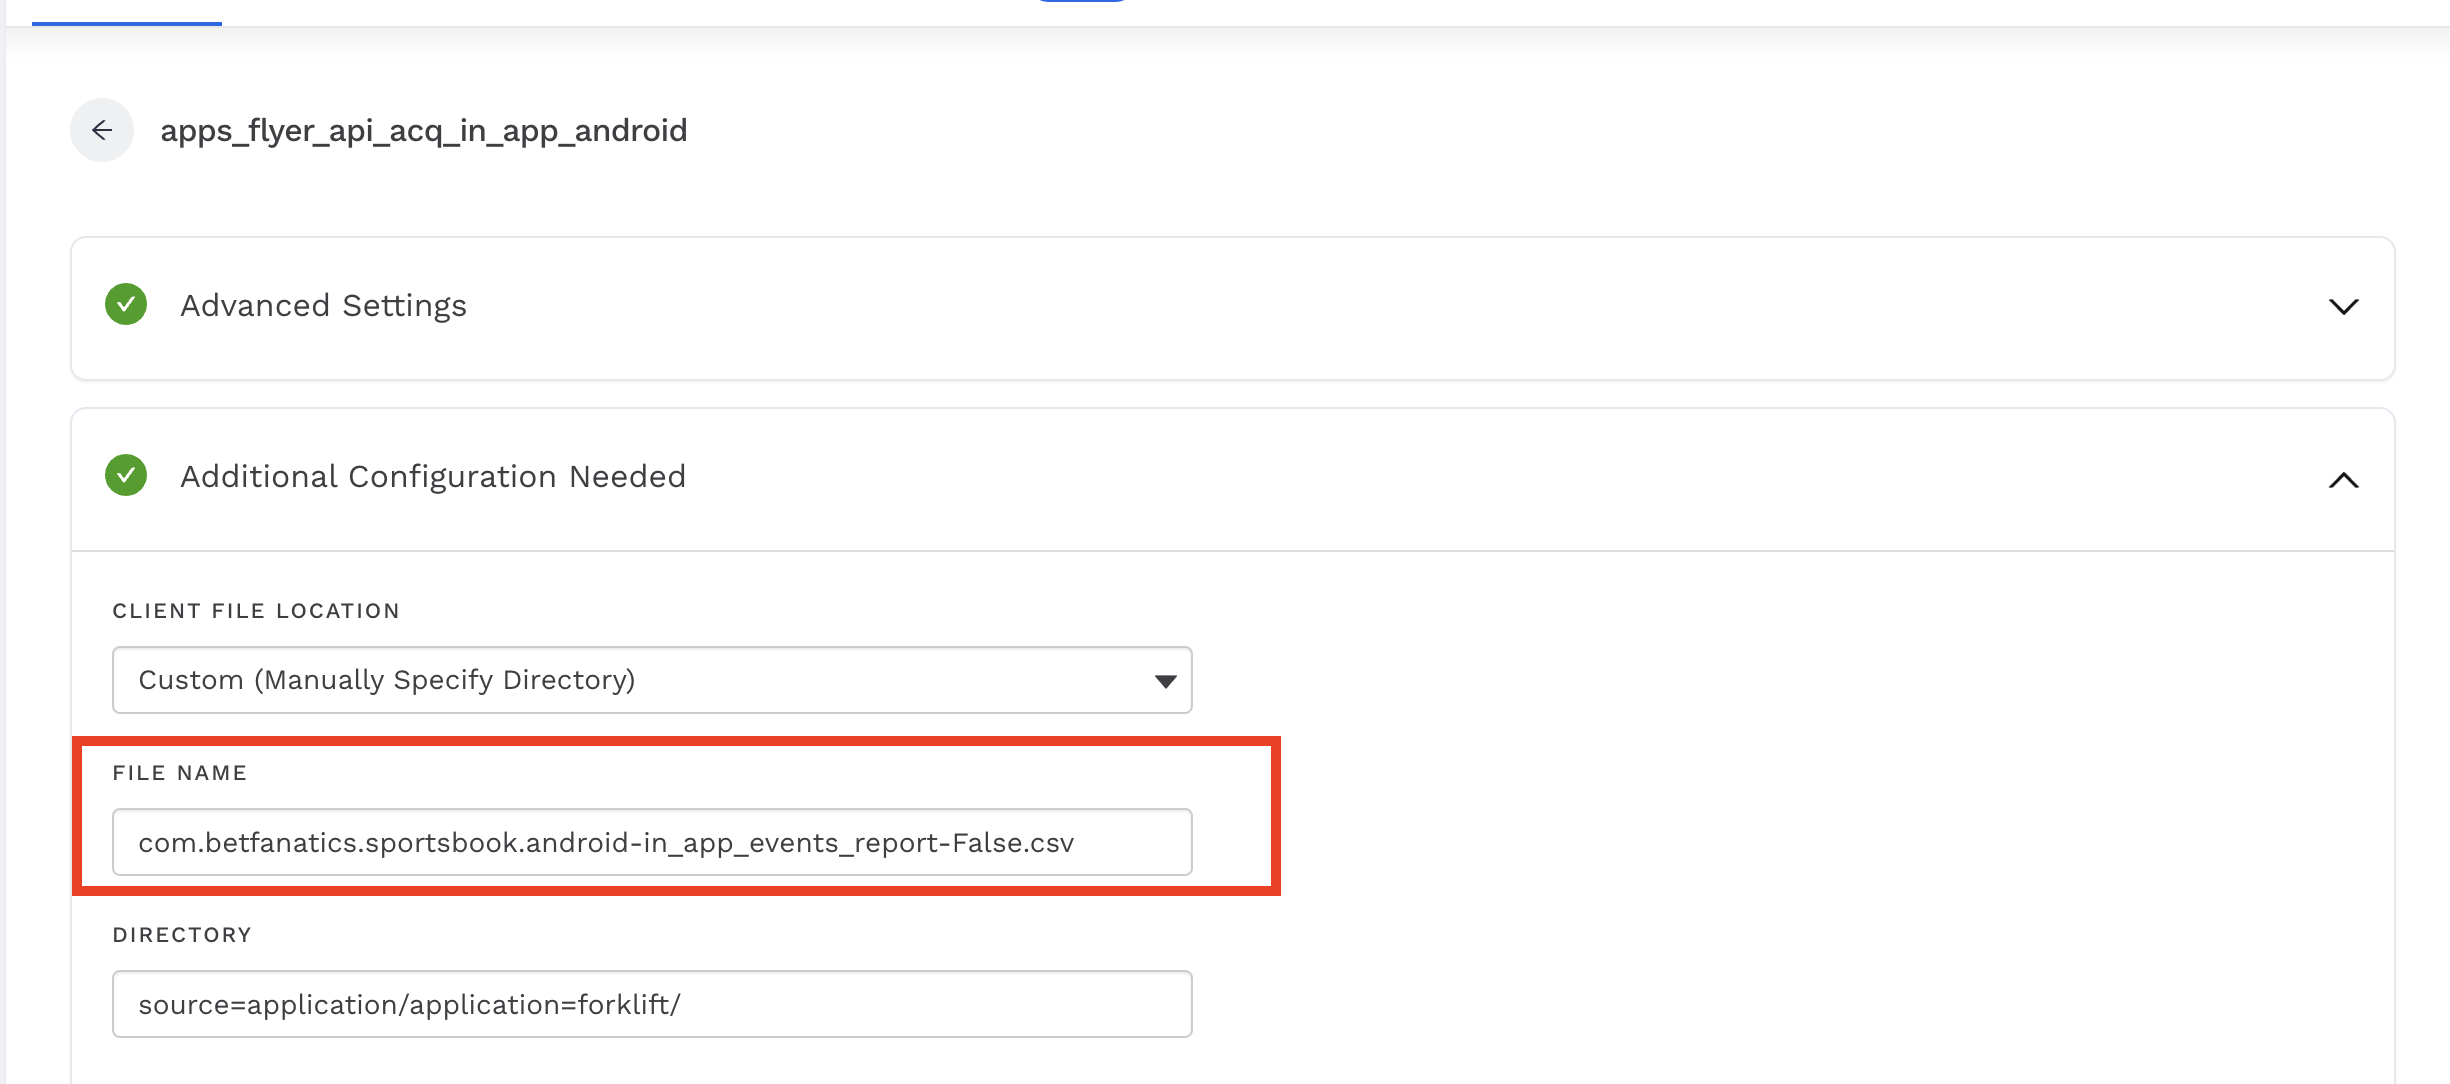
Choose “Custom (Manually Specify Directory”, paste in your file name from the API execution, and then put “source=application/application=forklift/” in the directory
Next, you’ll add your dimensions and metrics
Note that the dimensions and metrics will be different than the reports in the AppsFlyer Raw Data Export, so the best way I found to do this is to manually add each dimension/metric, and then duplicate your datasource when you’re repeating the process for the next report, as the API dimensions/metrics will stay the same across all reports.
|
Column |
Data Type |
Column Type |
|---|---|---|
|
attributed_touch_type |
numbers and letters |
attribute/metric |
|
attributed_touch_time |
numbers and letters |
attribute/metric |
|
install_time |
numbers and letters |
attribute/metric |
|
event_time |
date timestamp |
dimension |
|
event_name |
numbers and letters |
attribute/metric |
|
event_value |
numbers and letters |
attribute/metric |
|
event_revenue |
numbers and letters |
attribute/metric |
|
event_revenue_currency |
numbers and letters |
attribute/metric |
|
event_revenue_usd |
numbers and letters |
attribute/metric |
|
event_source |
numbers and letters |
dimension |
|
is_receipt_validated |
numbers and letters |
attribute/metric |
|
partner |
numbers and letters |
attribute/metric |
|
media_source |
numbers and letters |
attribute/metric |
|
channel |
numbers and letters |
attribute/metric |
|
keywords |
numbers and letters |
attribute/metric |
|
campaign |
numbers and letters |
attribute/metric |
|
campaign_id |
numbers and letters |
attribute/metric |
|
adset |
numbers and letters |
attribute/metric |
|
adset_id |
numbers and letters |
attribute/metric |
|
ad |
numbers and letters |
attribute/metric |
|
ad_id |
numbers and letters |
attribute/metric |
|
ad_type |
numbers and letters |
attribute/metric |
|
site_id |
numbers and letters |
attribute/metric |
|
sub_site_id |
numbers and letters |
attribute/metric |
|
sub_param_1 |
numbers and letters |
attribute/metric |
|
sub_param_2 |
numbers and letters |
attribute/metric |
|
sub_param_3 |
numbers and letters |
attribute/metric |
|
sub_param_4 |
numbers and letters |
attribute/metric |
|
sub_param_5 |
numbers and letters |
attribute/metric |
|
cost_model |
numbers and letters |
attribute/metric |
|
cost_value |
numbers and letters |
attribute/metric |
|
cost_currency |
numbers and letters |
attribute/metric |
|
contributor_1_partner |
numbers and letters |
attribute/metric |
|
contributor_1_media_source |
numbers and letters |
attribute/metric |
|
contributor_1_campaign |
numbers and letters |
attribute/metric |
|
contributor_1_touch_type |
numbers and letters |
attribute/metric |
|
contributor_1_touch_time |
numbers and letters |
attribute/metric |
|
contributor_2_partner |
numbers and letters |
attribute/metric |
|
contributor_2_media_source |
numbers and letters |
attribute/metric |
|
contributor_2_campaign |
numbers and letters |
attribute/metric |
|
contributor_2_touch_type |
numbers and letters |
attribute/metric |
|
contributor_2_touch_time |
numbers and letters |
attribute/metric |
|
contributor_3_partner |
numbers and letters |
attribute/metric |
|
contributor_3_media_source |
numbers and letters |
attribute/metric |
|
contributor_3_campaign |
numbers and letters |
attribute/metric |
|
contributor_3_touch_type |
numbers and letters |
attribute/metric |
|
contributor_3_touch_time |
numbers and letters |
attribute/metric |
|
region |
numbers and letters |
attribute/metric |
|
country_code |
numbers and letters |
attribute/metric |
|
state |
numbers and letters |
attribute/metric |
|
city |
numbers and letters |
attribute/metric |
|
postal_code |
numbers and letters |
attribute/metric |
|
dma |
numbers and letters |
attribute/metric |
|
ip |
numbers and letters |
attribute/metric |
|
wifi |
numbers and letters |
attribute/metric |
|
operator |
numbers and letters |
attribute/metric |
|
carrier |
numbers and letters |
attribute/metric |
|
language |
numbers and letters |
attribute/metric |
|
appsflyer_id |
numbers and letters |
attribute/metric |
|
advertising_id |
numbers and letters |
attribute/metric |
|
idfa |
numbers and letters |
attribute/metric |
|
android_id |
numbers and letters |
attribute/metric |
|
customer_user_id |
numbers and letters |
attribute/metric |
|
imei |
numbers and letters |
attribute/metric |
|
idfv |
numbers and letters |
attribute/metric |
|
platform |
numbers and letters |
attribute/metric |
|
device_type |
numbers and letters |
attribute/metric |
|
os_version |
numbers and letters |
attribute/metric |
|
app_version |
numbers and letters |
attribute/metric |
|
sdk_version |
numbers and letters |
attribute/metric |
|
app_id |
numbers and letters |
attribute/metric |
|
app_name |
numbers and letters |
attribute/metric |
|
bundle_id |
numbers and letters |
attribute/metric |
|
is_retargeting |
numbers and letters |
attribute/metric |
|
retargeting_conversion_type |
numbers and letters |
attribute/metric |
|
attribution_lookback |
numbers and letters |
attribute/metric |
|
reengagement_window |
numbers and letters |
attribute/metric |
|
is_primary_attribution |
numbers and letters |
attribute/metric |
|
user_agent |
numbers and letters |
attribute/metric |
|
http_referrer |
numbers and letters |
attribute/metric |
|
original_url |
numbers and letters |
attribute/metric |
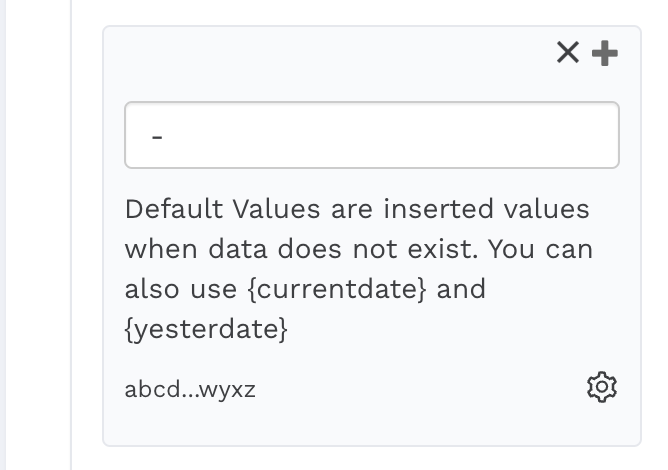
Another note is that not all columns will have data, and since you can’t select which columns to bring in from the report, for all attribute/metrics (aka: not the dimensions), you’ll want to double click on the column card and add a “-” as the Default Value, otherwise Alli will skip the row and stop bringing in data after 200 skipped rows
After your datasource is set up, you’ll repeat this process for each API report/operating system, so creating a new report app, copying the file name from the executions, then duplicating your datasource and changing the datasource name and the file name
3. Creating Force Sync Apps
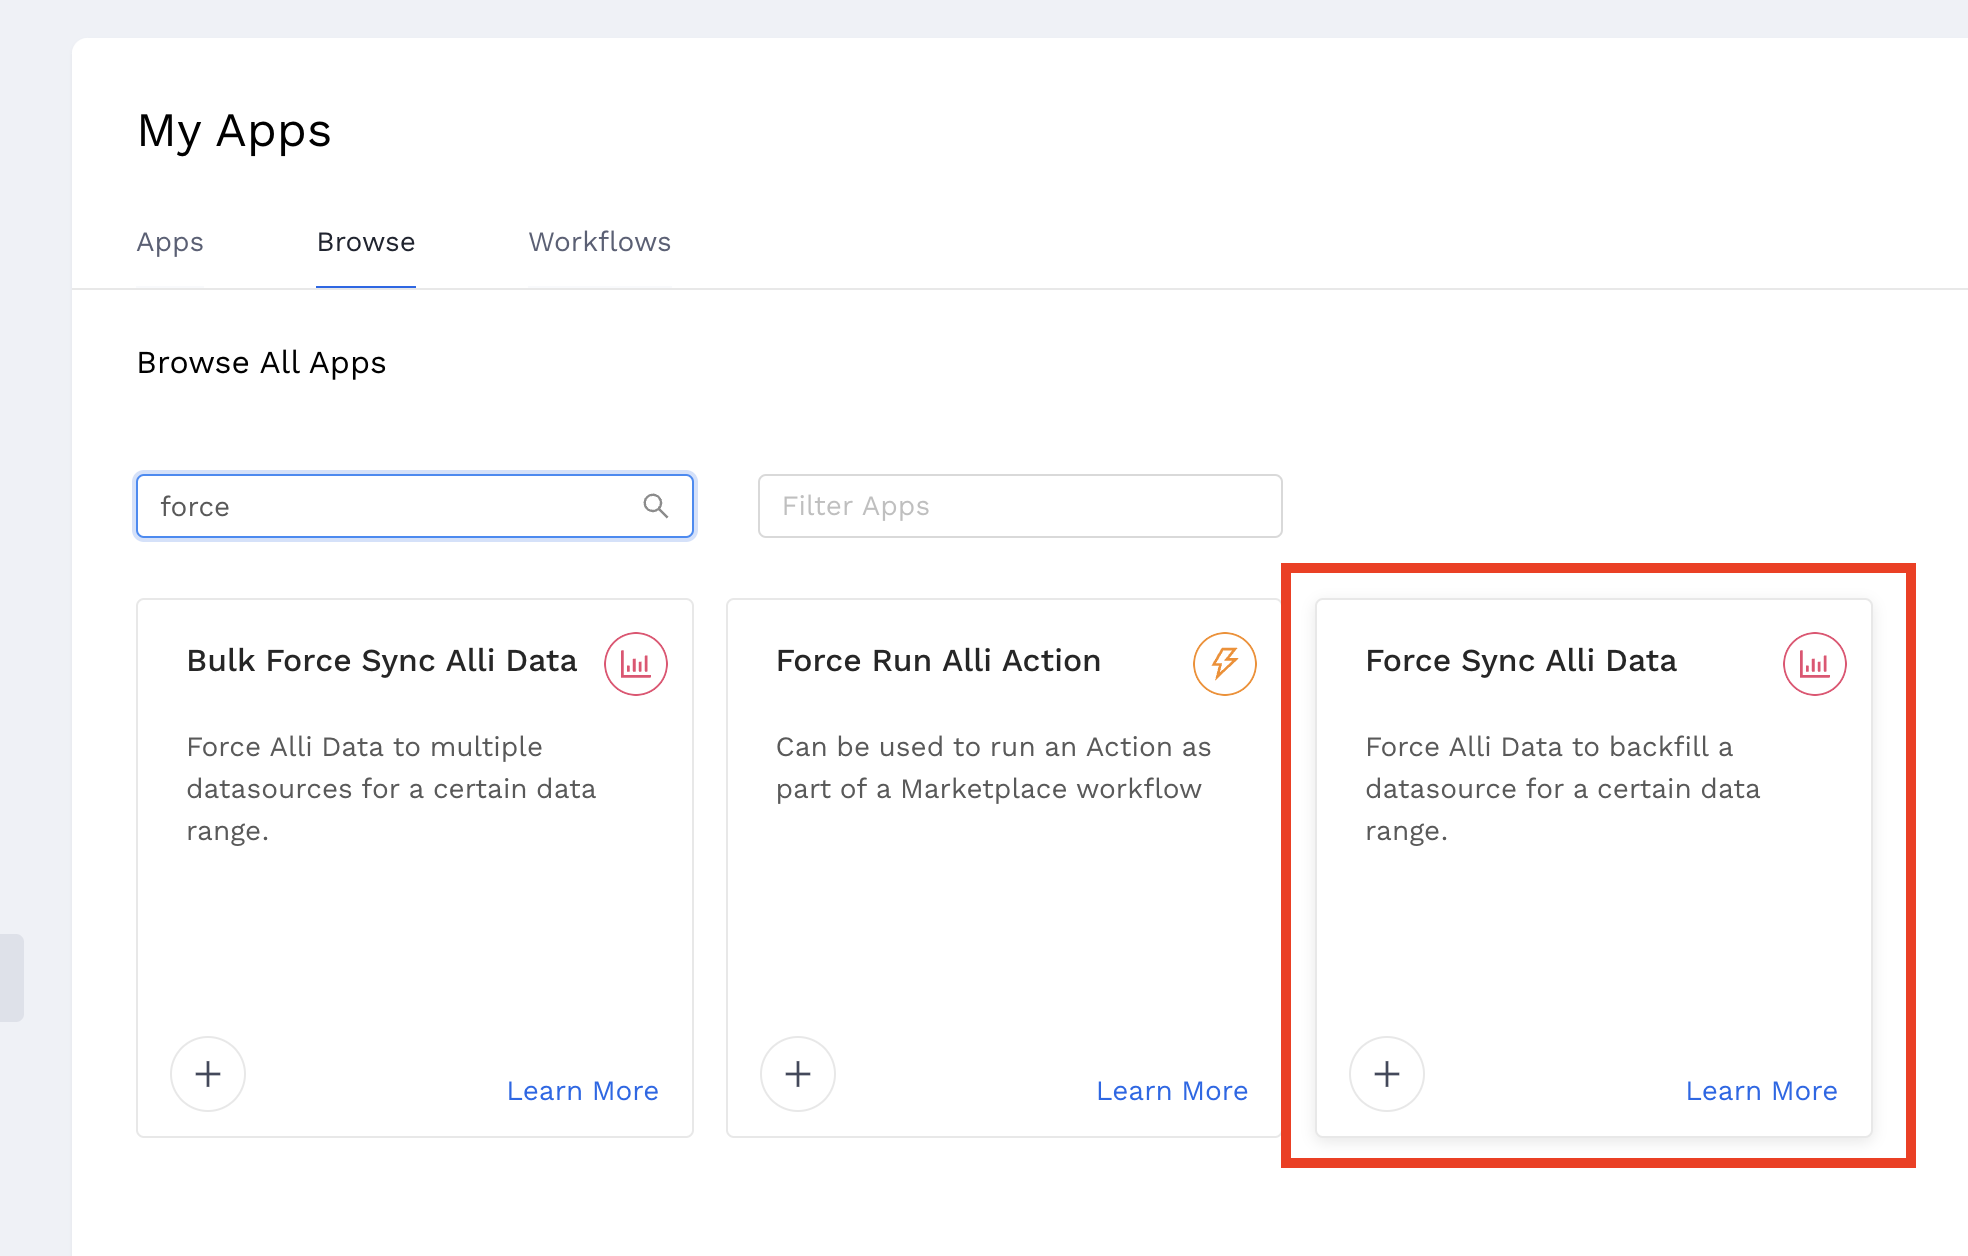
Finally, you’ll make a Force Sync app for each of your datasources (so by the end of this, if you’re bringing in 4 AppsFlyer reports, you’ll have created 8 AppsFlyer API apps, 8 Alli Cloud Storage datasources, and 8 Force Sync apps)
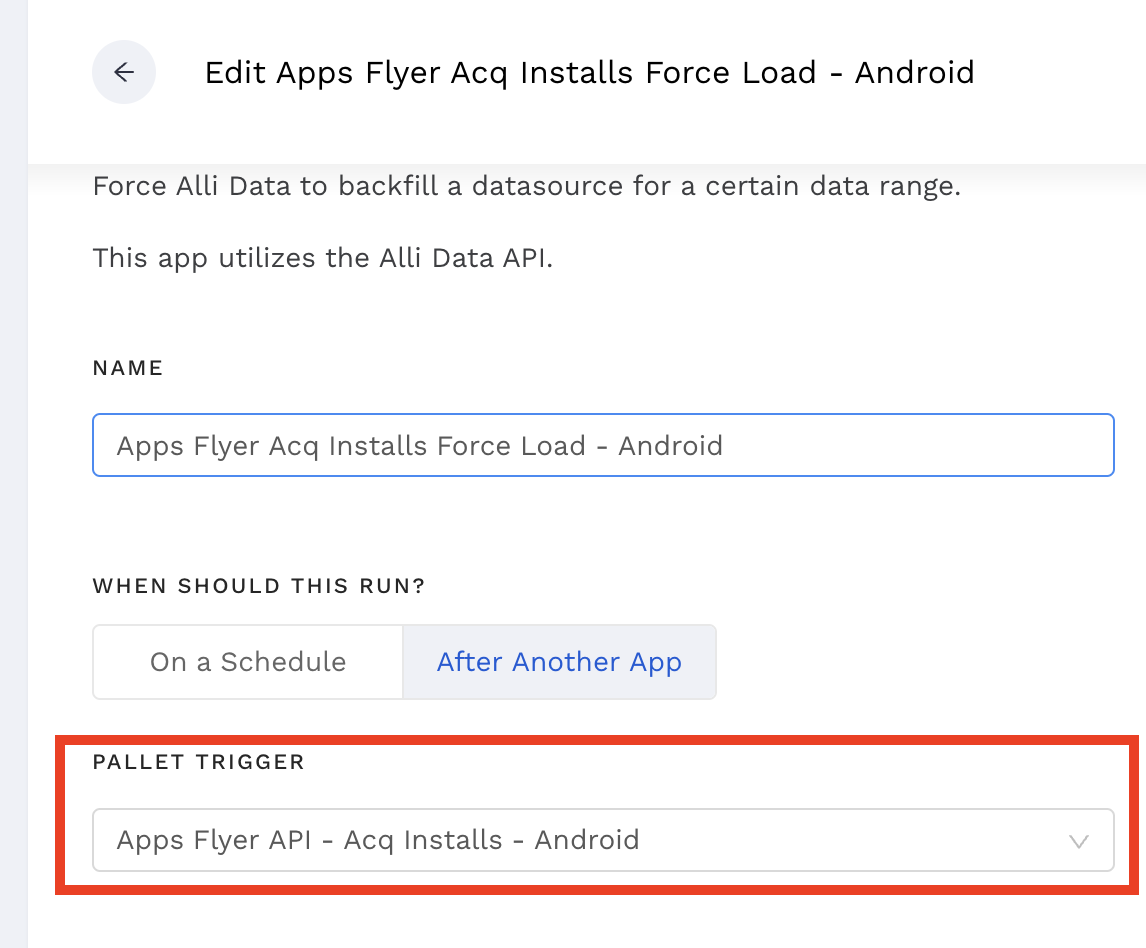
For the schedule, schedule it to run after the API app associated with your datasource (so you’re basically telling Alli to load the datasource each time the API app runs)
You’ll paste in your datasource ID (found in the URL of the datasource), and then you can give it a date range to load, or leave it on “default.”
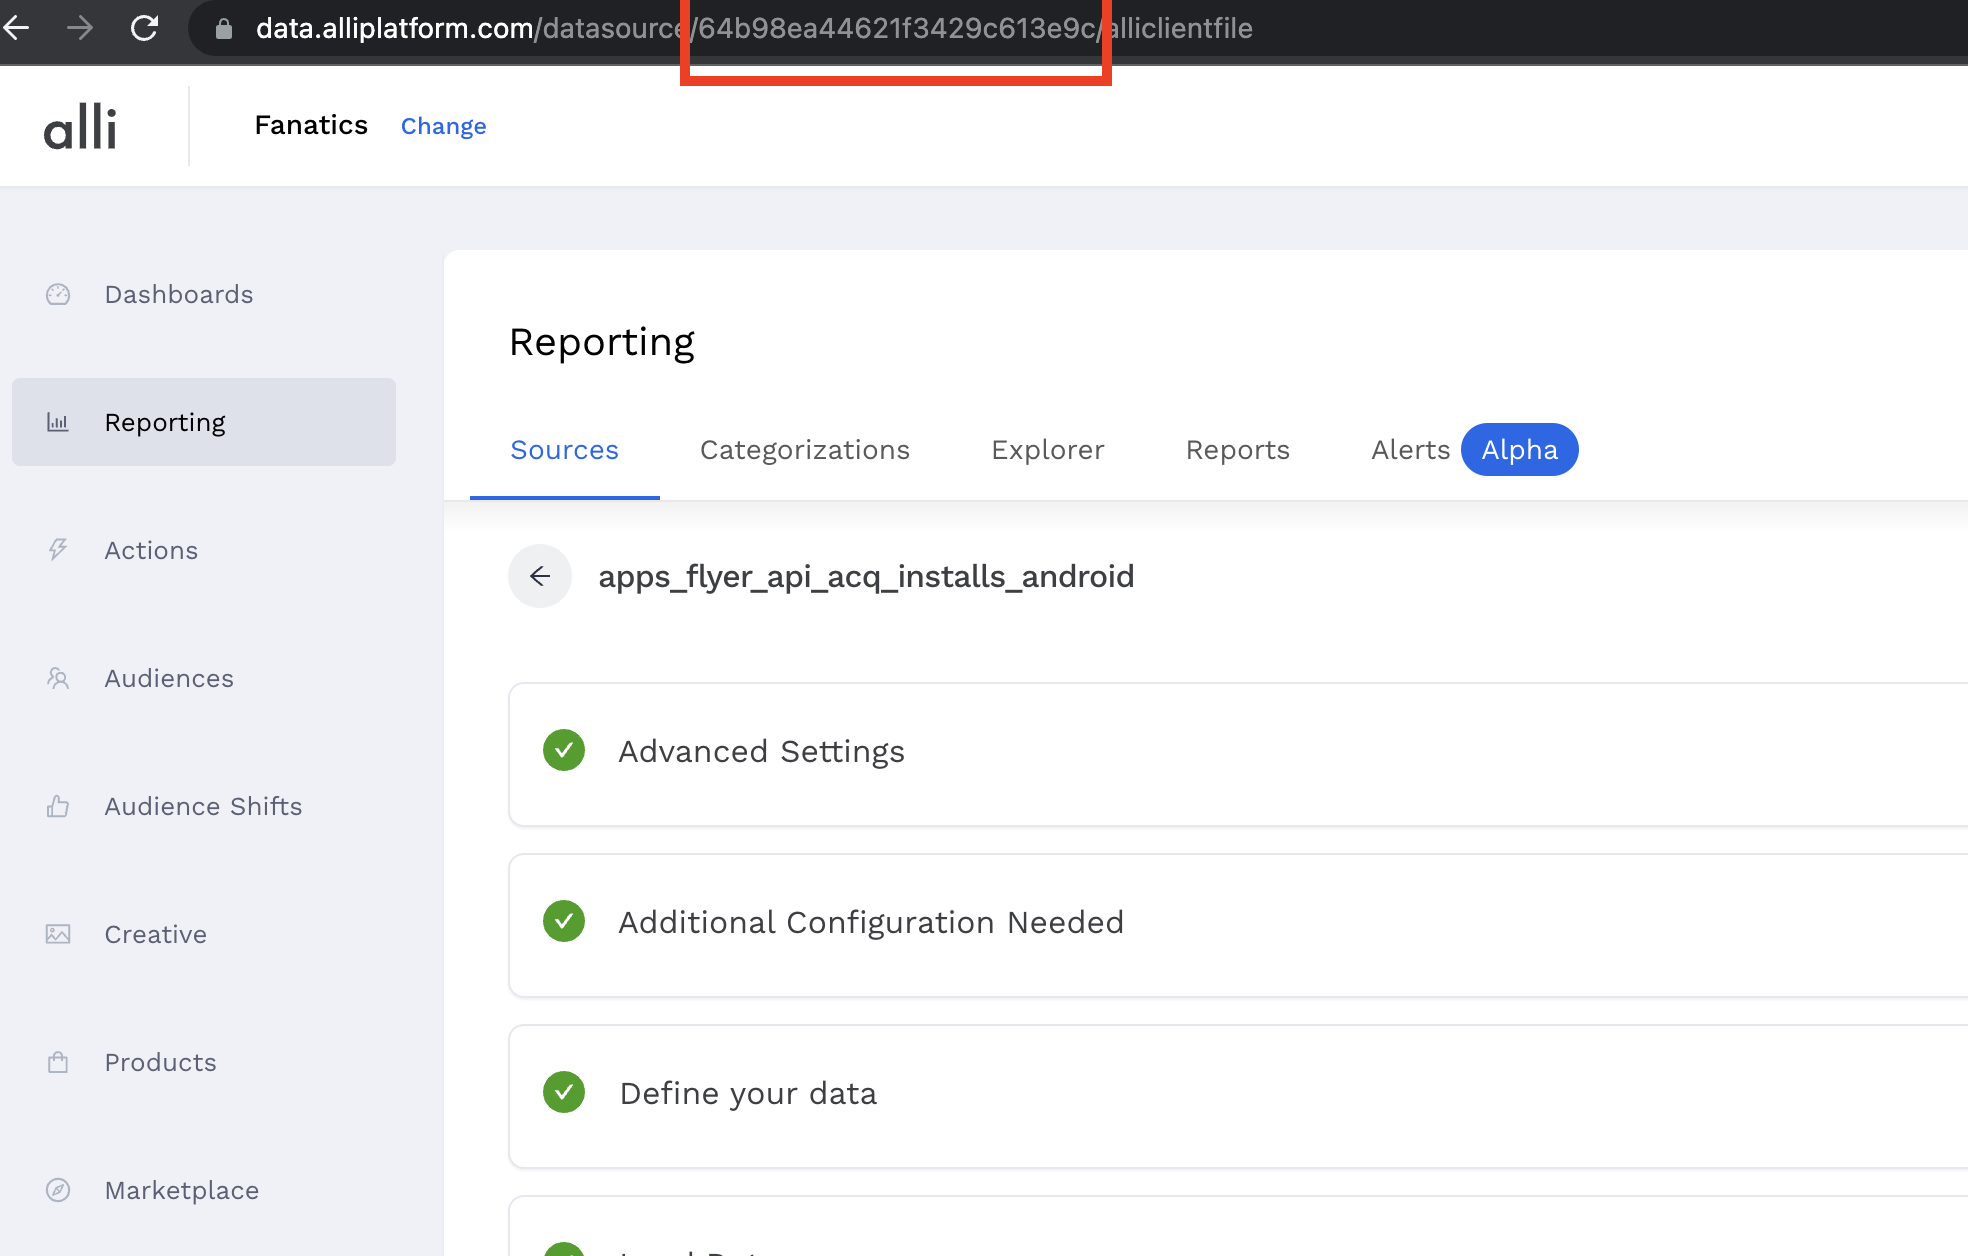
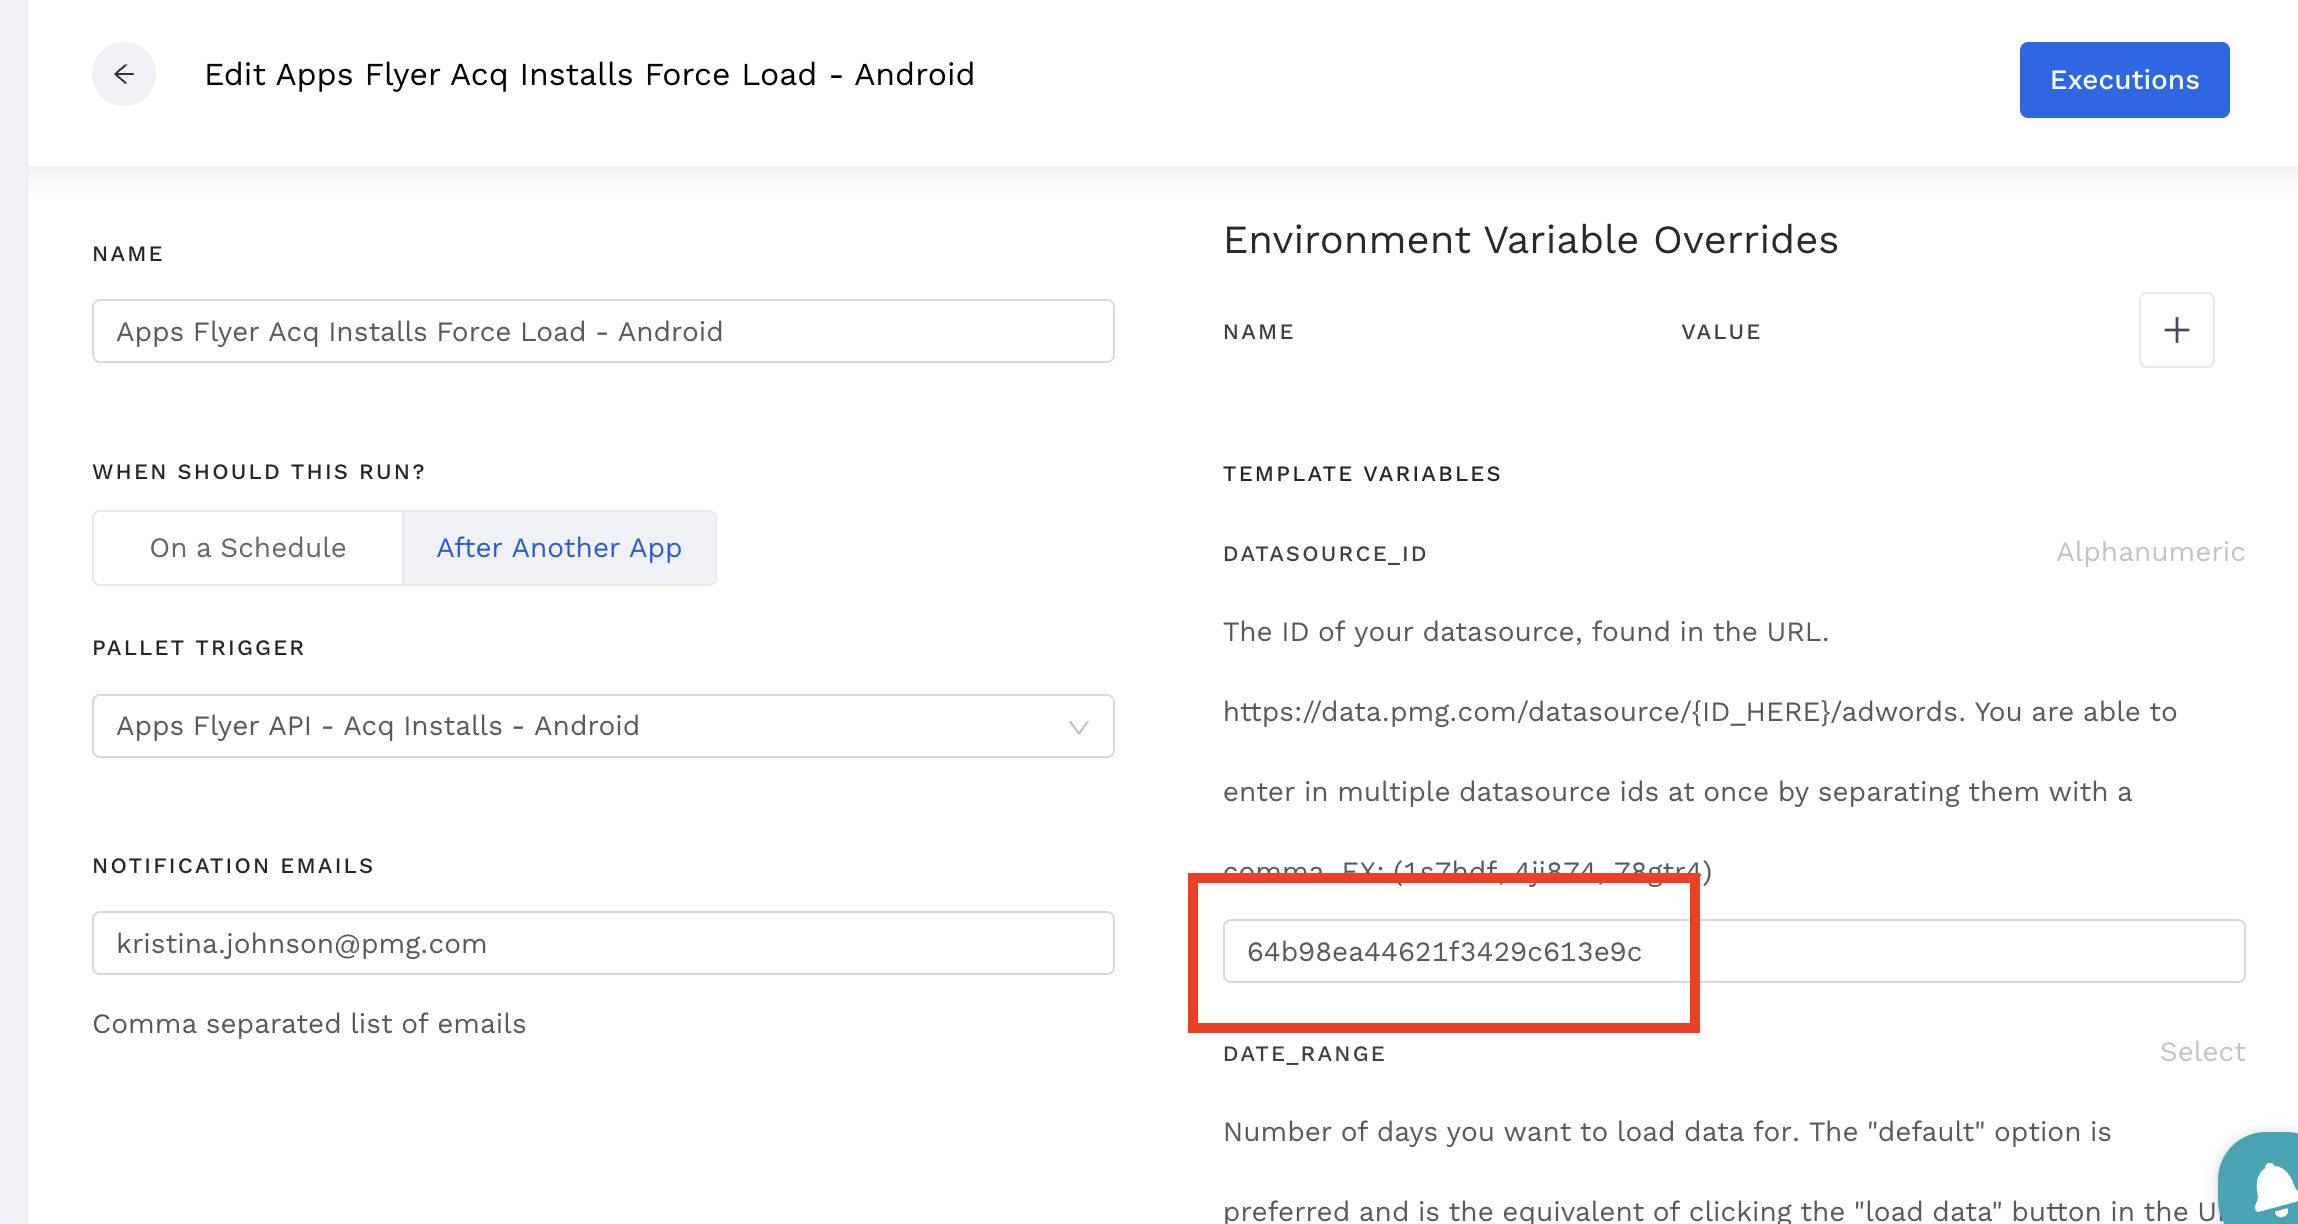
& then repeat this for each of your datasources, run the Force Sync apps, give them like 10-15 minutes, and BOOM, there’s your AppsFlyer data!

A good way to QA to make sure you’ve brought in everything is to go back to your API app, check to see how many rows were loaded in that file, and confirm that your datasource loaded all of the rows [minus 1 for the header :)]
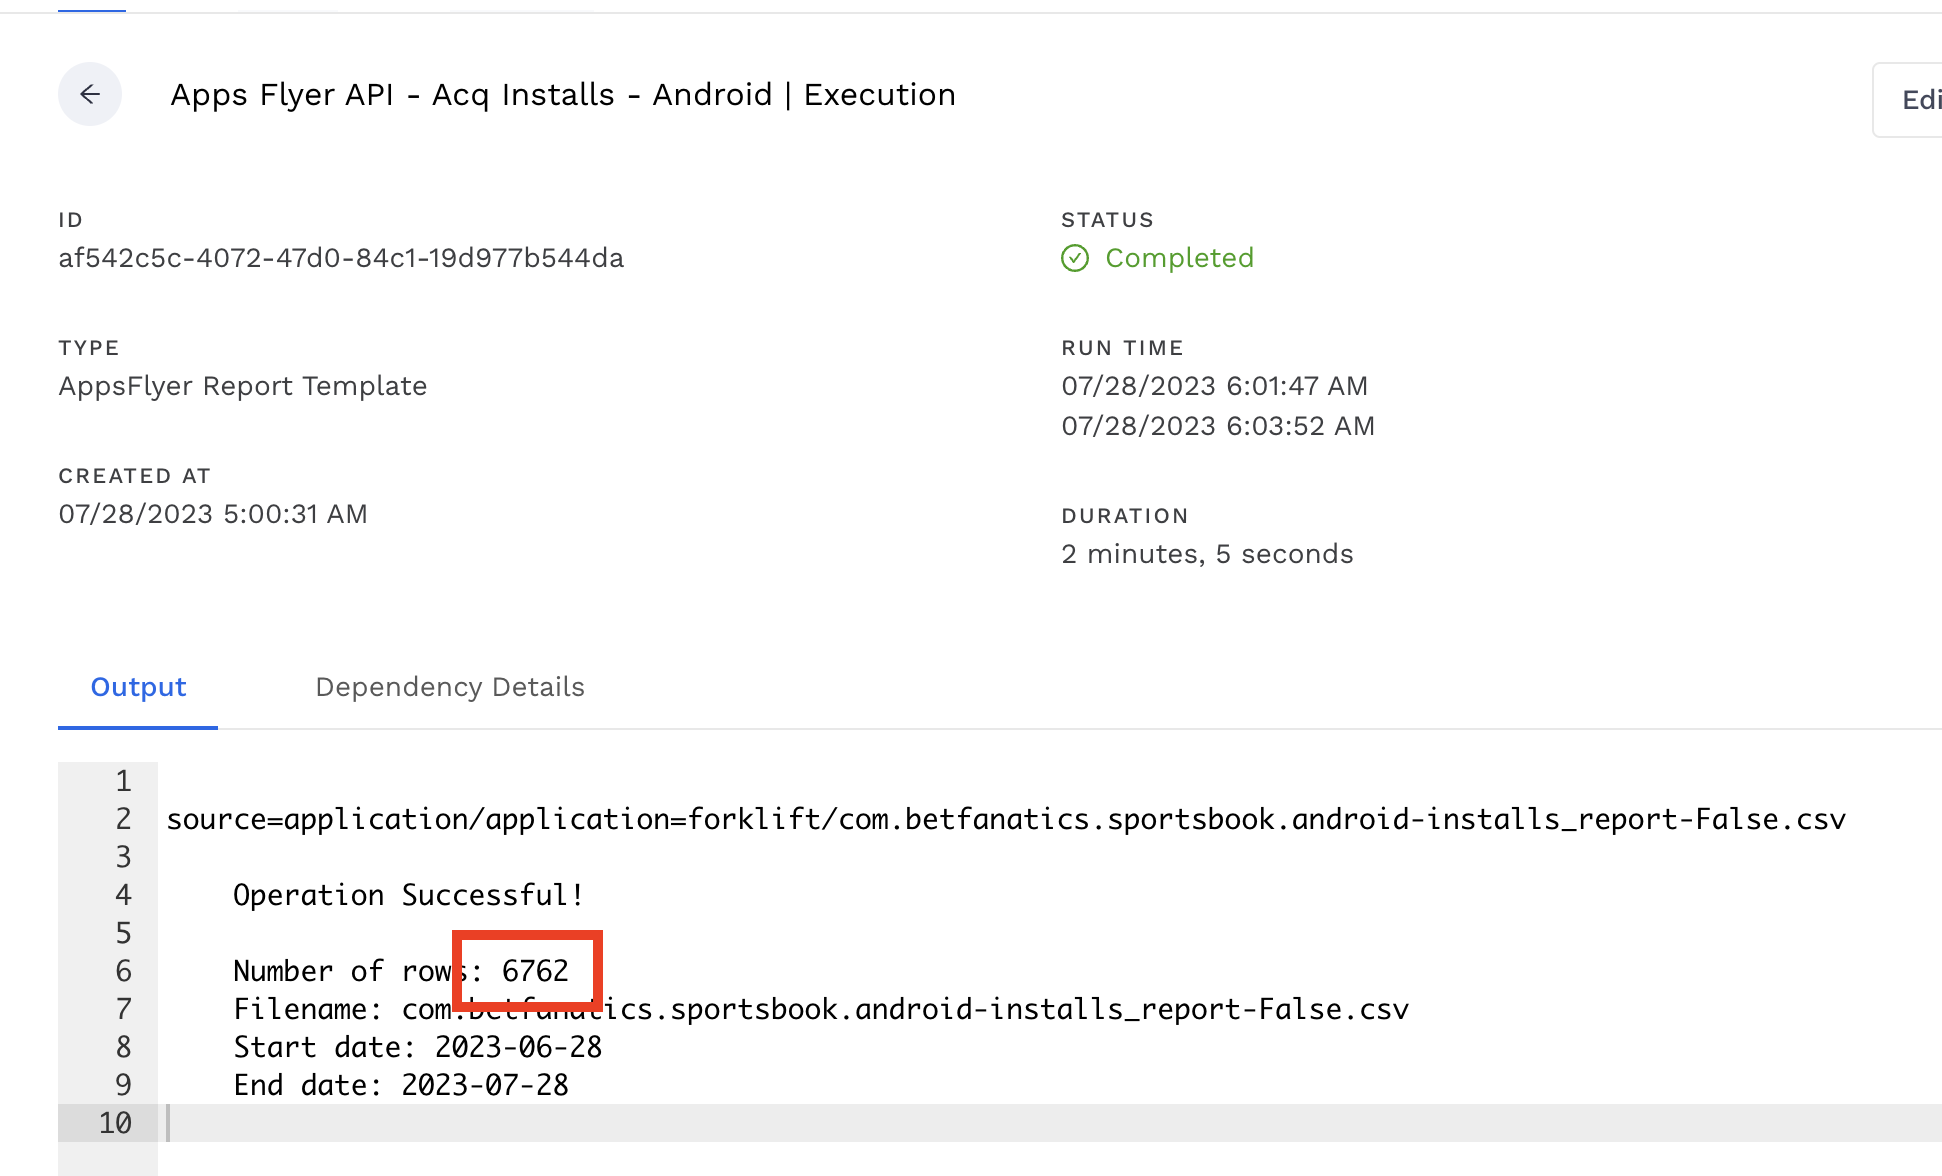

Congratulations, you did that!!!!
