
Here’s a step-by-step of how to pull detailed mobile app performance data for inMobi.
This set-up process has 3 main steps:
-
Creating an API connection app that will load the report into Alli Cloud Storage
-
Creating an Alli Cloud Storage datasource that grabs your report file
-
Creating a Force Sync app that refreshes the datasource each day (the automated equivalent of pressing the “Load Data” button)
To get started, you will need the inMobi API Key and API Secret (contact your onboarding team or the PMG team member managing the account).
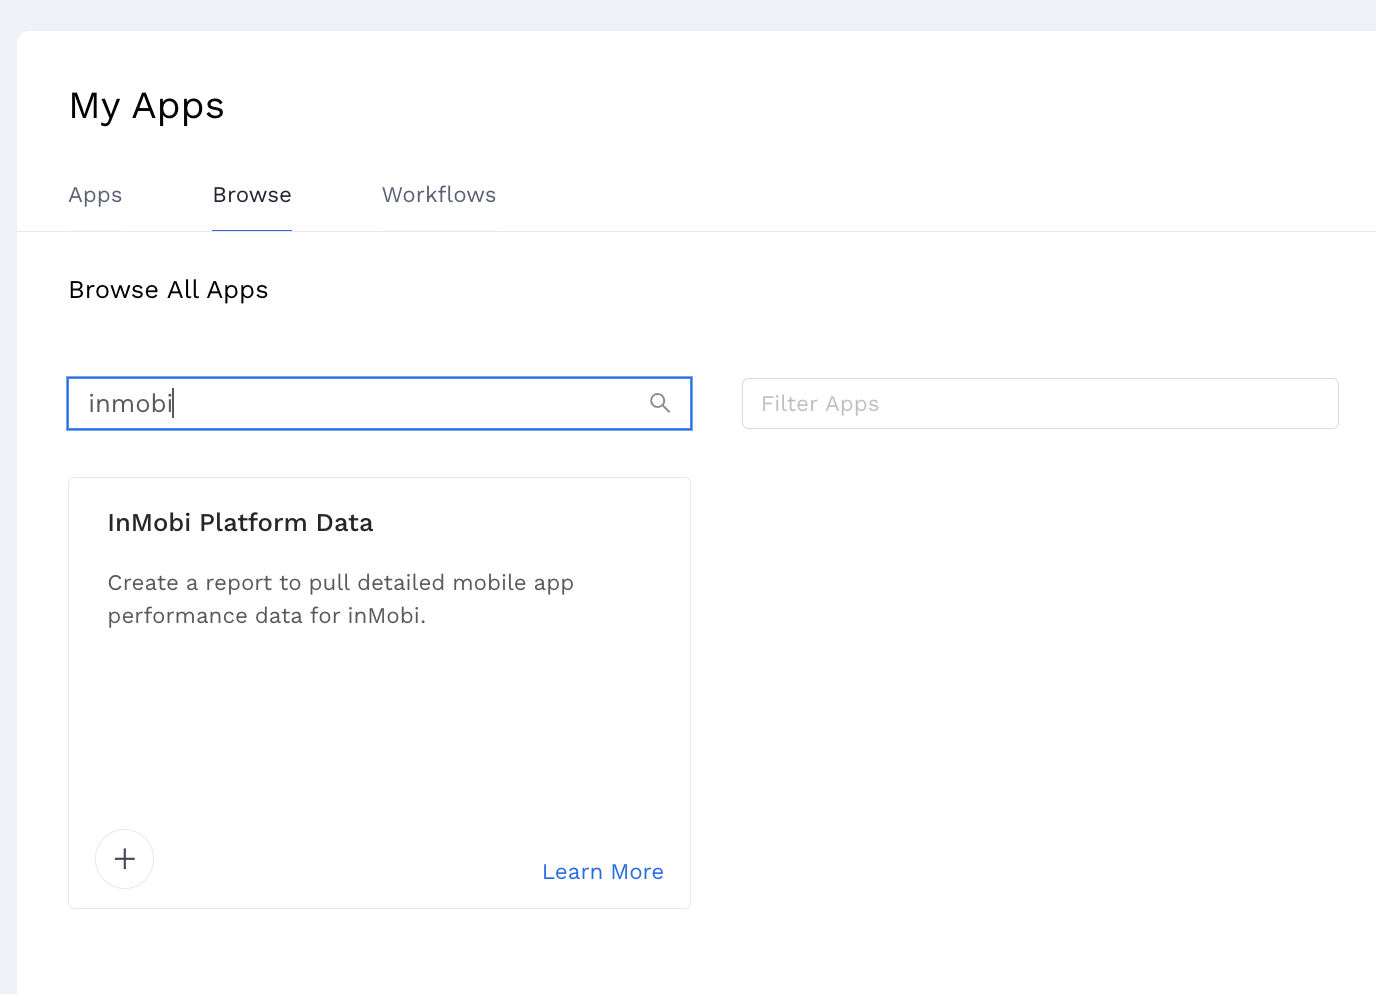
1. Create inMobi Marketplace App
Go to Marketplace Apps, Add a New App, Create a New “inMobi Platform Data” App.
Next, input values for the Client ID, Client Secret, Report Type and Date range you wish to pull.
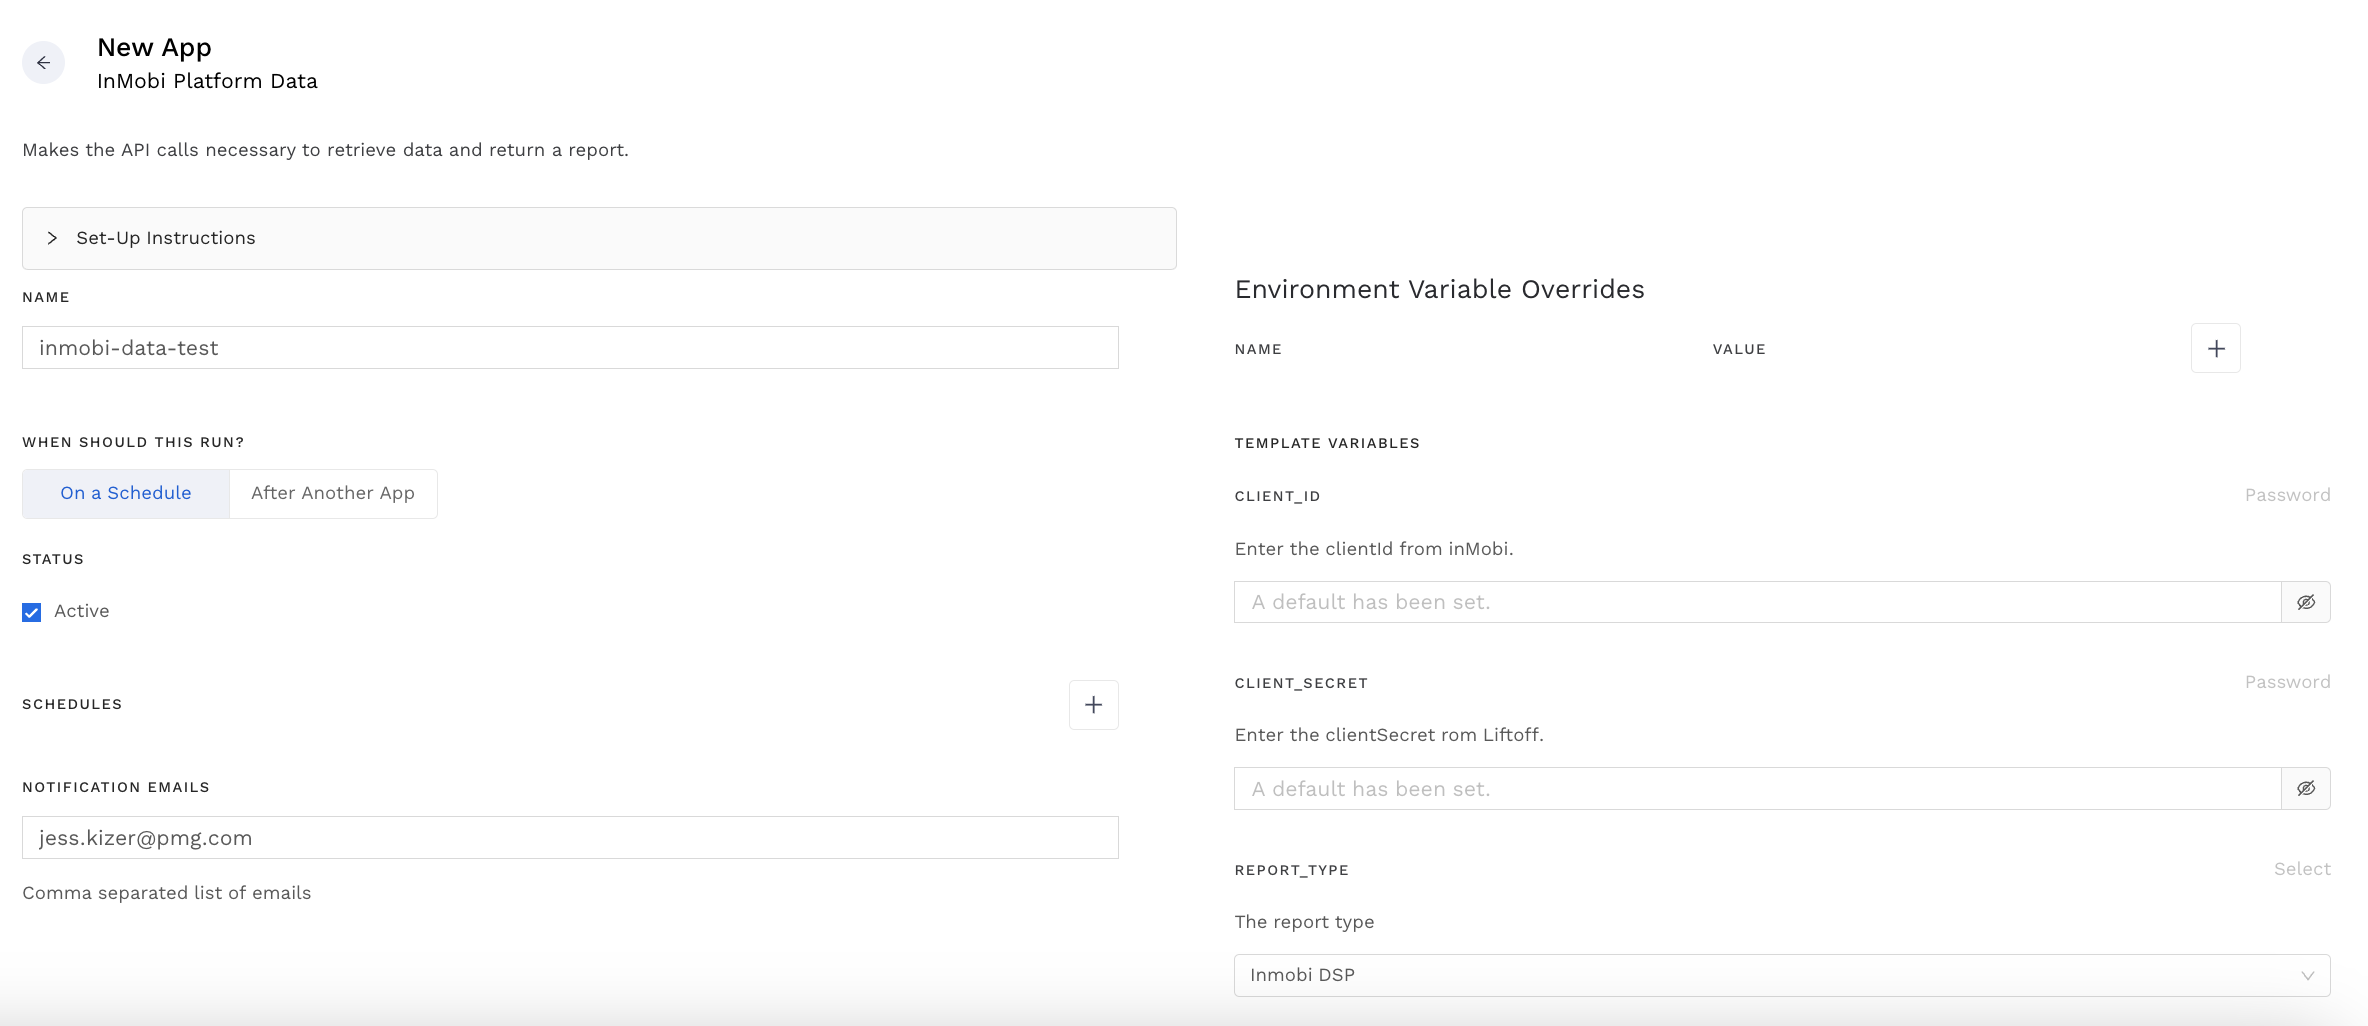
NOTE: previous data is limited to previous 90 days. It is recommended to pull a maximum date range of 3 days, otherwise the query may fail due to file limits set by inMobi. We highly recommend pulling the data day-wise.
Once your app is set up and has run successfully (don’t forget to set a schedule!), go to Executions, open up the most recent one, and copy the filename at the bottom.

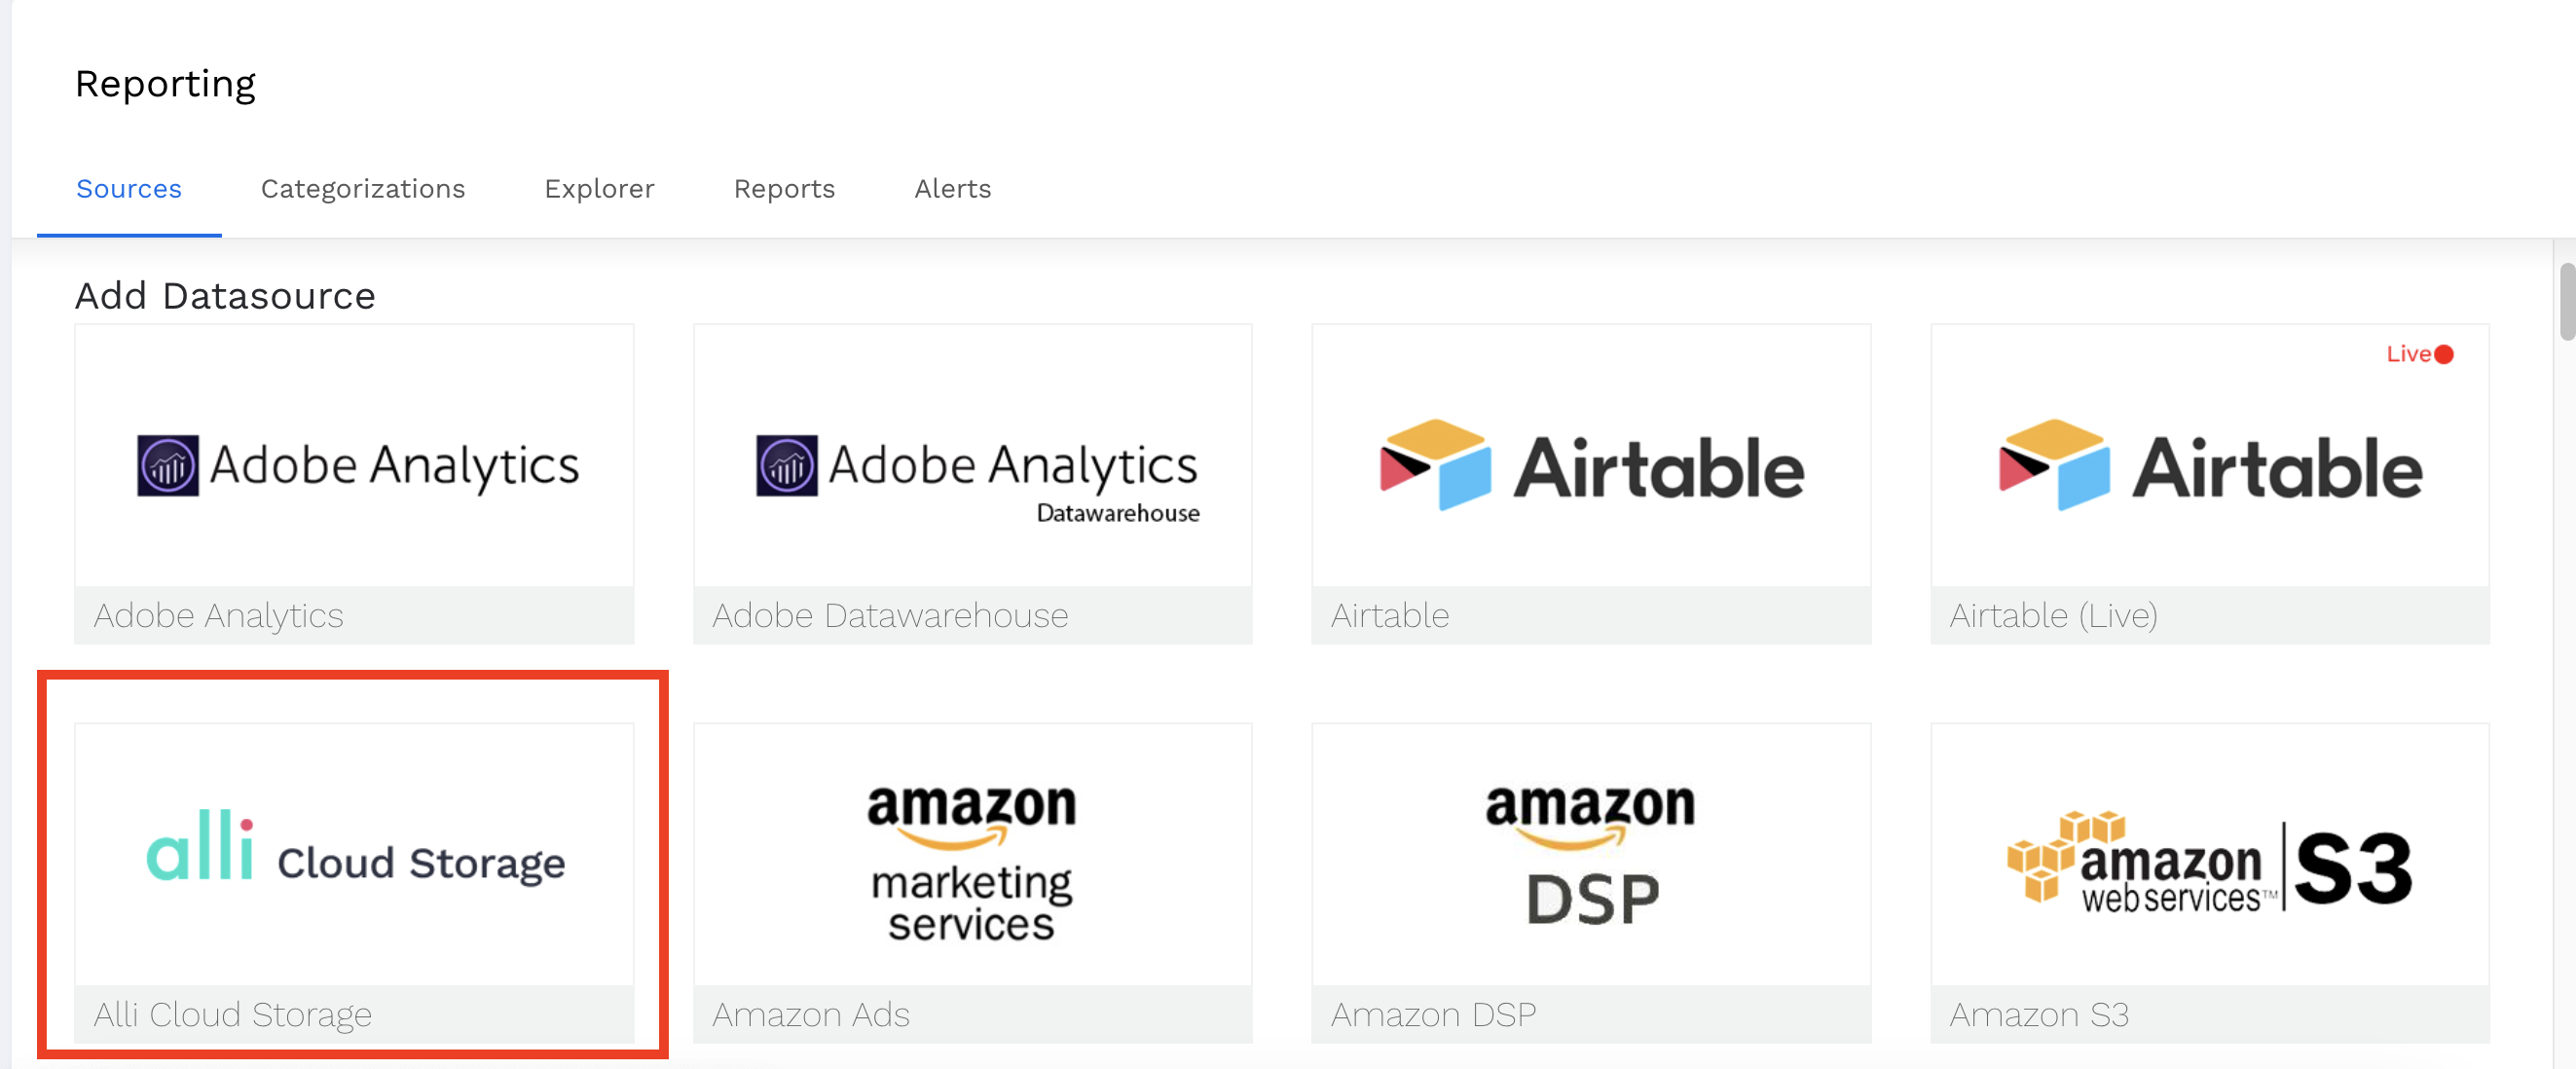
2. Create Alli Cloud Storage Datasource
Go to Data Sources, Add a New Datasource, & select “Alli Cloud Storage”.
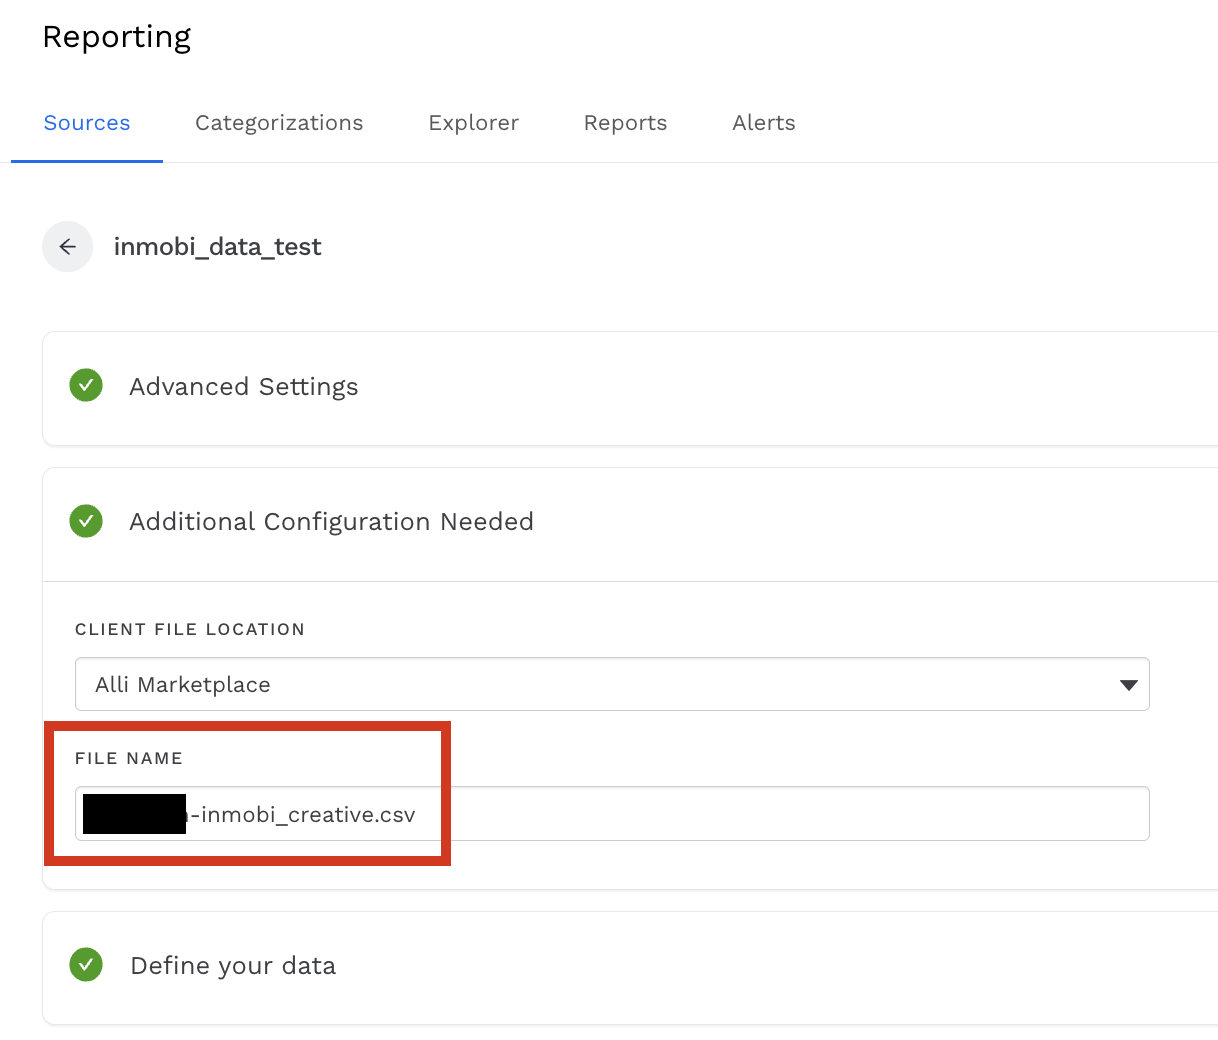
For additional configuration, choose “Alli Marketplace” and paste in your filename from the API execution.
Next, create the dimensions and metrics by uploading this csv template in the Define your Data section:
You will need to manually set the date column as “Date Timestamp” from the dropdown:
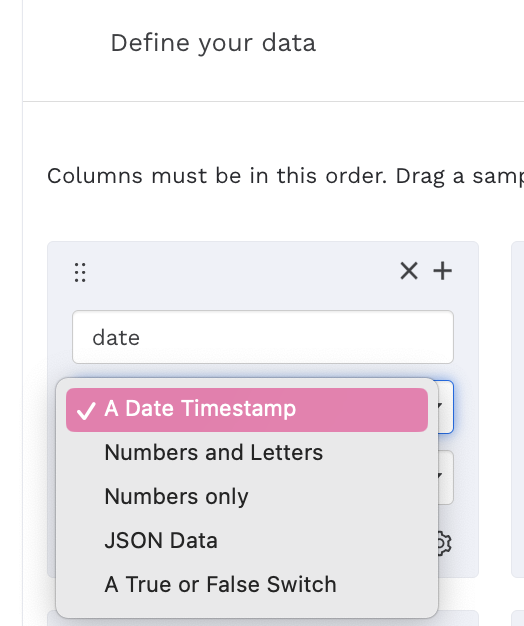
And set the following Attribute / Metrics as “Numbers only” in their respective dropdowns.
|
impressions |
media cost |
ecpm |
|
clicks |
ctr |
ecpi |
|
installs |
cr |
ecpe |
|
events |
ipm |
|
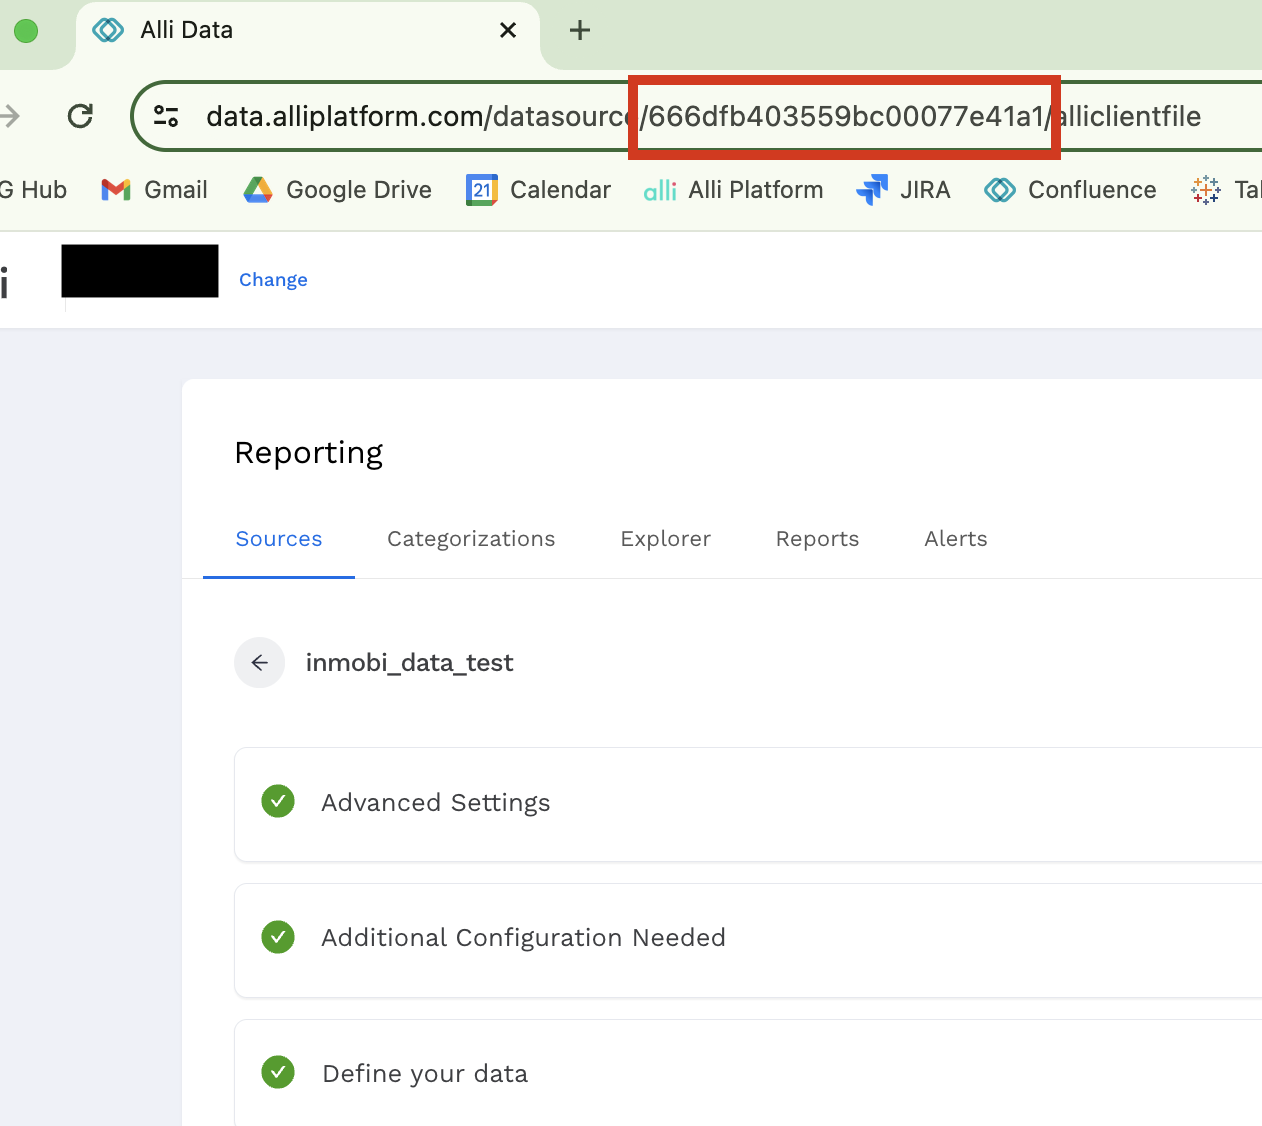
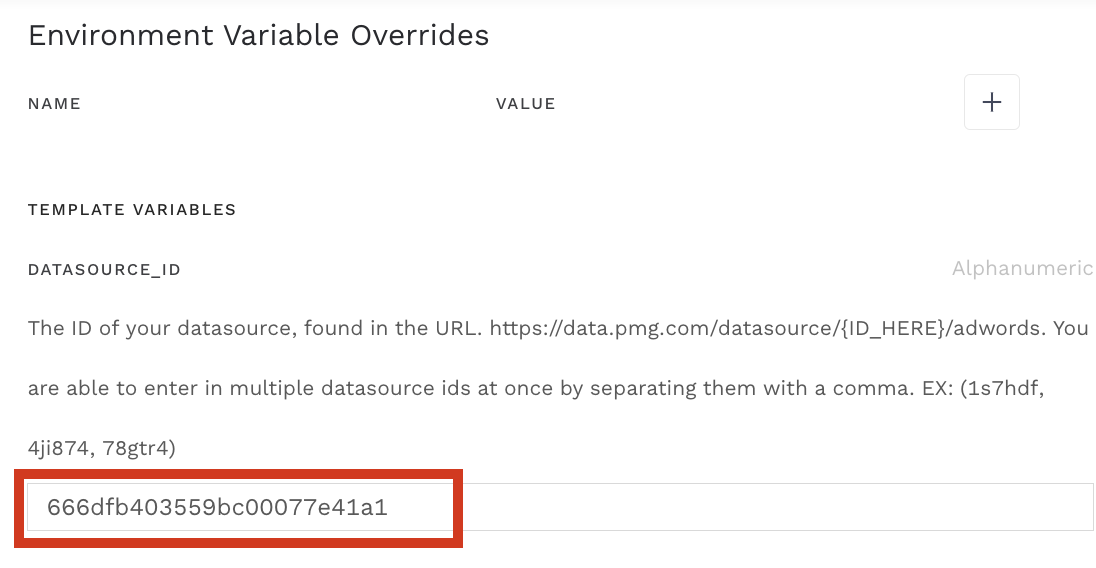
After creating your datasource, copy the ID from the datasource URL to use in the next step.
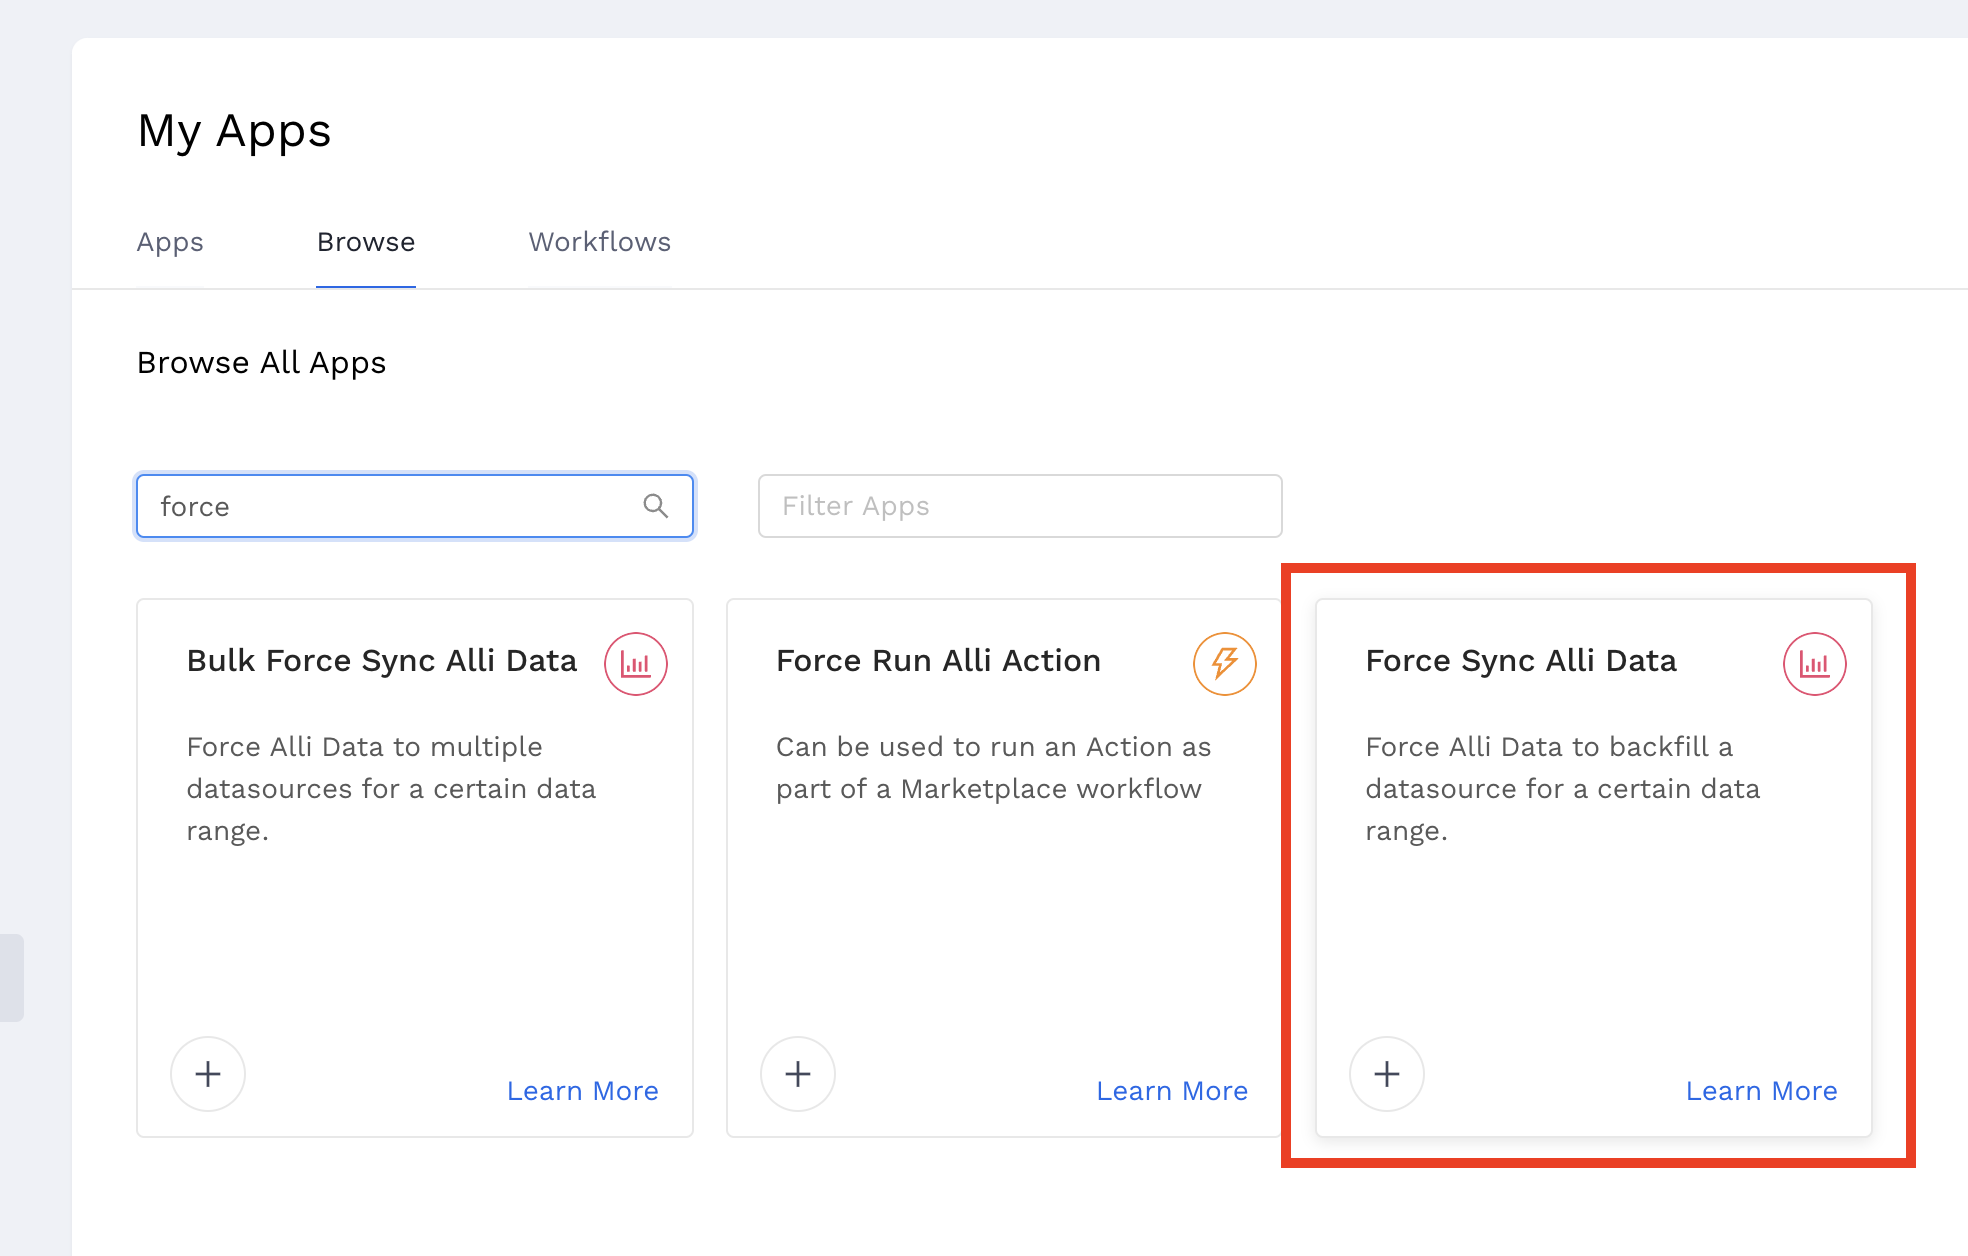
3. Create a Force Sync App
Finally, you’ll make a Marketplace Force Sync app for the datasource.
Trigger the sync to run after the API app you created initially.
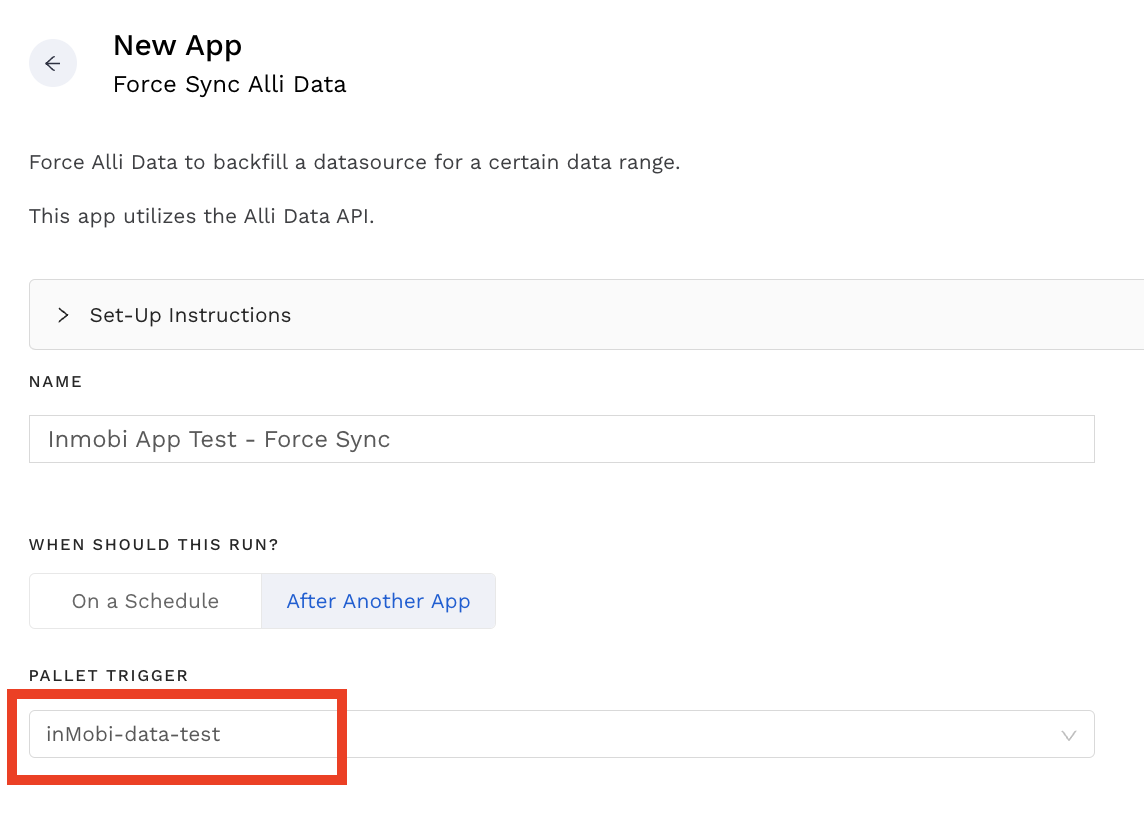
Paste in the datasource ID you copied from before.
Run the Force Sync app, give it a bit to load, and there you have it!
Copy CodeCopy Code
A good way to QA to make sure you’ve brought in the data is by navigating back to your App, check to see that dates / rows that were loaded in that file, and confirm that your datasource dates / rows match.