
How-To: Use Microsoft Publisher URL Negation
The URL negation app is used to automatically negate publisher URLs via the Bing API and stop them from serving forever. Setting up the app is a four step process.
Setting up the Bing Insights Report
Before creating a Bing Insights report, review the datasources that are already set up in your client; it is very likely that a report already exists. If that is the case, use step 6 under this section to see a list of the columns that need to be selected.
If all the columns are selected, you can move to setting up your SQL view!
If some columns are missing, reach out to the datasource owner to inquire about adding those; duplicated datasources are never helpful/can be confusing, so best to use something that already exists if possible!
Go to data.alliplatform.com and choose your client name from the Client dropdown.
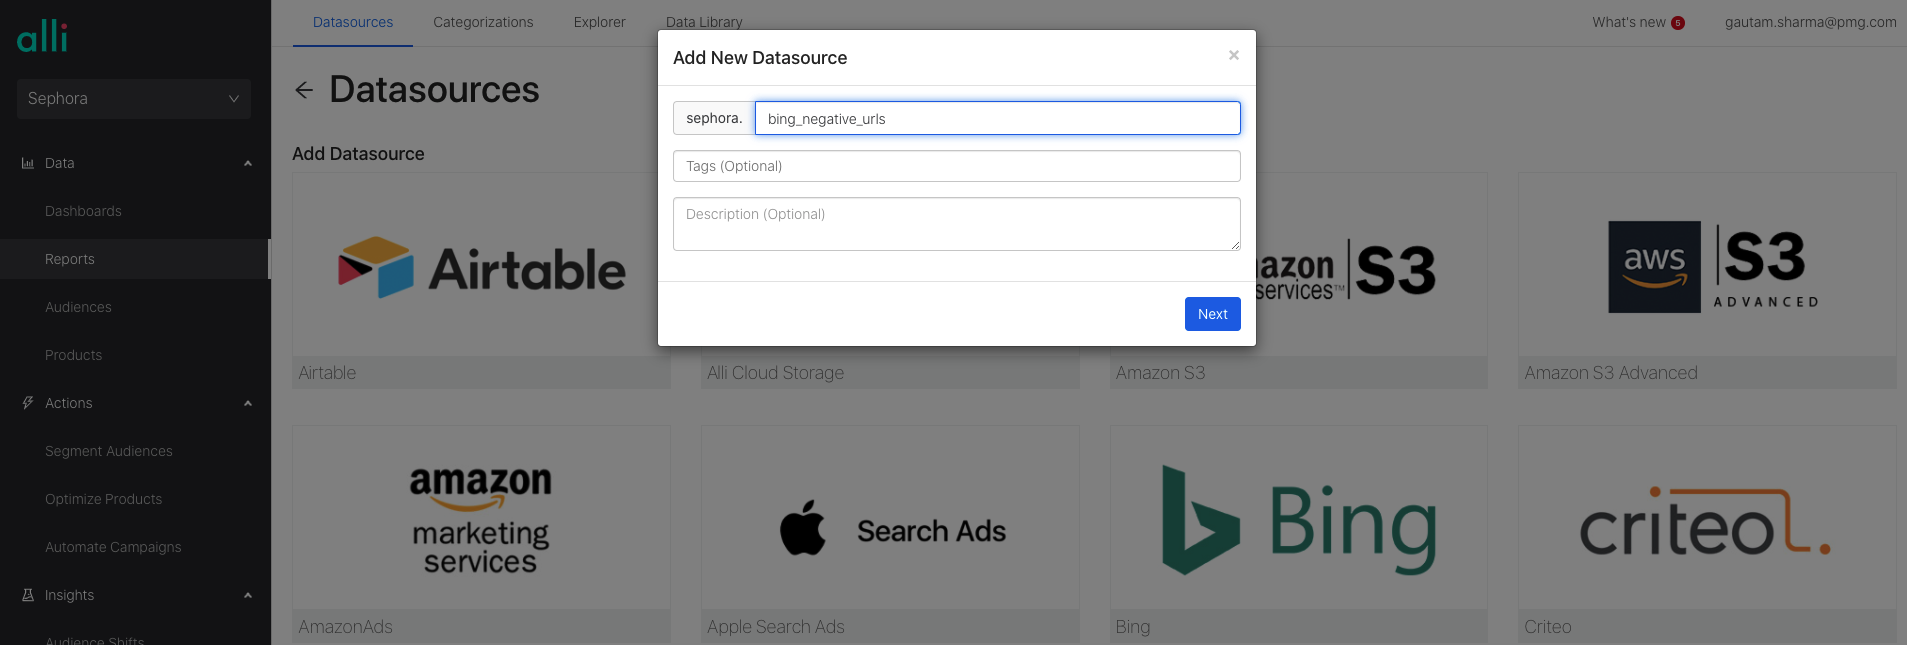
Choose “Reports” from the left pane and click on “Add new Datasource” on the top right corner. Choose the datasource type as Bing.
Give a meaningful name for your report and click Next. You can optionally give a description for your datasource.
4. Under the advanced settings, make sure that the “New Uploads” field is set to “Add and update”

5. Sign in with your Bing Creds. Under “Additional Configuration Needed”, Choose the account name for which the URL negation app needs to be setup. Please choose only one account at a time and do not multi-select them. The app needs to be setup separately for each account. Choose “PublisherUsagePerformanceReport” from the dropdown menu for “Report Type”.
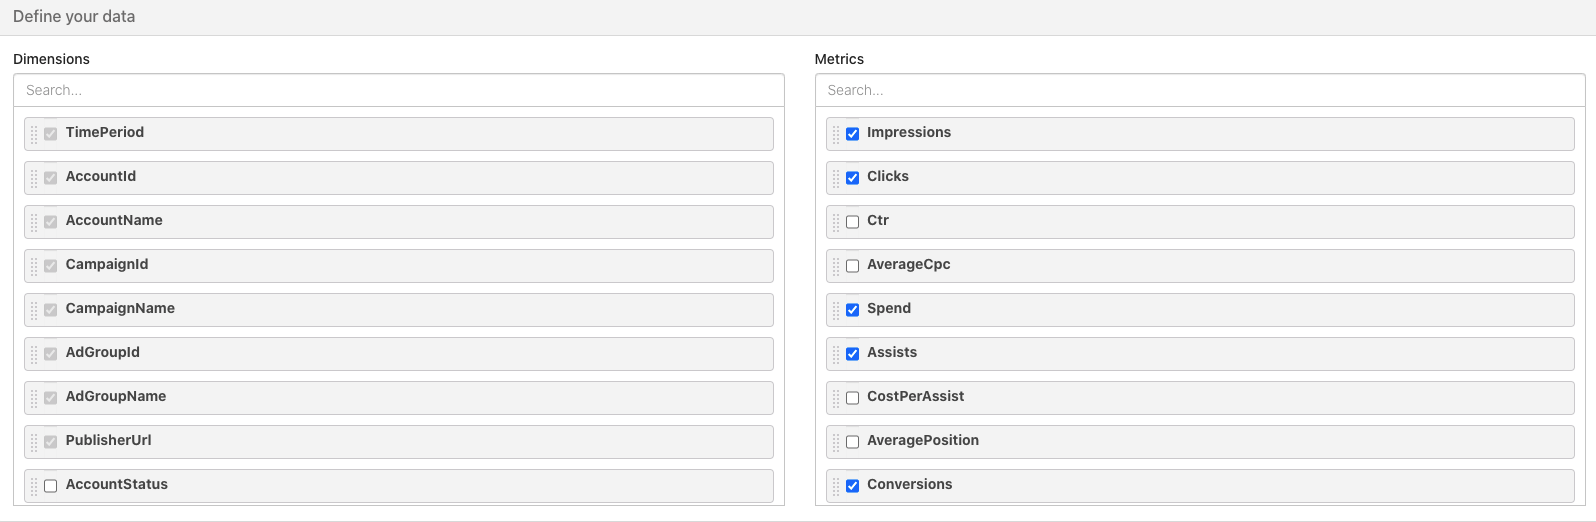
6. Under “Define your data”, select Impressions, clicks, spend, assists, conversions, revenue. These are typically the metrics used to determine a bad URL that is being served. If your client needs another metric to be used in the decision making process, select that as well. Click Next.
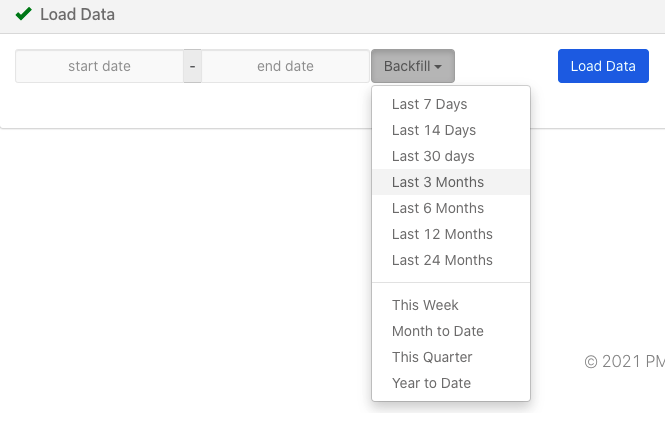
7. Under Load Data, choose Backfill--> Last 30 days and click on Load Data. This will take a while to load. Once it is complete, you will get a popup display that says “Your job has finished”
Setting up the SQL View
Login to data.alliplatform.com and choose your client from the dropdown.
Choose “Reports“ from the left pane, “Explorer” tab on top and click on “New Data Report” on the top right.
Give a unique name for your report that lets you understand which account the report was created for for example: “sephora_us_tm_negativeurls”.
Choose “Custom Redshift” from the Report Type dropdown.
You need a SQL which exactly has 4 columns campaign_id, negative_sites, customer_id, account_id in the same order. Given below is an example SQL.
Here are the key things to note while editing the SQL.
a. Line 13 and 33: Change the client name and the report name. This is the name of the report you created in step 1.
b. Line 14: This is your time period. If you want to check the last 30 days excluding today to see which URLs did not perform well, the time period would be CURRENT_DATE-31 AND CURRENT_DATE-1
c. Lines 19-22: This is where you edit your criteria that determines a bad URL.
d. Lines 37-39: Add the URLs that you never want to be negated to this list. This is an exclusion list and any URL in this list will not be negated even if it fails the criteria you have set.
e. Your Customer ID on line 27. You can find this by logging into Bing Ads and copying the cid parameter from the URL
WITH urldata AS
  (SELECT *,
          SUM(url_spend)OVER() AS total_spend_of_all_urls,
          CASE
              WHEN url_conversions IS NOT NULL
                   AND url_conversions != 0 THEN url_spend/url_conversions
          END AS cost_per_conversion
   FROM
     (SELECT publisherurl AS url,
             SUM(spend) AS url_spend,
             SUM(conversions) AS url_conversions,
             SUM(impressions) AS url_impressions
      FROM <<client_name.publisher_report_name>>
      WHERE timeperiod BETWEEN CURRENT_DATE-31 AND CURRENT_DATE-1
      GROUP BY url)),
     negative_sites AS
  (SELECT *
   FROM urldata
   WHERE ((url_spend>100
           AND url_conversions=0)
          OR (url_impressions>10000
              AND url_conversions =0)))

SELECT DISTINCT(campaignid) AS campaign_id,
       publisherurl AS negative_sites,
       accountid AS account_id,
       '<<YOUR CUSTOMER ID>>' AS customer_id
FROM <<client_name.publisher_report_name>>
WHERE publisherurl IN
    (SELECT url
     FROM negative_sites)
  AND publisherurl NOT IN ('Bing and Yahoo! Search Properties Only',
                           'www.duckduckgo.com',
                           'AOL Search Properties Only')
6. Once you have the SQL, paste it in the window and click preview to check if the SQL runs without errors. Then click on Save and finally click Publish to make the SQL View available for Alli Marketplace.

Setting up the Alli Action
Login to actions.alliplatform.com and choose your client from the dropdown menu.
Click on the Create Action button on the top right.
Under the “Select Action Type” search for “Set Negative Publisher URLs” and click on “Select”

4. Name your action and click Next. It is recommended, but not required, to give the same name as that of your SQL view. This makes things consistent and easier to troubleshoot later.
5. Under the “Where are your changes coming from” section, choose “Alli Marketplace” and then copy the Action-ID.
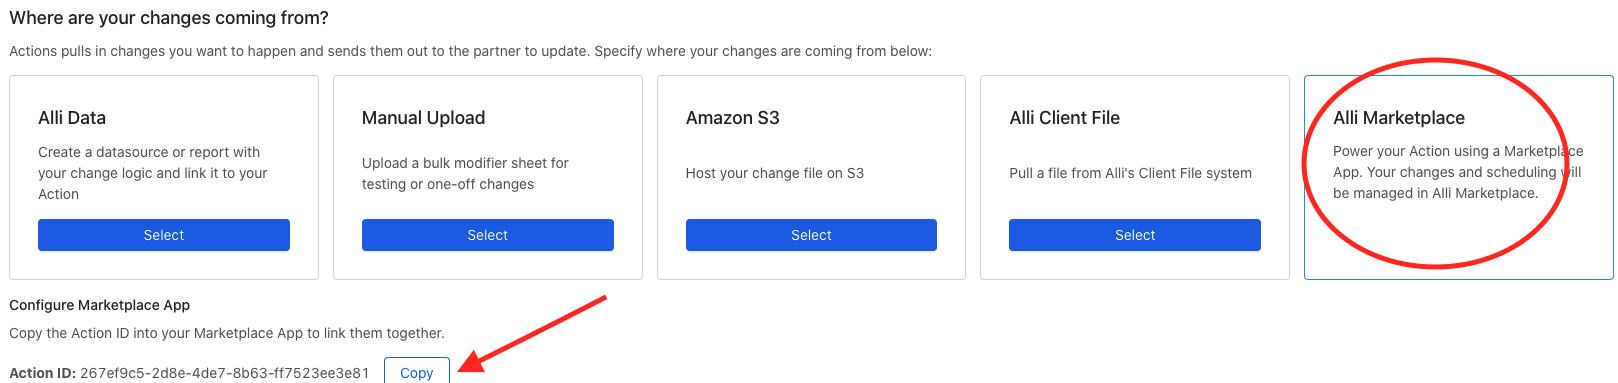
Your “action” should always be kicked off by Marketplace, never in Actions, once it’s setup. So to test, finalize your Marketplace App and run from there.
Setting up the Marketplace App
Login to http://marketplace.alliplatform.com and choose your client from the dropdown menu.
Choose “Discover” on the left pane and search for “Microsoft URL Negation”
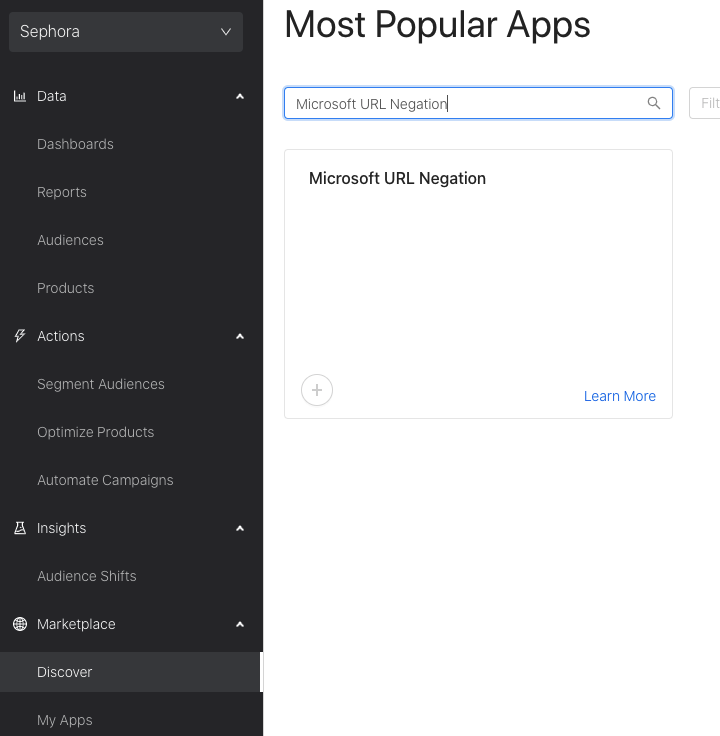
3. Select Microsoft URL Negation and click on “Install App”
4. Name your app. Under the view_name, enter your SQL view name from Step 2. It has to be in the format “client_name.view_name”. Under the action_id, paste the action_id you copied above in step 3. Enter the client name.
5. The run_type is used to check your URLs in case you want to. Setting the run_type to “Test Run” will just display the negative URLs and will not negate them. Setting the run_type to “Send to Actions” will send the negative URLs to alli actions which in turn will negate them via the Bing API.

If you have any issues, questions, or concerns, please feel free to reach out to your Alli Solution Partner.