
How-To: Save your filters
Overview
Quick guide on how to best make use of the saved filters functionality.
Prerequisites
Please refer to How to filter down your ads which talks about how to filter.
Tired of having to remember all the numbers and names? With Saved Filters you just have to add them once and apply them whenever you want with two clicks.
What’s new with filters?
A new filter - Creative Types, that lets you filter by static or video ads.
No more lengthy URLs. Don’t worry about sharing URLs, you can apply a saved filter and share the URL to anybody that has access to the client and they’ll see the filtered information.
Can I not apply filters without saving them? Yes, you absolutely can. You can apply filters first and then choose a platform or date range, your ads will still be filtered. The filters are applied as long as a page refresh doesn’t happen. This way URLs won’t be shareable.
Instructions
Filters:
Click on the advanced filtering button ‘More Filters’ to open up the drawer.
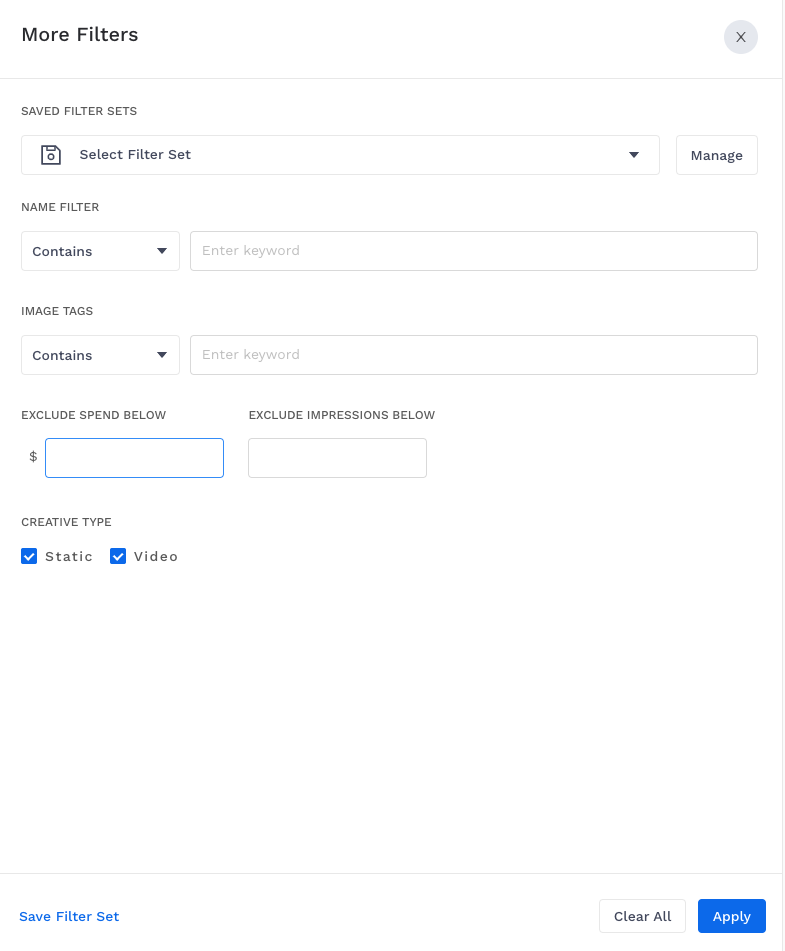
Select what you want to filter: by naming conventions or by image tags.
Select whether you want to view all ads that match your keyword(s) or whether you want to exclude the matching creatives by clicking on the “Contains” or “Does not contain” buttons respectively.
Type down your keyword(s).
Select which ad formats you want to view: Static, Video, or leave it as is if you want both.
You can add as many filters as you want! The tool will show only the creatives that match with ALL the applied filters (following an “AND” logic).
At any given moment, click the “clear all” button to delete all filters for the category.
Pressing the “cancel” button at any given moment will undo all the changes and revert to the filters applied before the modal was opened.
On clicking apply, your filters will be applied.
The More Filters button will show the number of filters applied on the button ‘More Filters (x)’.
Save Filters:
If this is a set that you want to save, click on ‘Save Filter Set’ which will open a modal with fields Name and Description.
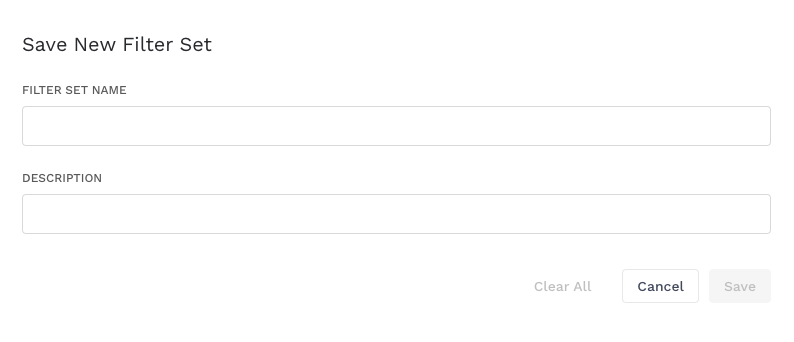
Enter a name that you like(shouldn’t start with a number or character) and description(optional) and click on save.
You’ll see that the ‘Select Filter Set’ dropdown in the modal, will show the name and you can click on apply.
Want to make another set that has all the filters from an existing set and add/remove few filters? Select the set you’d like to modify, make changes and repeat the process to save a filter set.
Manage Filters:
Click on ‘Manage’ button.
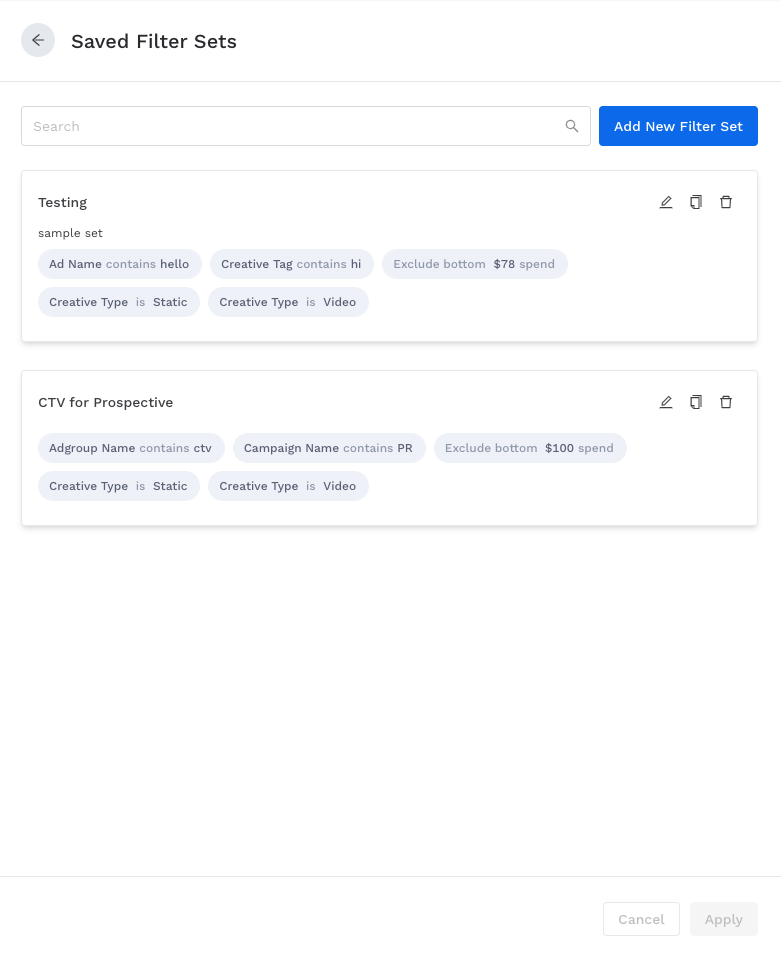
You can search the filter set using name of the set.
Click on edit icon to make changes the existing set, if it was already applied, don’t worry about reapply, it’ll automatically be applied.
Click on copy icon to create a duplicate/copy of an existing filter set and you can make changes to it if you desire.
No longer need a set? Click on delete icon, it’ll be deleted permanently.
You can create a new filter set, on this page by clicking on ‘Add New Filter Set’.
To apply a filter set from this page, click on a filter set card and click on ‘Apply’.