
Prerequisites
-
If your client is managed by Partner PMG (Partner ID:
emzstyr): API creds (ttd_api_emzstyr@pmg.com) has access to client's TTD instance if your clients -
If your client is managed by other Partners, such as PMG - Turbotax, ServiceNow (other Partner IDs): API Username & API Password OR a Long-Lived Token. Those can be obtained from your Tradedesk representative
Workflow
The general workflow is:
-
Create TTD reports manually - more details can be found below
-
Create the datasources via ADL Onboarding App
-
Auth and link the report to the datasources and save
-
Load data
Clients Managed by Partner PMG
-
If your client is managed by Partner PMG(Partner ID:
emzstyr), other partners can be found below
Creating the Trade Desk Report via UI
Set the REPORT_TIMEZONE to EST (America/New_York) unless requested otherwise
-
) Go and find the following report templates on Tradedesk UI, which help build ADL-required Tradedesk datasources:
-
1818799 - used for building
tradedesk_insights_ad -
1819936 - used for building
tradedesk_insights_geo -
1819976 - used for building
tradedesk_insights_inventory -
4812361 - used for building
tradedesk_insights_dma
-
Please check this doc if you are not able to find the templates on the UI

2.) Make sure all the report settings are good to go. Click on Run to get the report running and built
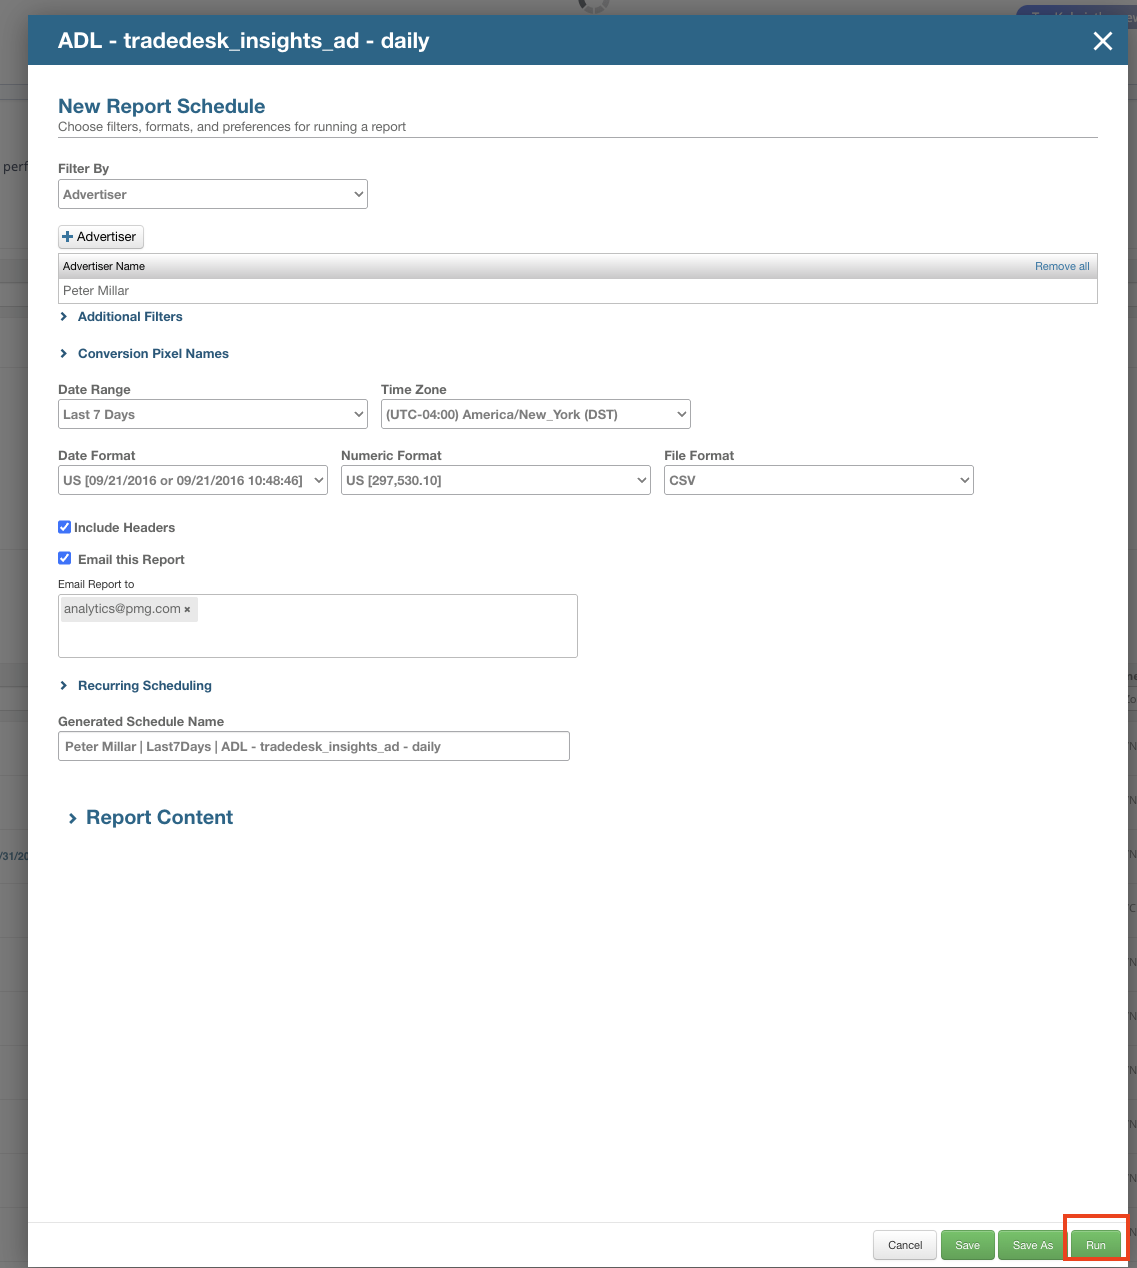
3.) The reports will be available under the Generated Reports section.
Creating the Tradedesk datasources
1.)Navigate to ADL Onboard marketplace app
2.) Choose Tradedesk and run the app
3.) 3 ADL-required datasources will be built after the App succeeds. The datasources can be found when choosing Alli Data Library and Tradedesk tags
Linking the report to the datasource
1.) In Alli Data, navigate to each of the tradedesk_insights_* datasources and update the following fields:
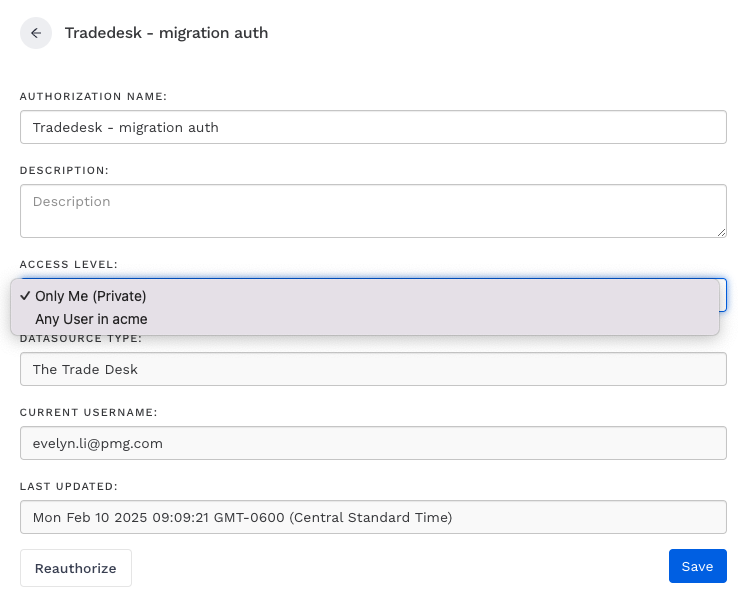
Required Authorization
You can select an existing authorization or create a new one. Fill out the auth form by entering

-
API Username (find in 1Pass)
-
API Password (find in 1Pass)
-
Long-lived Token (find in 1Pass)
When filling out the authentication form, provide either:
-
API Username and API Password or
-
Long-lived Token
You do not need to enter both.
-
Partner ID (find on Tradedesk UI)

Datasource Configuration
-
Advertiser Name (select the appropriate one based on the client)
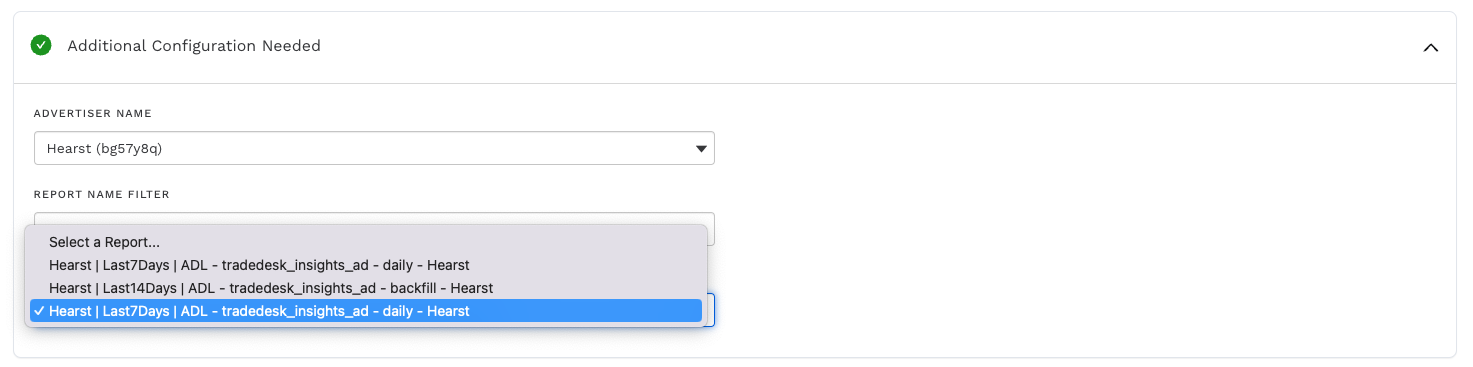
2.) Hit Next to save the configuration
3.) Select the appropriate report created in step #3 of the previous section

4.) Hit Next to save the datasource
5.) Hit Load to load data into the datasource
Backfilling the datasource
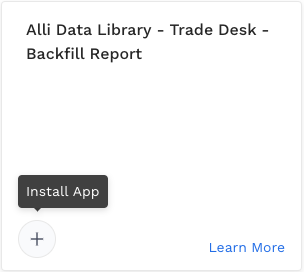
1.) Install the Alli Data Library - Trade Desk - Backfill Report Marketplace app
2.) Fill out the required fields and run the app
3.) If successful, you should receive an email (via the email address entered in the app) with the backfill report attached, e.g.:
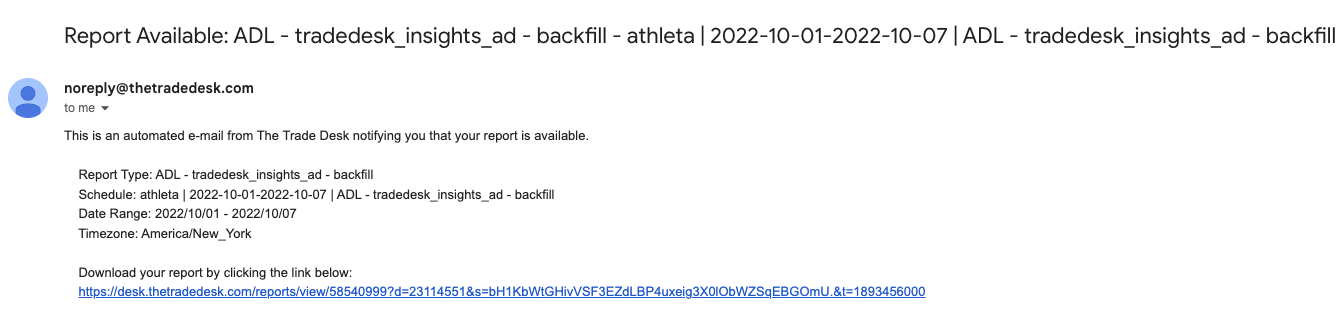
4.) Download the report and upload it to the corresponding datasource to execute the backfill
If you’re experiencing errors when using the app, please follow the steps to create reports for clients manually on Tradedesk UI:
1.) Go and find the following report templates on Tradedesk UI, which help backfill ADL-required Tradedesk datasources:
-
1819918 - used for backfilling
tradedesk_insights_ad -
1819950 - used for backfilling
tradedesk_insights_geo -
1820757 - used for backfilling
tradedesk_insights_inventory
Please do not use templates for daily reports for backfilling - it will disable the daily reports
2.) Select custom Date Range and enter the date range you’d like to backfill for the client
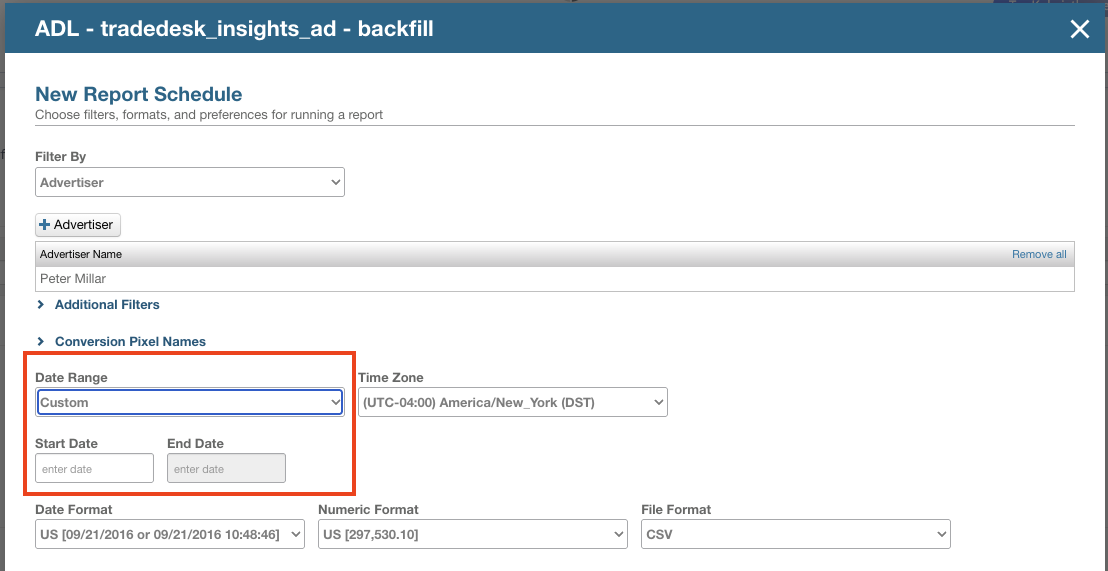
3.) Hit Run to build the backfill report
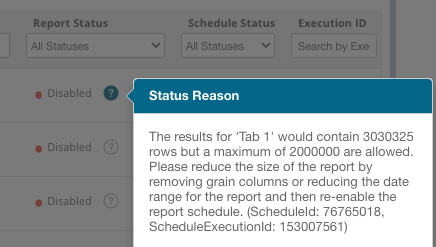
4.) Download the report and upload it to the corresponding datasource to execute the backfill. If the datasource is big, please try to zip it and upload to the datasource.
Make sure to check the error message when your report is disabled. For example, please select a shorter custom data range and backfill again if you see the following error message.
Clients Managed by Other Partners
-
If your client is managed by partners other than Partner PMG(Partner ID:
emzstyr)
Creating the Trade Desk Report via UI
1.) Log in to the Tradedesk UI and create reports based on your needs from templates
-
tradedesk_insights_ad: created from the template id1818799 -
tradedesk_insights_geo: created from the template id1819936 -
tradedesk_insights_inventory: created from the template id1819976 -
tradedesk_insights_dma: created from the template id4812361
2.) Download the report once it completes the first load
If you cannot find the templates, please follow this Google Sheet to manually create the reports on the Tradedesk UI.
Creating the Tradedesk datasources
1.)Navigate to ADL Onboard marketplace app
2.) Choose Tradedesk and run the app
3.) 3 ADL-required datasources will be built after the App succeeds. The datasources can be found by choosing Alli Data Library and Tradedesk tag
Linking the report to the datasource
1.) In Alli Data, navigate to each of the tradedesk_insights_* datasources and update the following fields:
Required Authorization
You can select an existing authorization or create a new one. Fill out the auth form by entering
-
API Username (find in 1Pass)
-
API Password (find in 1Pass)
-
Long-lived Token (find in 1Pass)
When filling out the authentication form, provide either:
-
API Username and API Password or
-
Long-lived Token
You do not need to enter both.
-
Partner ID (find on Tradedesk UI)
Datasource Configuration
-
Advertiser Name (select the appropriate one based on the client)
2.) Hit Next to save the configuration
3.) Select the appropriate report from the dropdown list
4.) Hit Next to save the datasource
5.) Hit Load to load data into the datasource