
How to use Alli Data Snowflake integration
The Alli Data Snowflake integration works as any other database integration that we have (though it does more closely resemble how we load data into Redshift rather than Bigquery). This connection allows for Alli Data to create schemas, tables, and views as well as load data into tables, delete data from tables and archive/unarchive them. So you want to set this connection up? Snowflake is considered to be “cloud service agnostic” meaning it can hook into any of the major cloud service providers (AWS, Google Cloud, and Azure). At PMG we mostly use AWS so these directions will be AWS focused.
Steps
Just as a preface these directions will be almost identical whether we are hooking Alli Data into a clients snowflake account or if we are adding a client to our snowflake account.
Step 1:
Because of how Alli Data works and how we insert data into tables using S3 as the initial “stage”, we need to set up what Snowflake calls a Storage Integration. This is pretty much a connection between Snowflake and your cloud storage service of choice. Snowflake already has very detailed instructions on how to do this HERE. All of our storage integrations will have to follow the same naming scheme being {client_name}_s3_int.
  create storage integration {Your client name here!}_s3_int
  type = external_stage
  storage_provider = s3
  storage_aws_role_arn = 'arn:aws:iam::002096479106:role/client-creds-role'
  enabled = true
  storage_allowed_locations = ('s3://client-creds-bucket');
Examples of current storage integrations for staging clients:
demo_client_s3_int
acme_s3_int
At the most basic level we (PMG) will need them to create this storage integration with one of our client creds s3 roles, have them get the external id and user arn that it creates and add them to the client credentials infrastructure (like in this PR that was made for the acme and demo_client staging clients)
Step 2:
Now that we have this S3 integration following the correct naming scheme (very important), we need to create a user that has read and write permissions to the correct database in the snowflake account. To do this lets start by making a role that we can then grant usage permissions to the correct database.
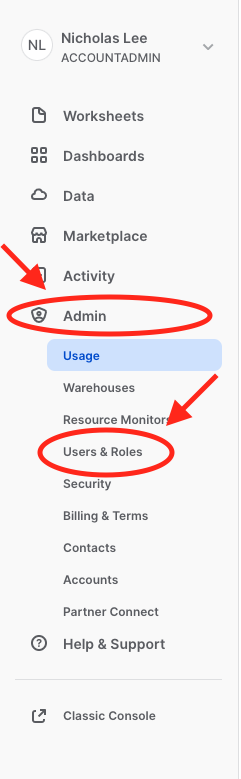
First you want to create a role by clicking on the Admin tab → navigating to the Users & Roles Sections → clicking on Roles at the top → Then clicking the +Role button


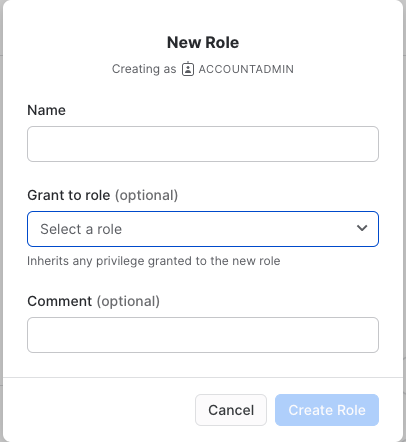
After clicking on the +Role button a pop up will come up and all you have to do is fill in the name and a comment if you'd like. You do not have to “Grant to role”.
After this role is created you will have to grant it access to the warehouse, database, any schemas, and all tables to those schemas
grant usage on warehouse {your warehouse name} to role {your role name};
grant usage on database {your database name} to role {your role name};
grant usage on all schemas in database {your database name} to role {your role name};
grant select,insert,update,delete on all tables in database {your database name} to role {your role name};
Once you have given the role all necessary permissions for read and writing into the database of your choice you will have to create a user with and assign that role to it. Going back to the Users/Roles section of the admin page, you’ll want to press the +User button and a pop up will come up much like the +Role button

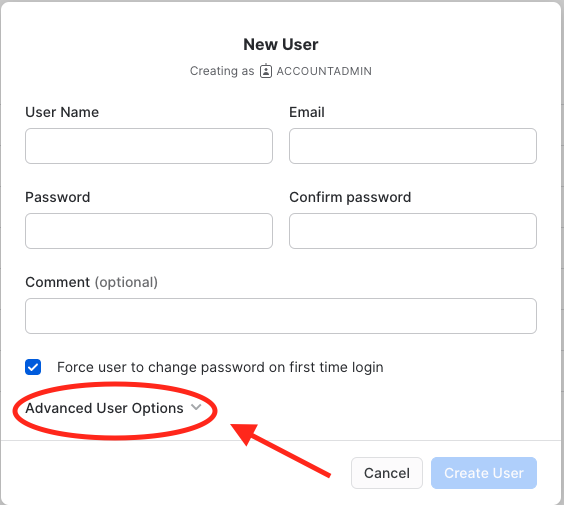
After setting the User name and password of the New User (make sure you remember the password as you will need this later) you’ll want to click the Advanced User Options dropdown
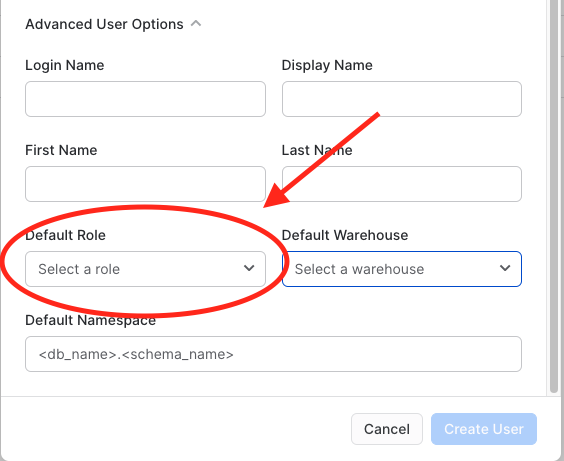
After that drop down appears you will want to assign the default role to the role we just created and granted permissions to, you can also set the default warehouse if you'd like as well but as we are only granting permissions to one warehouse this is unnecessary.
Once you have all the necessary information in there you can go ahead and create the user. Again make sure you save your users password because we will need it in the following step.
Step 3:
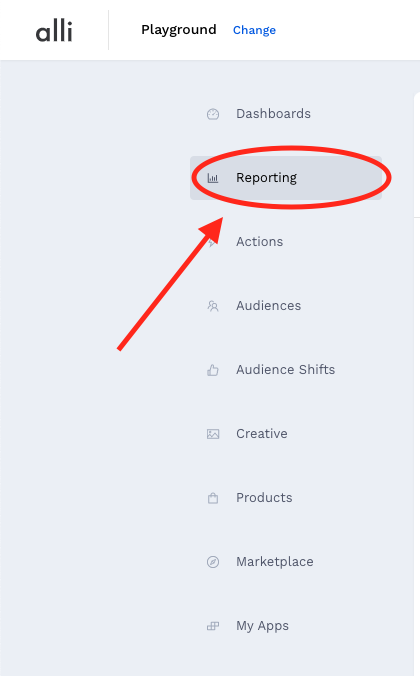
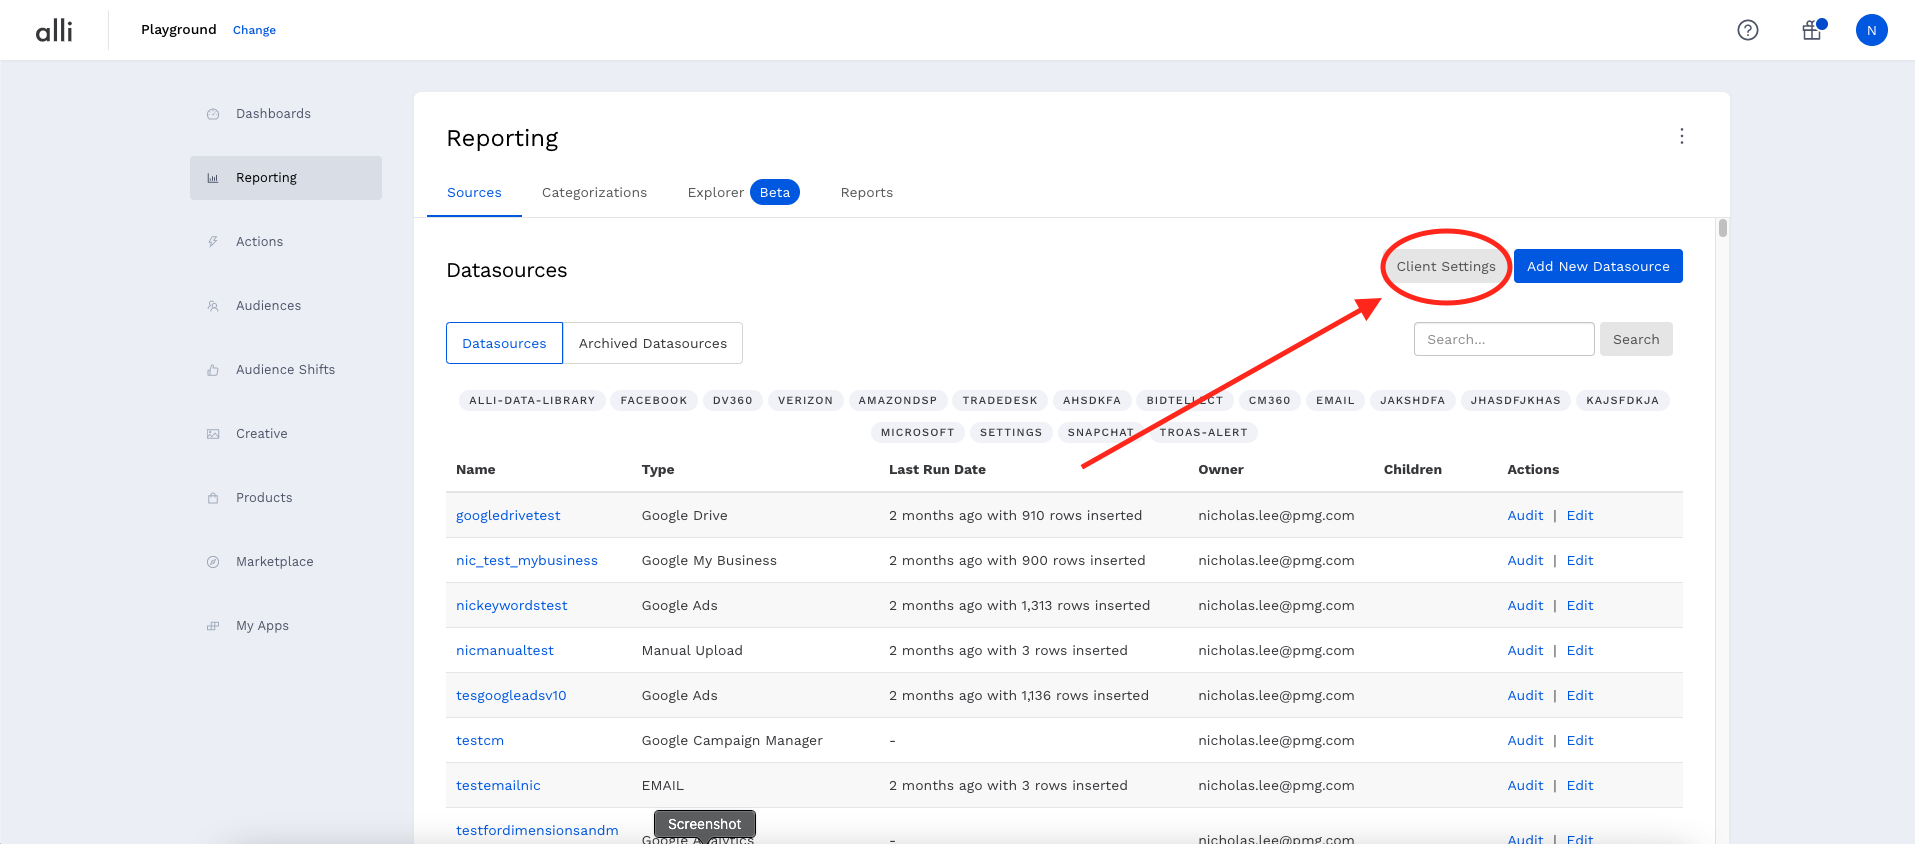
The next step is to take our role and input it into the Client Settings of whatever client we are setting this up for. You’ll navigate to the client in question and click on the reporting tab on the left hand side. Once you are in this section you will want to click on the client settings button on the right hand side.
Once in the client settings you’ll want to scroll down to the Snowflake Settings portion.
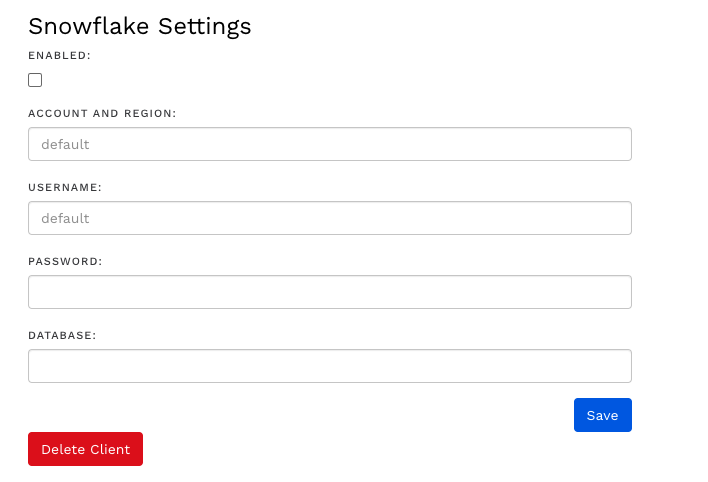
You will need the account and region, username, password, and whatever database you want to connect too. Your account name and region should look something like this ias24522.us-east-1 with them being separated by a period and your cloud provider region being after the period (here is some Snowflake docs on account identifiers). The username will be the user we created in step 2 and the password will be the one you should’ve saved for that user.
The End
After all those fields are inputed all you need to do is click that ‘enabled’ checkbox and save your changes and if everything was set up correctly you should now how your Alli Data datasources loading in to your Snowflake account! Congrats!