Tagger
Vendor/Partner | Tagger |
|---|---|
Version | Tagger API version: 0.1 Alli tool version: 1.0.4 |
API Documentation | (Must have a login access) https://app.taggermedia.com/apidocs/campaignReporting/docs |
Sunset Date | |
Channel(s) | Social |
Refresh Time (CST) | 4am |
Default backfill | 30 days |
Alli Data Library |
|
Getting Started
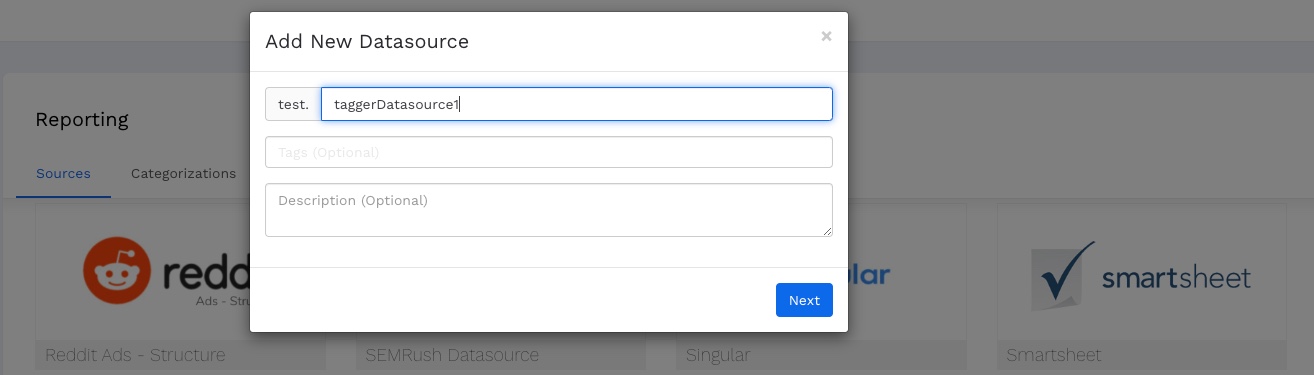
Navigate to Reporting from the side menu of Alli. Make sure you’re in the Sources tab and click “Add New Datasource”.
Scroll down to Tagger and click. Enter your datasource name.
Check the Advance Settings to check it is as expected. Check what you want to do with New Uploads and the data location. What is there by default should work.
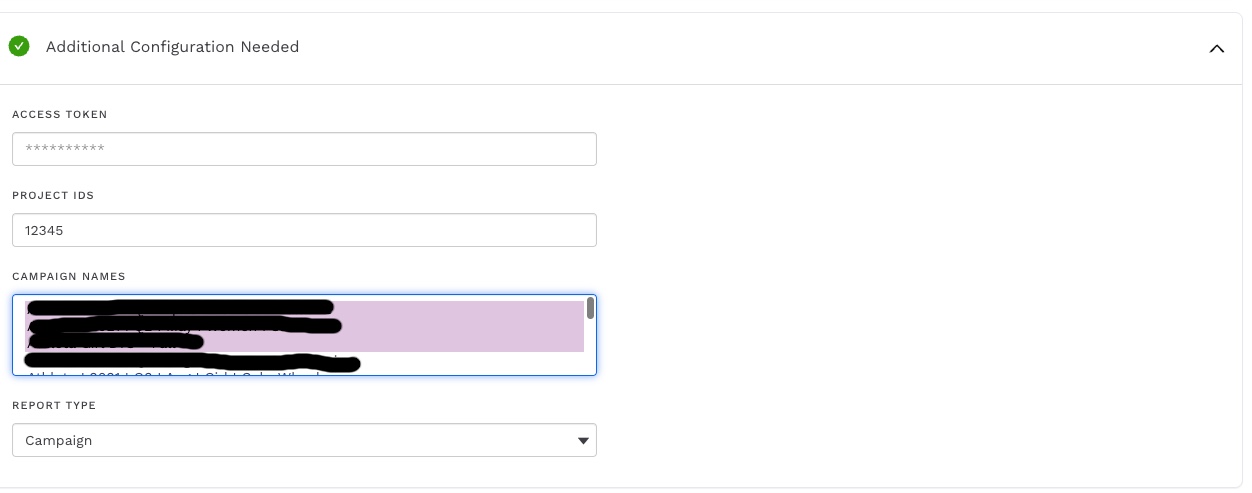
Enter the Access Token. If you are SAAS customer (not PMG) you’ll create this Access token yourself and keep track of this token. If you are looking to setup a datasource for a PMG client, please open up an Alli Service Desk ticket and request the Access Token for Tagger datasource.
Note: Regenerating a new Access Token affects all Tagger data sources created with this Access Token. Do not regenerate without checking in with other teams and updating the 1Pass vault with the new value. The regenerated token cannot be seen again after the first time so make sure it’s saved!
Enter the ID(s) of the project(s) that the campaigns reside under. This can be found on the Tagger site in the URL when visiting the project—separate project IDs by commas.
You will need to log in to Tagger to get these unless shared with you.
.jpeg?inst-v=60c6b320-96ac-46e7-ab4f-7bafcc7e41dc)
Click Next. This saves the information and grabs all the campaigns available and will appear in the Campaign Names box.
Reopen the Additional Configuration and now select the campaigns you want to pull. (CMD + select, selects multiple campaigns on Mac. CTRL + select for Windows)
Hit Save.
Backfill data now by choosing the backfill time range and hitting Next. Data should load and email you when complete.
.jpeg?inst-v=60c6b320-96ac-46e7-ab4f-7bafcc7e41dc)
Required Authorization
Access Token needs to be generated just once for an account.
Limitations
The API request limit currently is 30 per minute. This means we can’t have a ton of these datasources updating at the same time.
Regenerating a new Access Token affects all Tagger data sources created with this Access Token. Do not regenerate without checking in with other teams and updating the 1Pass vault with the new value. The regenerated token cannot be seen again after the first time so make sure it’s saved!
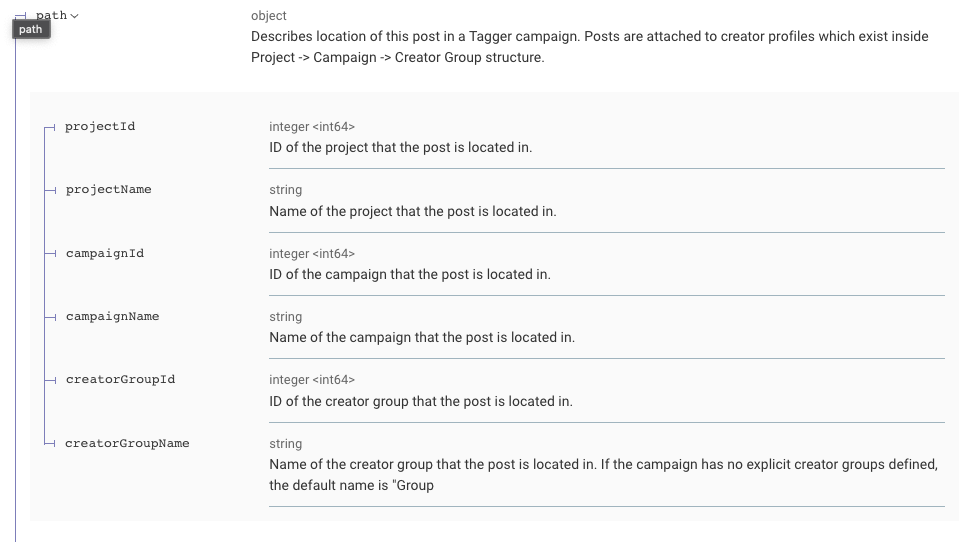
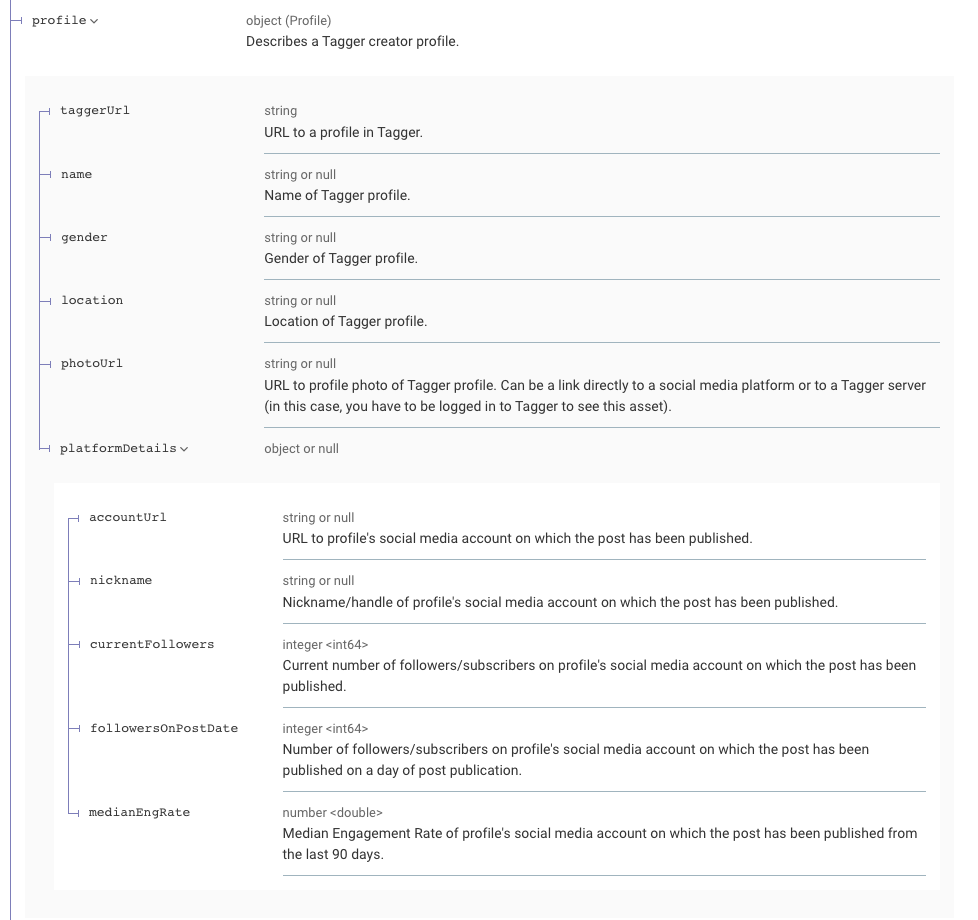
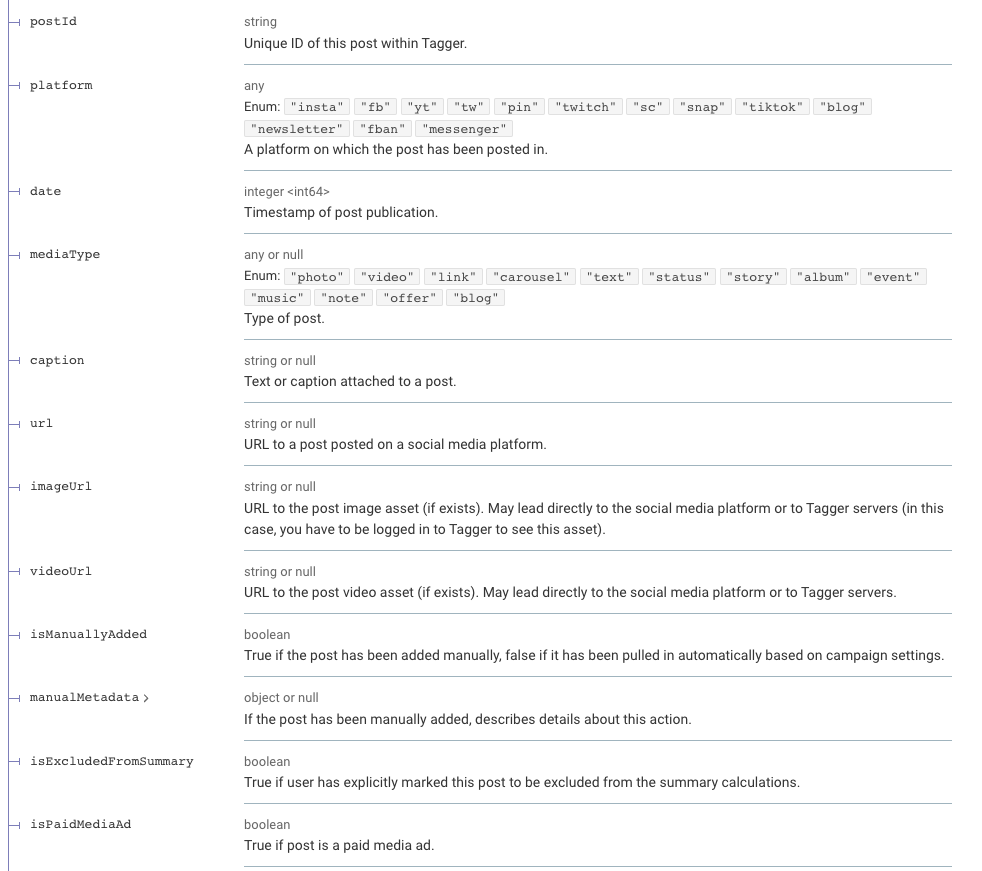
Define your Data
Source: https://app.taggermedia.com/apidocs/campaignReporting/docs#/paths/~1campaignReporting~1posts/post
Dimensions
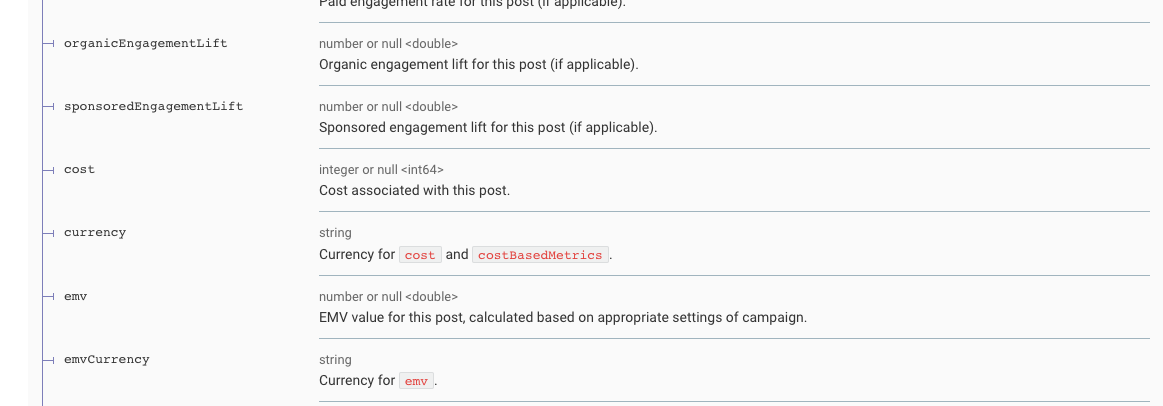
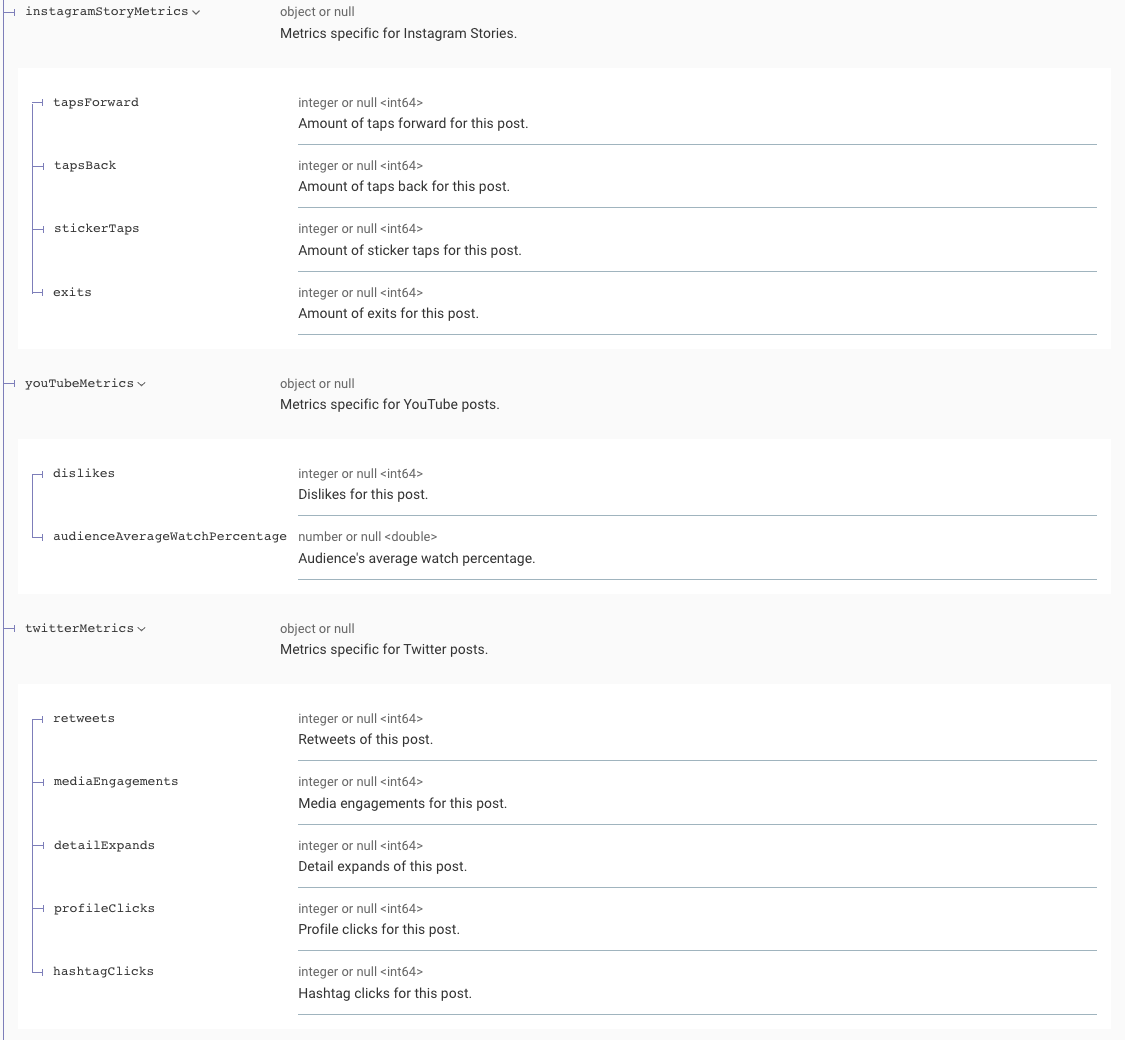
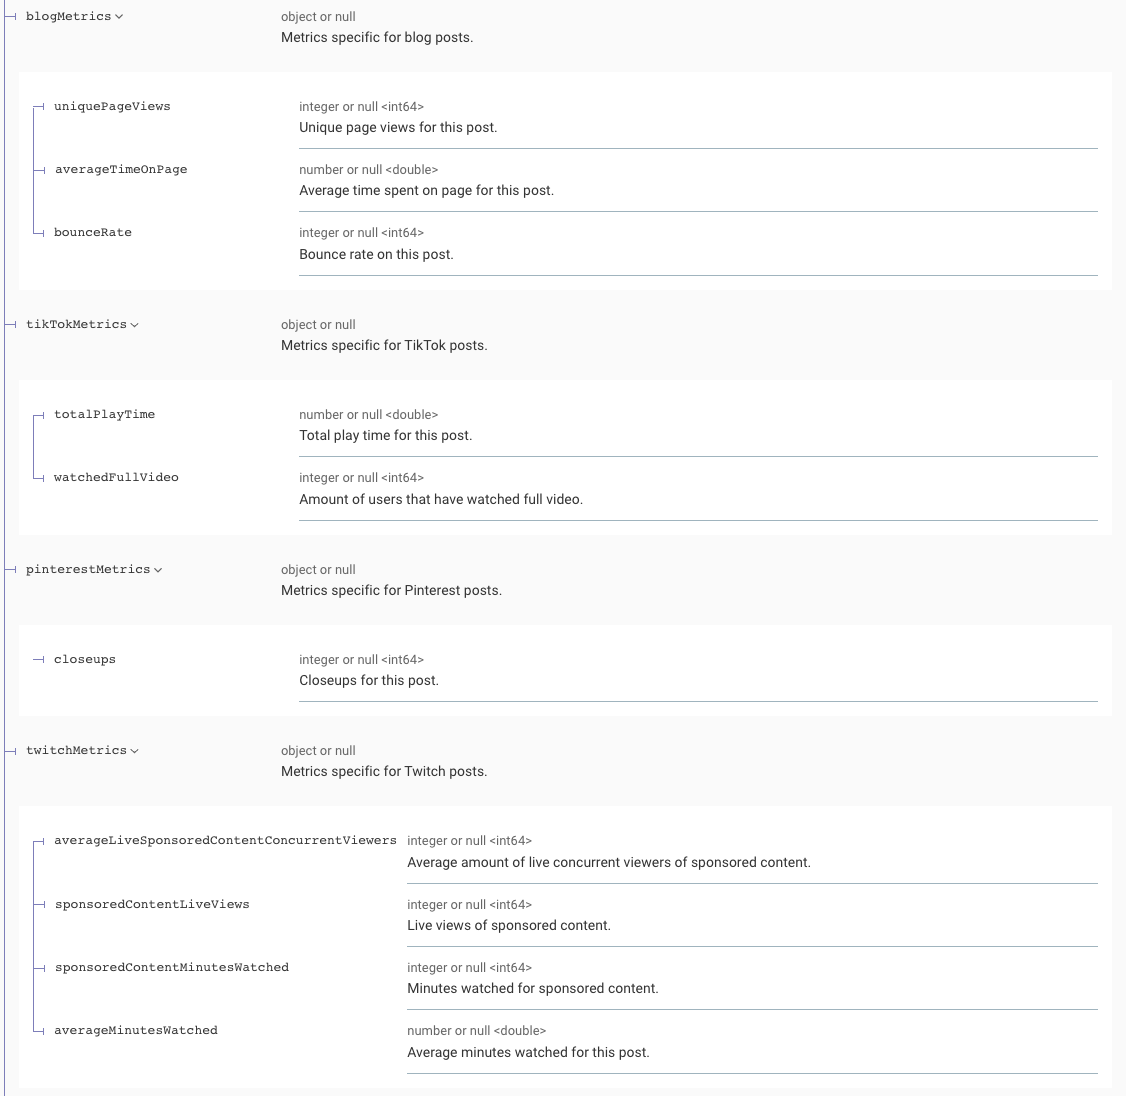
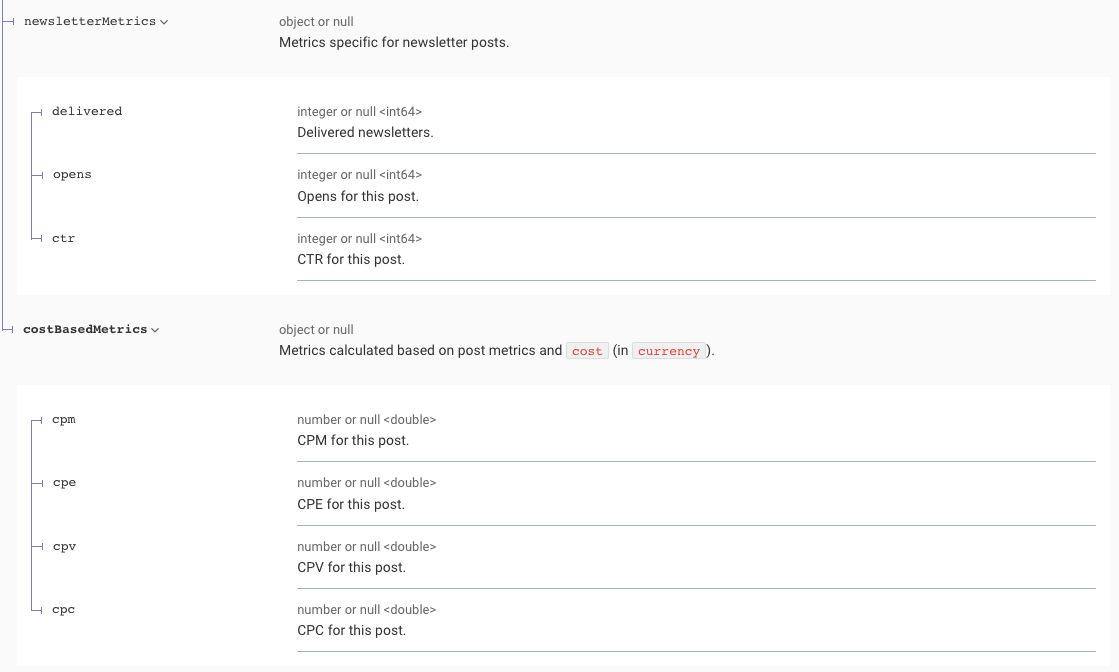
Metrics