
Alli Actions is designed to unlock strategic optimizations at scale by automating actions on campaigns based on pre-set parameters. Powered by the data sources within Alli, this tool seamlessly integrates with major advertising platforms, including Google Ads, Microsoft (Bing) Ads, Meta, DV360, and The Trade Desk.
Alli Actions is incredibly versatile, allowing you to automate a wide range of tasks that are typically performed manually through the user interface of the supported platforms. Some of the most common use cases include:
-
Updating Budgets: Automatically adjust campaign budgets based on performance metrics or pre-set parameters.
-
Modifying Bids: Scale bids up or down across campaigns or ad groups to optimize for specific goals, such as maximizing conversions or managing cost-per-click (CPC).
-
Negating Keywords or URLs: Efficiently negate underperforming keywords or irrelevant URLs, ensuring that your campaigns focus on the most relevant traffic.
-
Updating Campaign, Ad Set/Ad Group, or Ad Statuses: Bulk update the status of campaigns, ad sets/ad groups, or individual ads (e.g., pausing, activating, or deleting) to align with your strategic objectives.
Bulk Actions: Practically anything you can do in the UI of Google Ads, Microsoft (Bing) Ads, Meta, DV360, and The Trade Desk can be executed in bulk through Alli Actions, making it a powerful tool for managing large-scale campaigns with precision and efficiency.
By the end of this tutorial you will be able to:
-
Set up a new action that automates campaign and account settings
-
QA your action executions
-
Find specific item level details, like what was sent each execution, or specific error message to help troubleshoot
Please review before beginning your Action setup!
In the simplest terms, the way Actions works is you (the user) gives data to Actions, and Actions pushes that data to the platform of your choice to make the requested changes.
Actions will “action” on any and all data presented to it - it is crucial, no matter the data source, that any filtering or selection happen before connecting to Actions (so either filtering in Alli Data reports, Google Sheets, etc)
So for example, if you have a Google Sheet with daily budget updates, do not connect the base tab with every date, as it would send all of the rows every day. Instead, create a separate tab that filters that base data. For tips and tricks on this, review these tips & tricks for Google Sheets or these tips & tricks for Alli Data.
How To Set Up a New Action
-
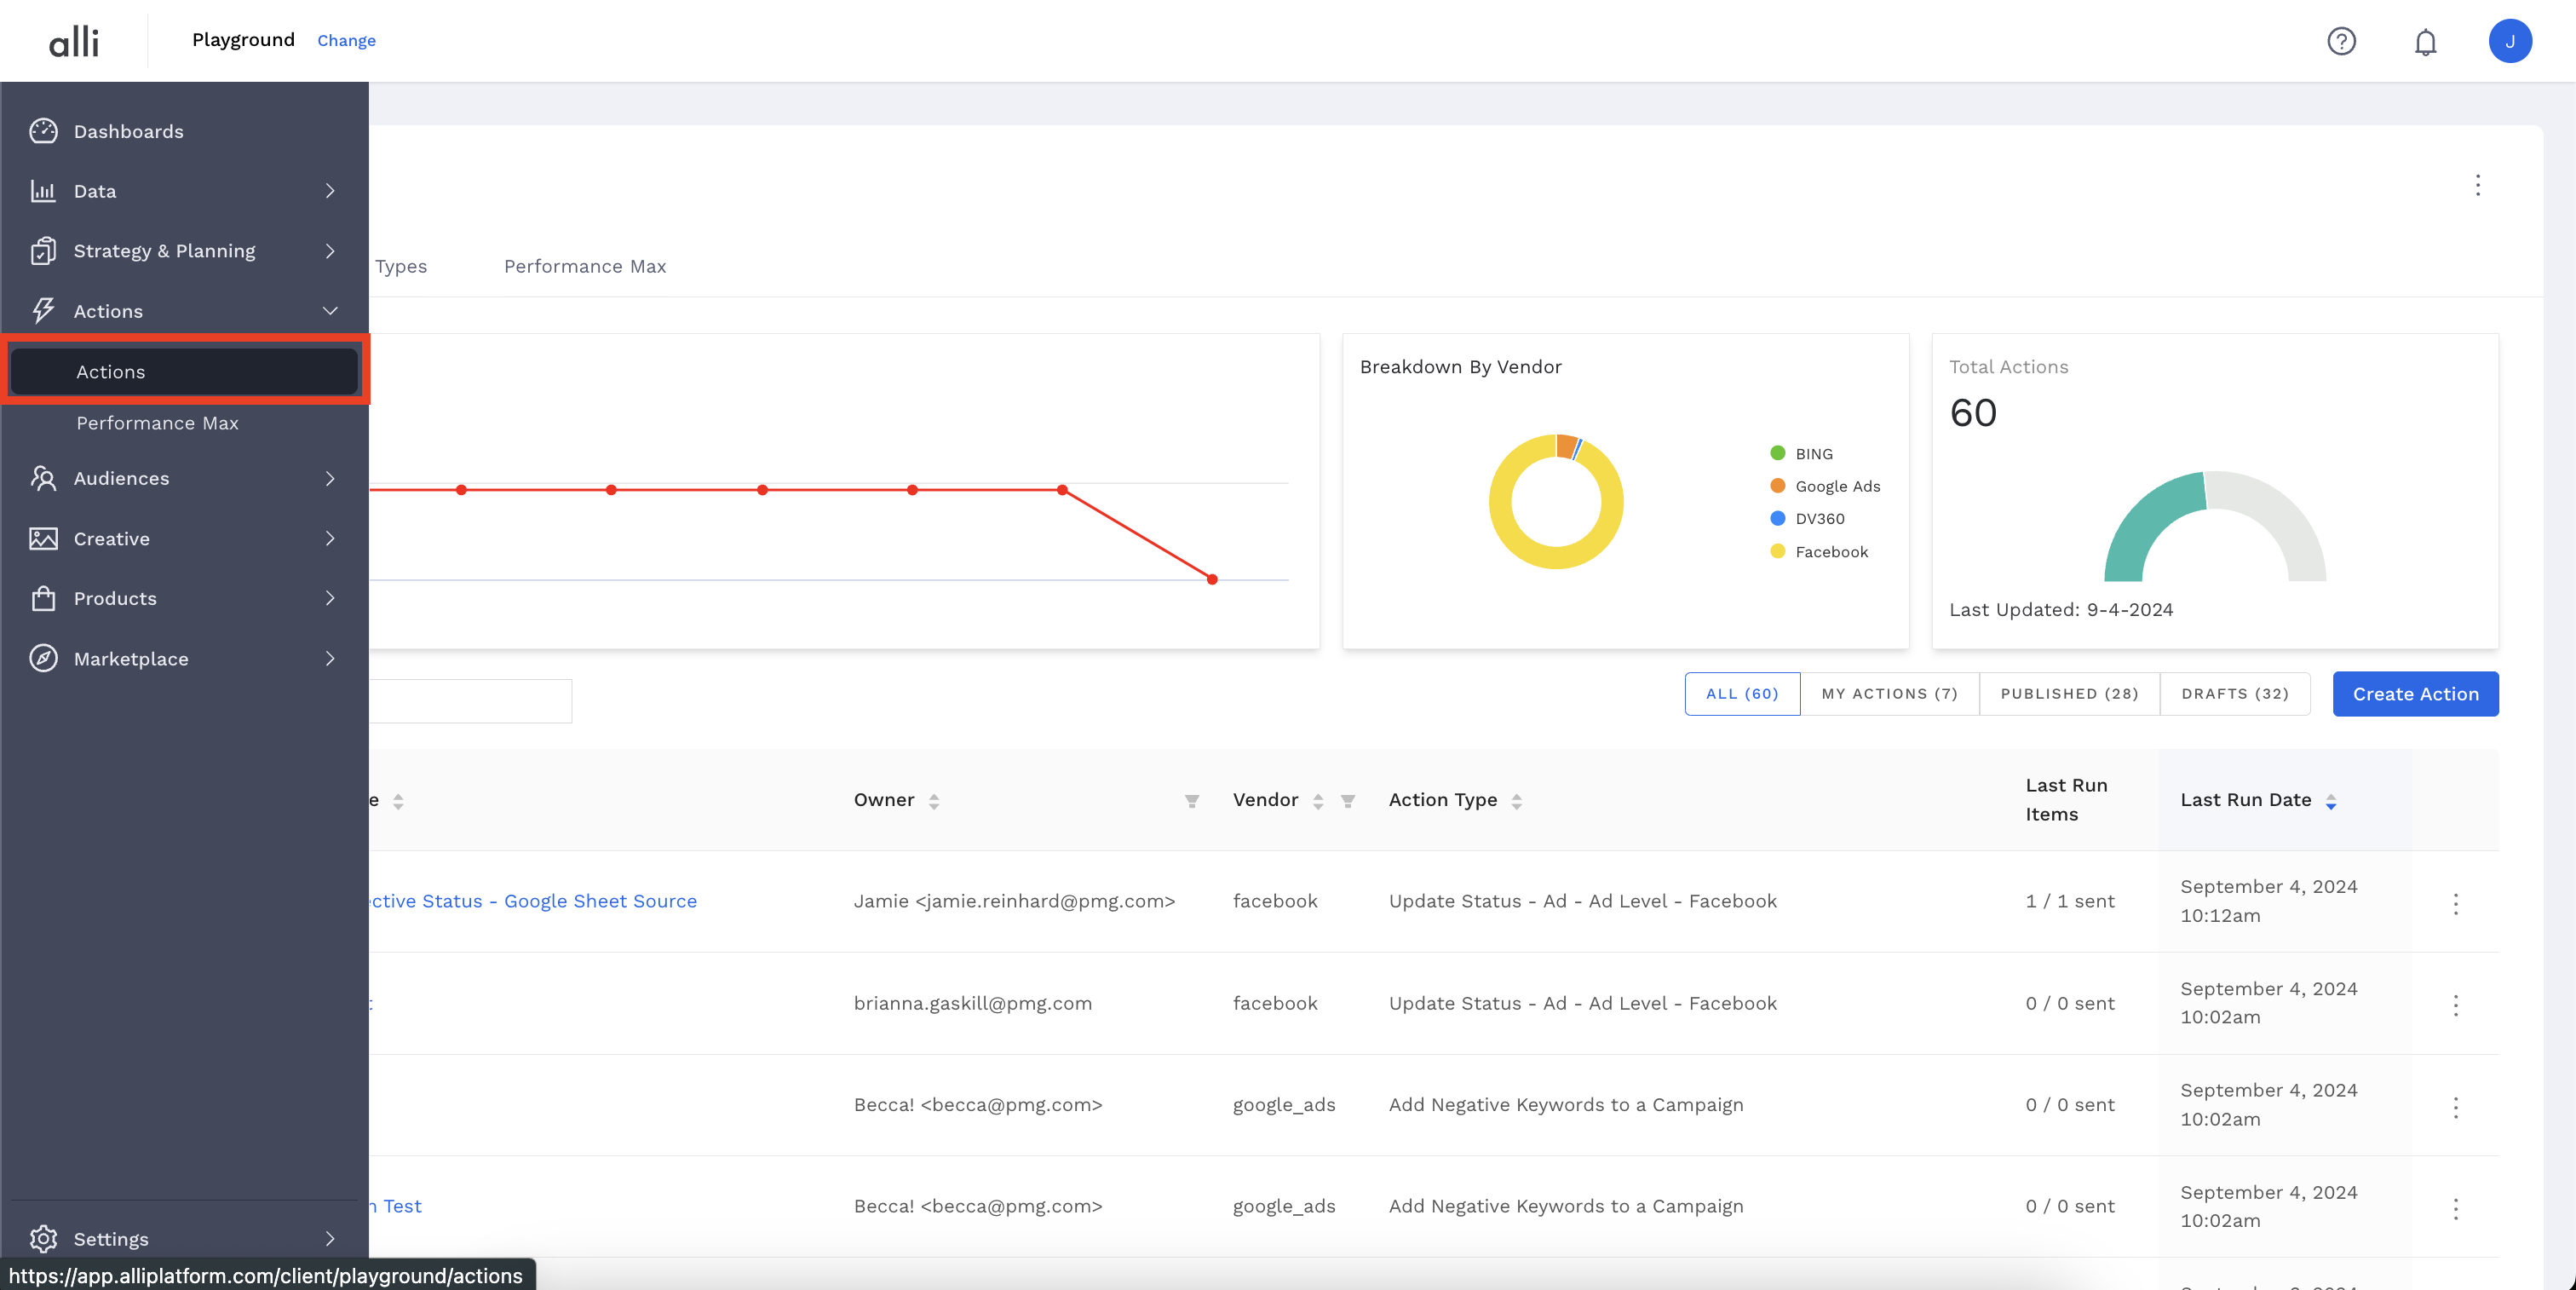
Navigate to Actions in the left side navigation.
-
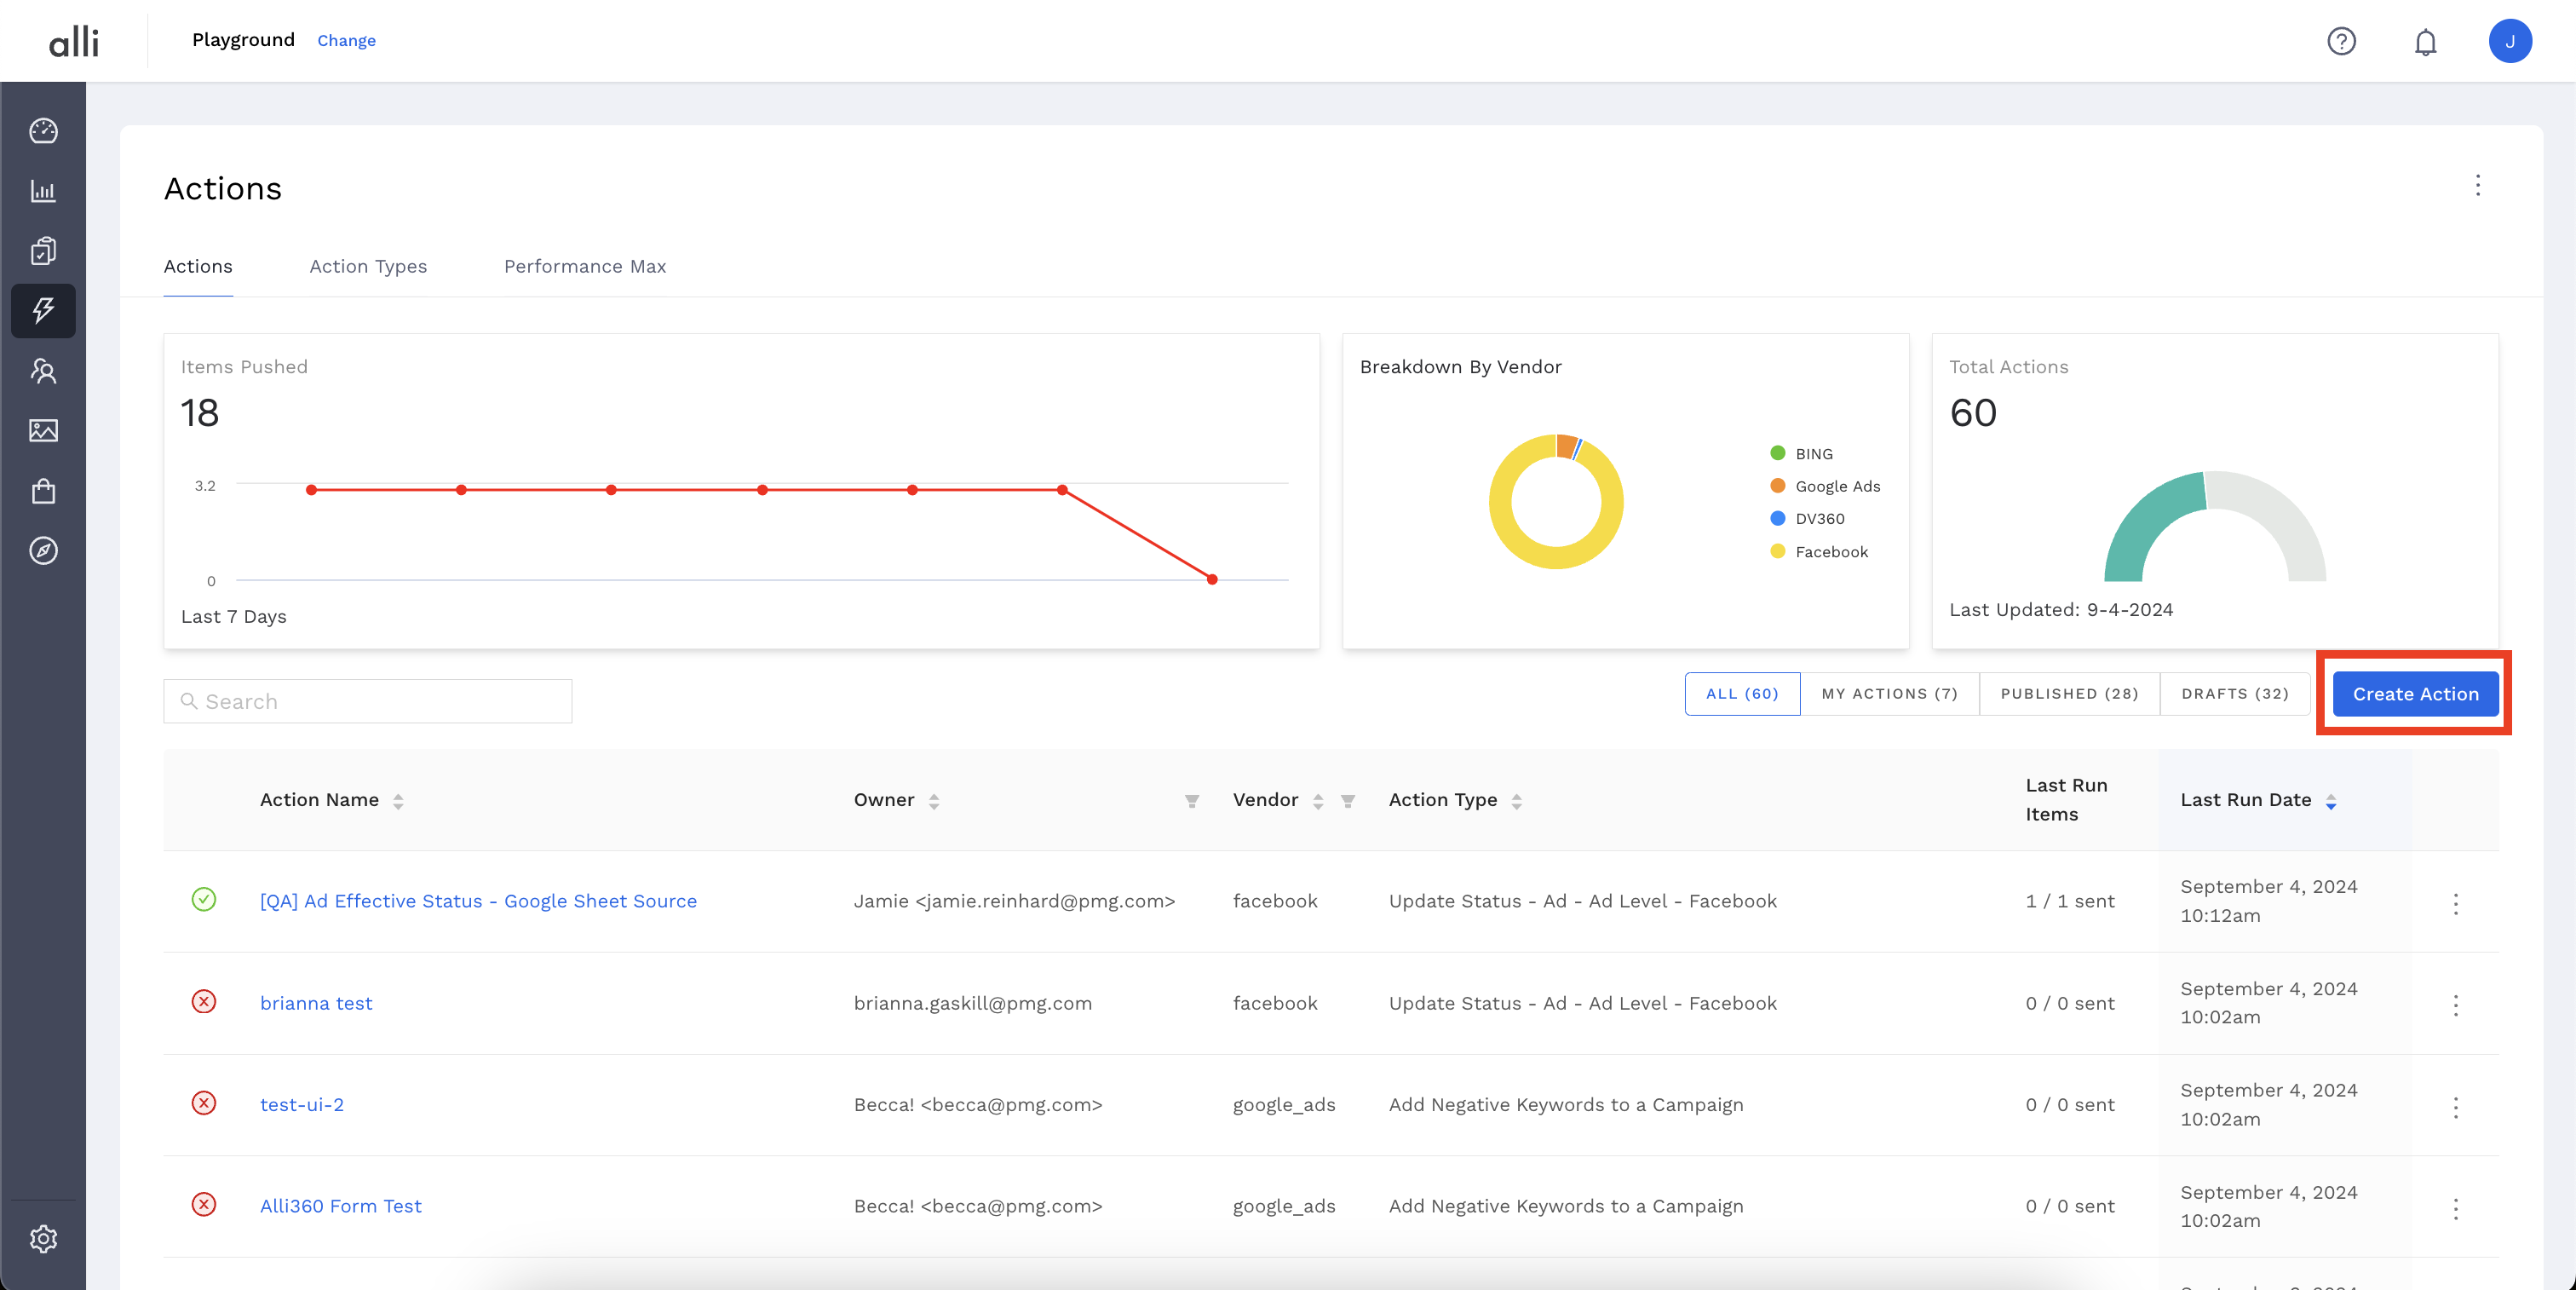
Click on the blue Create Action button.
-
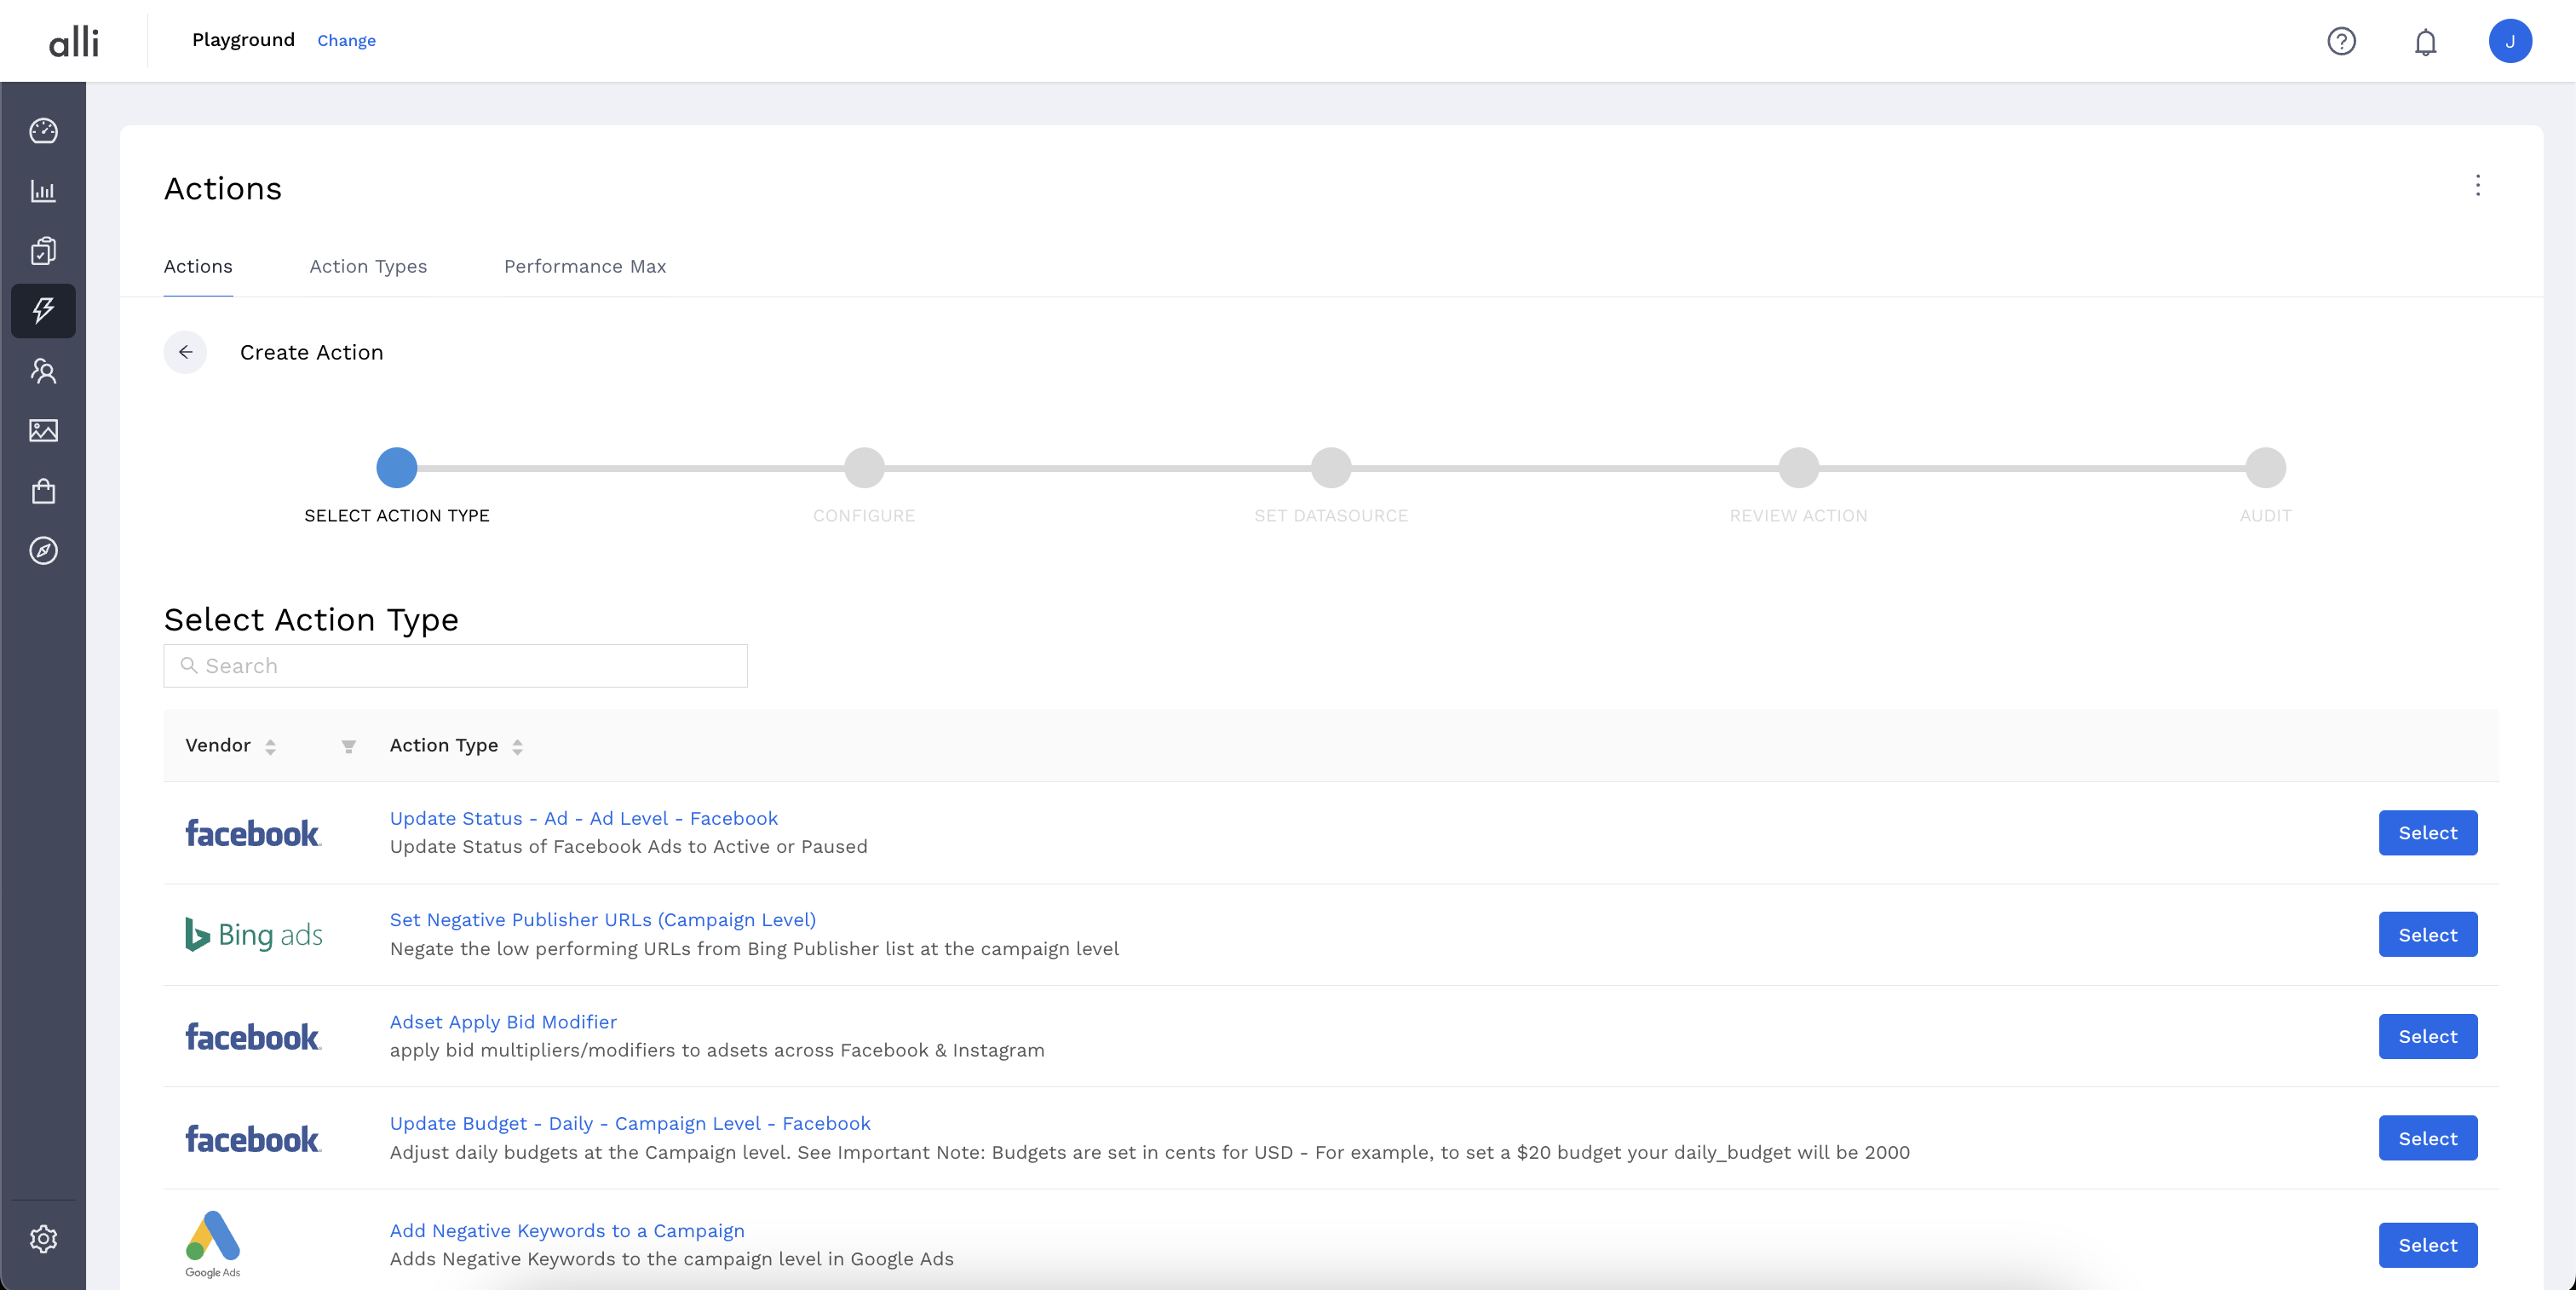
Select the Action Type that describes your goal. You can use the search bar to look specific Action Types, or filter by Vendor to help narrow your search.
-
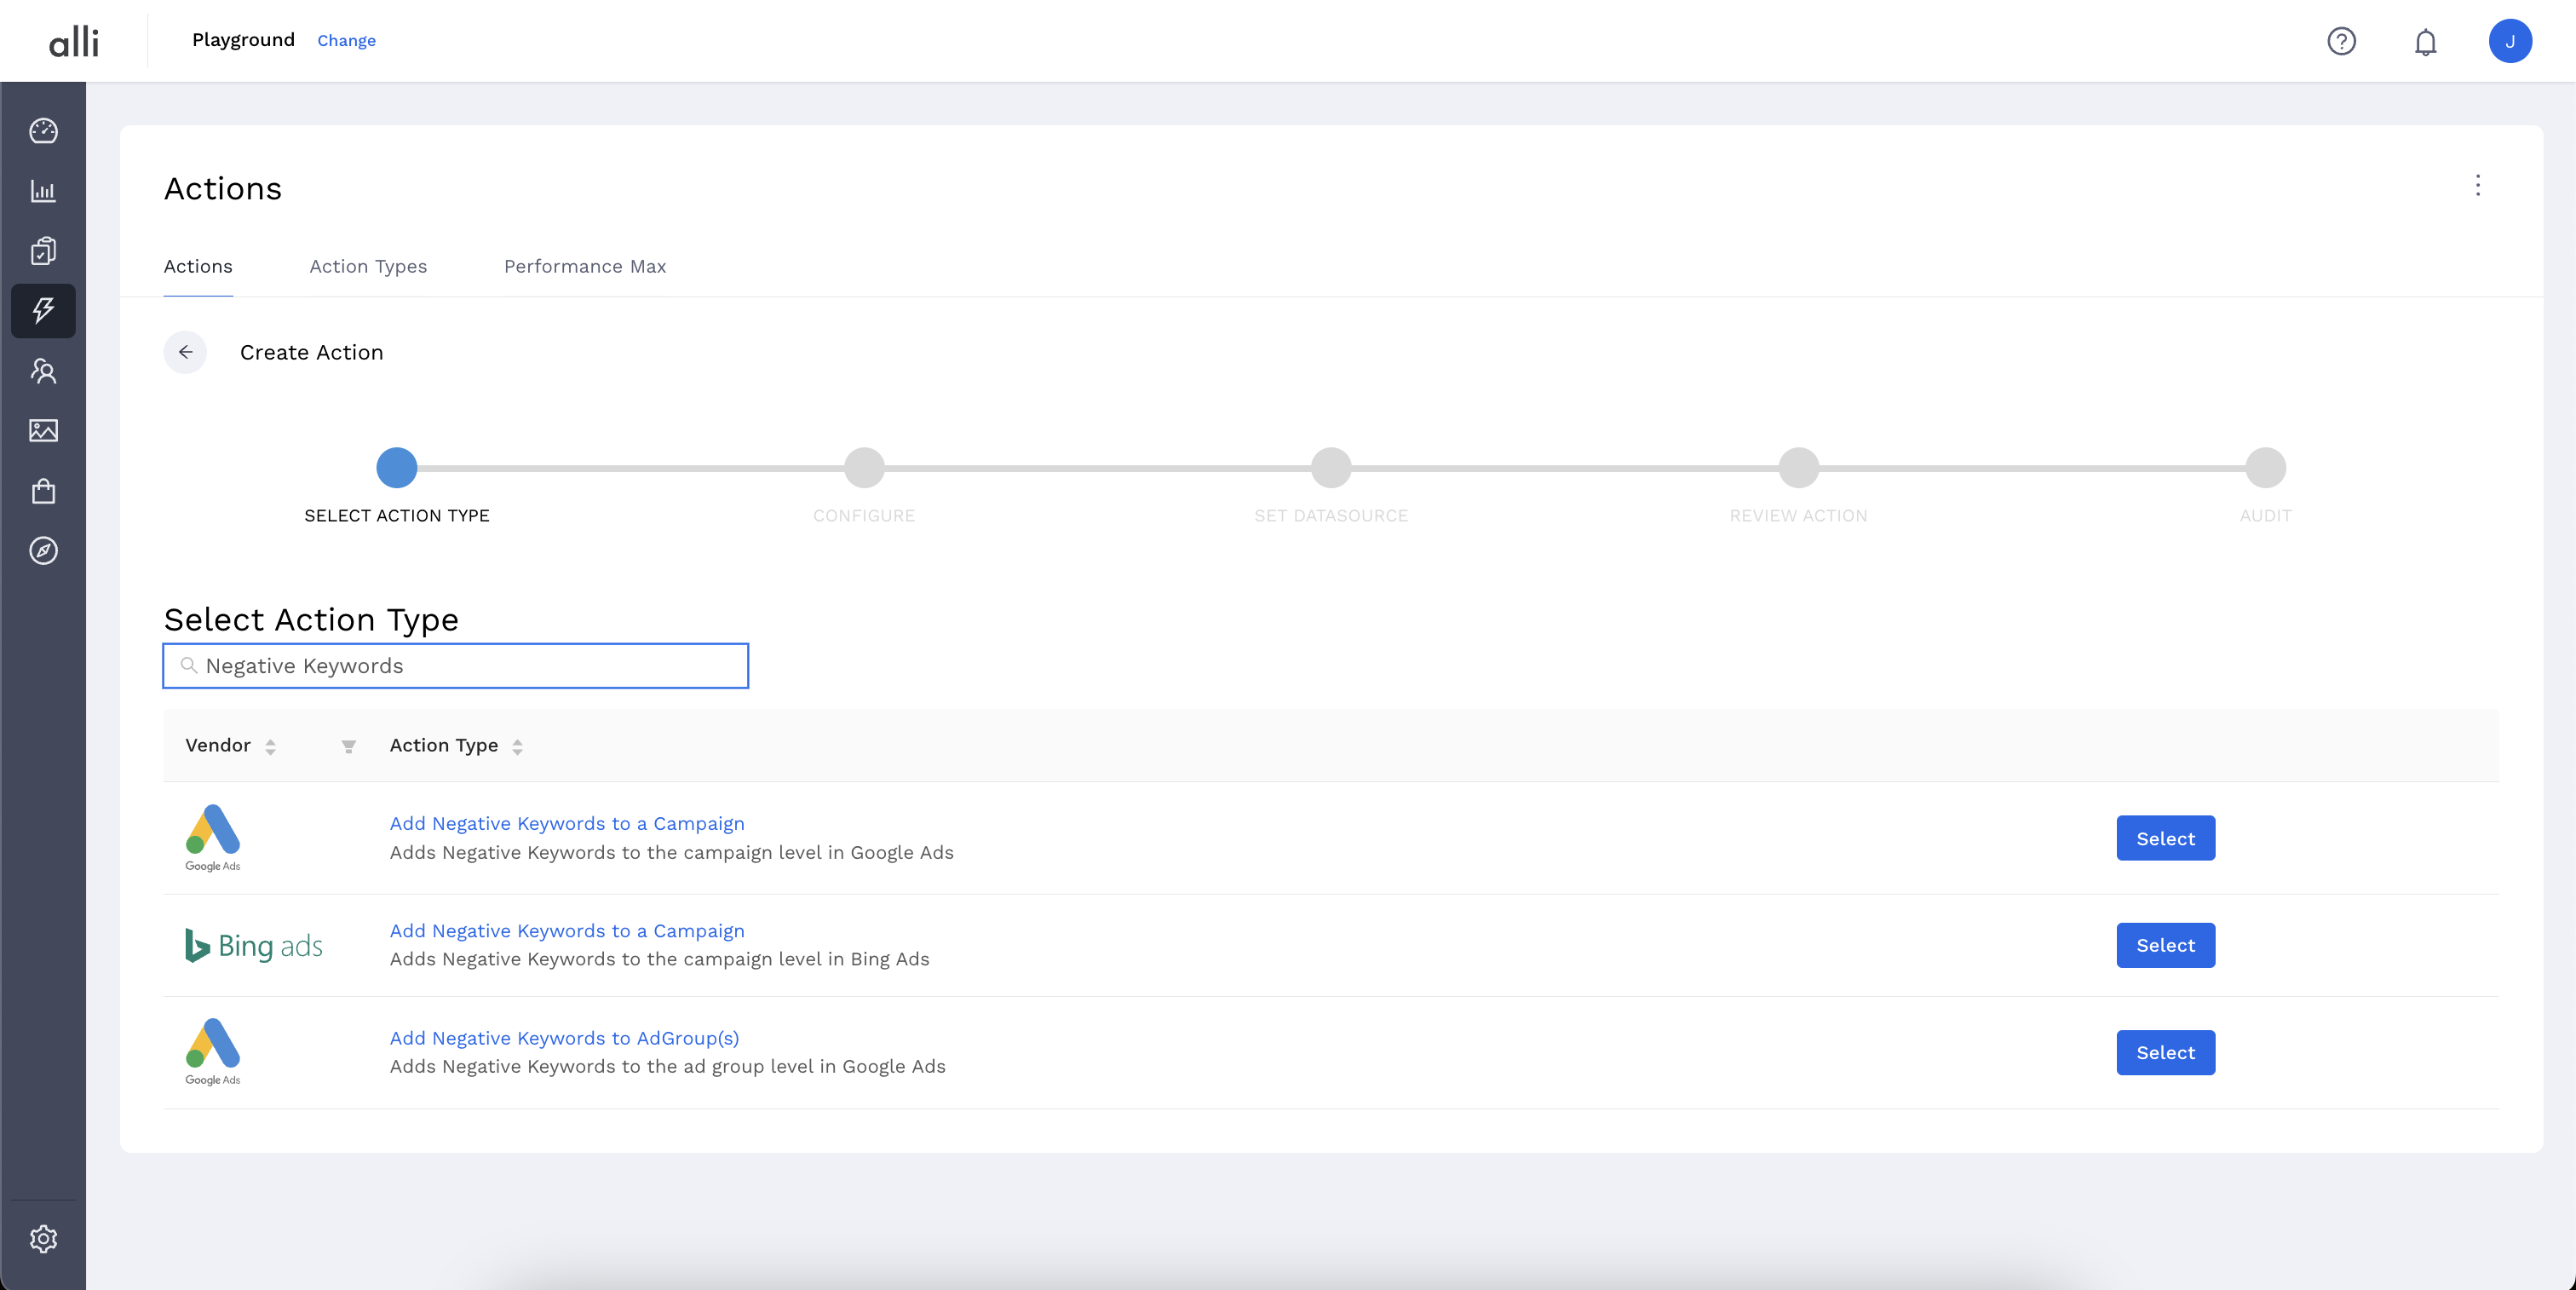
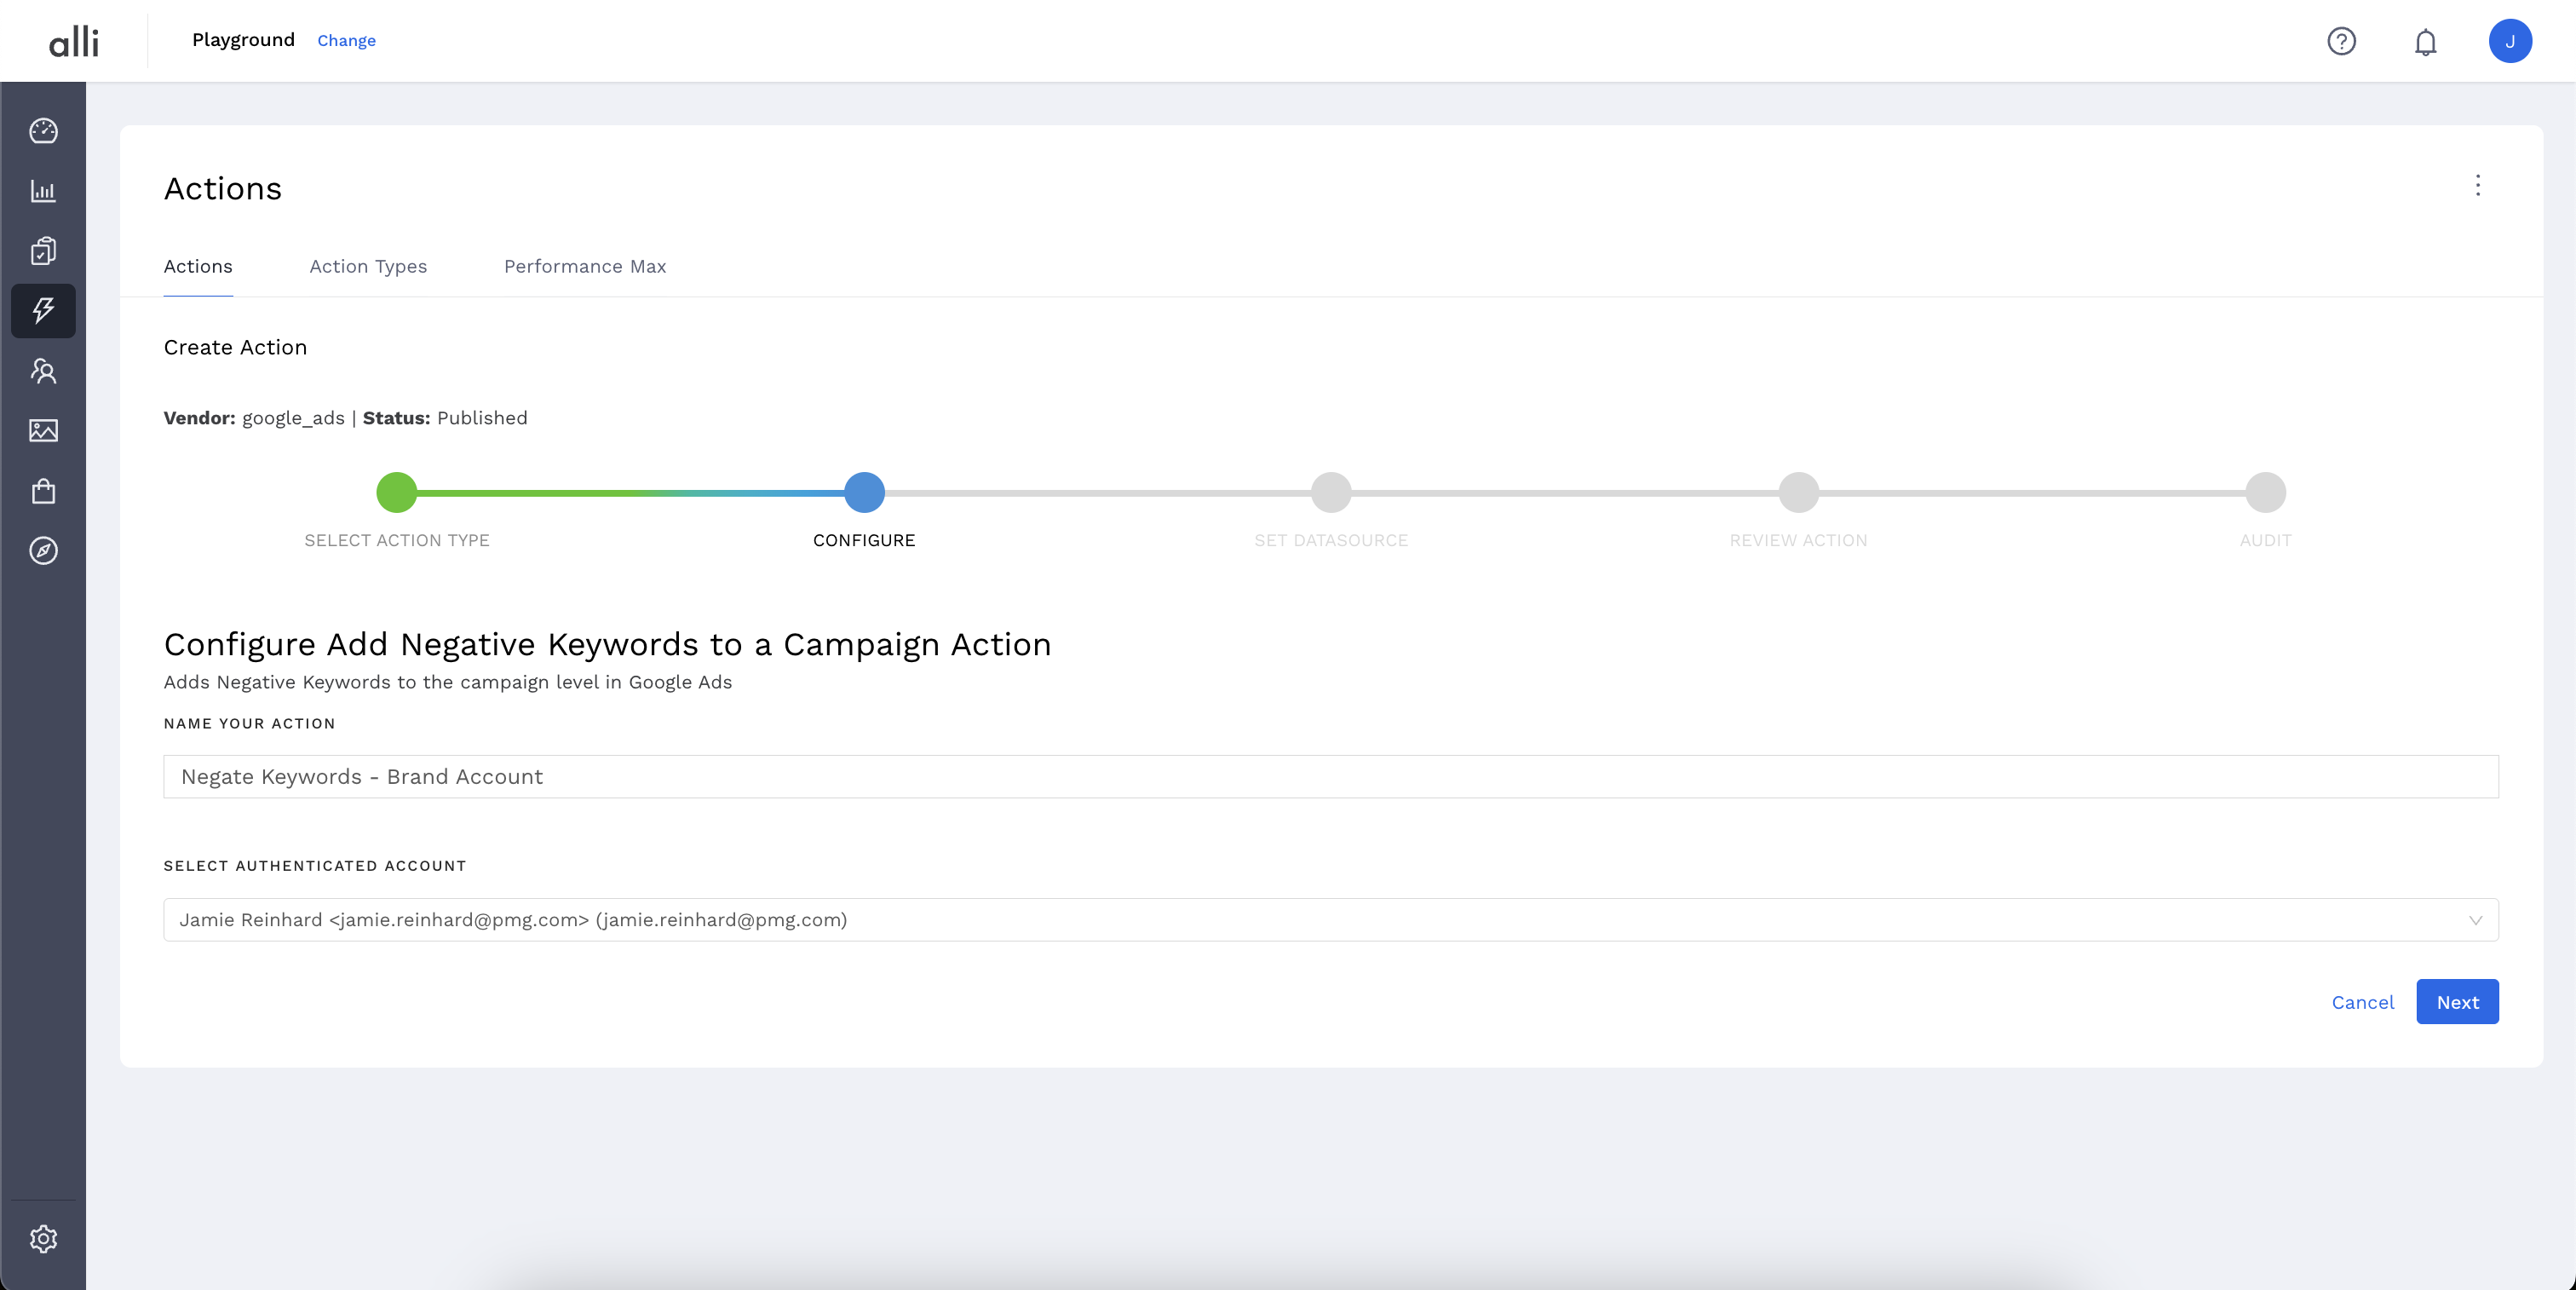
In this example, we will Add negative keywords to a campaign through Google Ads. Click the blue Select button.
-
Name your Action and select the Authenticated Account, the user account you'd like to use for making changes. The user associated with this account should have access to the relevant ad accounts.
-
Start by giving your action a descriptive name that reflects the changes you plan to make.
-
Tip: If your desired account isn't listed, or you need to create a new one, refer to the authentication documentation for instructions on how to authenticate a partner platform.
-
-
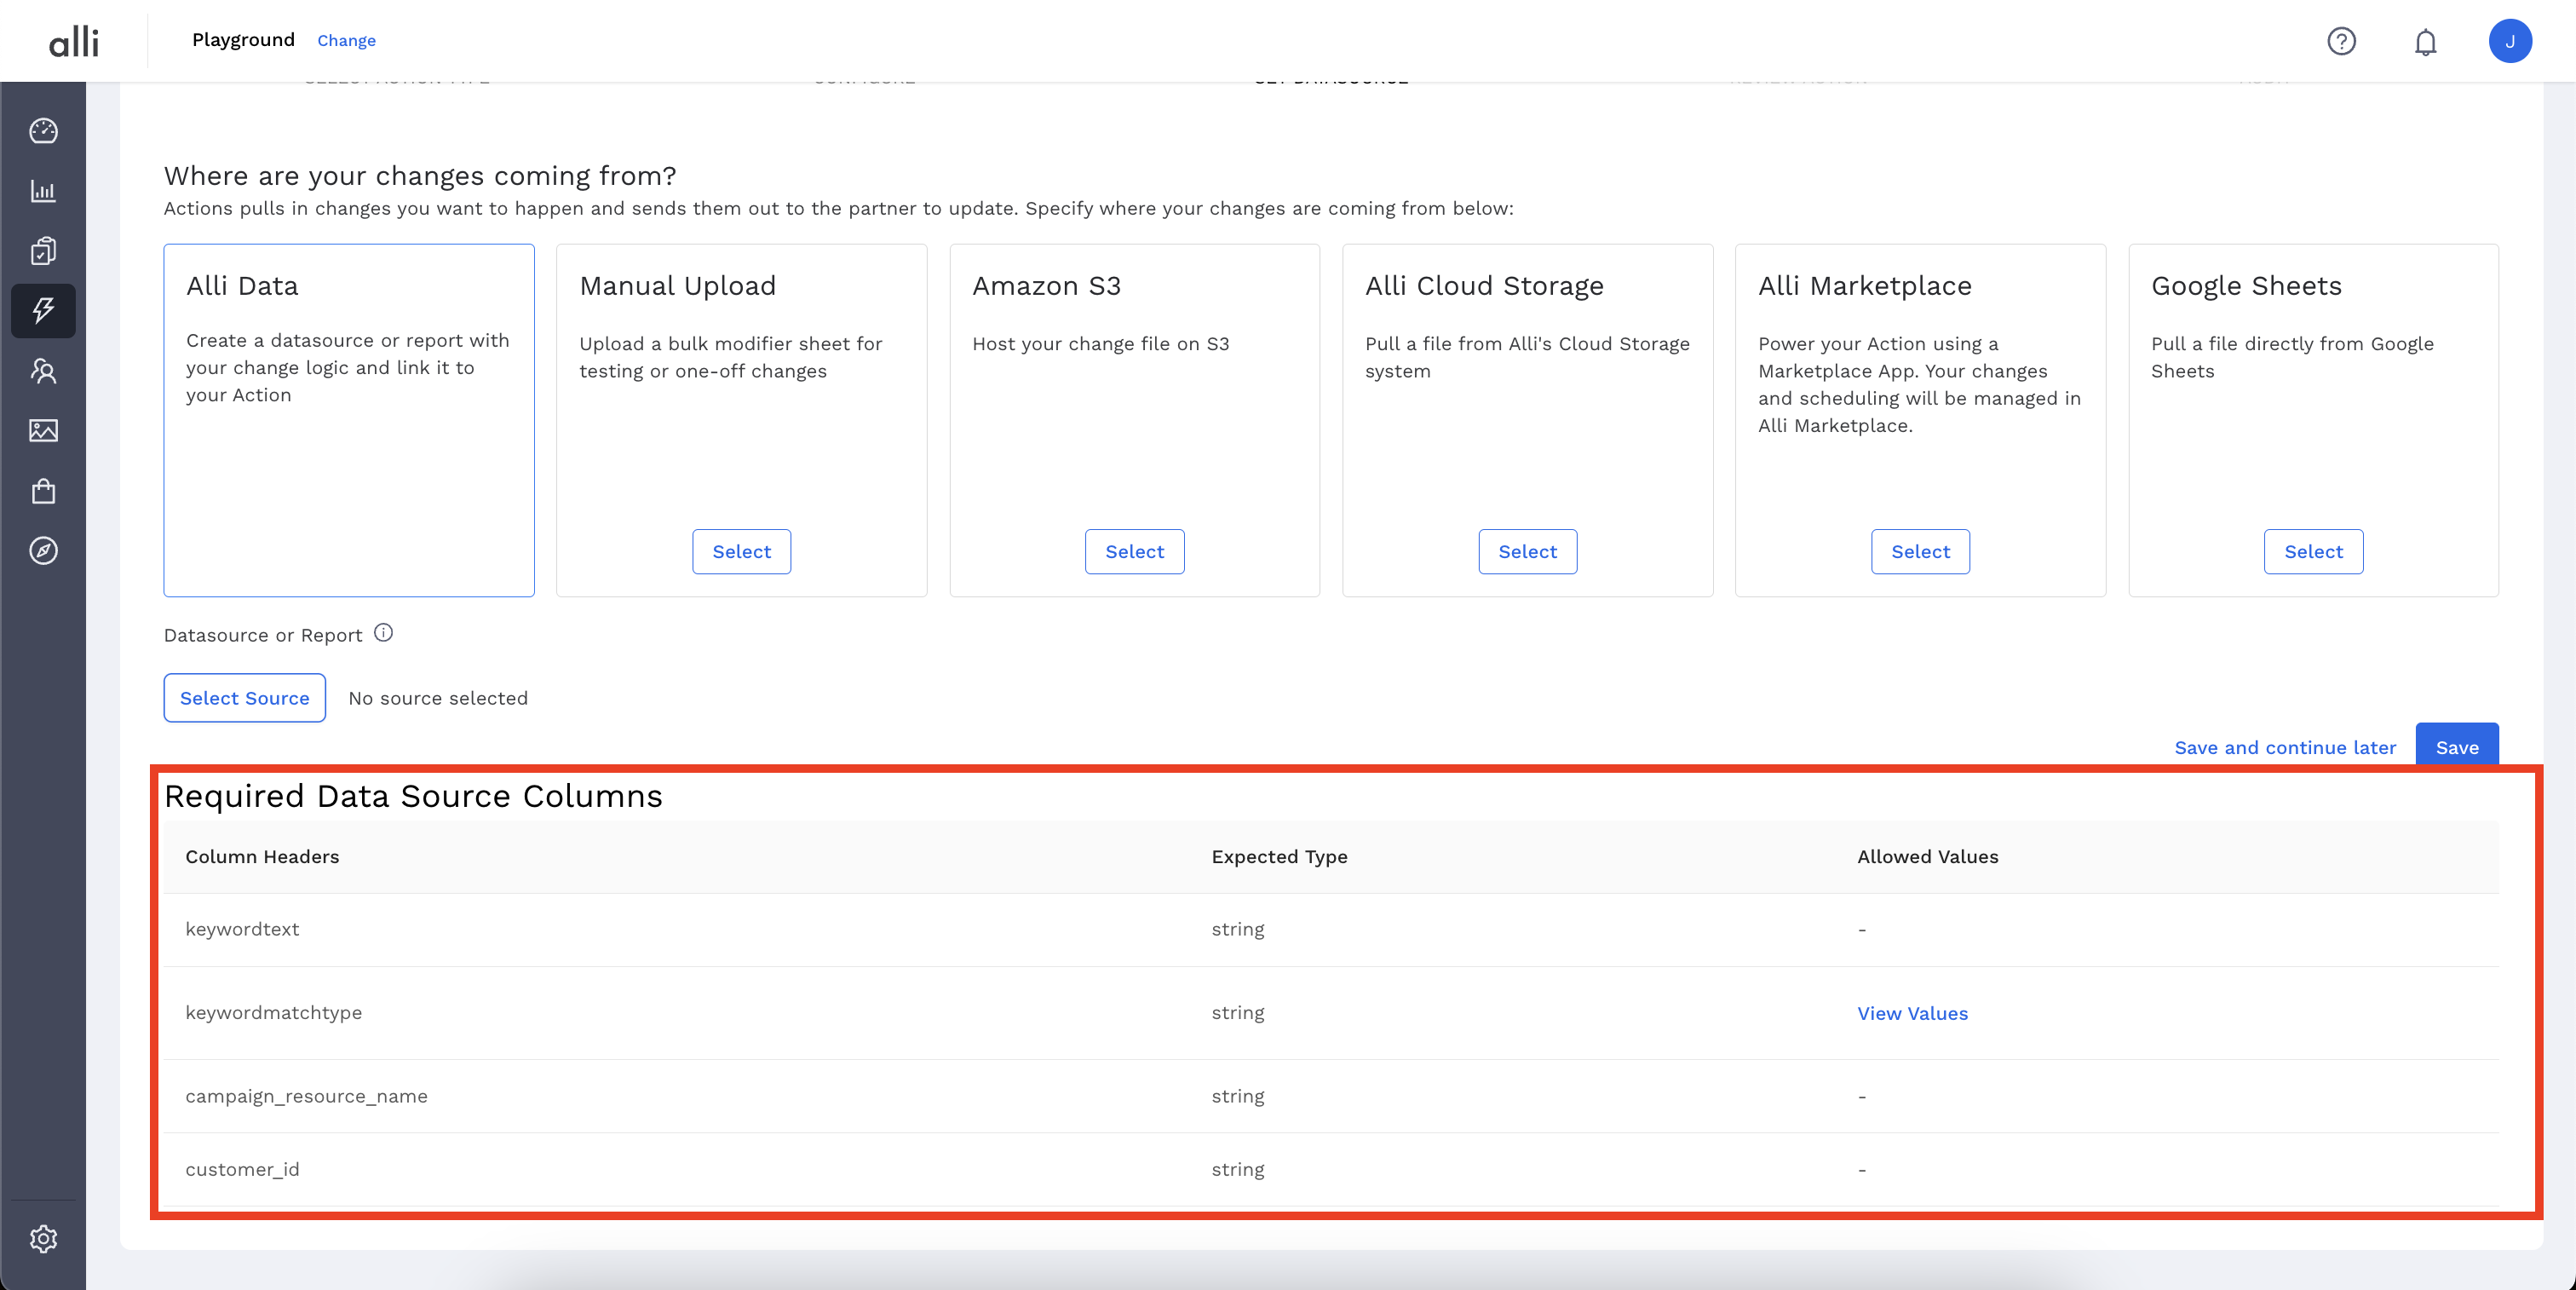
Select the correct data source where your changes are coming from.

-
Choosing Alli Data will prompt you to click
Select Sourceso you can filter to and select the datasource or report of your choosing -
choosing Google Sheet will give you the option to select or provide:
-
(google) Authenticated Account: used to access the Google Sheet. By default this will be you (the action creator)
-
URL: the URL of your google sheet
-
Sheet Name (optional): the name of the individual sheet (tab) within the Google Sheet where the data resides. If left blank, it will automatically default to
Sheet1
-
-
choosing Marketplace will provide you with an Action ID that can be copied and pasted into your Marketplace app.

-
choosing either Alli Cloud Storage or Amazon S3 will give you text inputs to provide the necessary data.
-
choosing Manual Upload will give you the option to upload a csv file to provide
-
-
Before moving forward, review the Required Data Source Columns at the bottom of the page. The table will provide you with the column headers (names of the columns in your data) required to complete the action, as well as tips to the expected data type or values required by the vendor. Ensure the data you are meets these requirements.
-
Click Save to continue setup once you are complete.
If you are using a datasource or report from Alli Data, click Select Source and scroll through or search to select. If you do not see the datasource or report you are looking for remember:
-
Your datasource needs to be active and contain data (if you just created it recently, give it time to load before setting up your action)
-
Your report needs to be saved and published
-
Your datasource or report must be in your client, Alli is unable to pull from datasources housed in other clients, so recreate the necessary datasource(s) in your client, or create the Action in the client your data lives under
If the above is true, and you still do not see your datasource or report, reach out for assistance in #alli-actions
If your data needs to be filtered by date, please review the tips & tricks for handling daylight savings and timezones to ensure your actions continue running smoothly
-
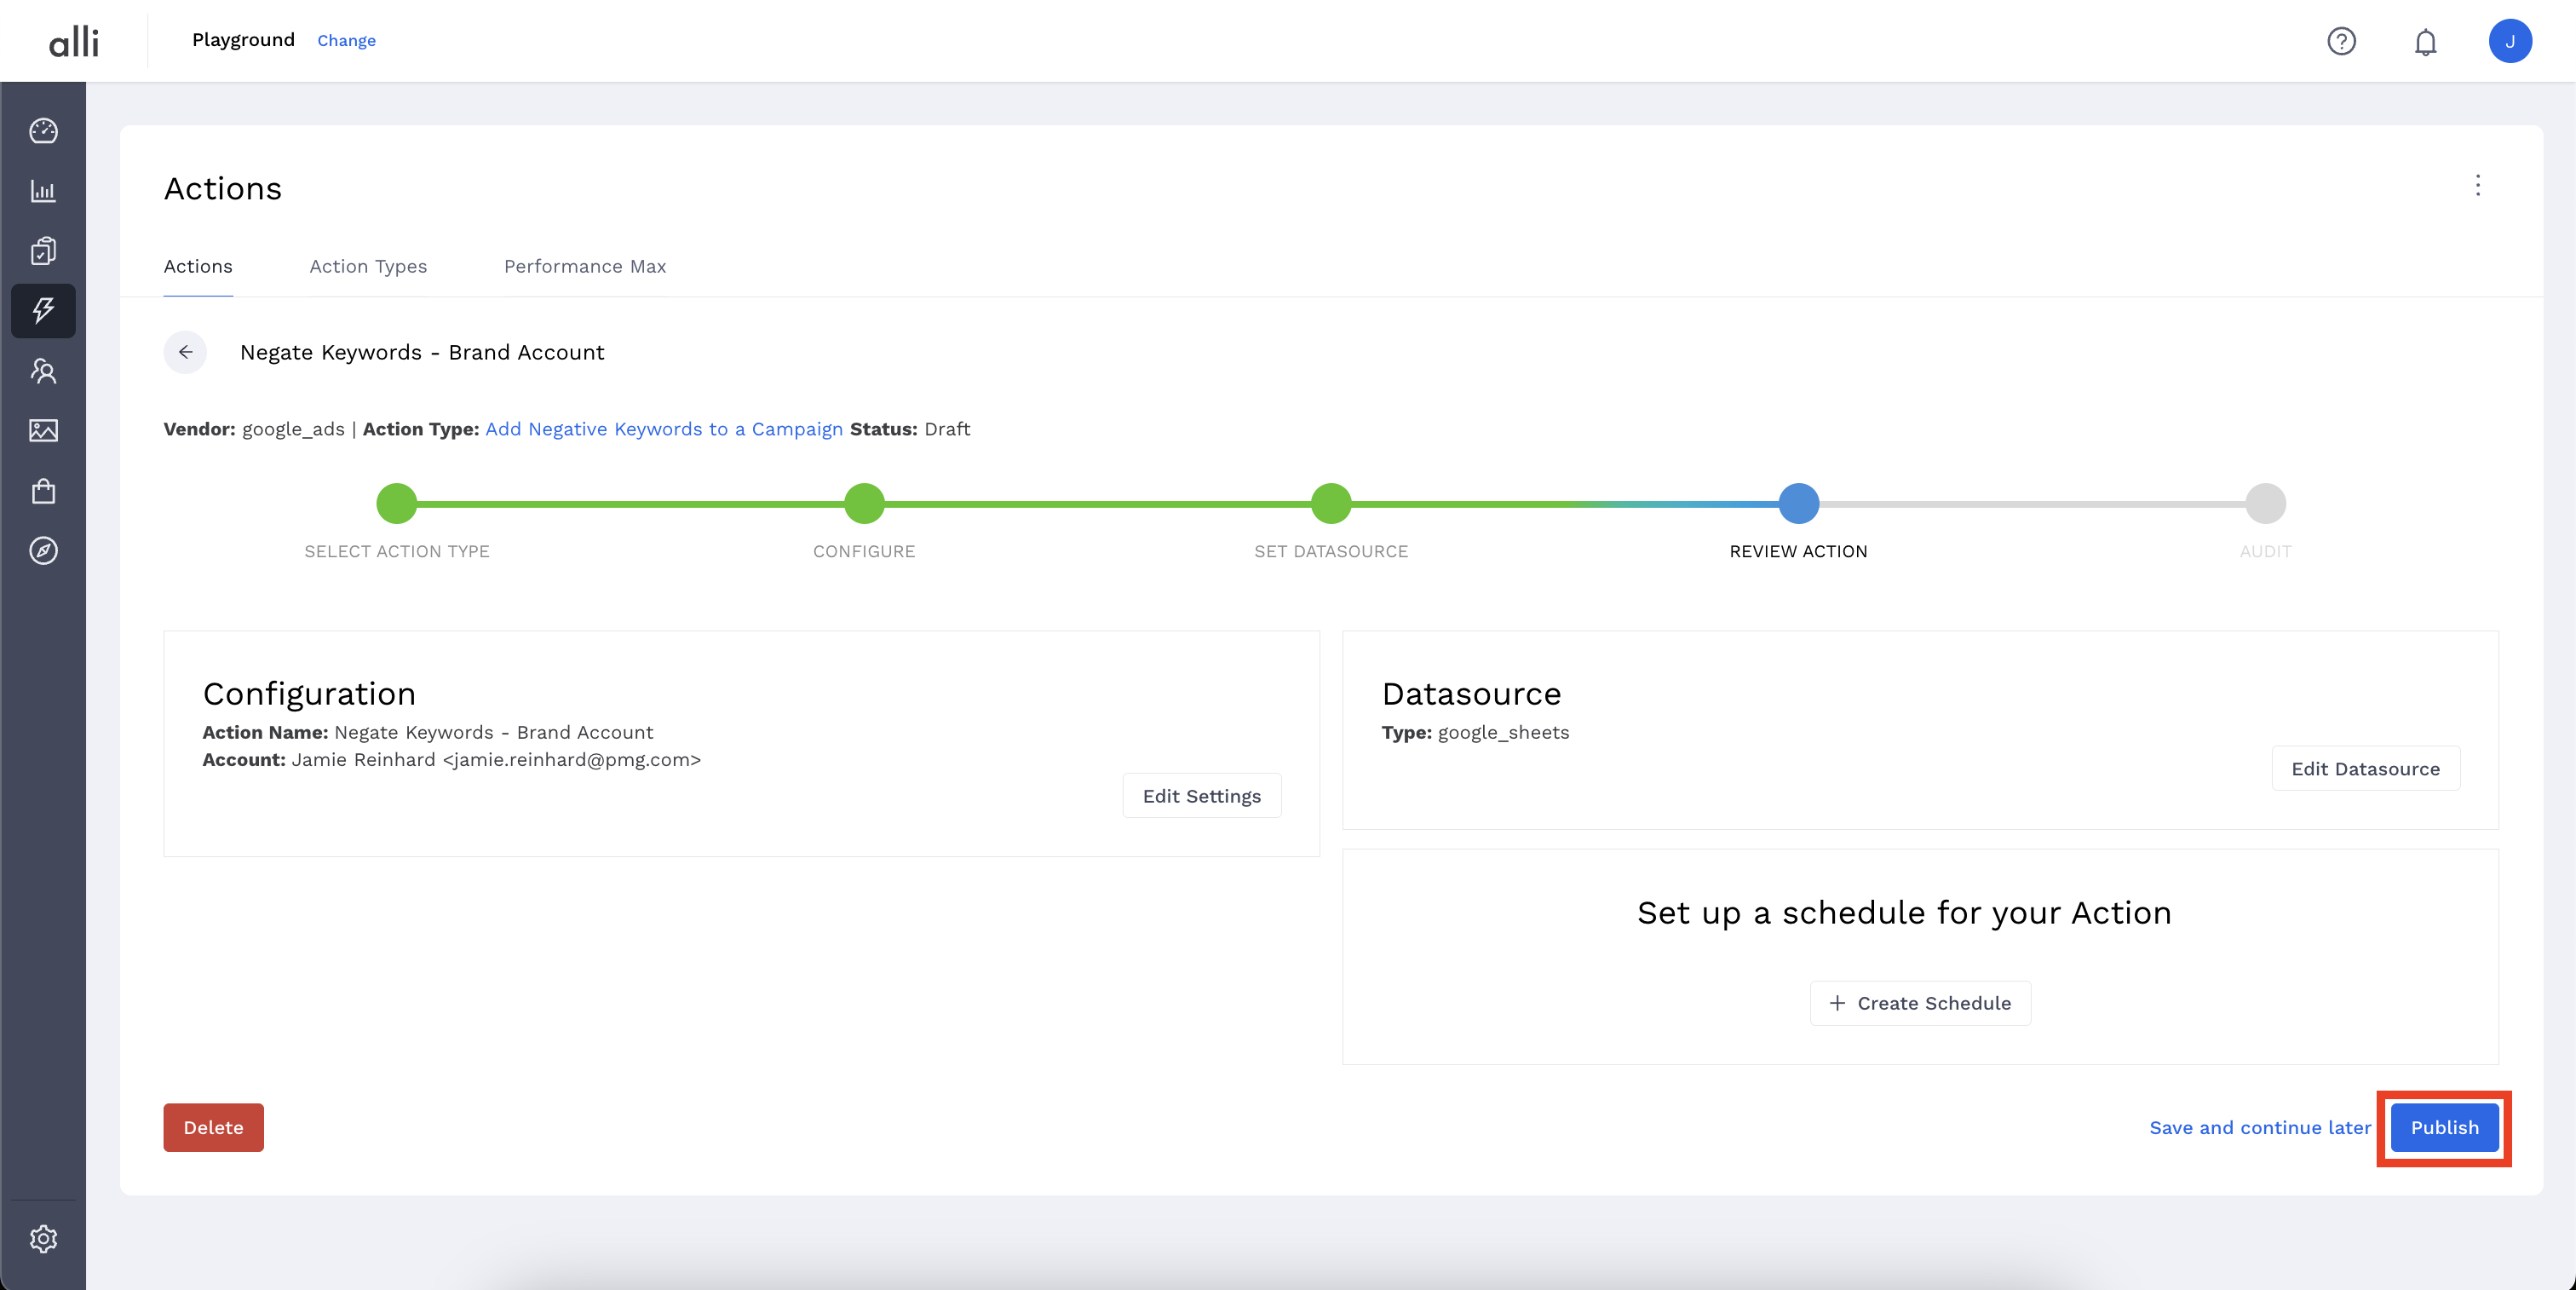
Review Action for accuracy. Set up a schedule for your Action if applicable. Select the blue Publish button.
-
A pop up box will confirm your setup. Click I’m Done to exit.
How To QA Your Action Runs
-
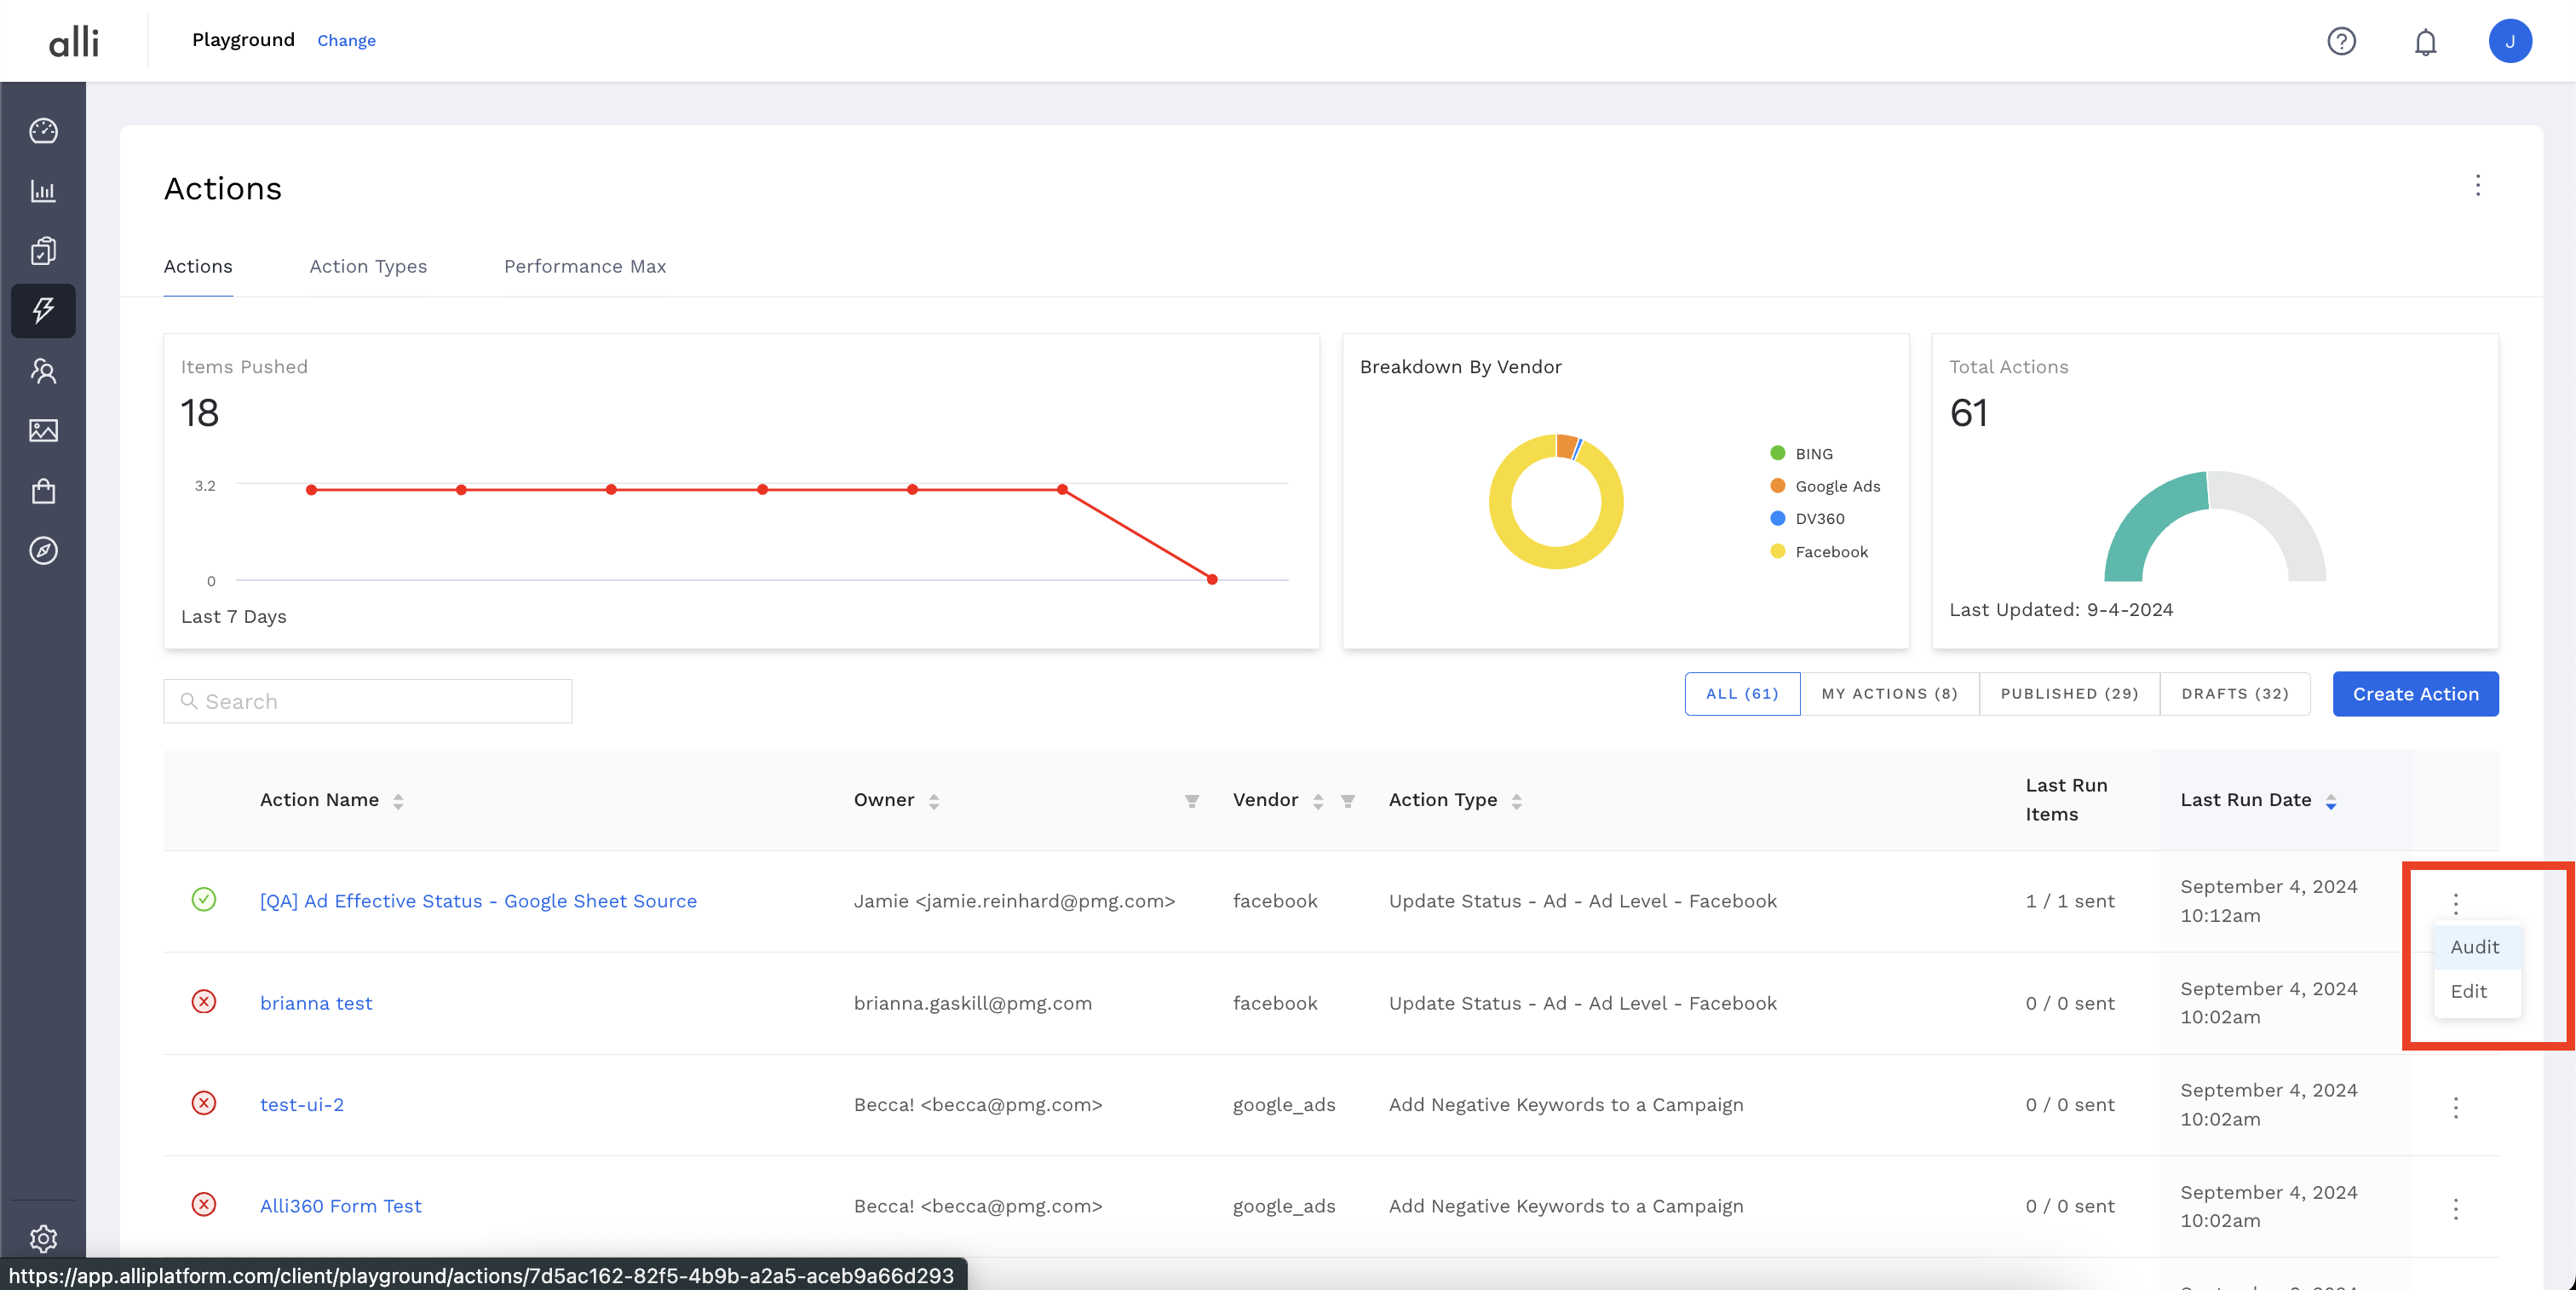
A list of actions will appear for the selected customer under Actions and Automate Campaigns from the left hand navigation. If an Action has had a successful run, a green checkmark will appear to the left hand side of its name. To see the list ordered by Last Run Date, click on that header to sort.
-
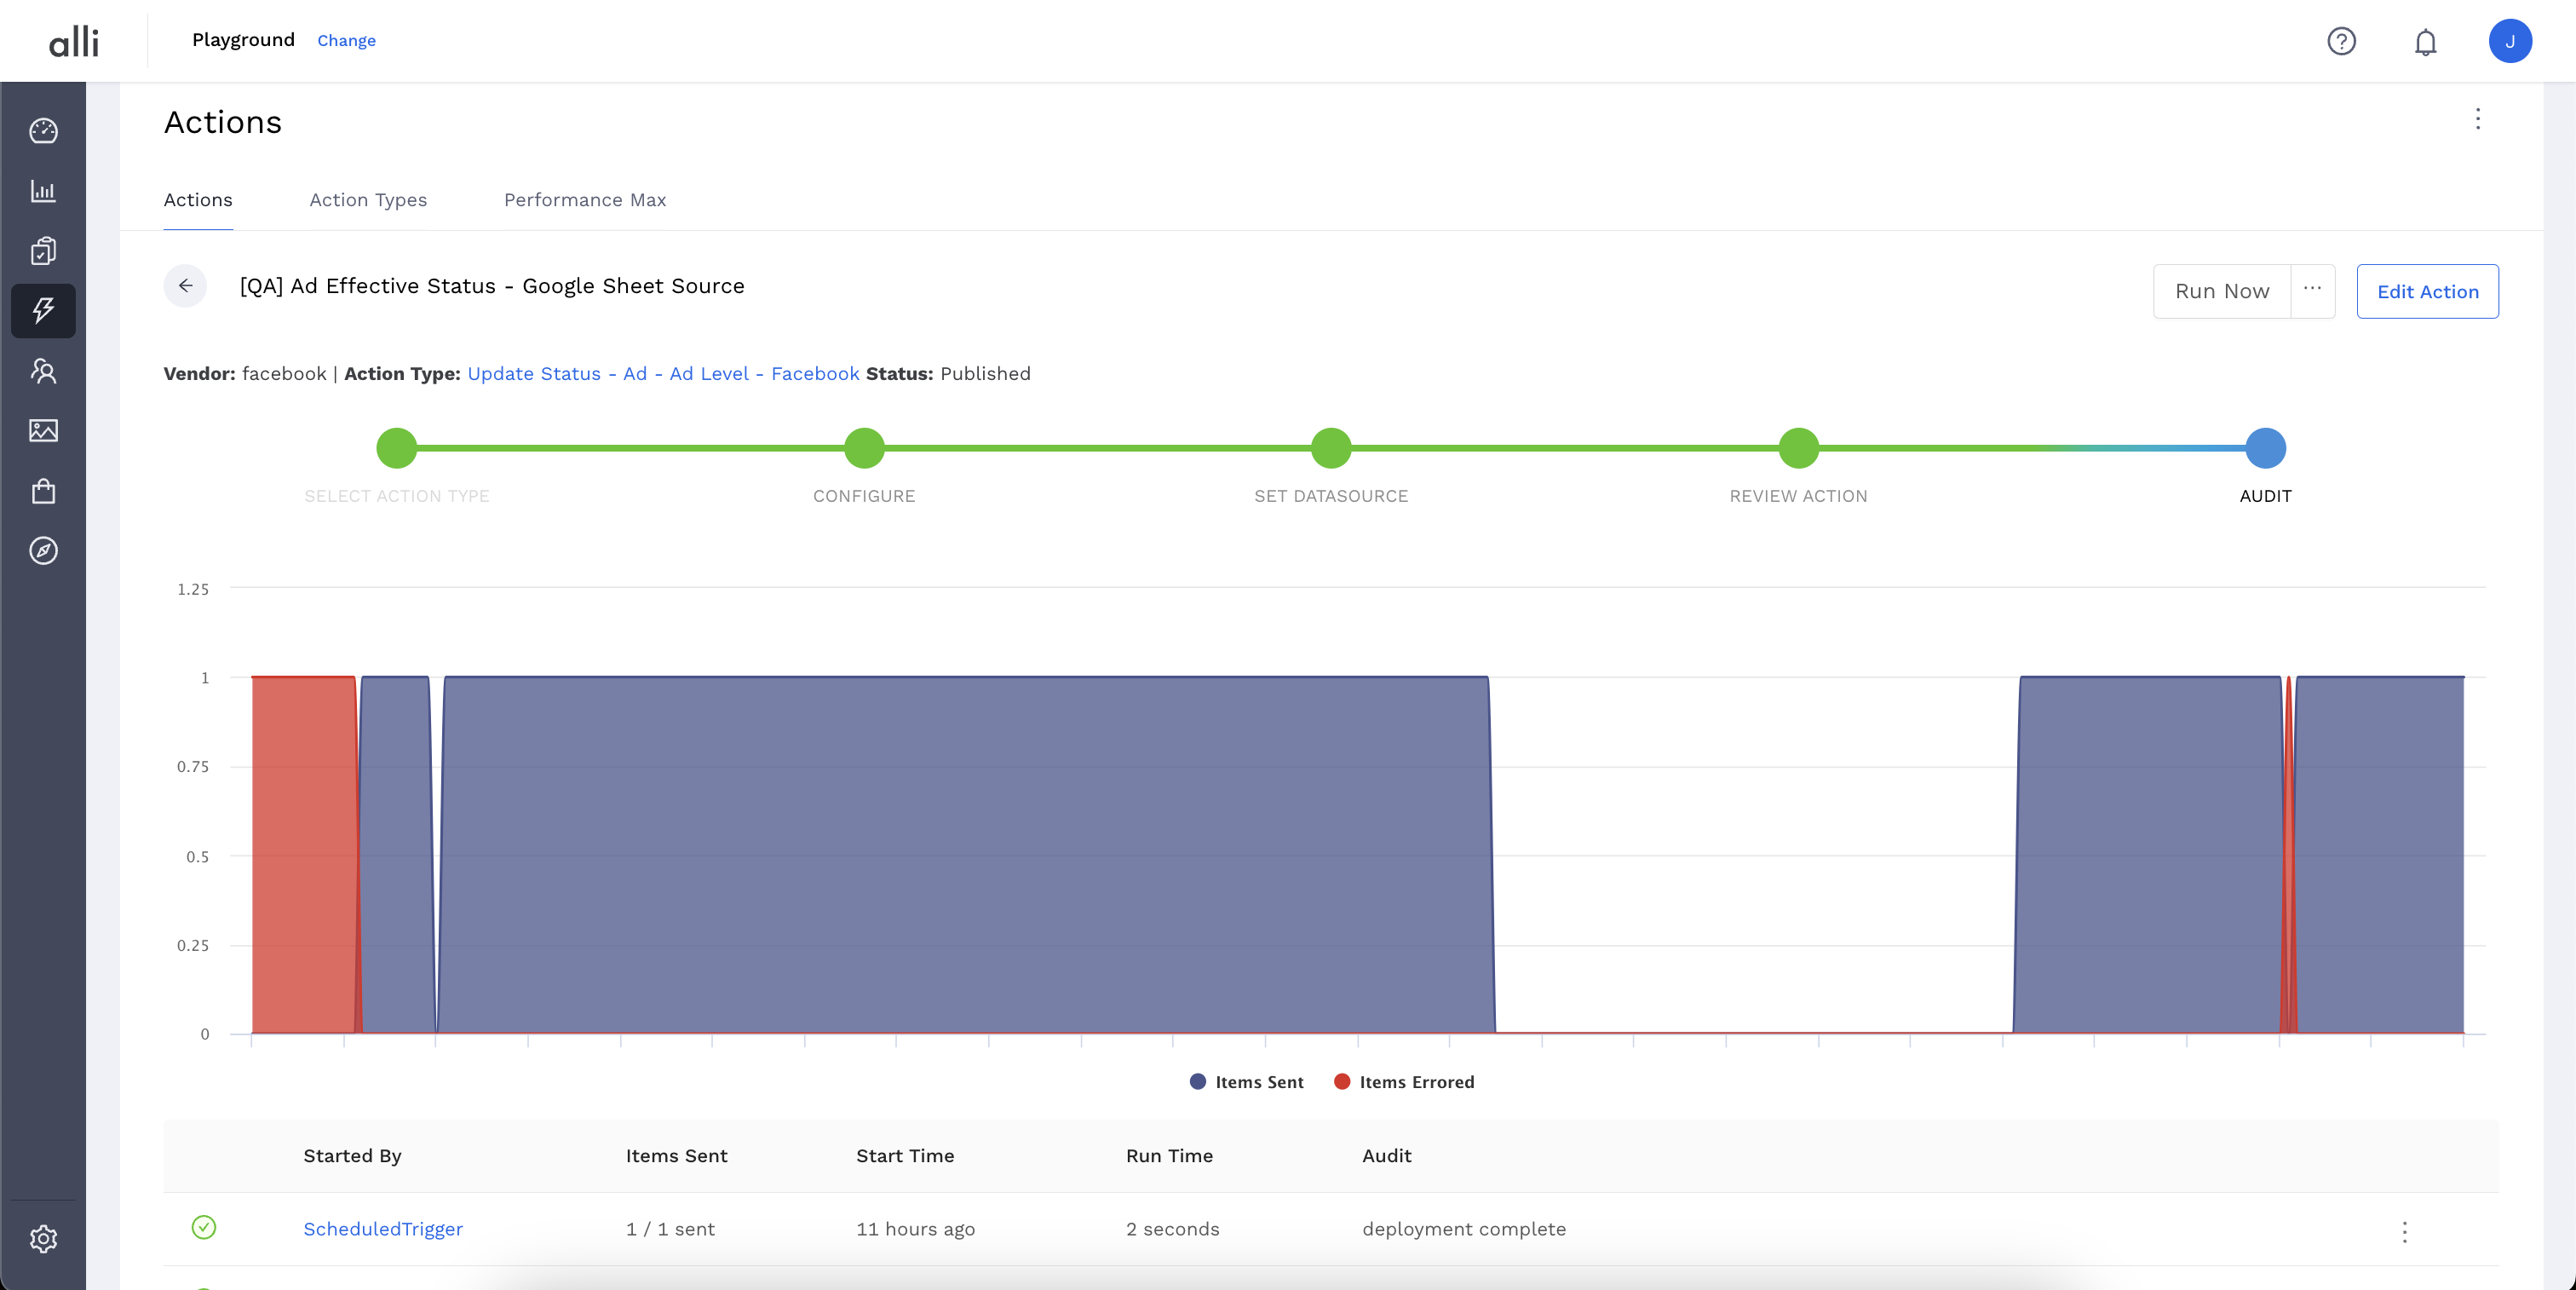
On the far right of the row under the three dots, select Audit.
3. The Audit screen will list the details of the last successful action runs, as well as the Items Sent and the time stamps.
-
To see a more detailed view, like what items were sent, or to view your specific error message, click on the execution trigger. In the image above,
Scheduled Triggeror by clicking the 3 dot menu to the far right.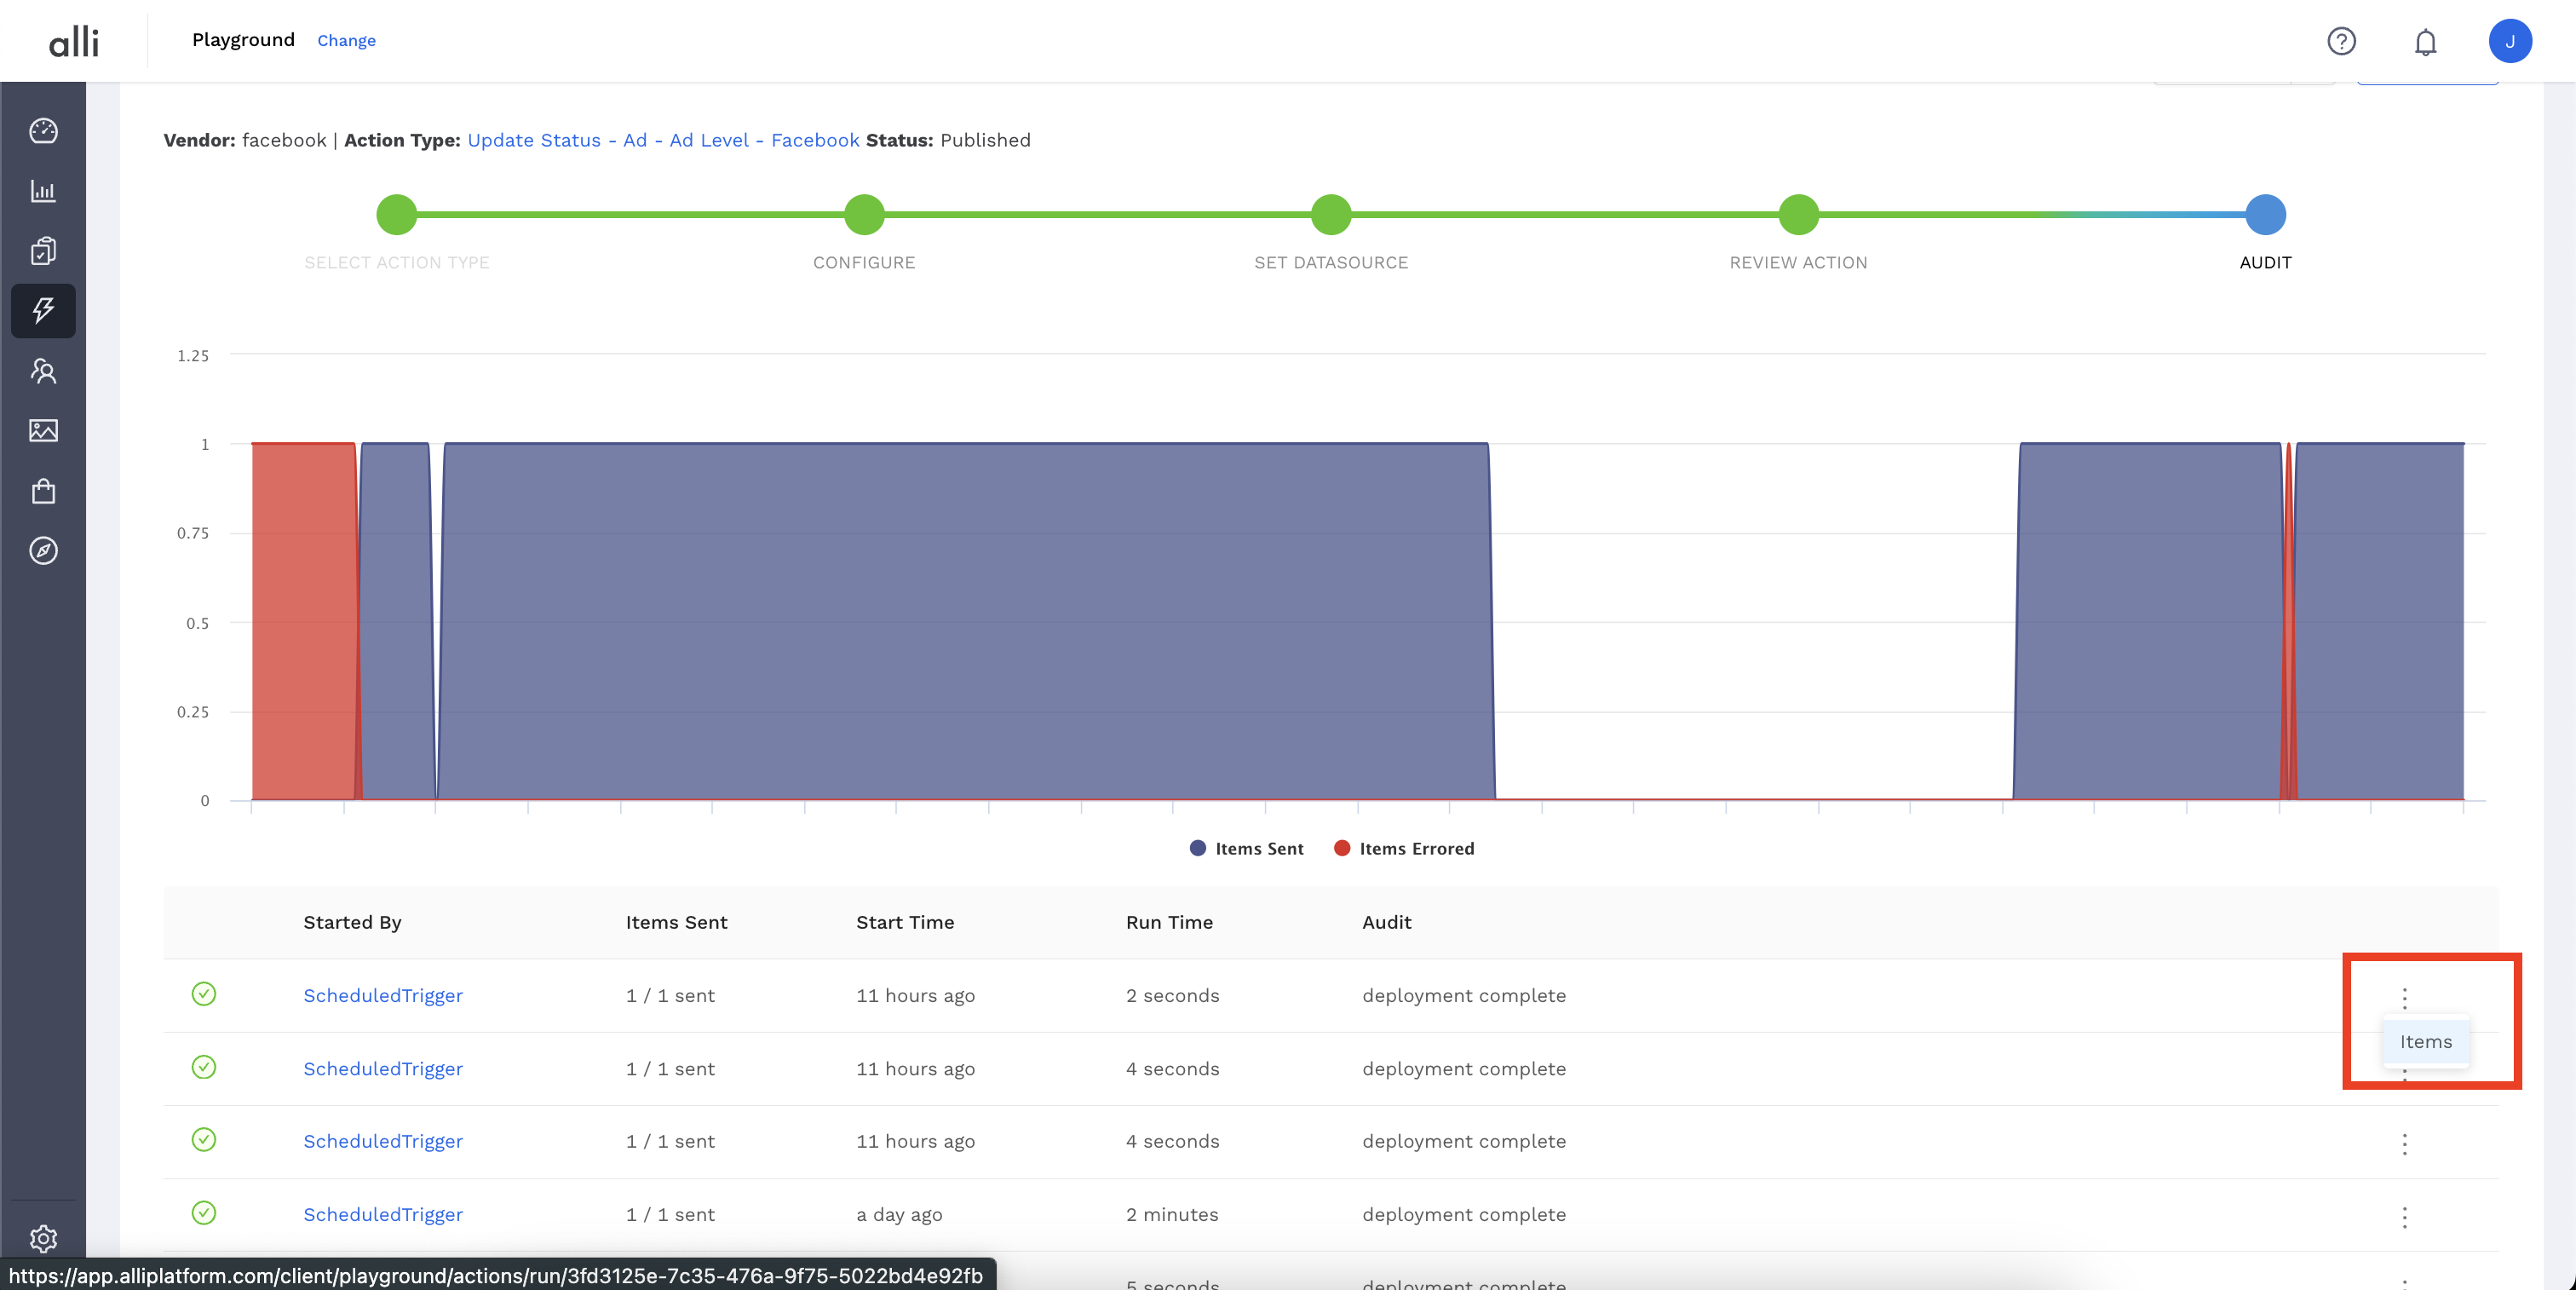
-
Once you’ve navigated there, click on the
Itemstab. You can toggle through theitemstate tabs to view an item level view.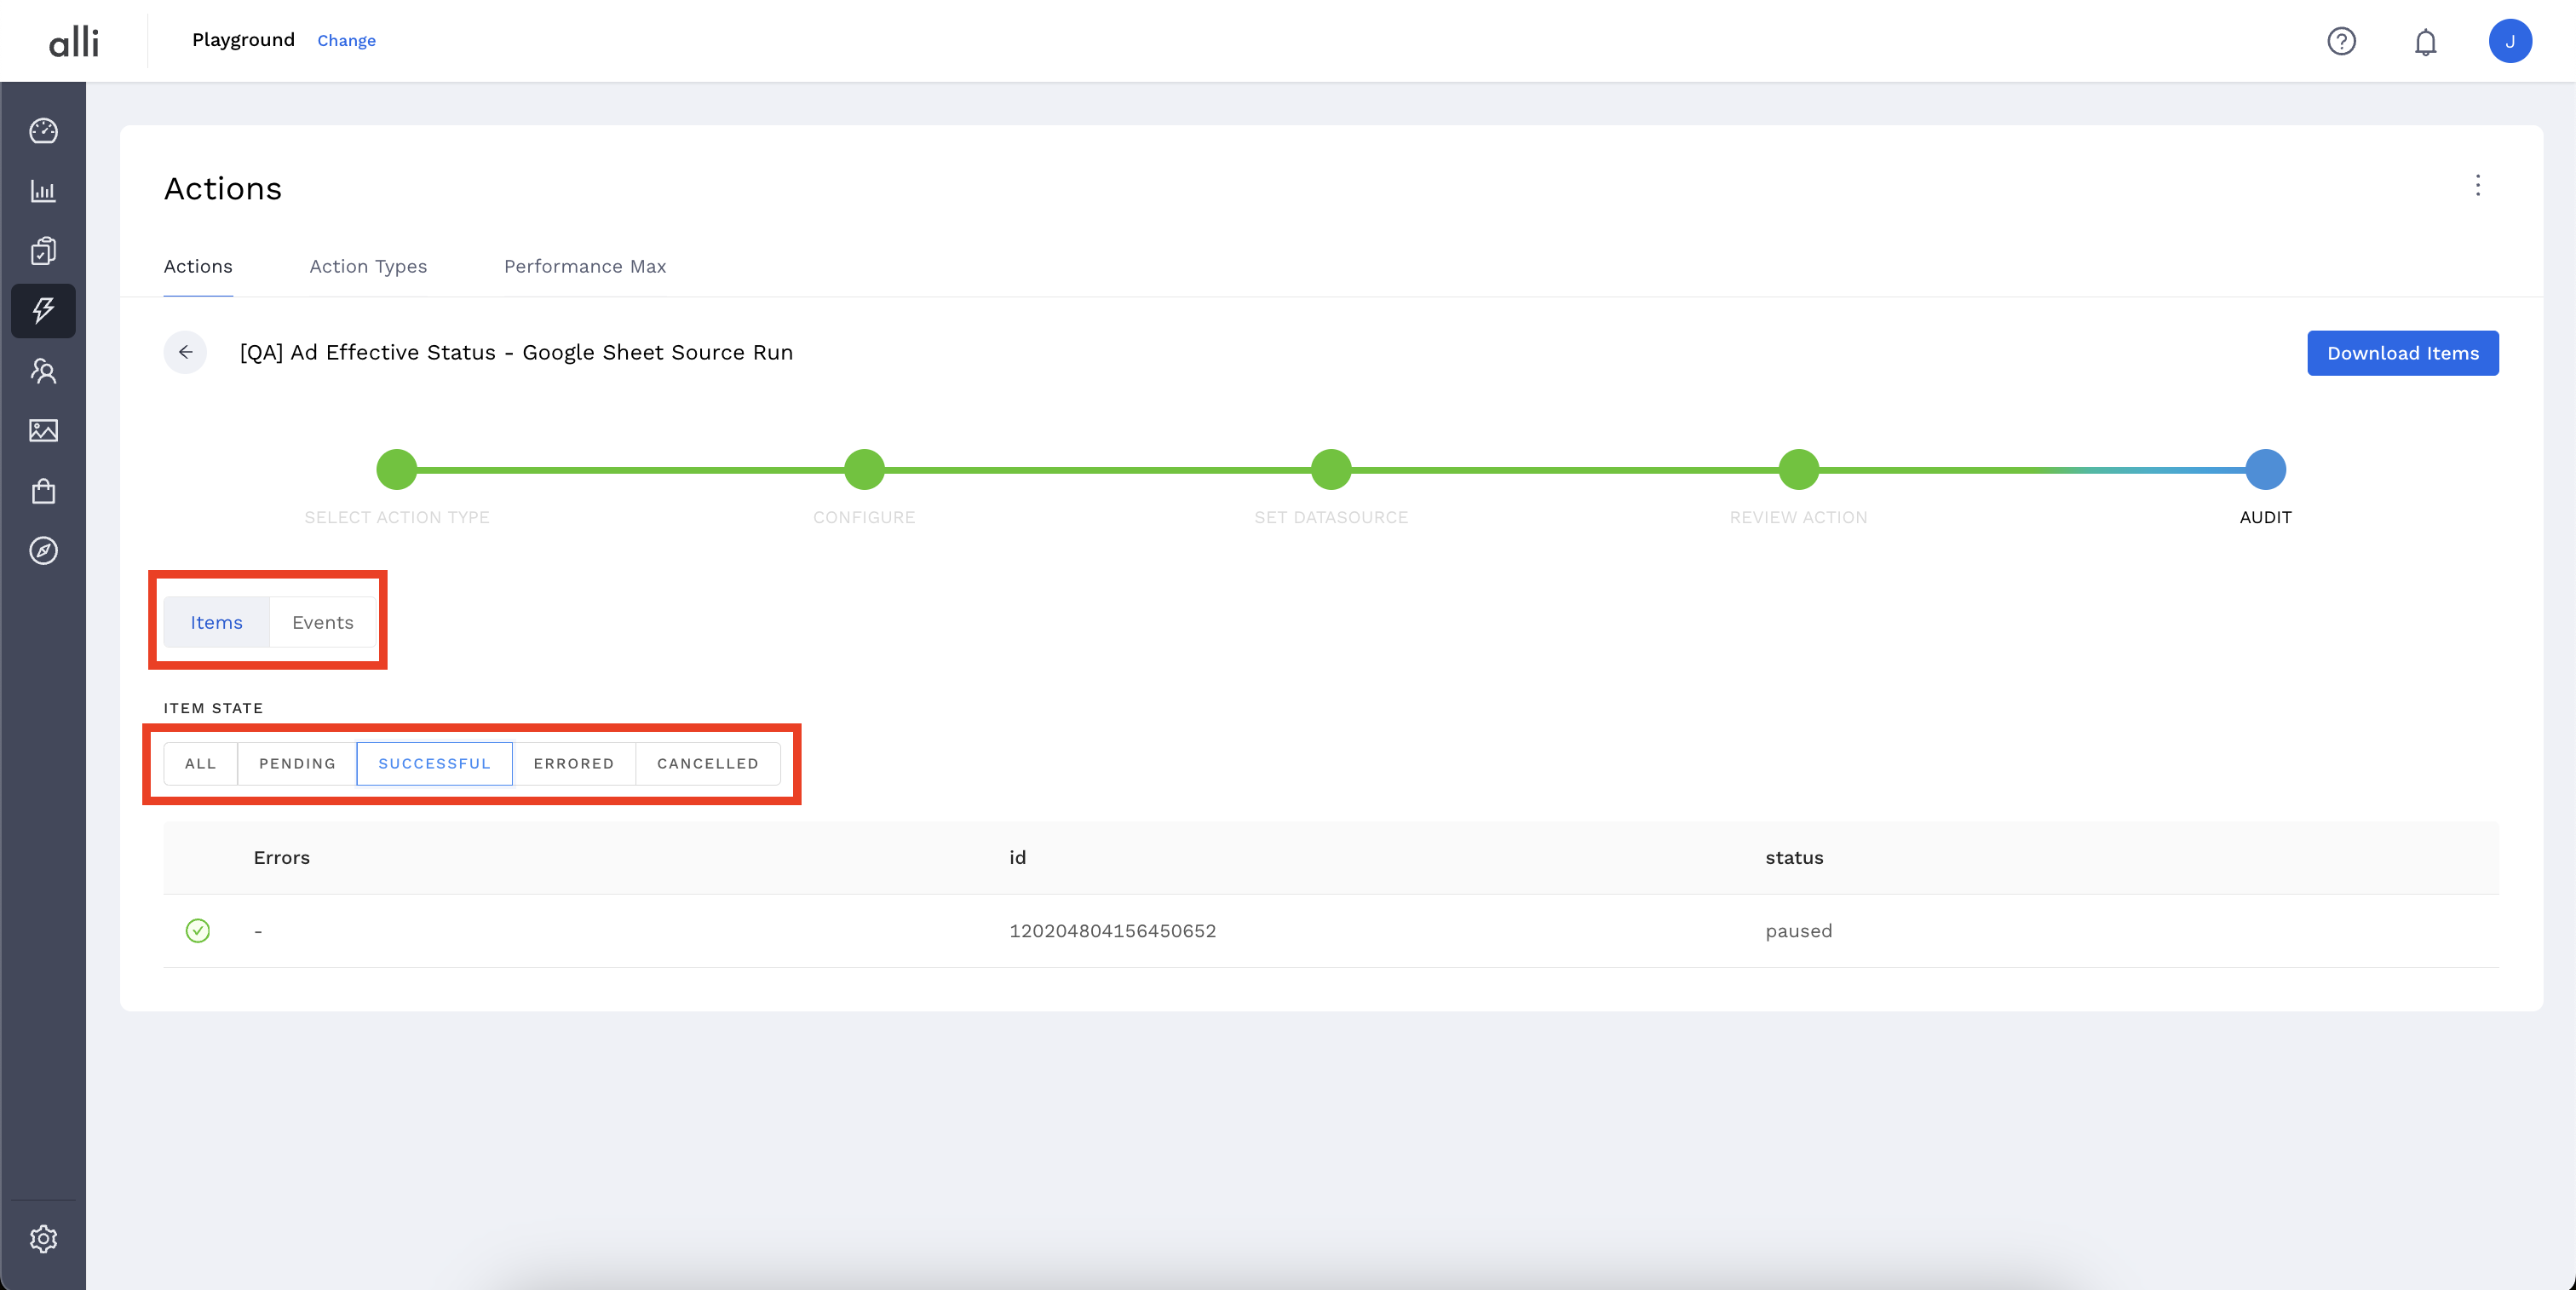
-
You can use the
Alltab to view all items collectively, or choose the particular state you want to see. For errored items, theErrorscolumn will list the specific error, which you can view in its entirety by simply clicking on the error message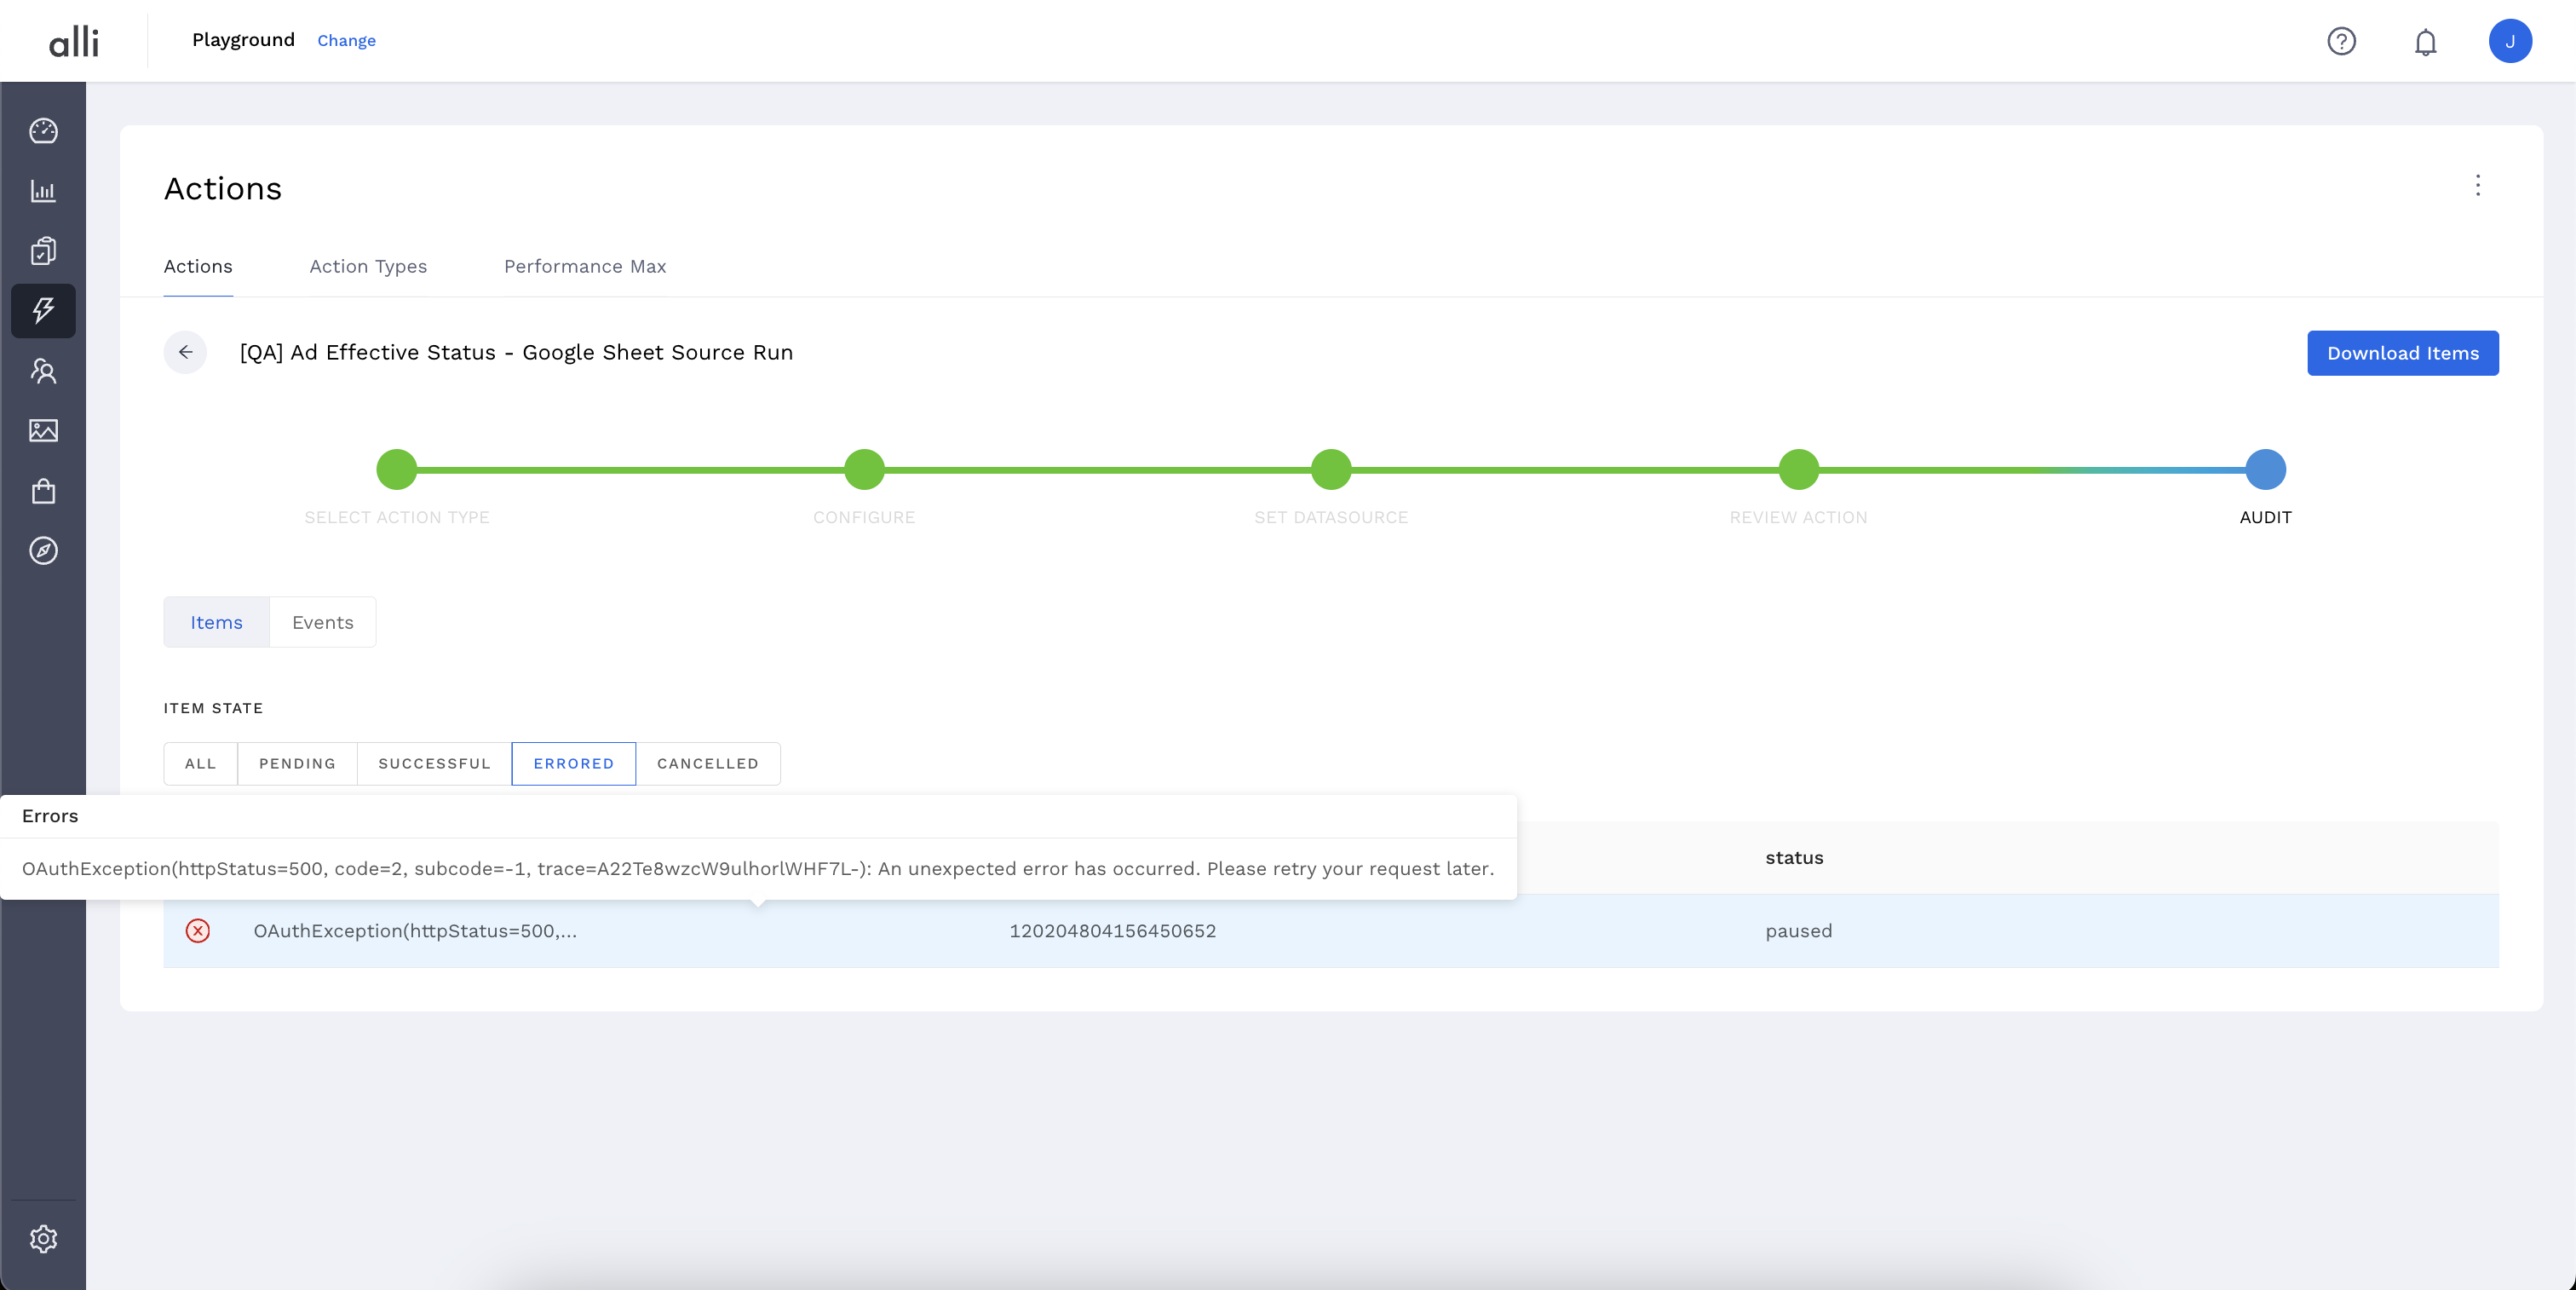
-
From there, the error message can give you a good idea on what went wrong, and you can begin to solve it on your own! You can always reach out in the #alli-actions channel for assistance, or submit a ticket for further help.