
Overview
This how-to walks you through how to connect your Google Sheet data to an Action.
If you’re creating a new Action with a Google Sheet datasource, you will need to refresh your Google token (see how-to).
If you are editing an existing Action to change the datasource option to be Google Sheets, you will need to share the Google Sheet with whomever originally created the Action and have them refresh their Google token (see how-to).
Instructions
Basics
-
Navigate to the Set Datasource page from one of two ways:
-
New Action
-
On the Actions' homepage, click ‘Create New’.
-
Select your Action Type.
-
Name your Action, select your authenticated account, and click ‘Next’
-
-
Existing Action
-
On the Actions' homepage, click the name of your Action.
-
Click the progress tracker above ‘Set Datasource’.
-
-
-
Select 'Google Sheets' as your Datasource.

-
Add the link to your Google Sheet and name of the tab that contains your data, if you have more than one.
-
(google) Authenticated Account: used to access the Google Sheet. By default this will be you (the action creator)
-
URL: the URL of your google sheet
-
Sheet Name (optional): the name of the individual sheet (tab) within the Google Sheet where the data resides. If left blank, it will automatically default to
Sheet1
-
-
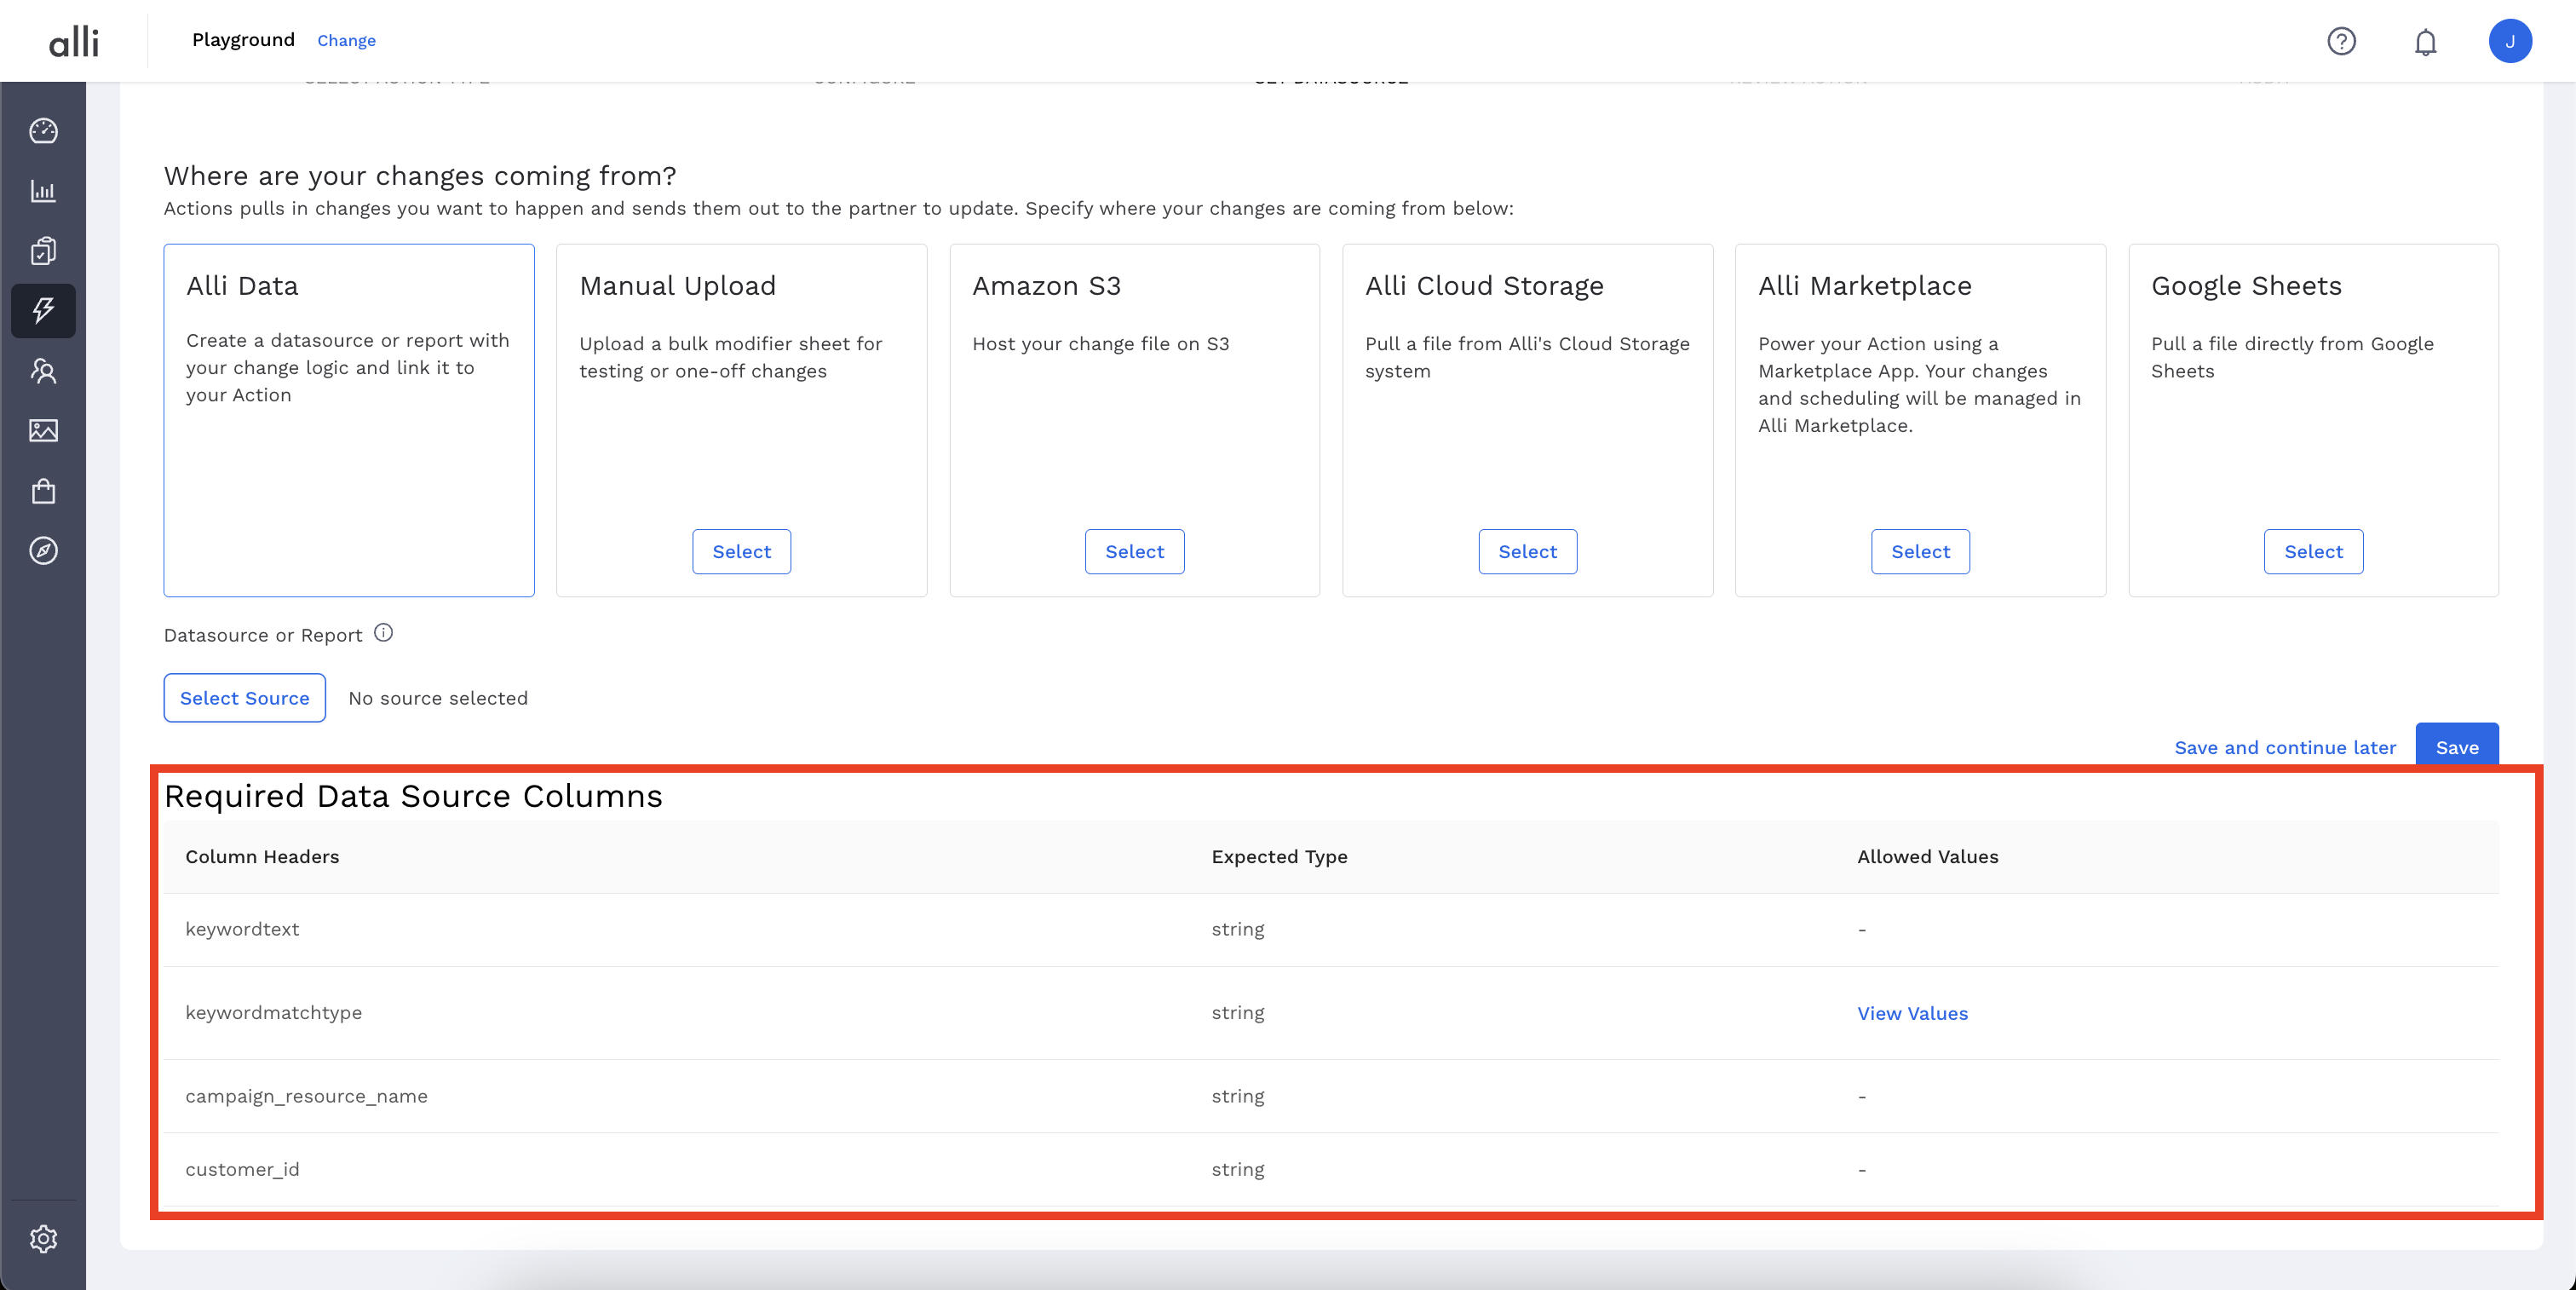
Before moving forward, review the Required Data Source Columns at the bottom of the page. The table will provide you with the column headers (names of the columns in your data) required to complete the action, as well as tips to the expected data type or values required by the vendor. Ensure the data you are meets these requirements.
-
Click ‘Save’. Your Action is now set up to connect to your Google Sheet.
-
If you’re setting up a new Action, complete the set up process:
-
On the ‘Review Action’ page, add a schedule if needed. Refer to the How-To: Schedule Your Action to Run documentation for questions.
-
Click ‘Publish’.
-
-
Actions ignores any filters applied within Google Sheets and will pull in all data present on the tab you select.
If you don’t want to send all of that data, you can either filter your data or update the tab regularly to ensure only the data you want to send is present there.
If you need filtered data, create a new tab with just the data you’d like to pass to Actions - for tips on how to filter to the current date (for example), see below.
Filtering Required
This assumes you have a “base” tab, with all the data you want to action on, but you want to filter the data. A common use case is filtering for rows by date, to pull in only the current date. The instrcutions below will detail how to do just that.
In Your Google Sheet
-
Create a new tab, name it appropriately (llike
Actions Sheet - DO NOT EDIT). -
Copy the headers from your first tab here.
It’s important to note when using Google Sheets, that your columns need to be named to match what Actions is expecting. At the Set Datasoruce step, Actions details the column names it expects, so adhere to those requirements.
-
In Cell A2 of your new tab, place and update this function
=IFERROR(FILTER('Sheet1'!A:H,'Sheet1'!E:E=TODAY()),"")-
Sheet1should be the name of your first sheet -
A:Hshould be the columns from your sheet you want to pull in -
E:Eshould be the row your date is present in
-
-
Check your google sheet timezone
-
this is impactful because
TODAY()gets the current date in the timezone. So if your action runs at 1 am eastern time on 2/10, but your google sheet is in pacific time,TODAY()in pacific time would be 2/9 (at 10 pm). TLDR - make sure your google sheet timezone makes sense with 1) what time & timezone your action will run in, and 2) what date you put in the first tab. -
File > Settings > Timezone
-
Example Filter Function
-
Assuming my base data tab is called
Base Dataand I want to pull in columns A through H:=FILTER('Base Data'!A:H,'Base Data'!E:E=TODAY())
In Your Action
-
Review the Basic Setup instructions above
Video Tutorial
Review this for a step by step walk through of setting up filtering in your google sheet, for common pitfalls, and for some tips & tricks on how to ensure things run as smoothly as you need them to!
Related articles
- How-To: Connect your Google Sheet to Actions
- How-To: Disable or Remove an Installed App
- How-To: Set Up a New Workflow
- How-To: Pull Data for TikTok Trends
- How-To: View Error Messages on an Action That Ran
- How-To: Filter Alli Data Reports by Date to Power Actions - Tips & Tricks
- How-To: Understanding Version Statuses
- How-To: Create a Scheduled Version
- How-To: Weather API App
- How-To: Set Up Brand Media Pacing Datastudio Dashboard
- Tutorial: Adding Negative Keywords to Google Ads
- How-To: Test Your Action
- How-To: Using the Execution Log
- How-To: Setup Weather Budget Adjuster
- Tutorial: TheTradeDesk - Brand Safety Alerts