
Instructions
This process can be used to quickly add negative keywords to your Advertise-level keyword exclusion list.
This should be used to update an existing list, not create a brand new one. If you already have one, skip to the Find Your Existing List Id section. If you do not already have one, create that first, add your standard keyword exclusions to kick it off, and then move on to that section.
DV360 sometimes may be unable to immediately apply all keywords. Keep the # of keywords per action run low (5-6 max)
But if your action errors, and only some of the keywords get added, you can simply clear the Date Added of the successful keywords, or change it to an older date, and re-run the alert. This will re-attempt to apply only the failed keywords
Find Your Existing List Id
Note: Negative keyword lists are built at the Advertiser level in DV360 but can only be applied at the Insertion Order level. This action will add negative keywords at the Advertiser level, subsequently updating all insertion orders that have the advertiser’s negative keyword list applied.
-
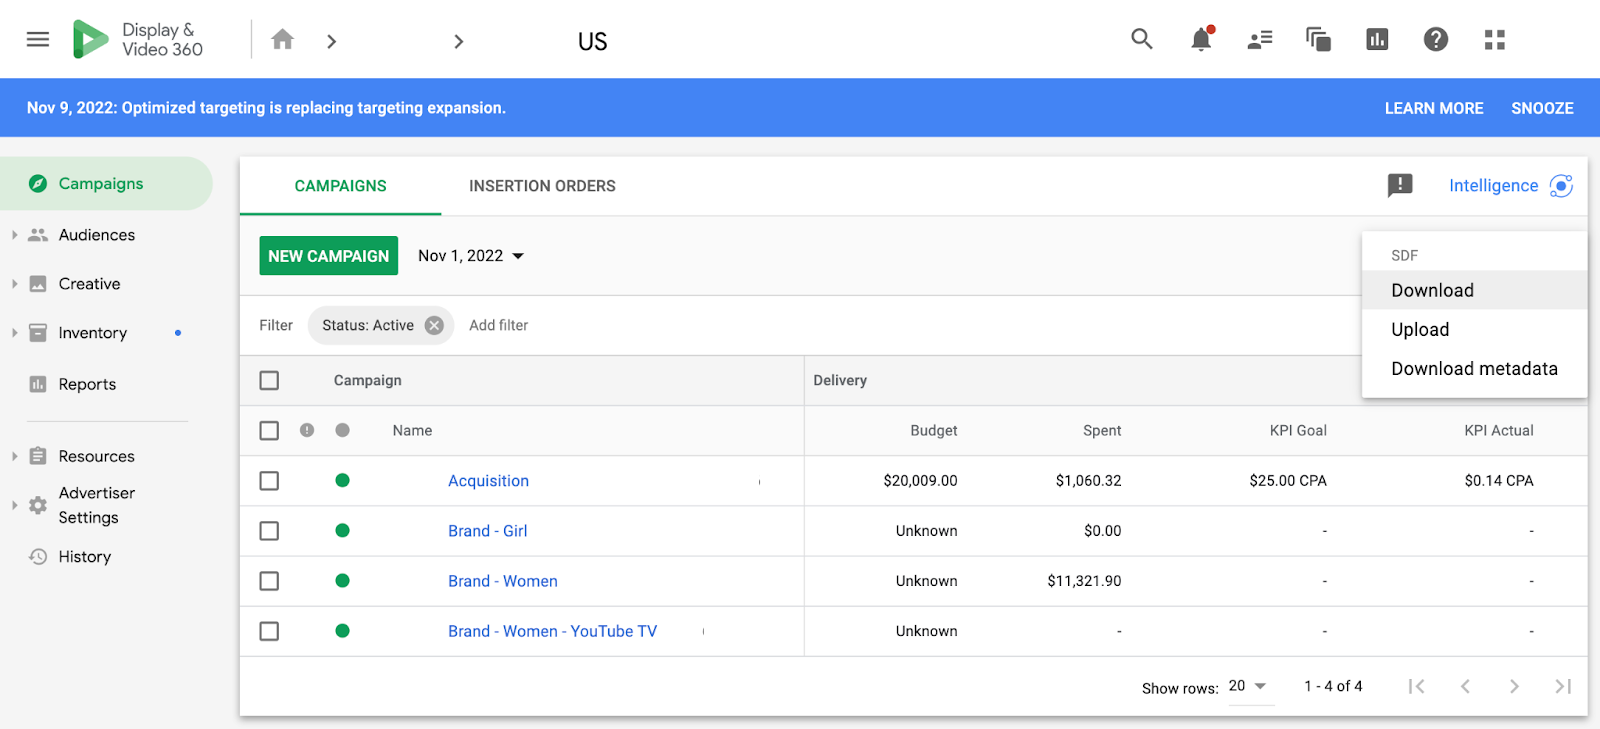
To find your List ID in DV360, navigate to the ‘Campaigns’ view for the Advertiser that your list will live in.
-
Select the three dots on the right side of the page. The SDF menu will populate then click download.
-
Since negative keyword lists are applied at the insertion order level, you only need to include granularity down to the insertion order level on this report.
-
-
Once your report has downloaded, open it in a google sheet.
-
Navigate to the SDF-Insertionorder.csv tab. This contains the SDF (structured data file) information at the insertion order level for your campaign.
-
Find the ‘Keyword List Targeting - Exclude’ column. You will notice that the list IDs in that column are repeated in multiple rows. This is because the list under that ID is applied to multiple insertion orders under the same advertiser.
-
Copy the list ID and paste it in your template.
Hint: there are multiple list IDs in one cell, there are multiple negative keyword lists applied to that IO. Try creating a dummy IO and applying the negative keyword list you are trying to update to that IO. You can download the SDF ad grab the ID from that row specifically!
Create Your Google Sheet Template
-
Navigate to the template and then select File > Make A Copy
-
Fill out your template
-
Template Variables
-
Account ID - the ID of the account you would like to apply the keyword exclusions to
-
List ID - the ID of the existing list you pulled in the
Find Your Existing List Idsection -
List Name - the name of the existing list
-
Keyword - the keyword
-
Date Added - the date you are adding the keyword. This should be the current date
-
-
Notes:
-
You may apply negative keywords to multiple accounts in the same google sheet, as long as your authentication token/user has access to each. Ensure each row has the appropriate account id, list id, and list name
-
-
-
You may edit the name of you google sheet, but do not edit the names of the tabs.
Create Your Alli Action
-
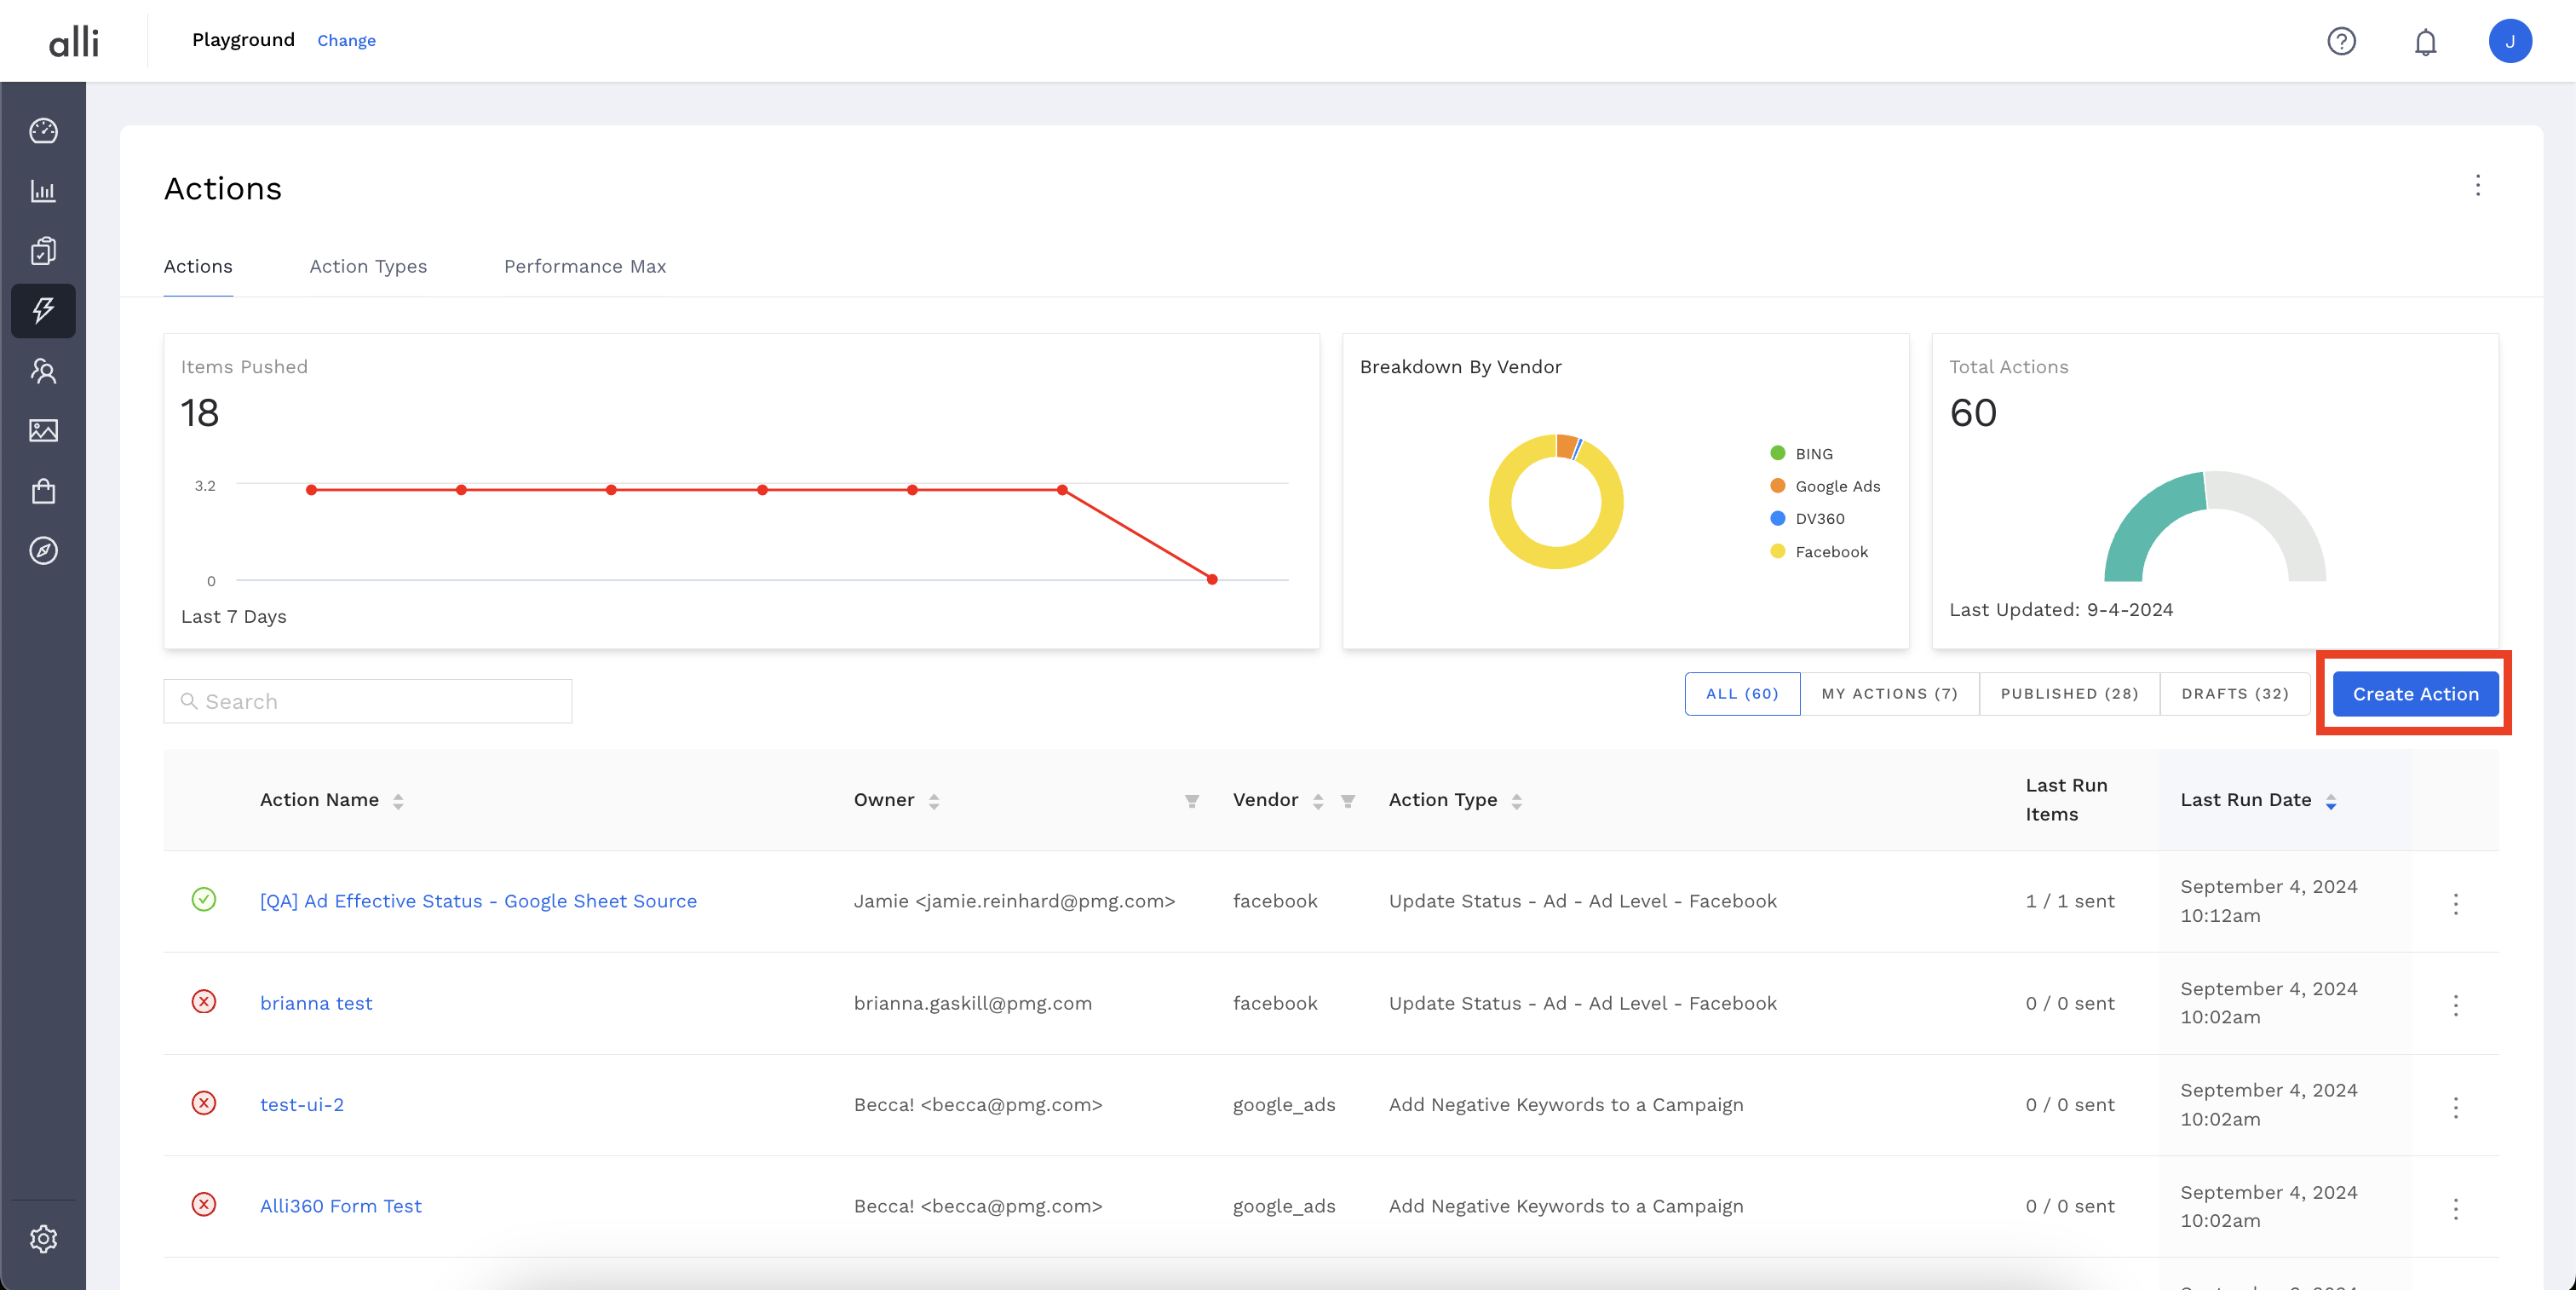
Go to Alli Actions then select Create Action.
-
Filter the Vendor column for Google Ads and select the Google Ads: Campaign Exclude Locations Action Type
-
Filter or search for the DV360 action named
Advertiser Level Negative Keyword List Updateand click
Select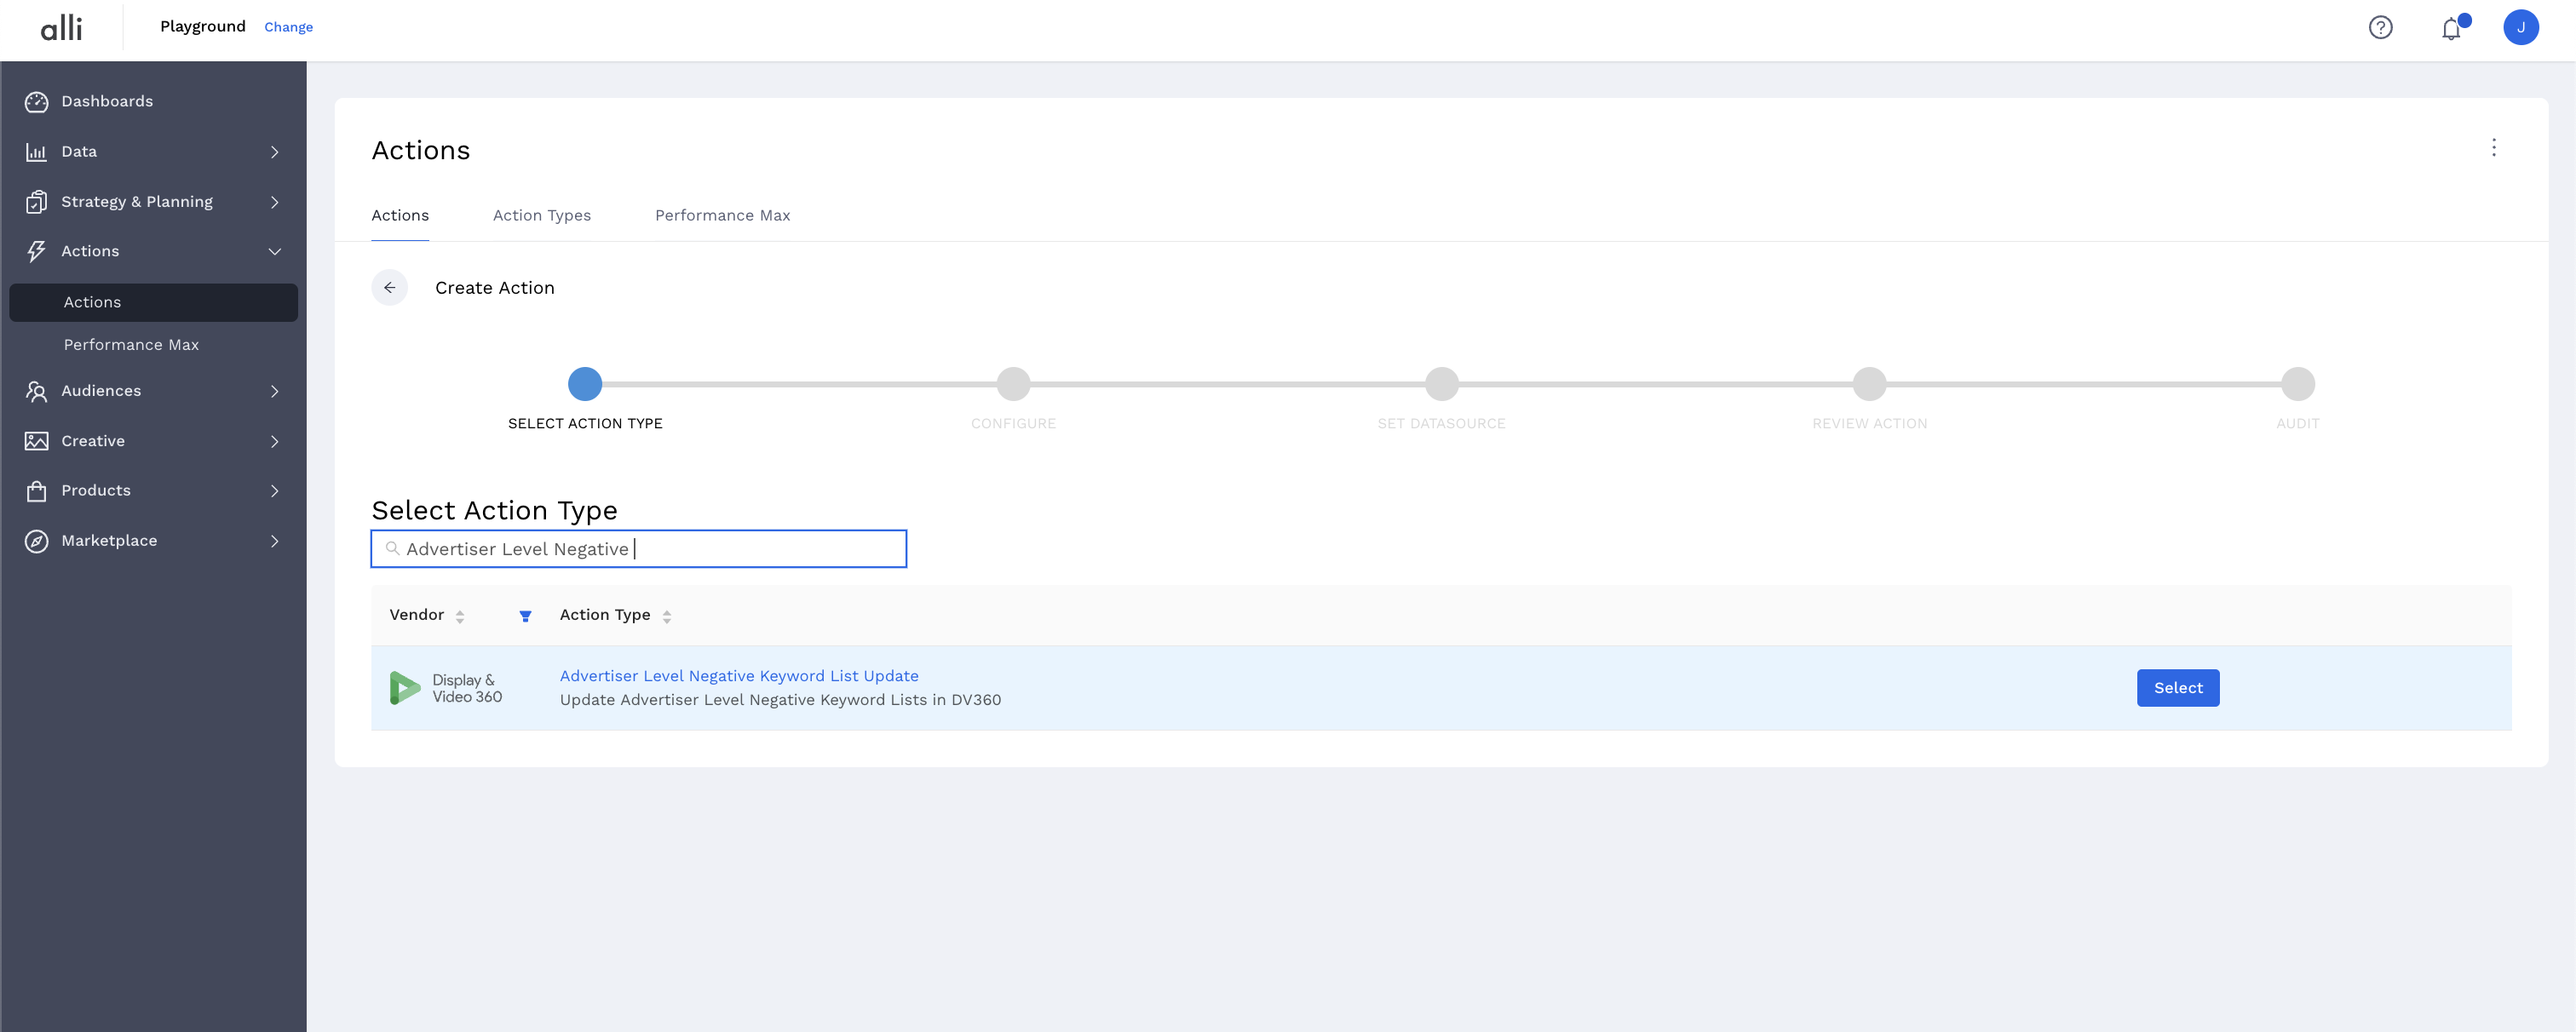
-
Name your Action and select the Authenticated Account, the user account you'd like to use for making changes. The user associated with this account should have access to the relevant ad accounts.
-
Start by giving your action a descriptive name that reflects the changes you plan to make.
-
Tip: If your desired account isn't listed, or you need to create a new one, refer to the authentication documentation for instructions on how to authenticate a partner platform.
-
-
Click Next. Select the correct data source where your changes are coming from. Since we have just created a sheet, we should select
Google Sheets-
Copy and paste the url to your google sheet in
URLfield -
Sheet Name should be
Leave This Alone - Todays Adds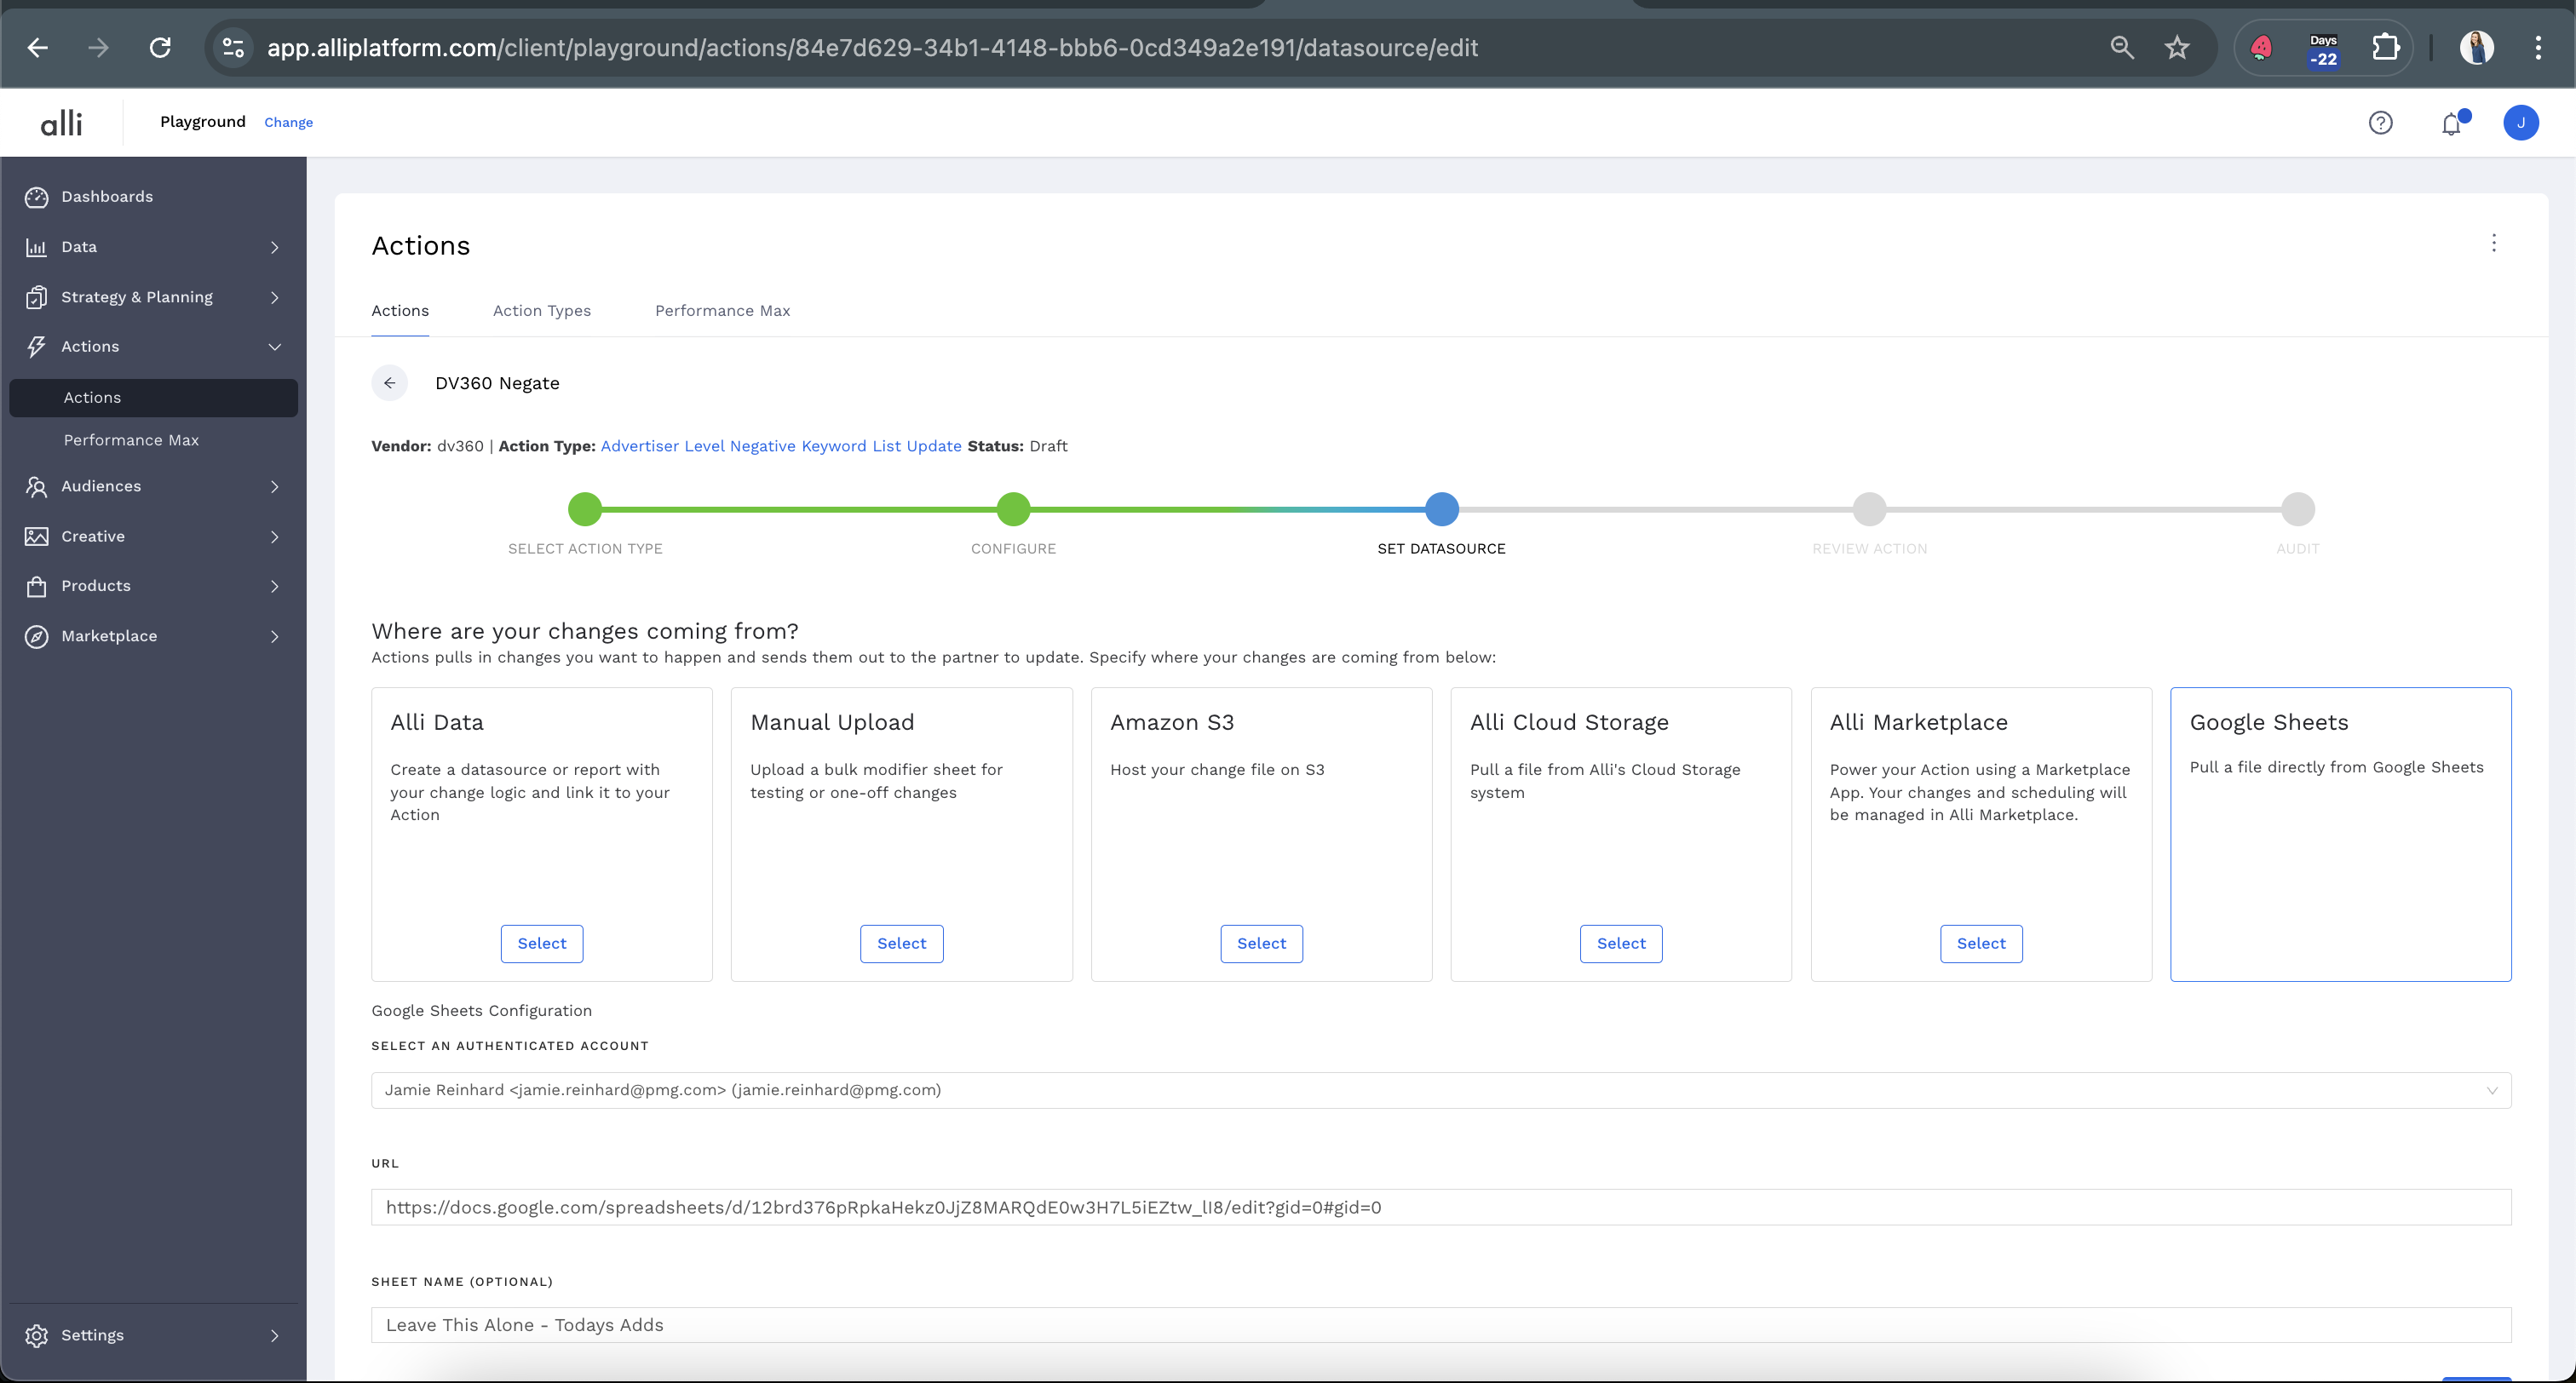
-
-
Click Save and review your Action setup.
-
Review Action for accuracy. Set up a schedule for your Action if applicable. Select the blue Publish button.
-
A pop up box will confirm your setup. Click I’m Done to exit.
We recommend copying the link to your action and pasting that into your google sheet. Any time you add new keywords, you can then just follow the link, click Run Now and run your action
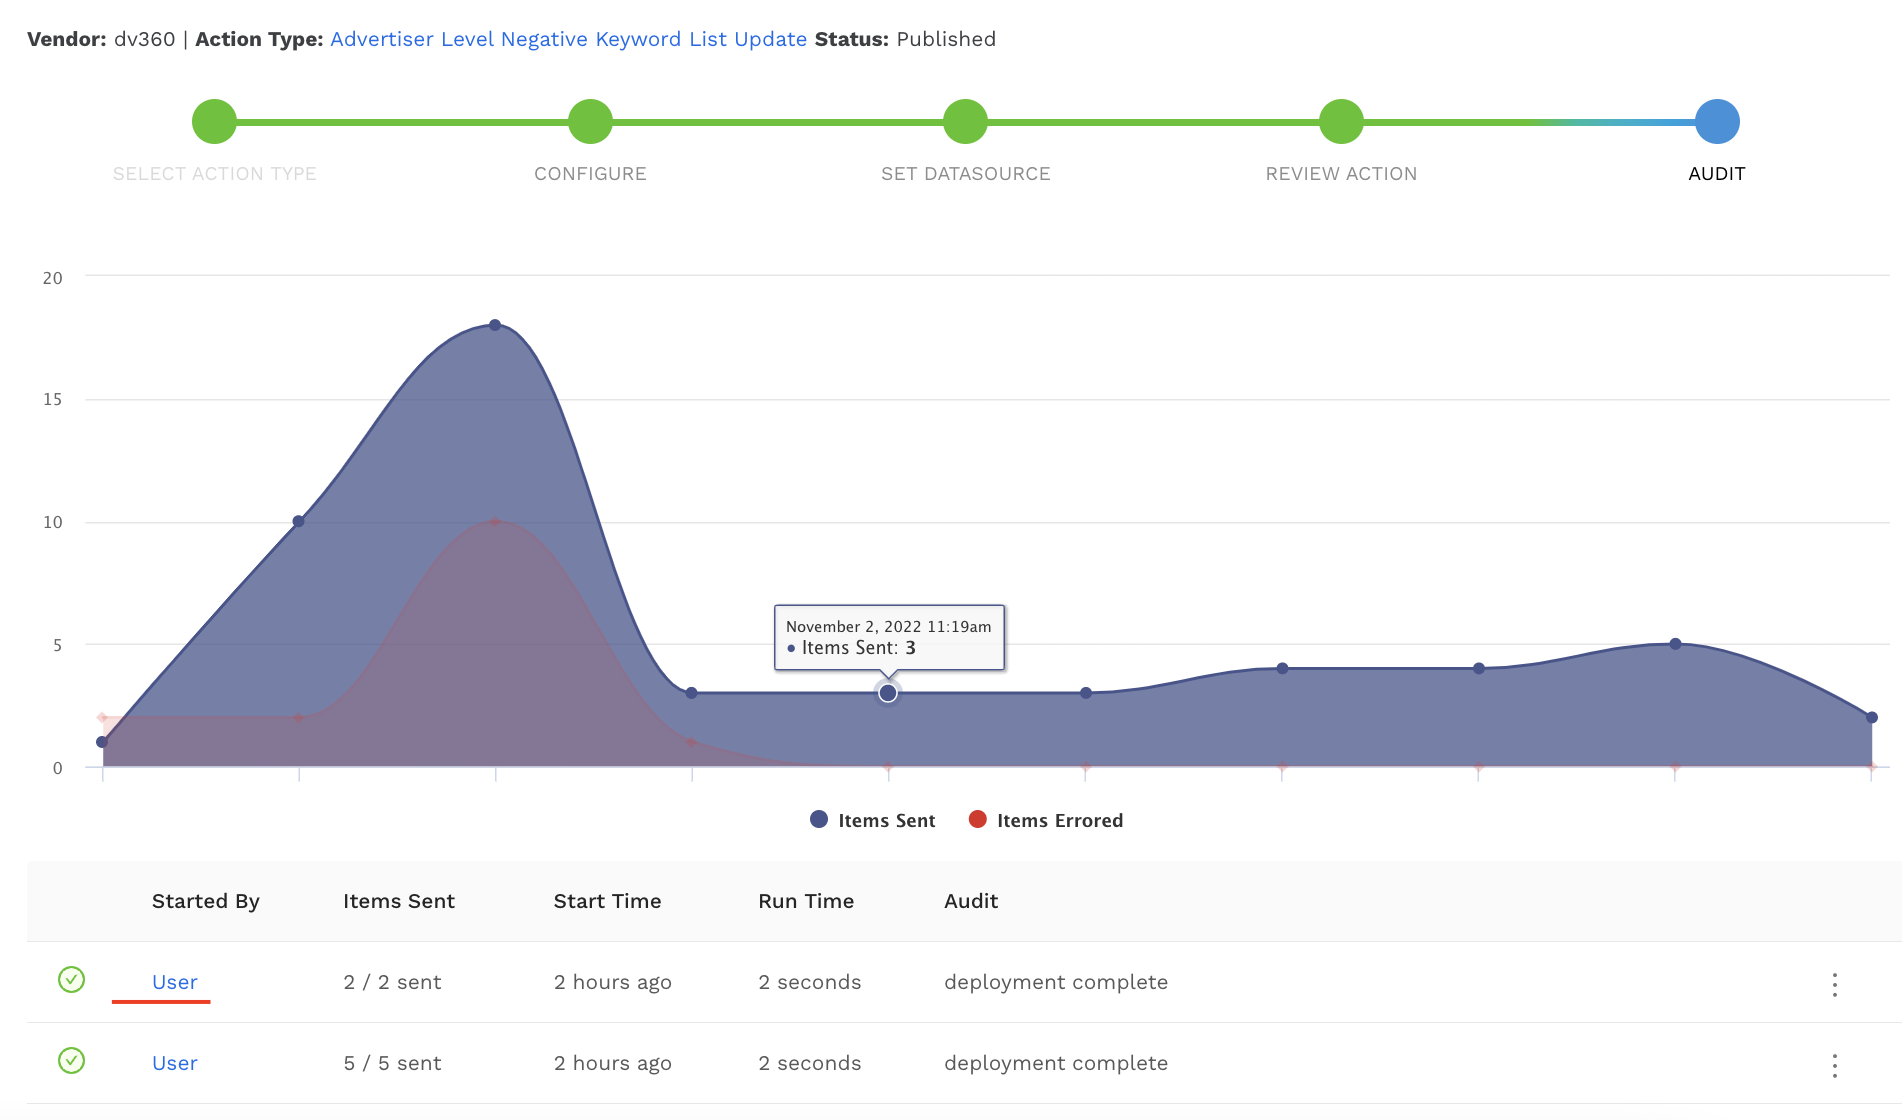
When Running Your Action
-
We recommend always checking on your action after clicking run now. Navigate back to your action, to the Audit page. Refer to the How-To: QA Your Action Runs documentation for further details
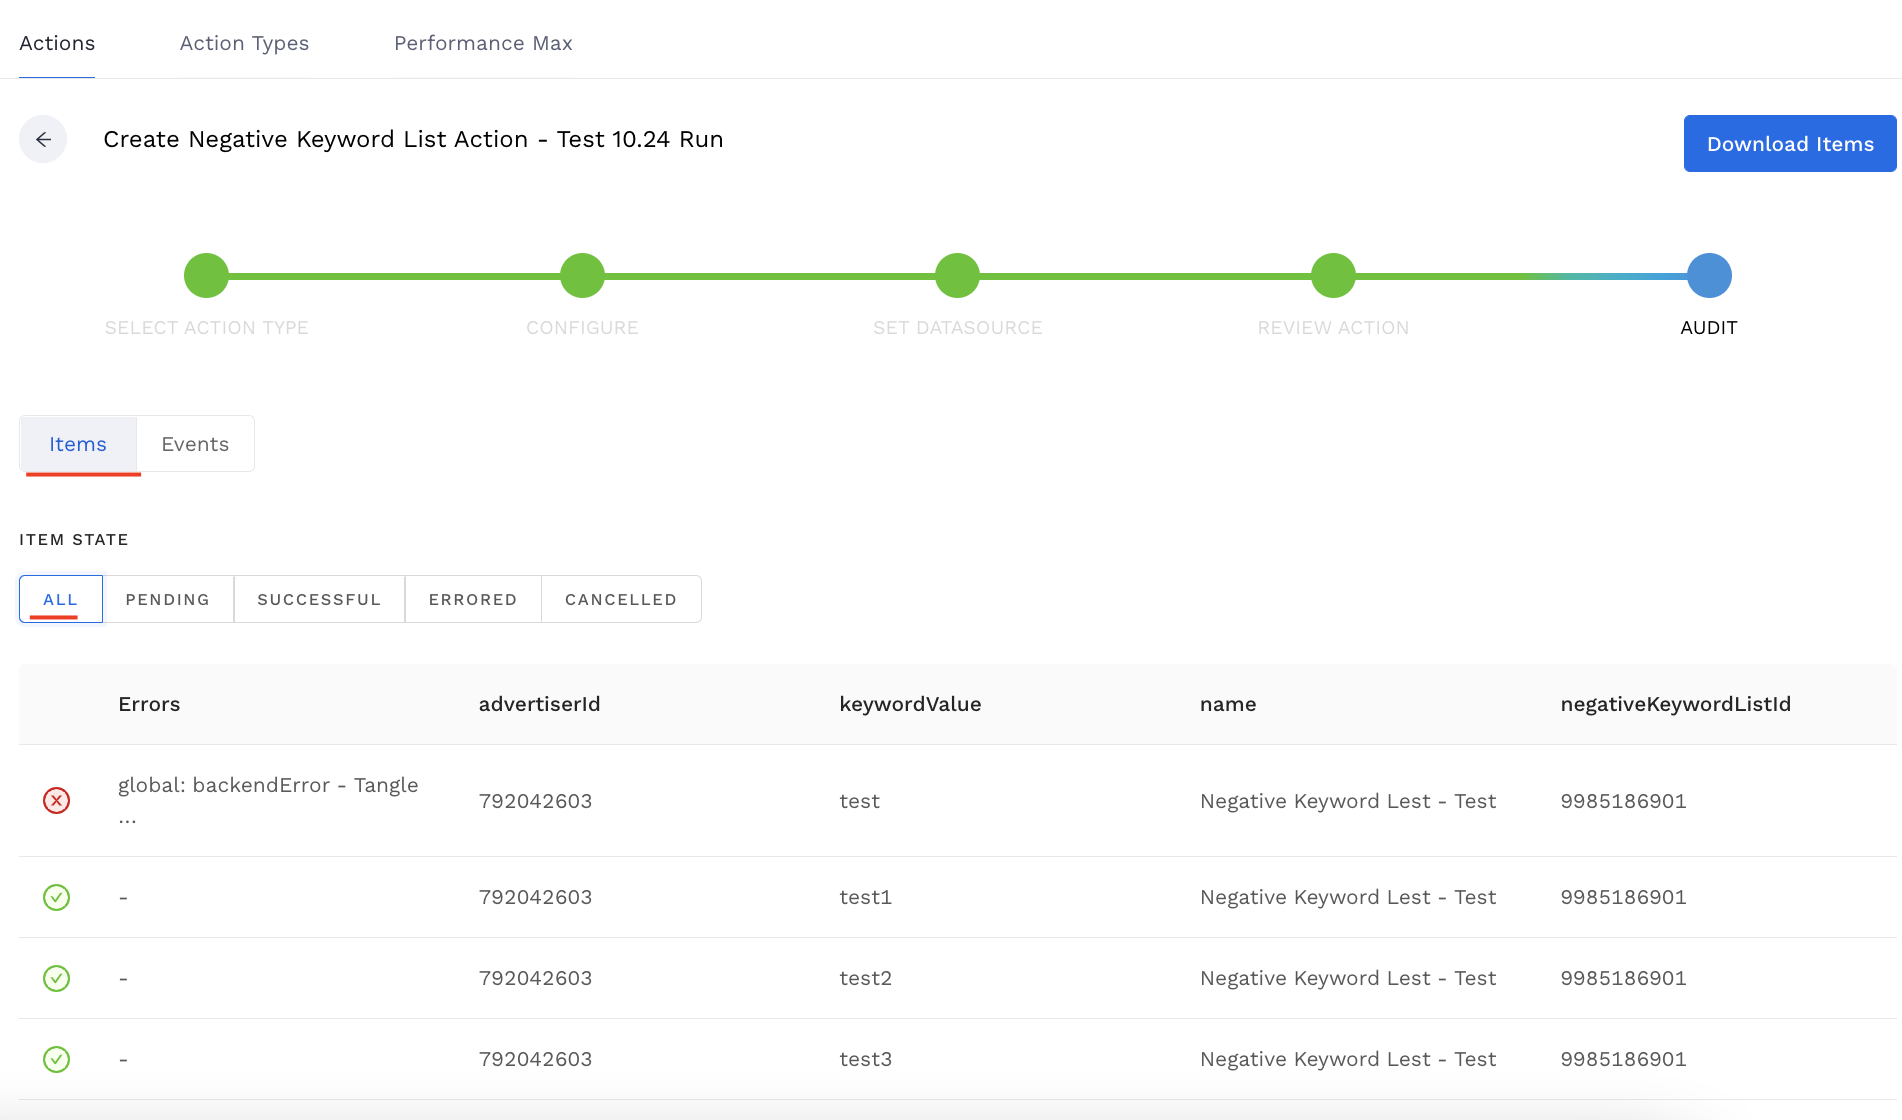
Full Process Recording - Watch This