
Overview
Scheduling an action allows it to run at a specified time.
Instructions
Actions that use Manual uploads or Marketplace as their datasource cannot be scheduled.
-
Navigate to Actions
-
Click on the Action you would like to create a schedule for or edit the schedule within. You will be directed to the
Review Actionpage, or using the navigation, make your way to that page.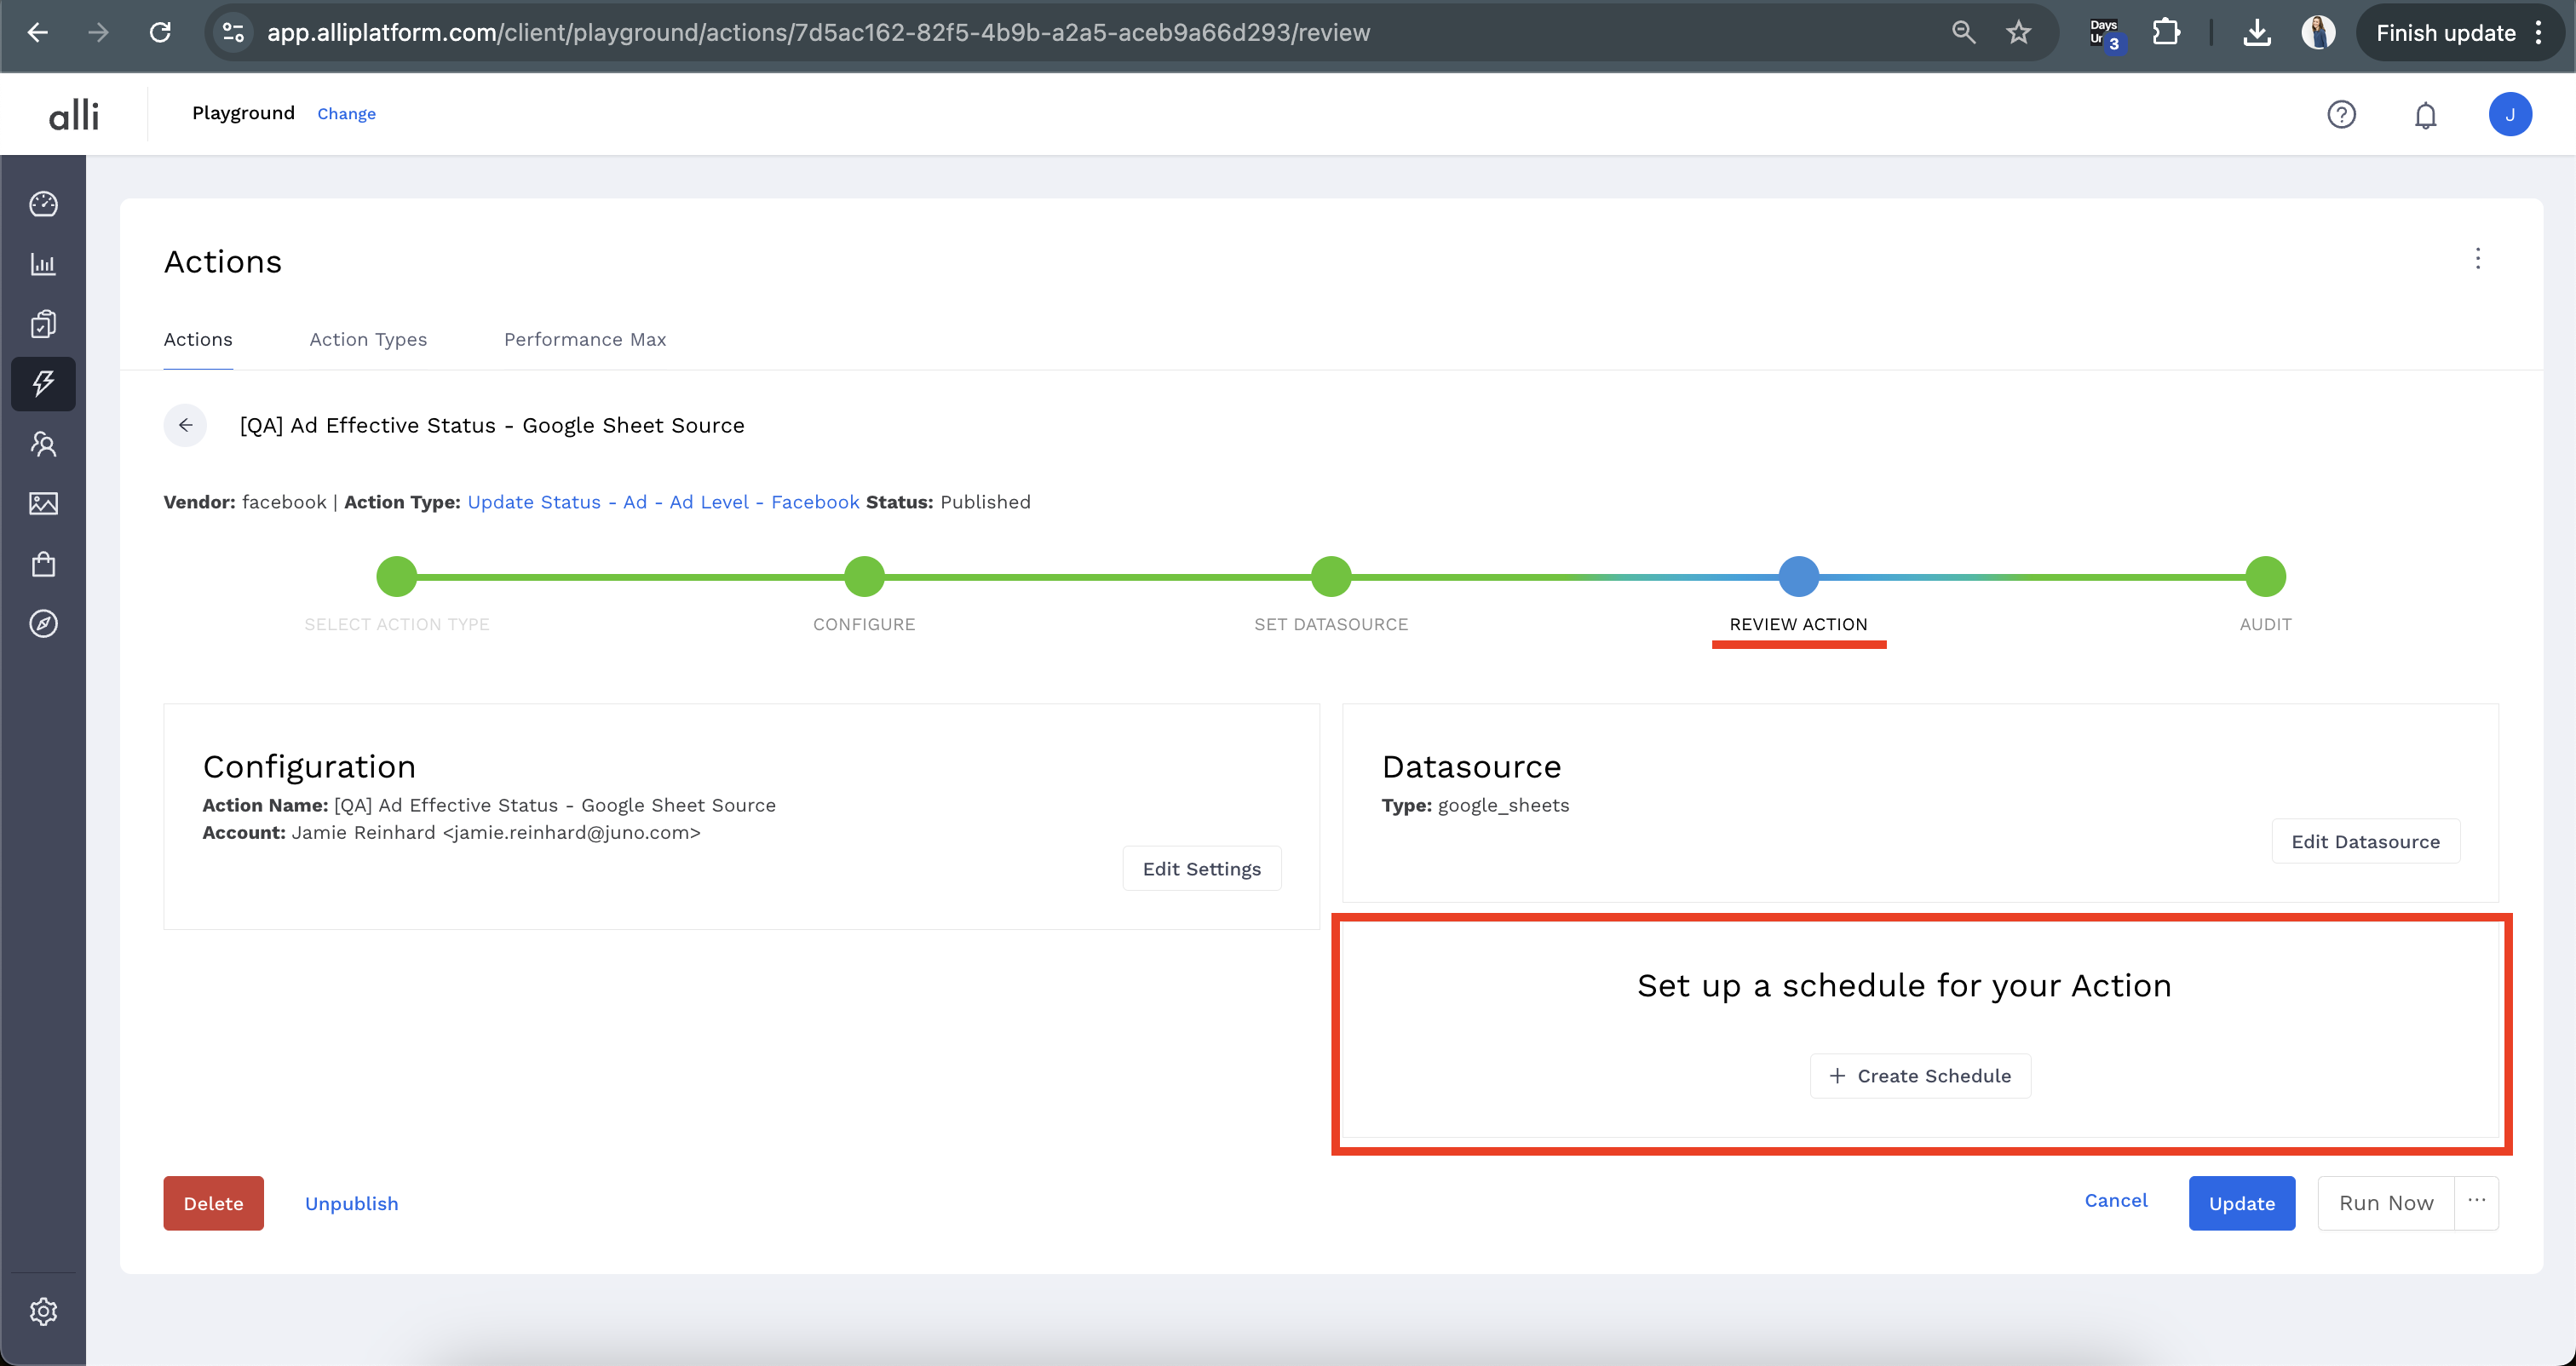
-
You will be able to Set Up a Schedule for Your Action. Select Create Schedule.
-
Add the Days and Time (CDT) that work best for your customer and that aligns with the data source selected. When complete, select the blue Update button.
-
A confirmation pop-up box will show you the next run time based on your schedule. Click I’m Done to navigate back to the main page, or click Close to stay on the Review action page and continue adjusting your action.
Related articles
- How-To: Connect your Google Sheet to Actions
- How-To: Disable or Remove an Installed App
- How-To: Set Up a New Workflow
- How-To: Pull Data for TikTok Trends
- How-To: View Error Messages on an Action That Ran
- How-To: Filter Alli Data Reports by Date to Power Actions - Tips & Tricks
- How-To: Understanding Version Statuses
- How-To: Create a Scheduled Version
- How-To: Weather API App
- How-To: Set Up Brand Media Pacing Datastudio Dashboard
- Tutorial: Adding Negative Keywords to Google Ads
- How-To: Test Your Action
- How-To: Using the Execution Log
- How-To: Setup Weather Budget Adjuster
- Tutorial: TheTradeDesk - Brand Safety Alerts