Overview
Creating a datasource in Alli is the first step to centralizing your data and automating your reporting for streamlined insights.
Instructions
-
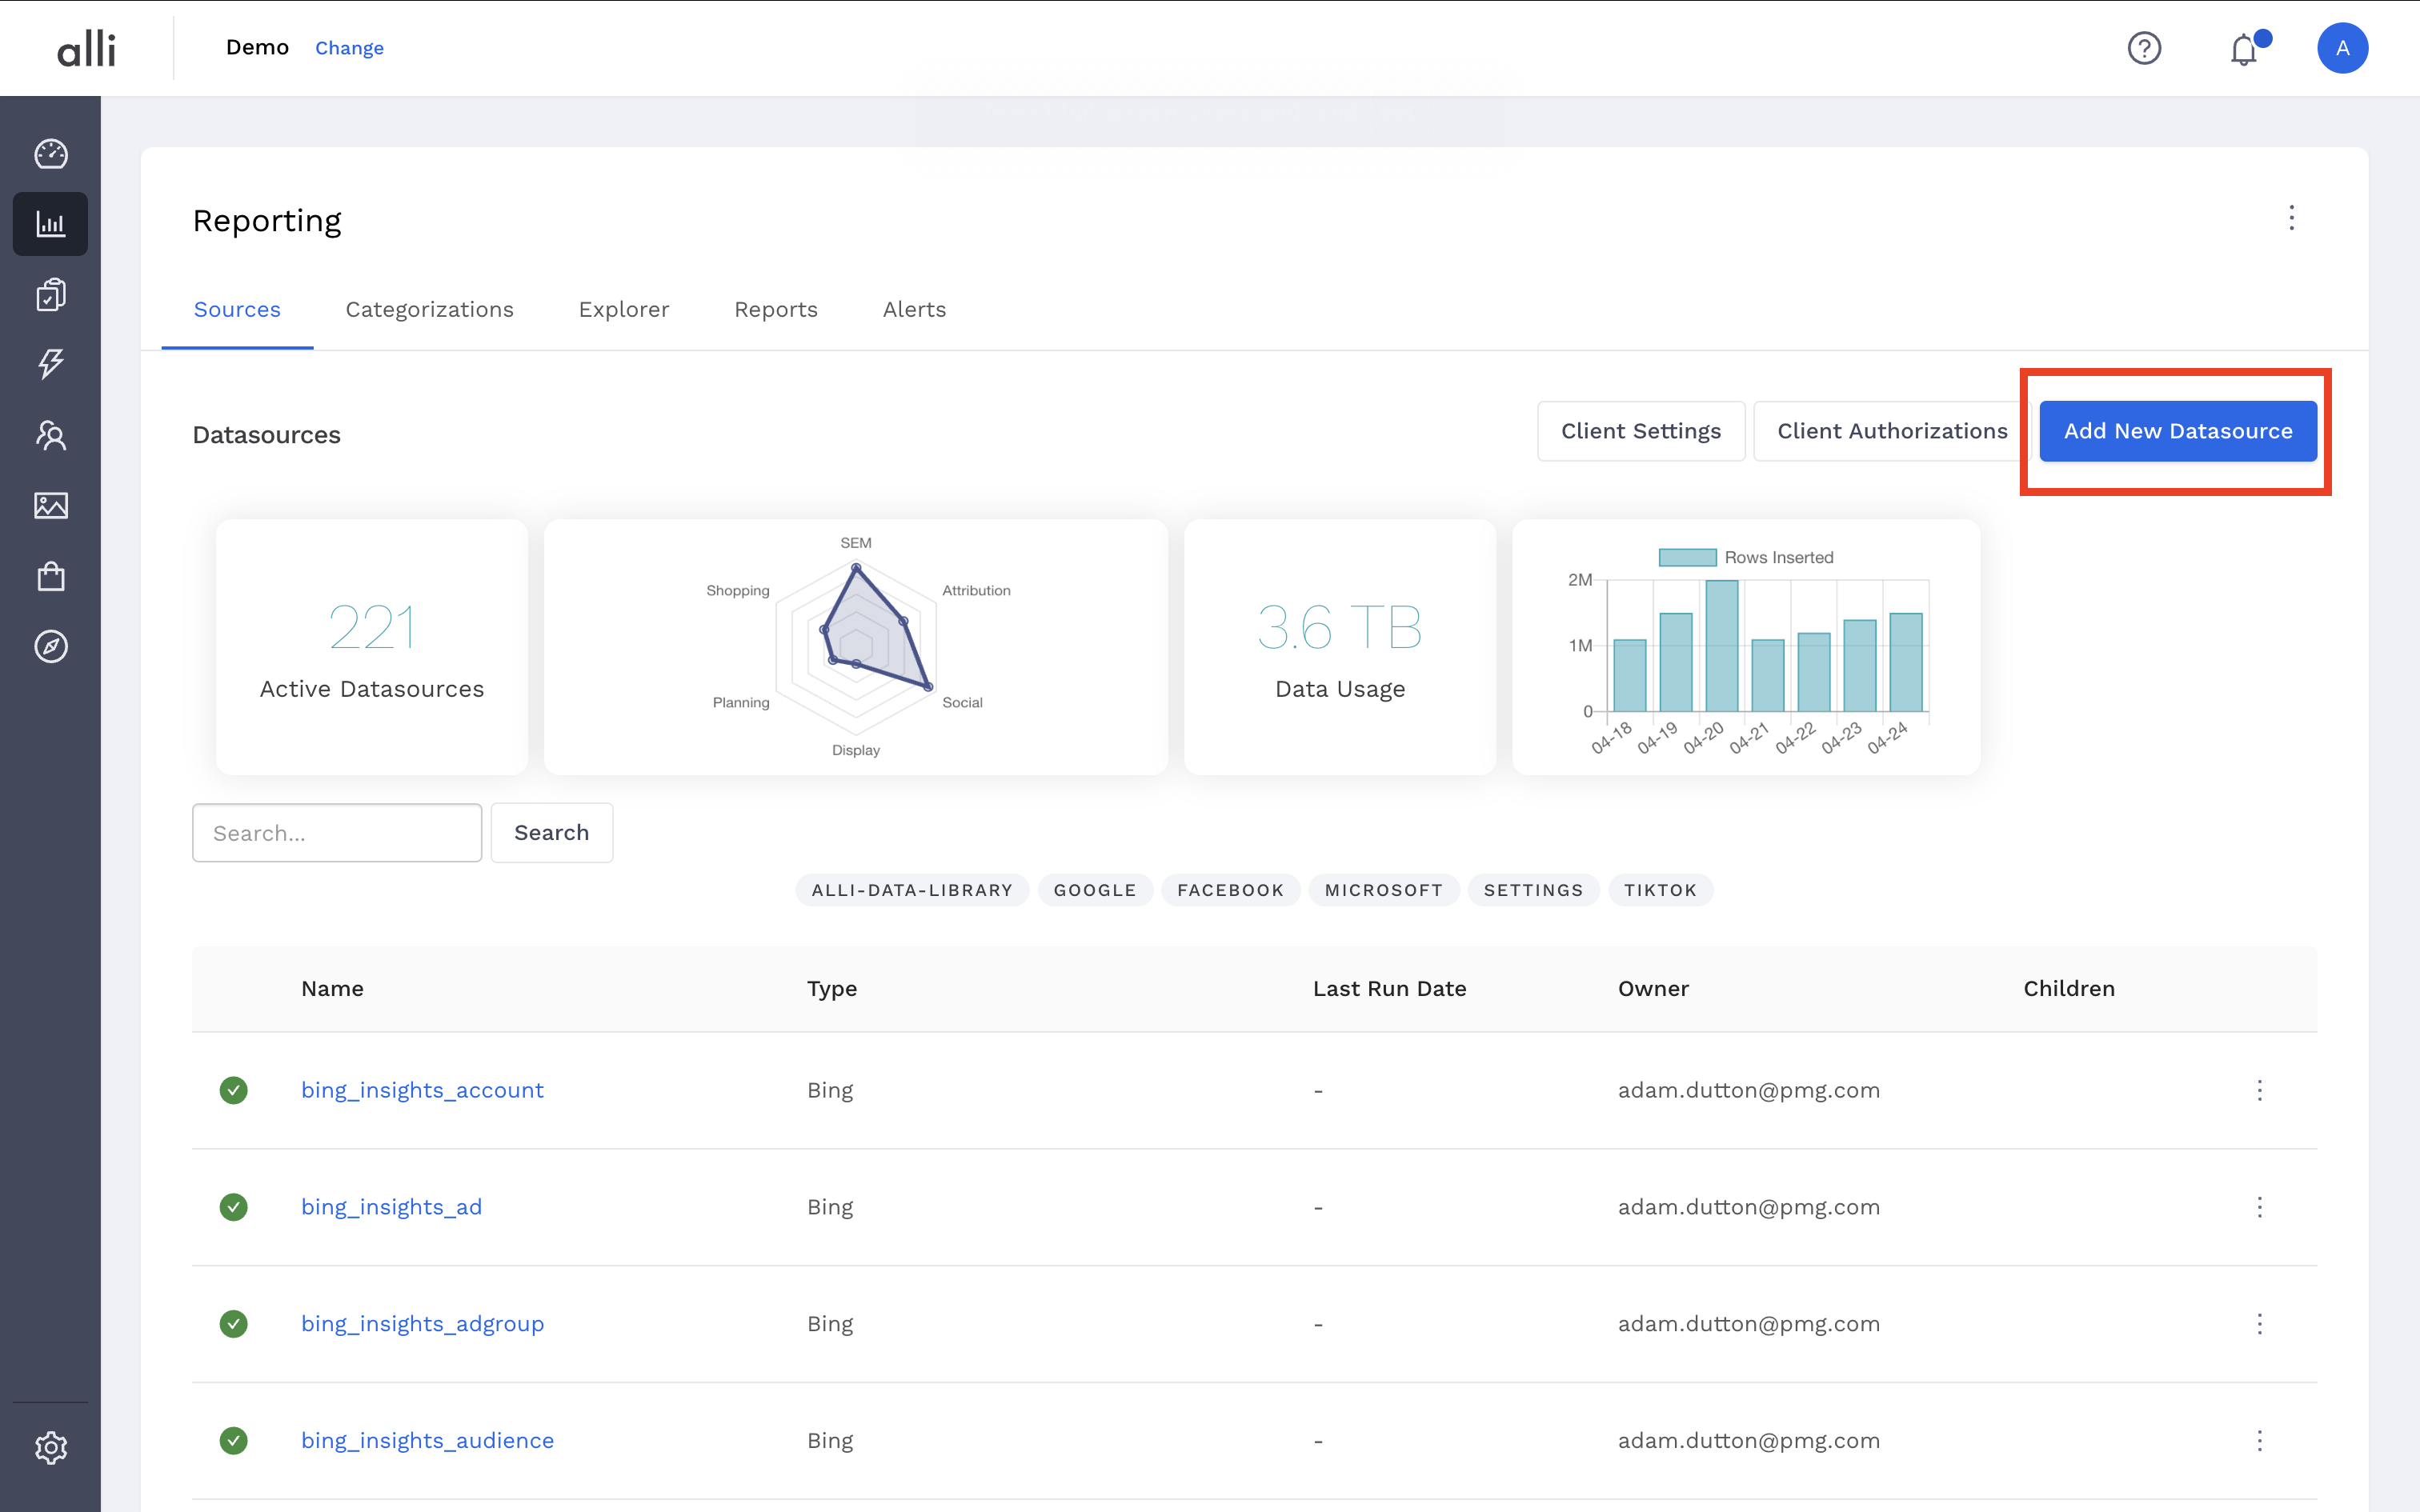
Navigate to the Sources page and click the Add New Datasource button in the upper left hand of the screen.
-
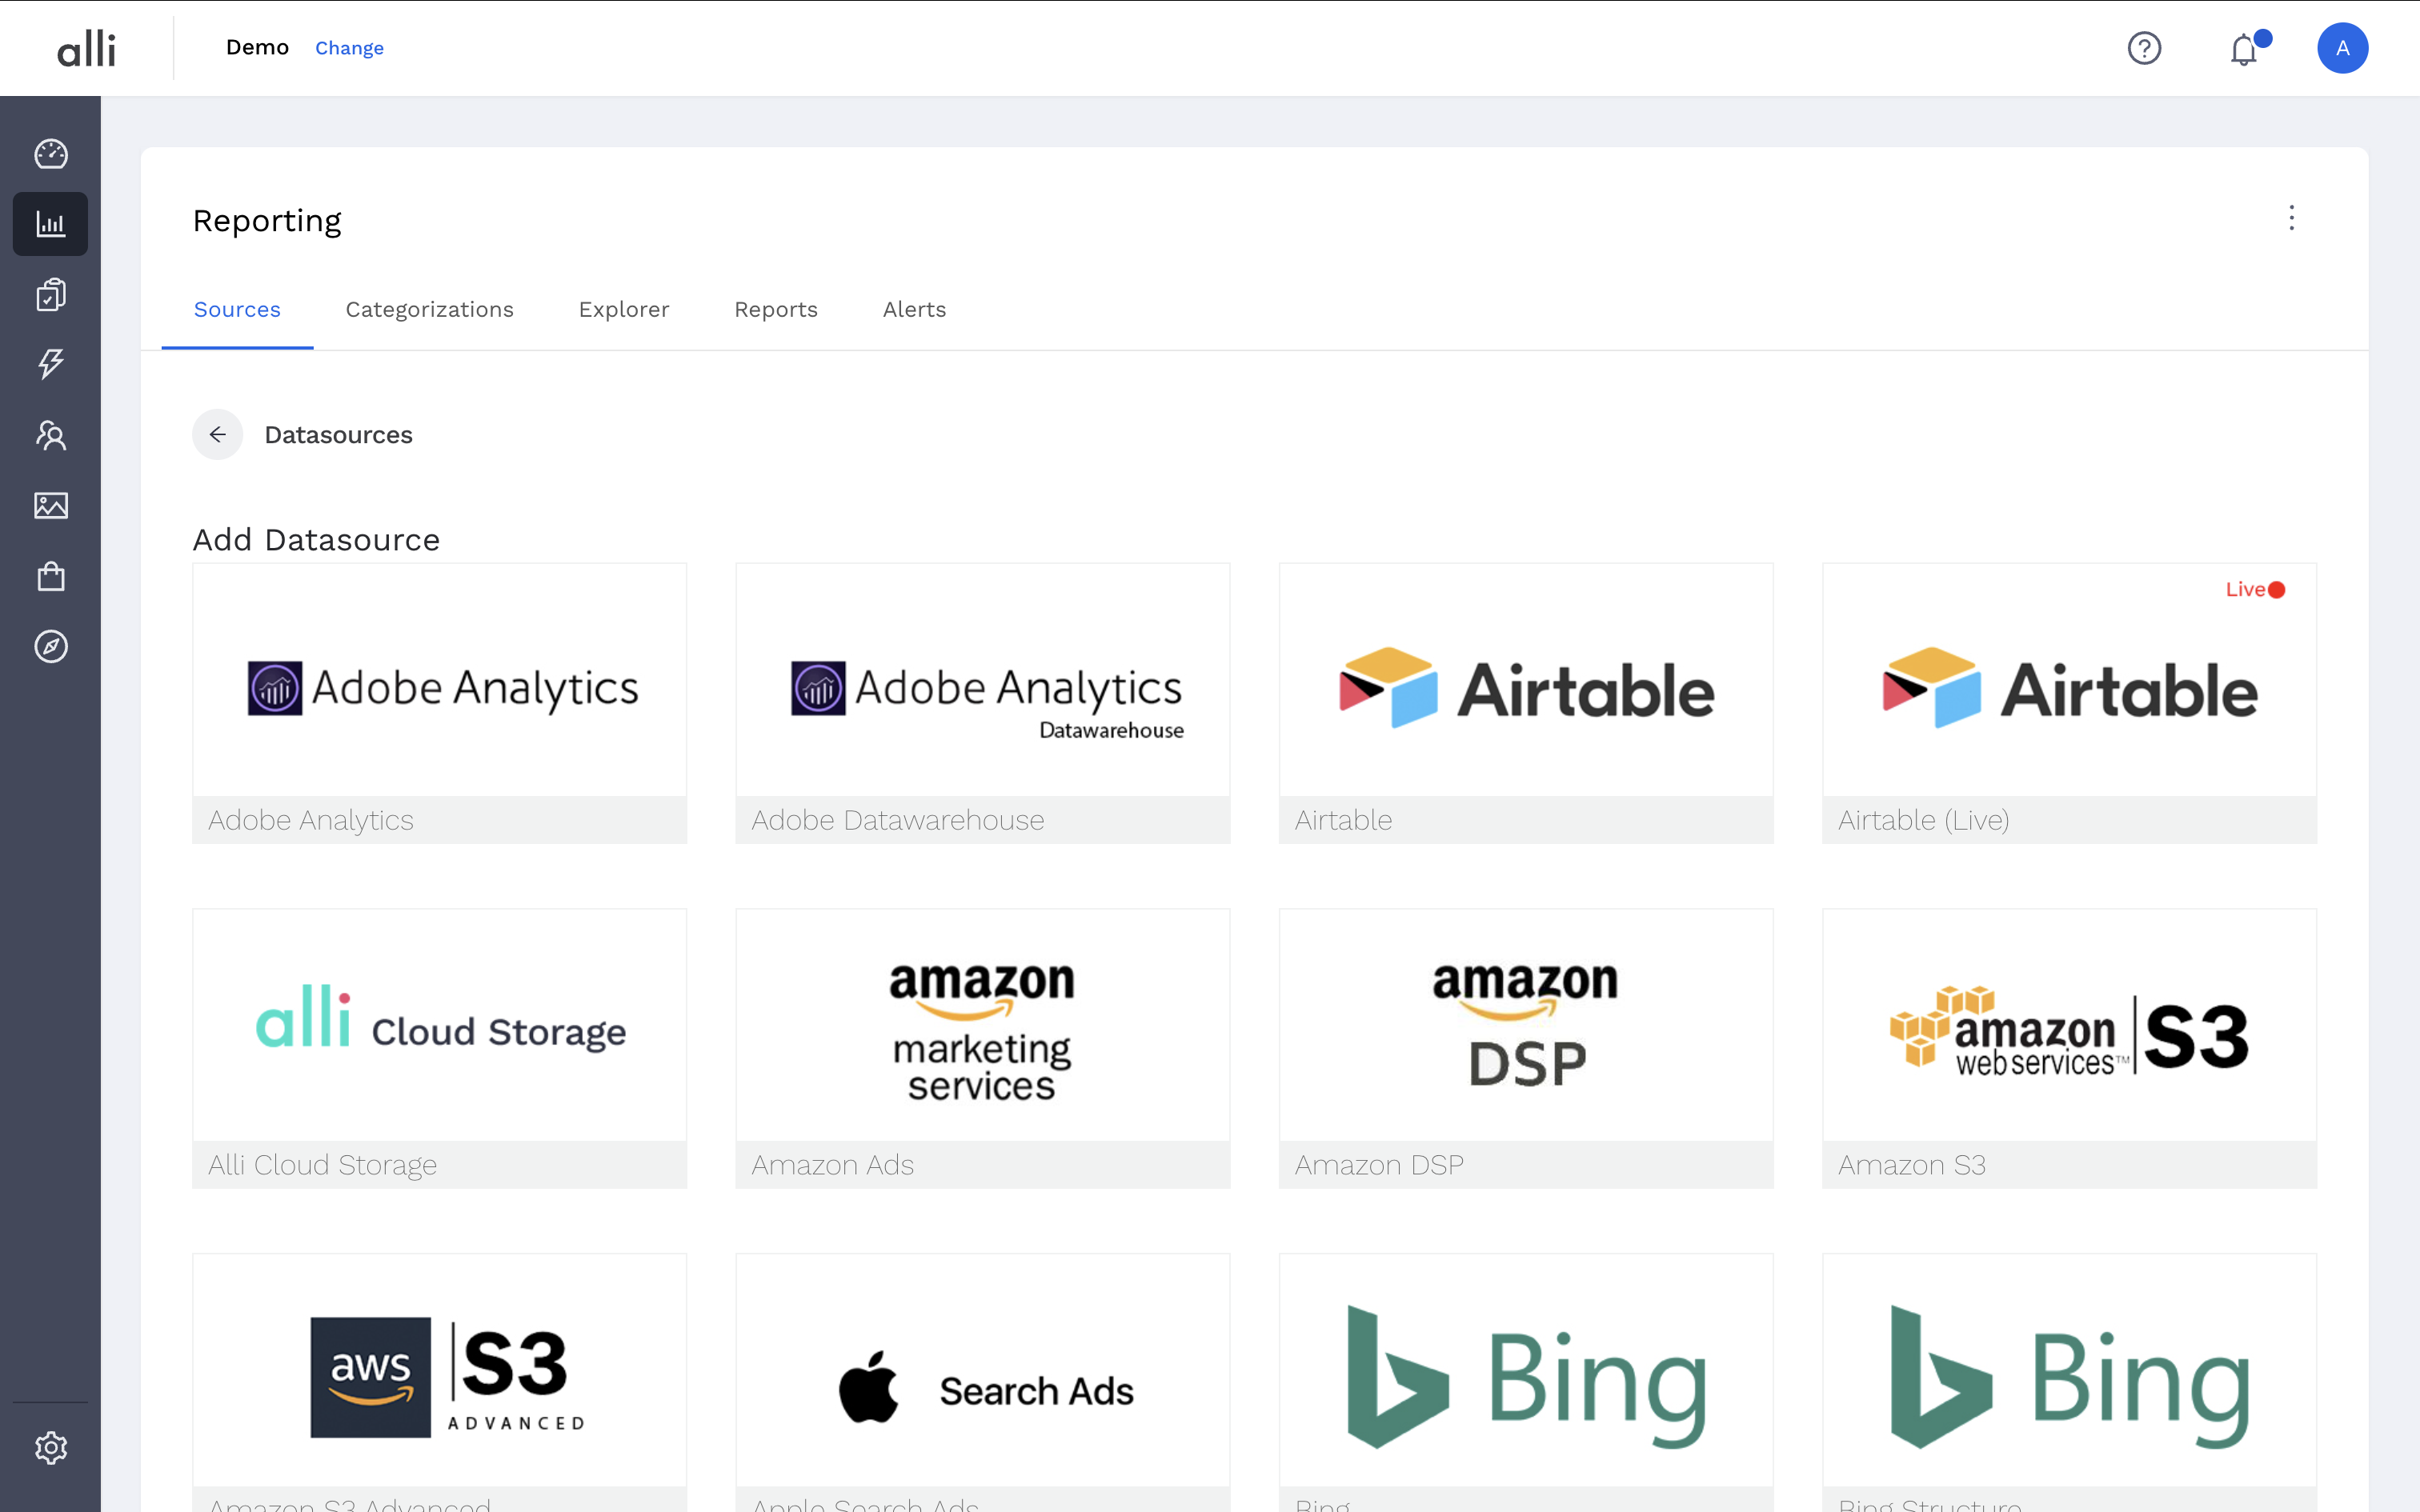
Select the icon for the datasource type you would like leverage.
-
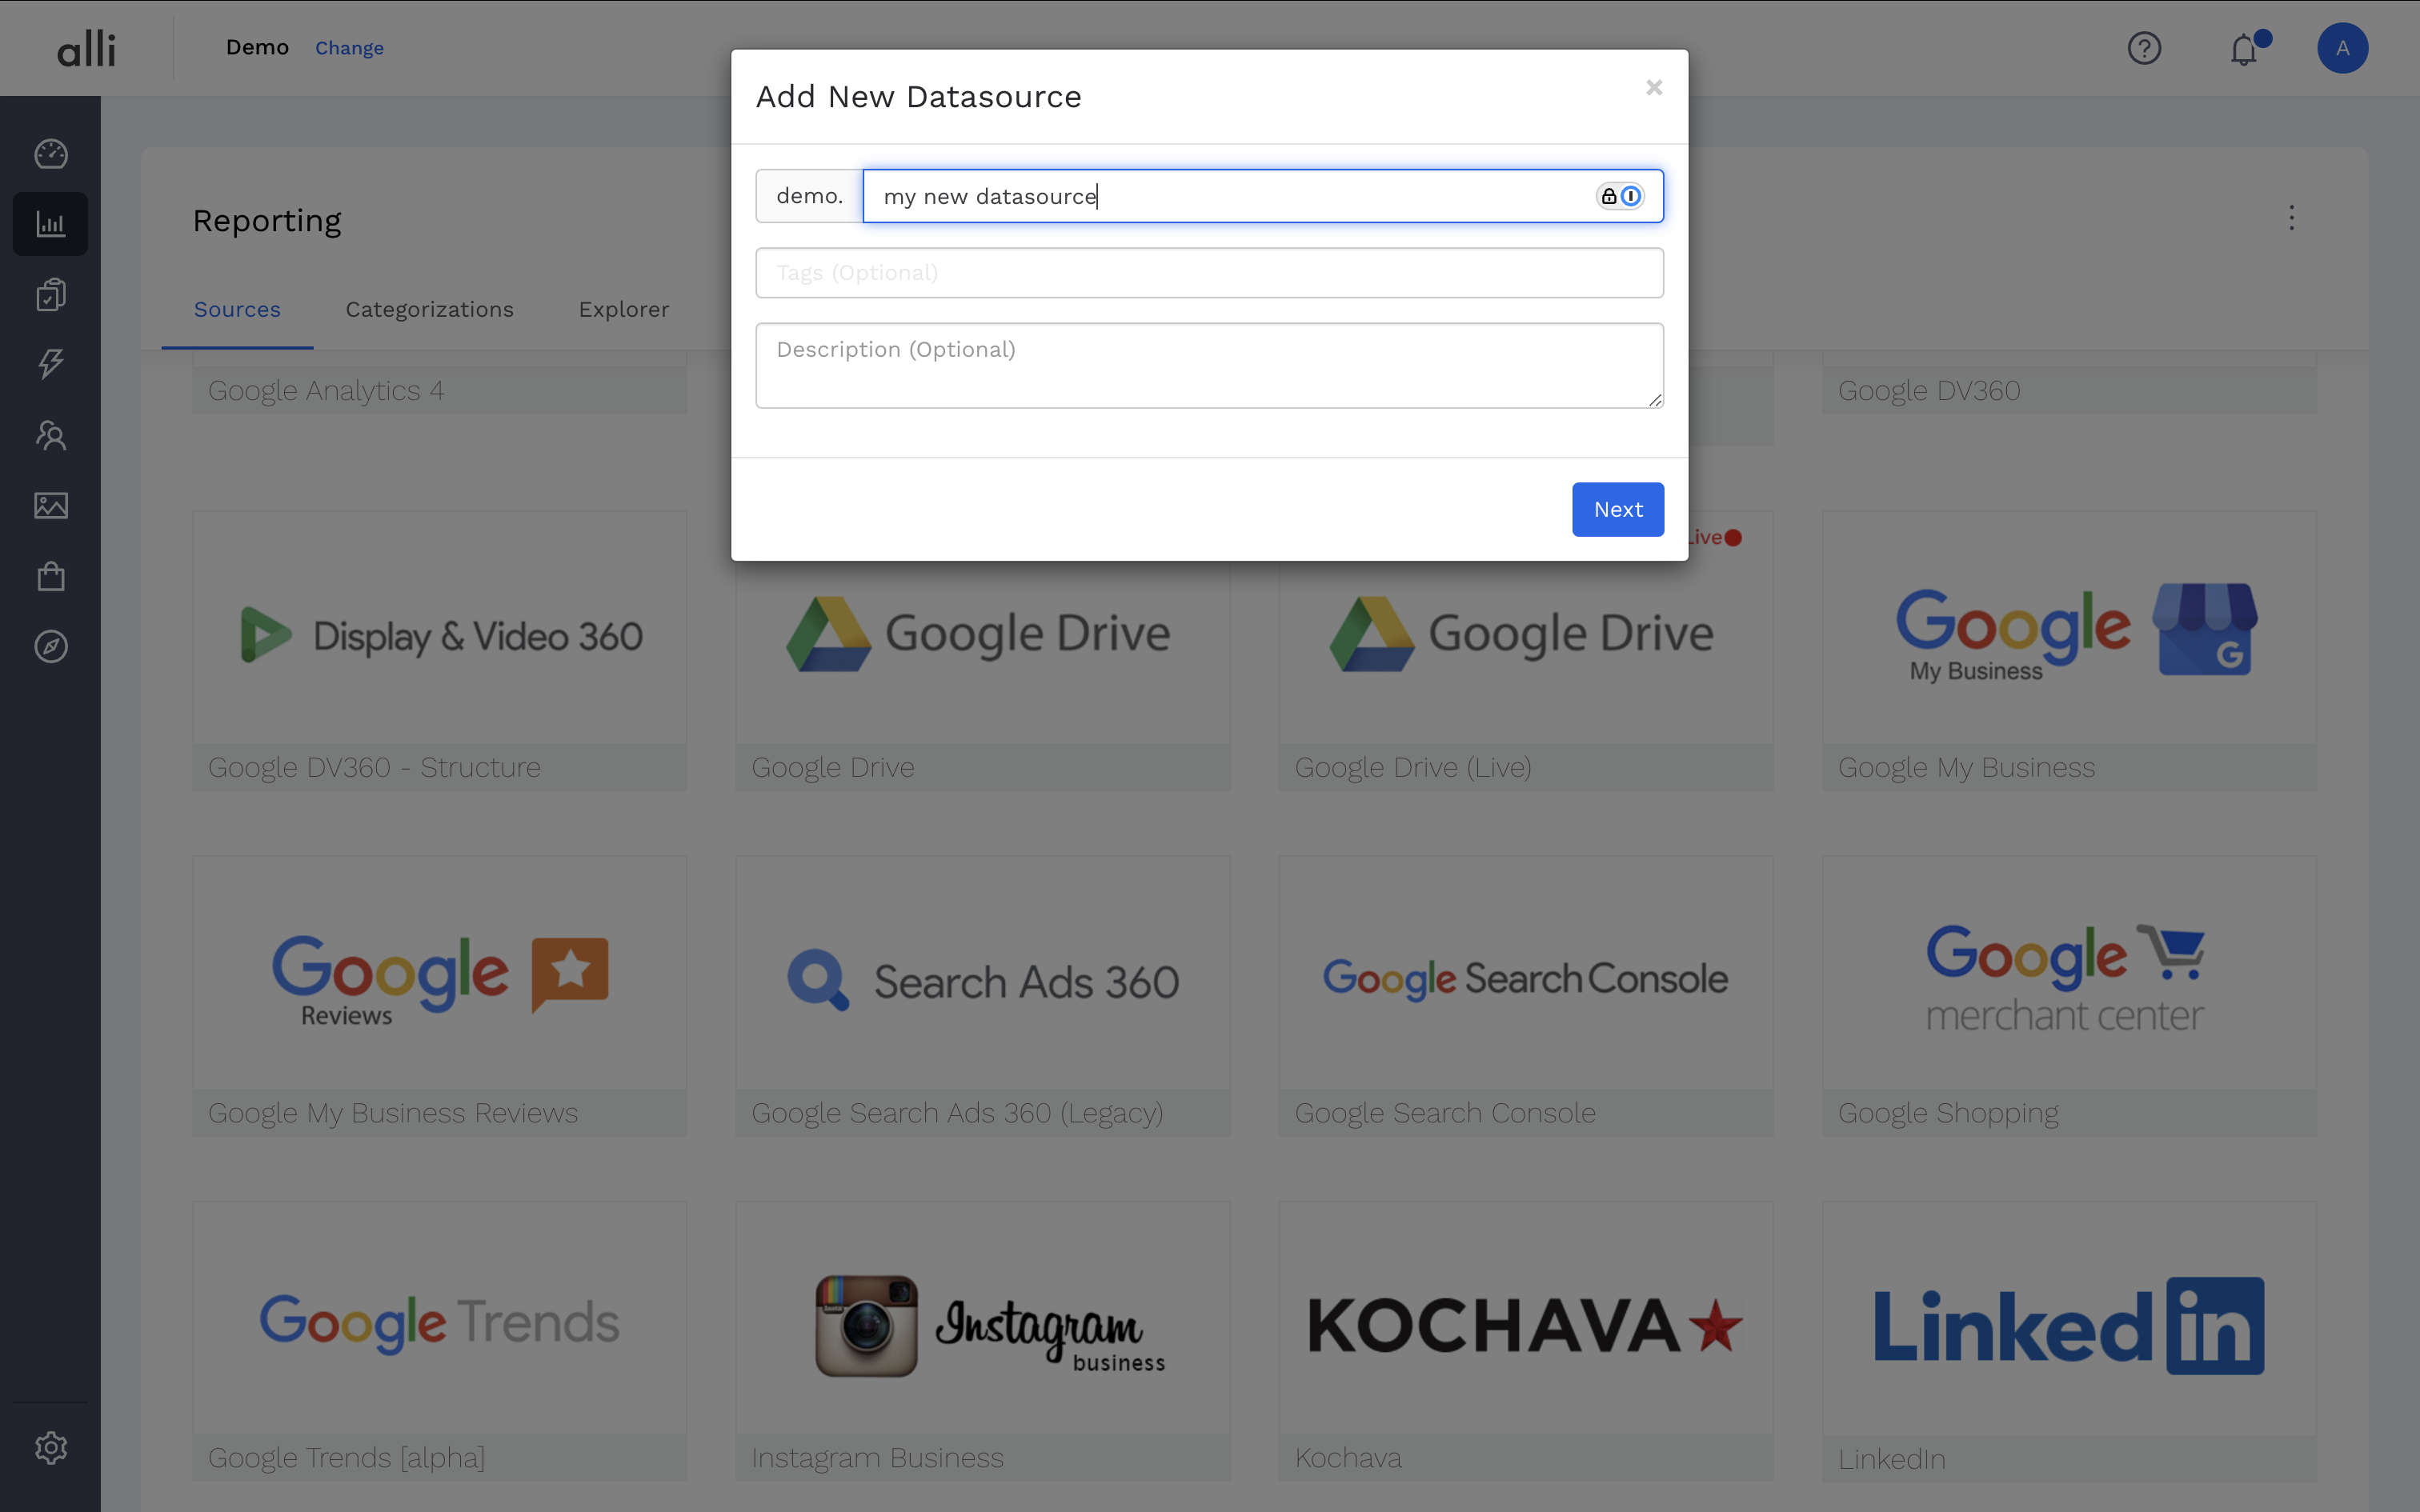
Input a name for your datasource, any tags that can be used for finding it later, and a description that lets your team know what this datasource is used for.
-
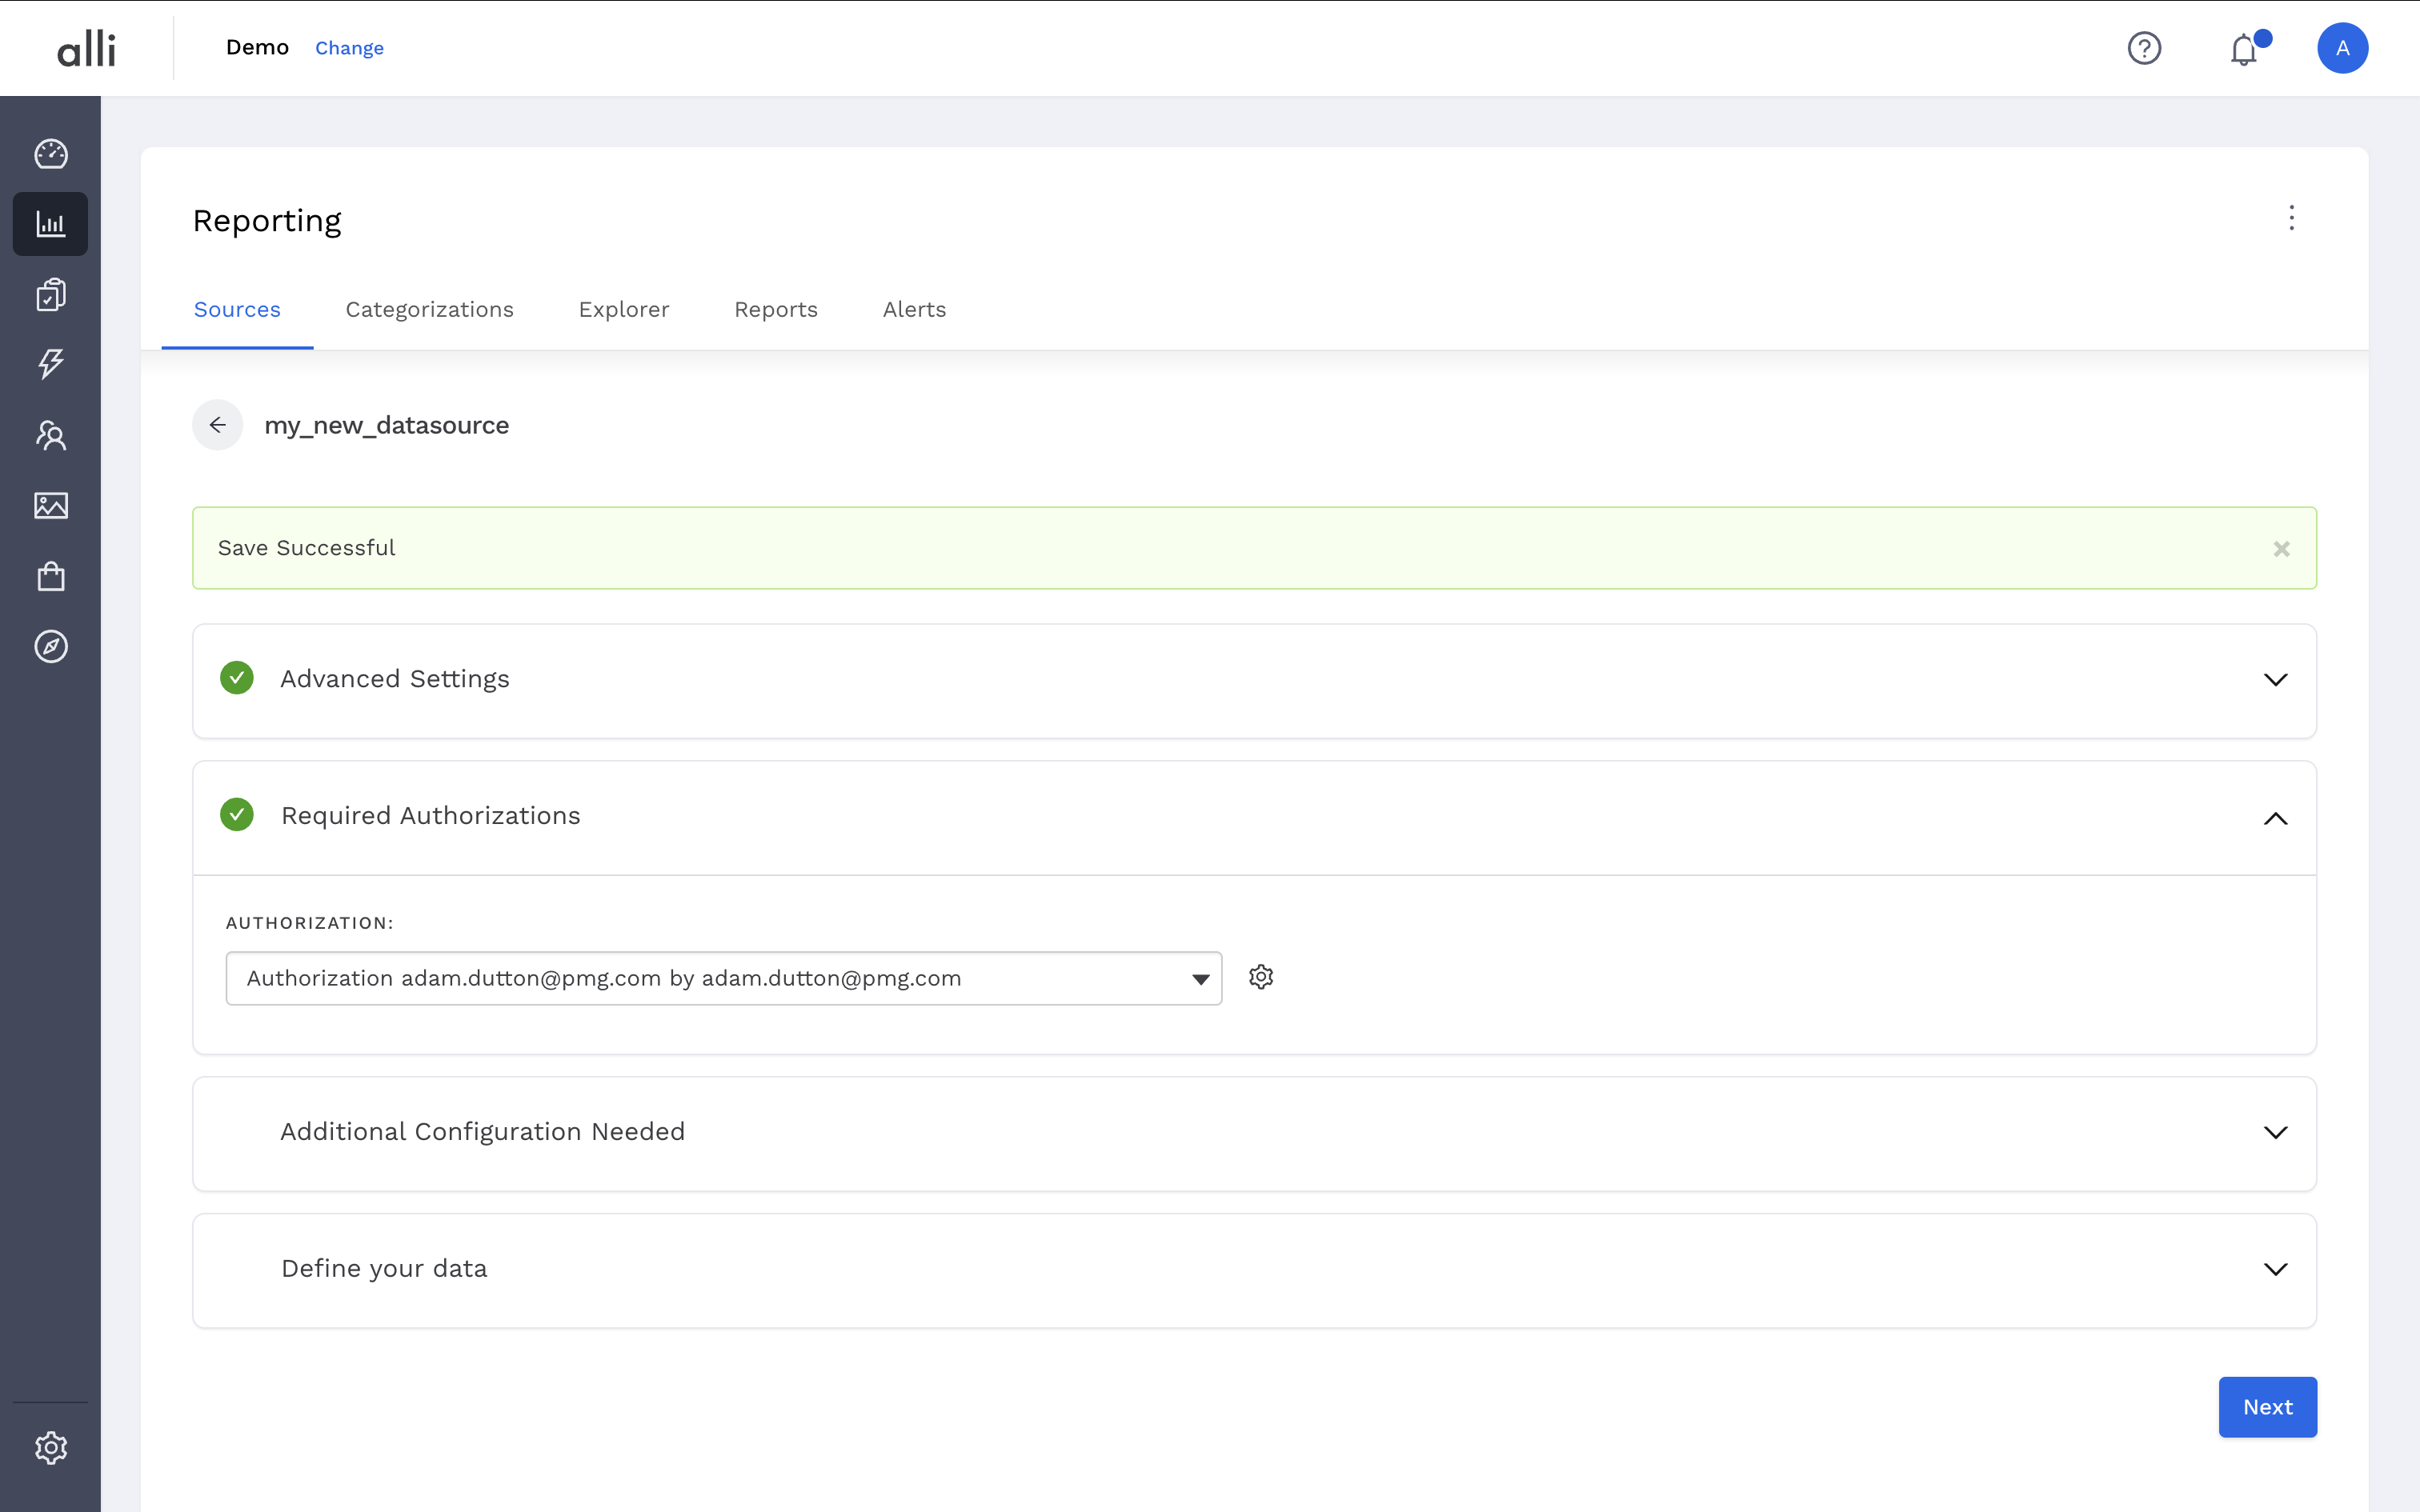
On the datasource configuration page, select an existing authorization and click Next in the lower right hand of screen, or click Save & Authorize to create a new authorization.
To learn more about the existing authorizations, check out this guide: Advanced Guide: Using Global User Authenticated Accounts
-
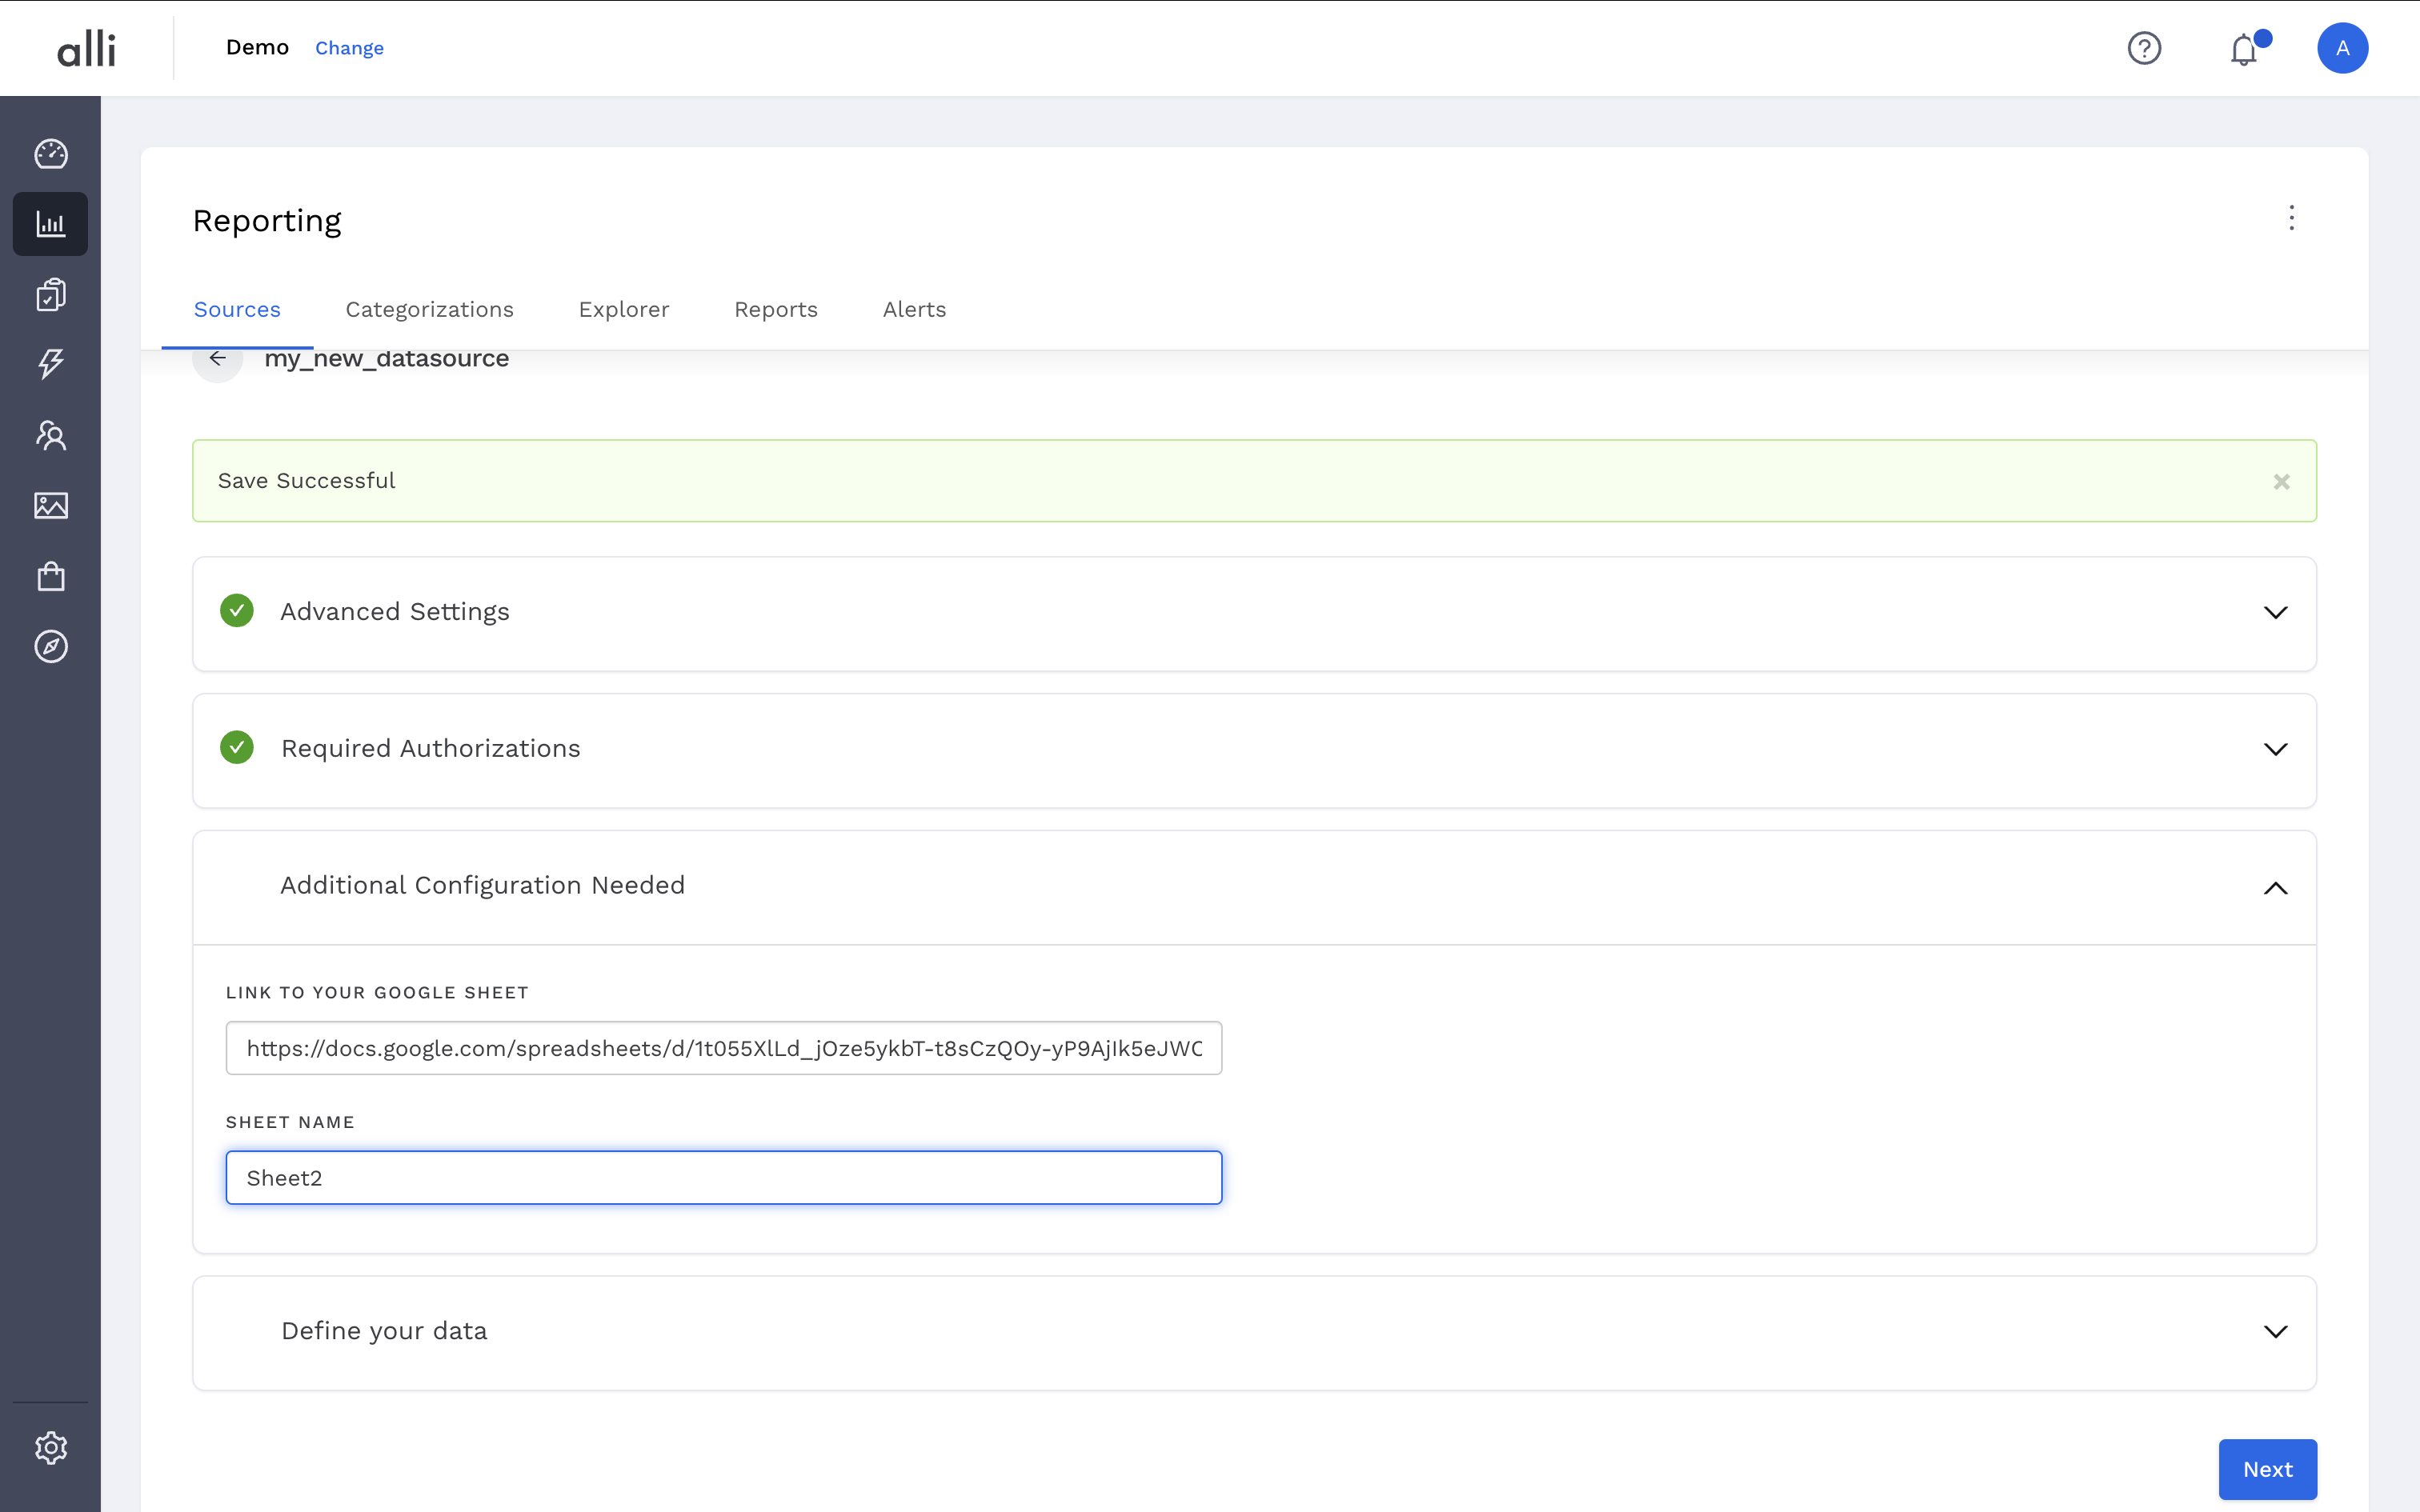
Next, input the Additional Configurations and click Next.
Additional Configurations are unique to the type of datasource you are setting up. This example leverages the Google Drive datasource type.
-
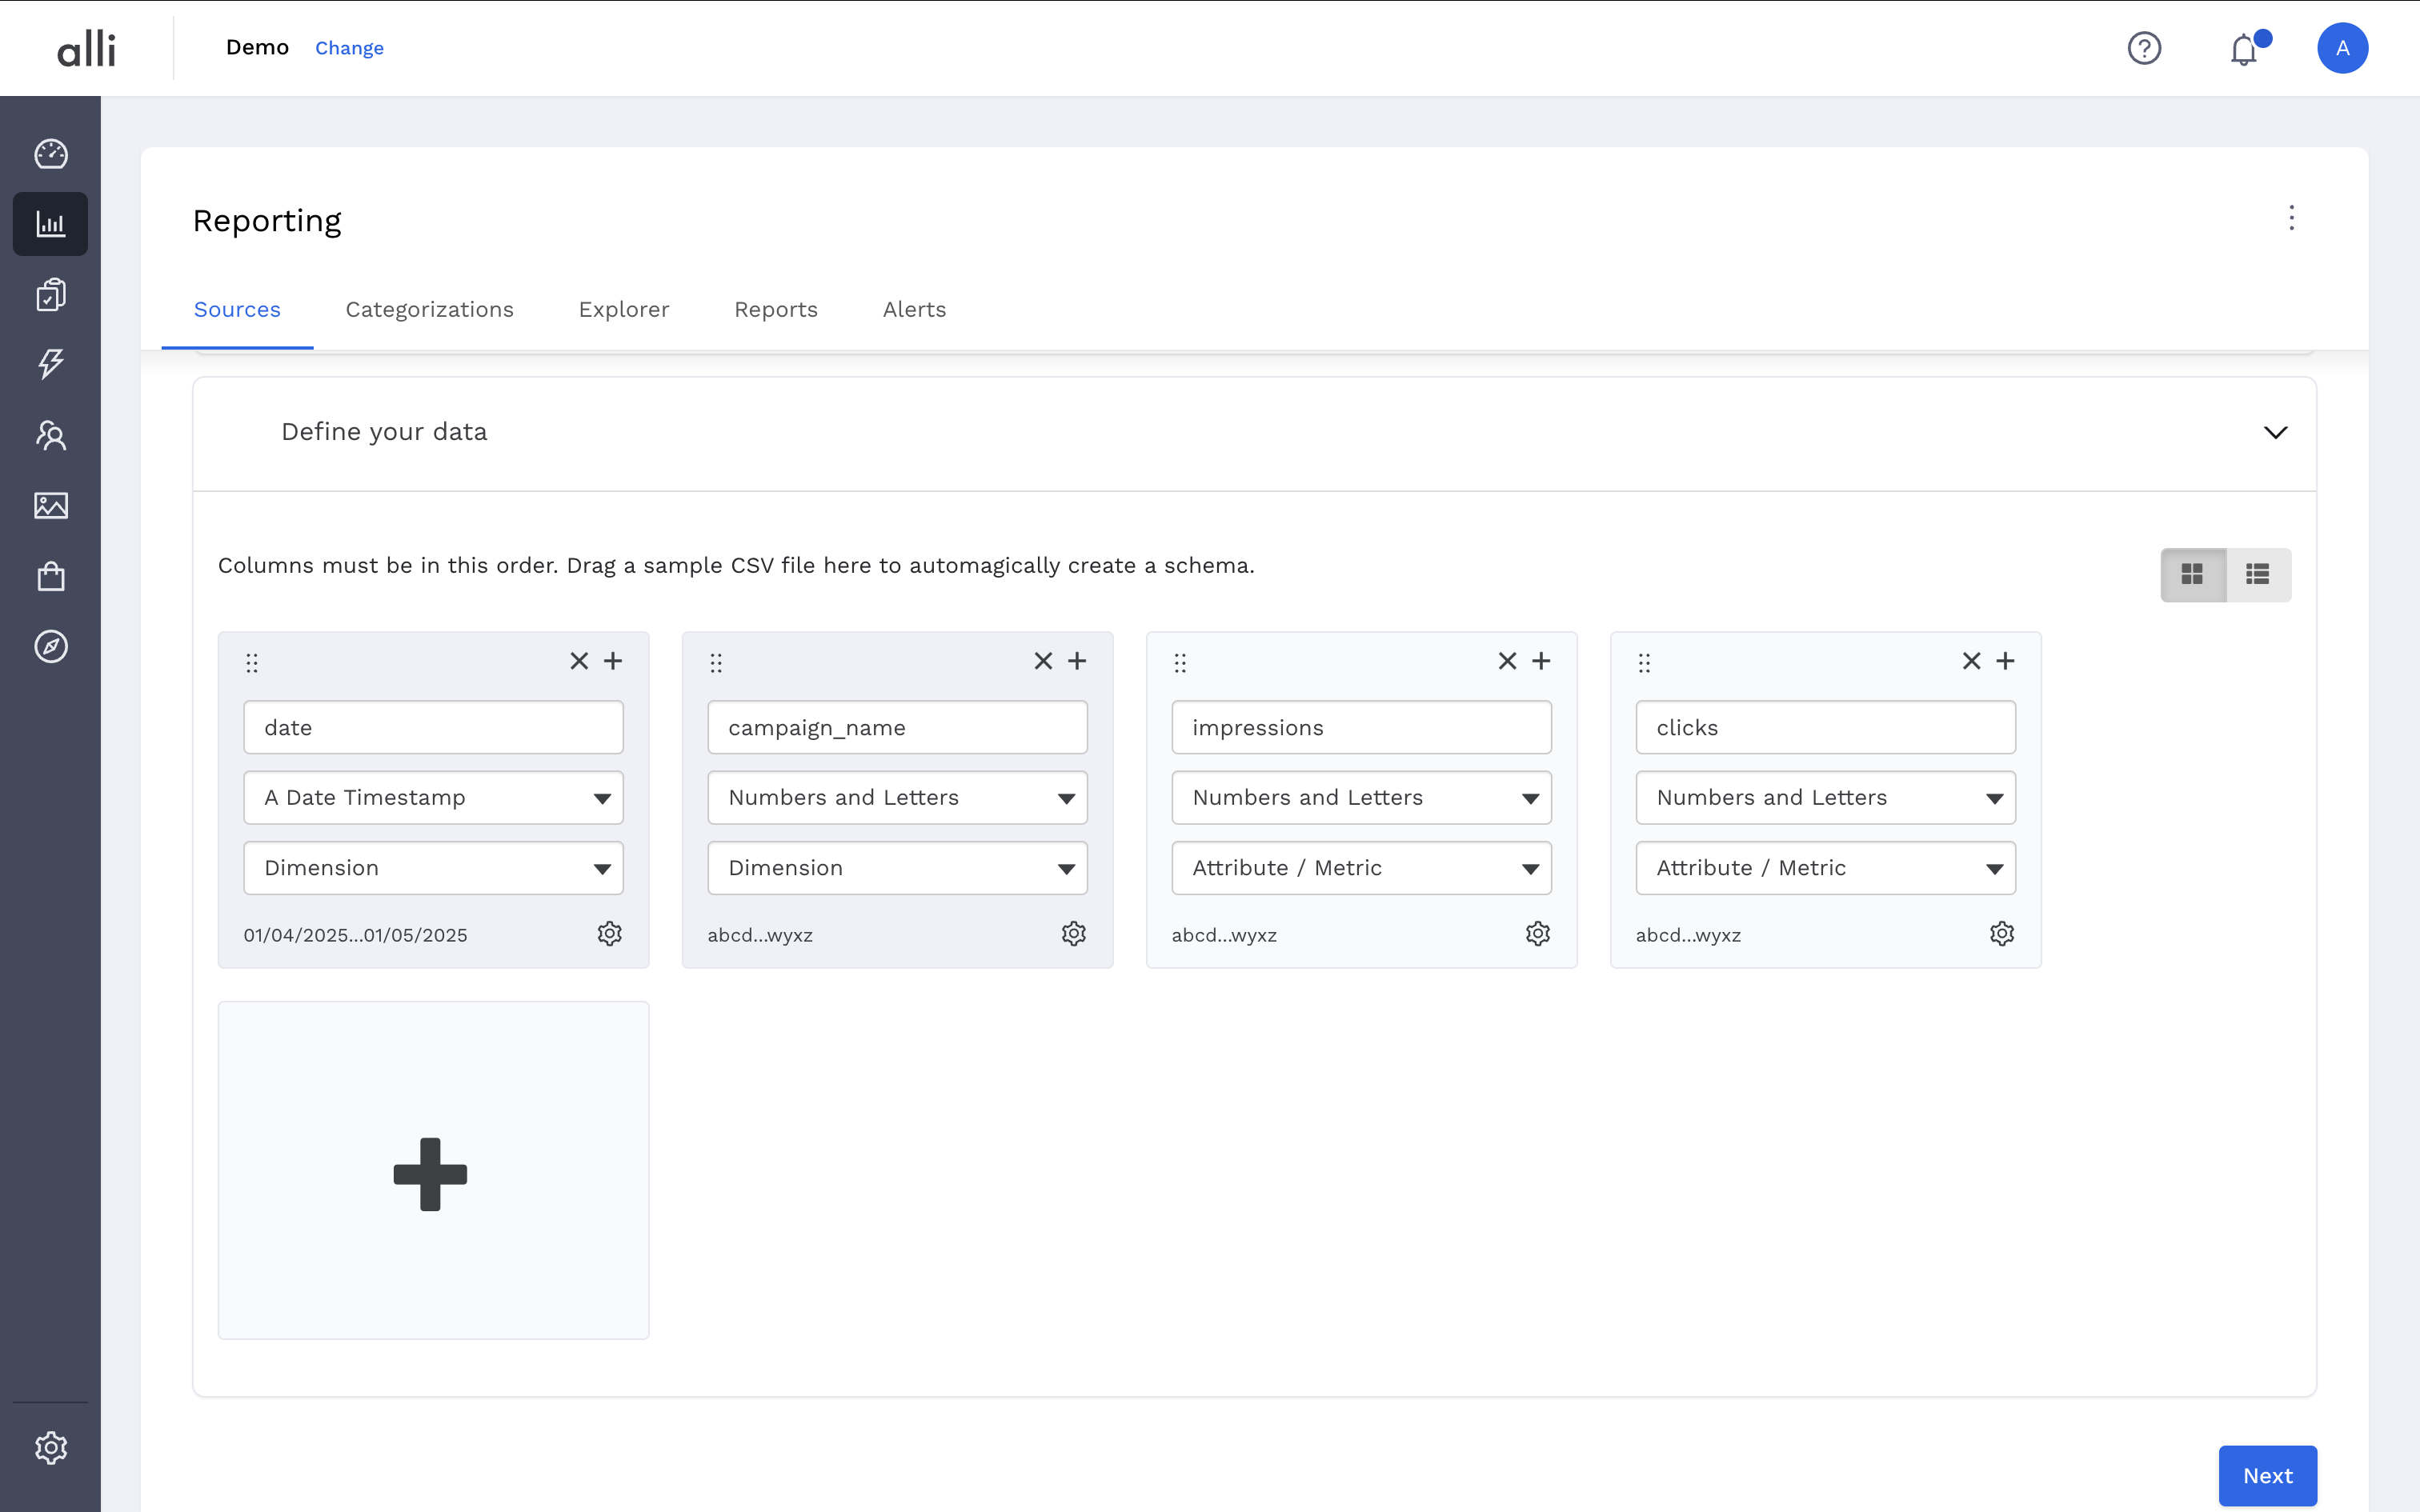
In the Define your data section, add the columns that align to the columns in your external source and click Next.
To learn more about setting up datasource columns, check out this guide: How-To: Setup a datasource that requires custom data
-
Your datasource is now set up and will import data on an automated schedule. To load data now, click the Load Data button.

Related articles
- How-To: Use categorizations within your custom report
- How-to add a new datasource to an existing Data Studio dashboard
- Advanced Guide: Enabling Big Query for a Custom Alert
- How-To: Name Datasource Columns
- How-To: Enable Product Feed Reporting
- How-To: Include Custom DSP Cost in Display Reporting
- How-To: Add a new categorization
- Tutorial: Getting started with Explorer Reports
- How-To: Backfill a datasource
- How-To: Categorize CM360 Conversions
- How-To: Create a new datasource
- How-to Create a Sentiment Dashboard from FB Sentiment
- How-To: Identify Which Platforms and Report Types are Enabled for Reporting
- How-To: Enable Device and Demographic Reporting
- How-To: Manually upload data to an existing datasource
- How-To: Enable Hourly Reporting
- How-To: Reclassify Media Channel
- How-To: Add New Accounts for an Existing Platform
- How-To: Update datasource owner
- How-To: View datasource errors and warnings
- How-To: Locate Source Data Used in Reporting
- How To: Debugging Discrepancies in Alli Data Library