This step-by-step tutorial will guide you through setting up Performance Max in Alli, linking your Google Ads account, and managing your first campaign.
Step 1: Access the Performance Max Tool
-
Log in to Alli.
-
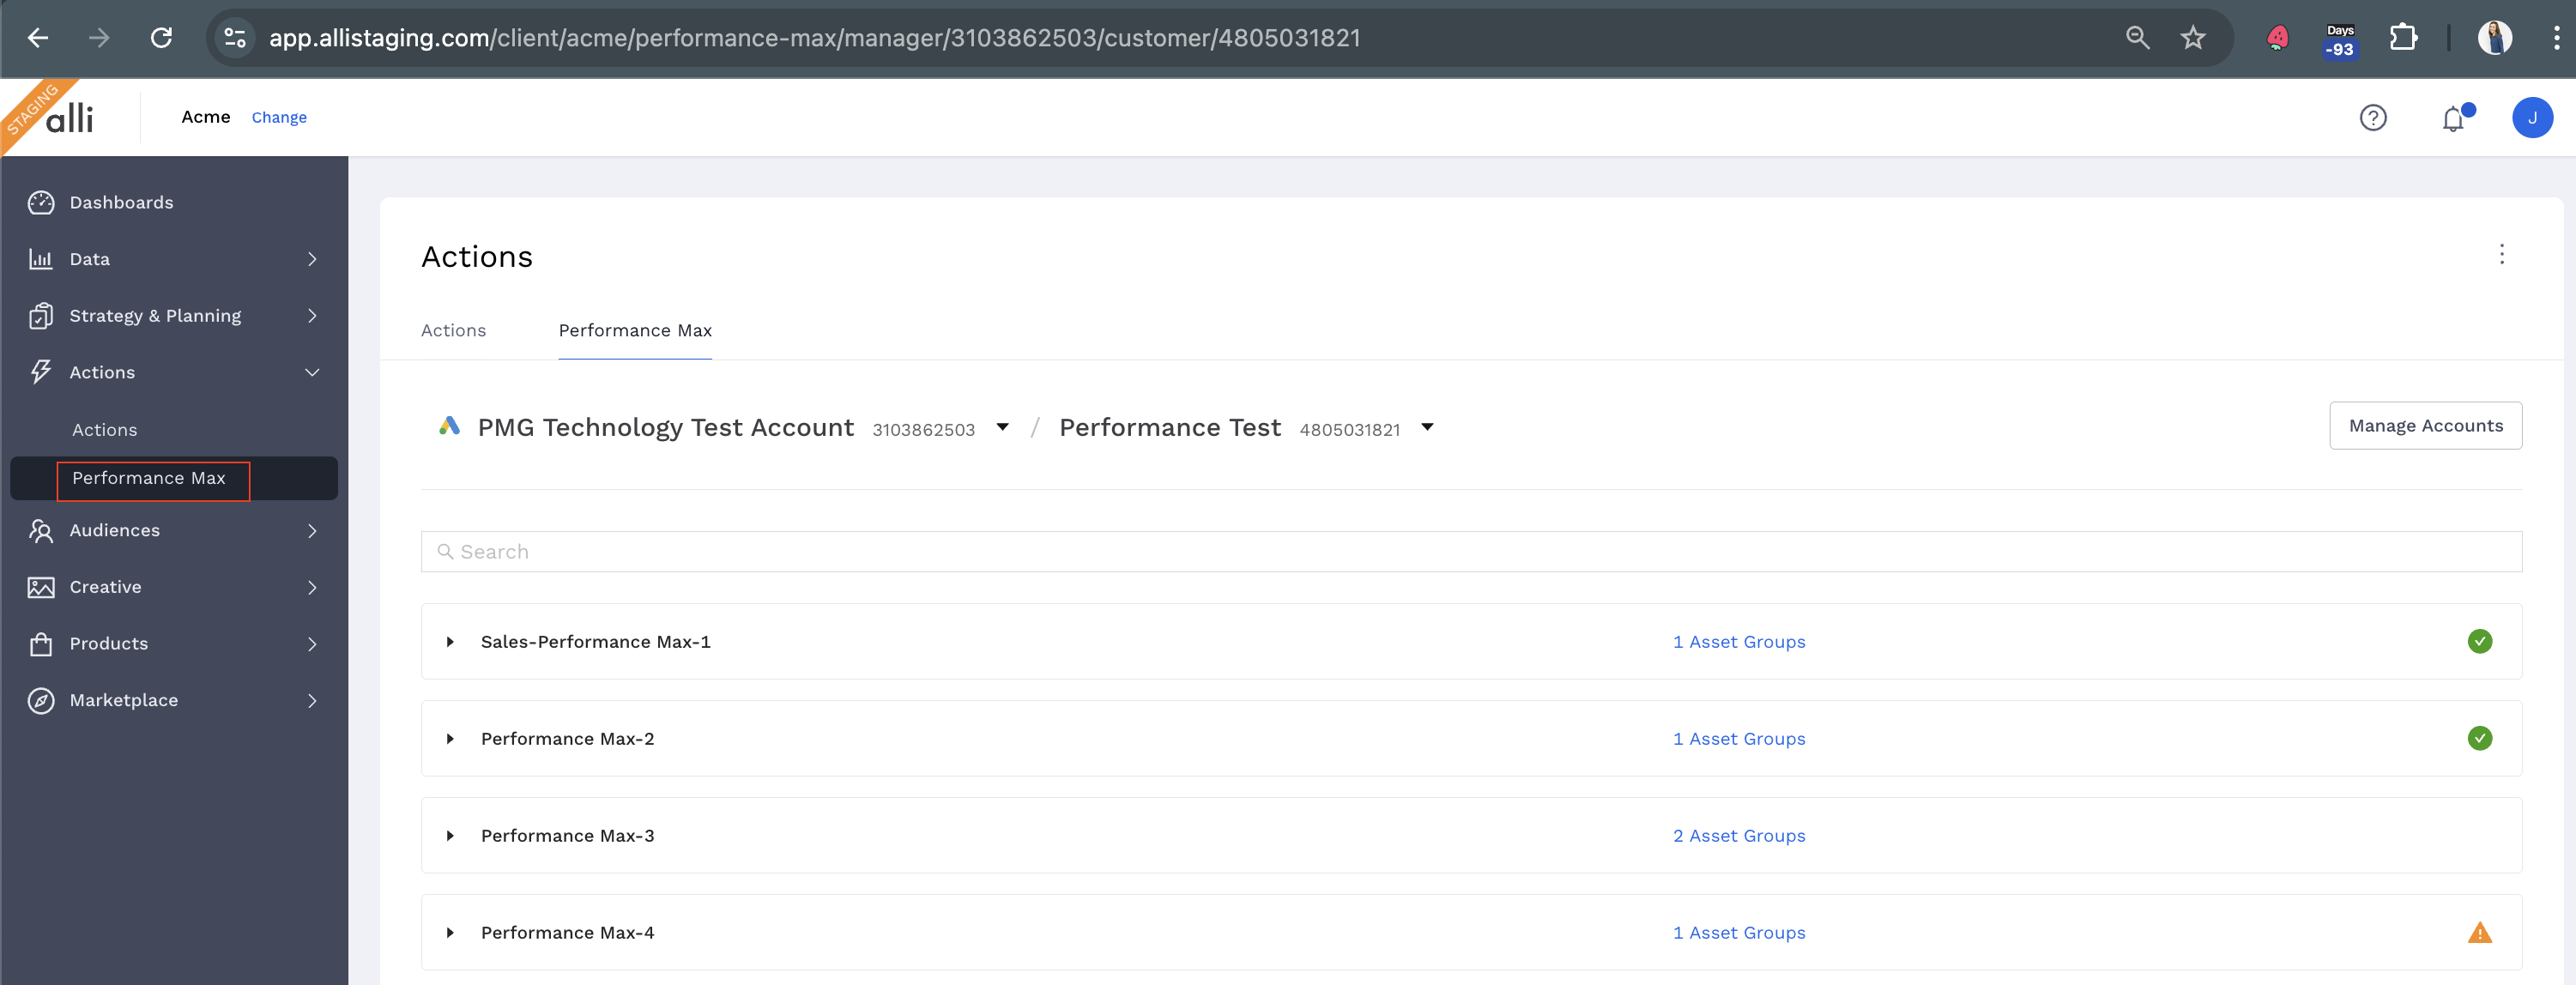
In the side navigation, go to Actions > Performance Max.

Step 2: Link Your Google Ads Account
-
Click the Manage Account button.
-
Follow the prompts to link your Google Ads account.
-
This process may take a few minutes so wait 5-10 minutes to refresh the page to verify the connection.
Step 3: Explore the Landing Page
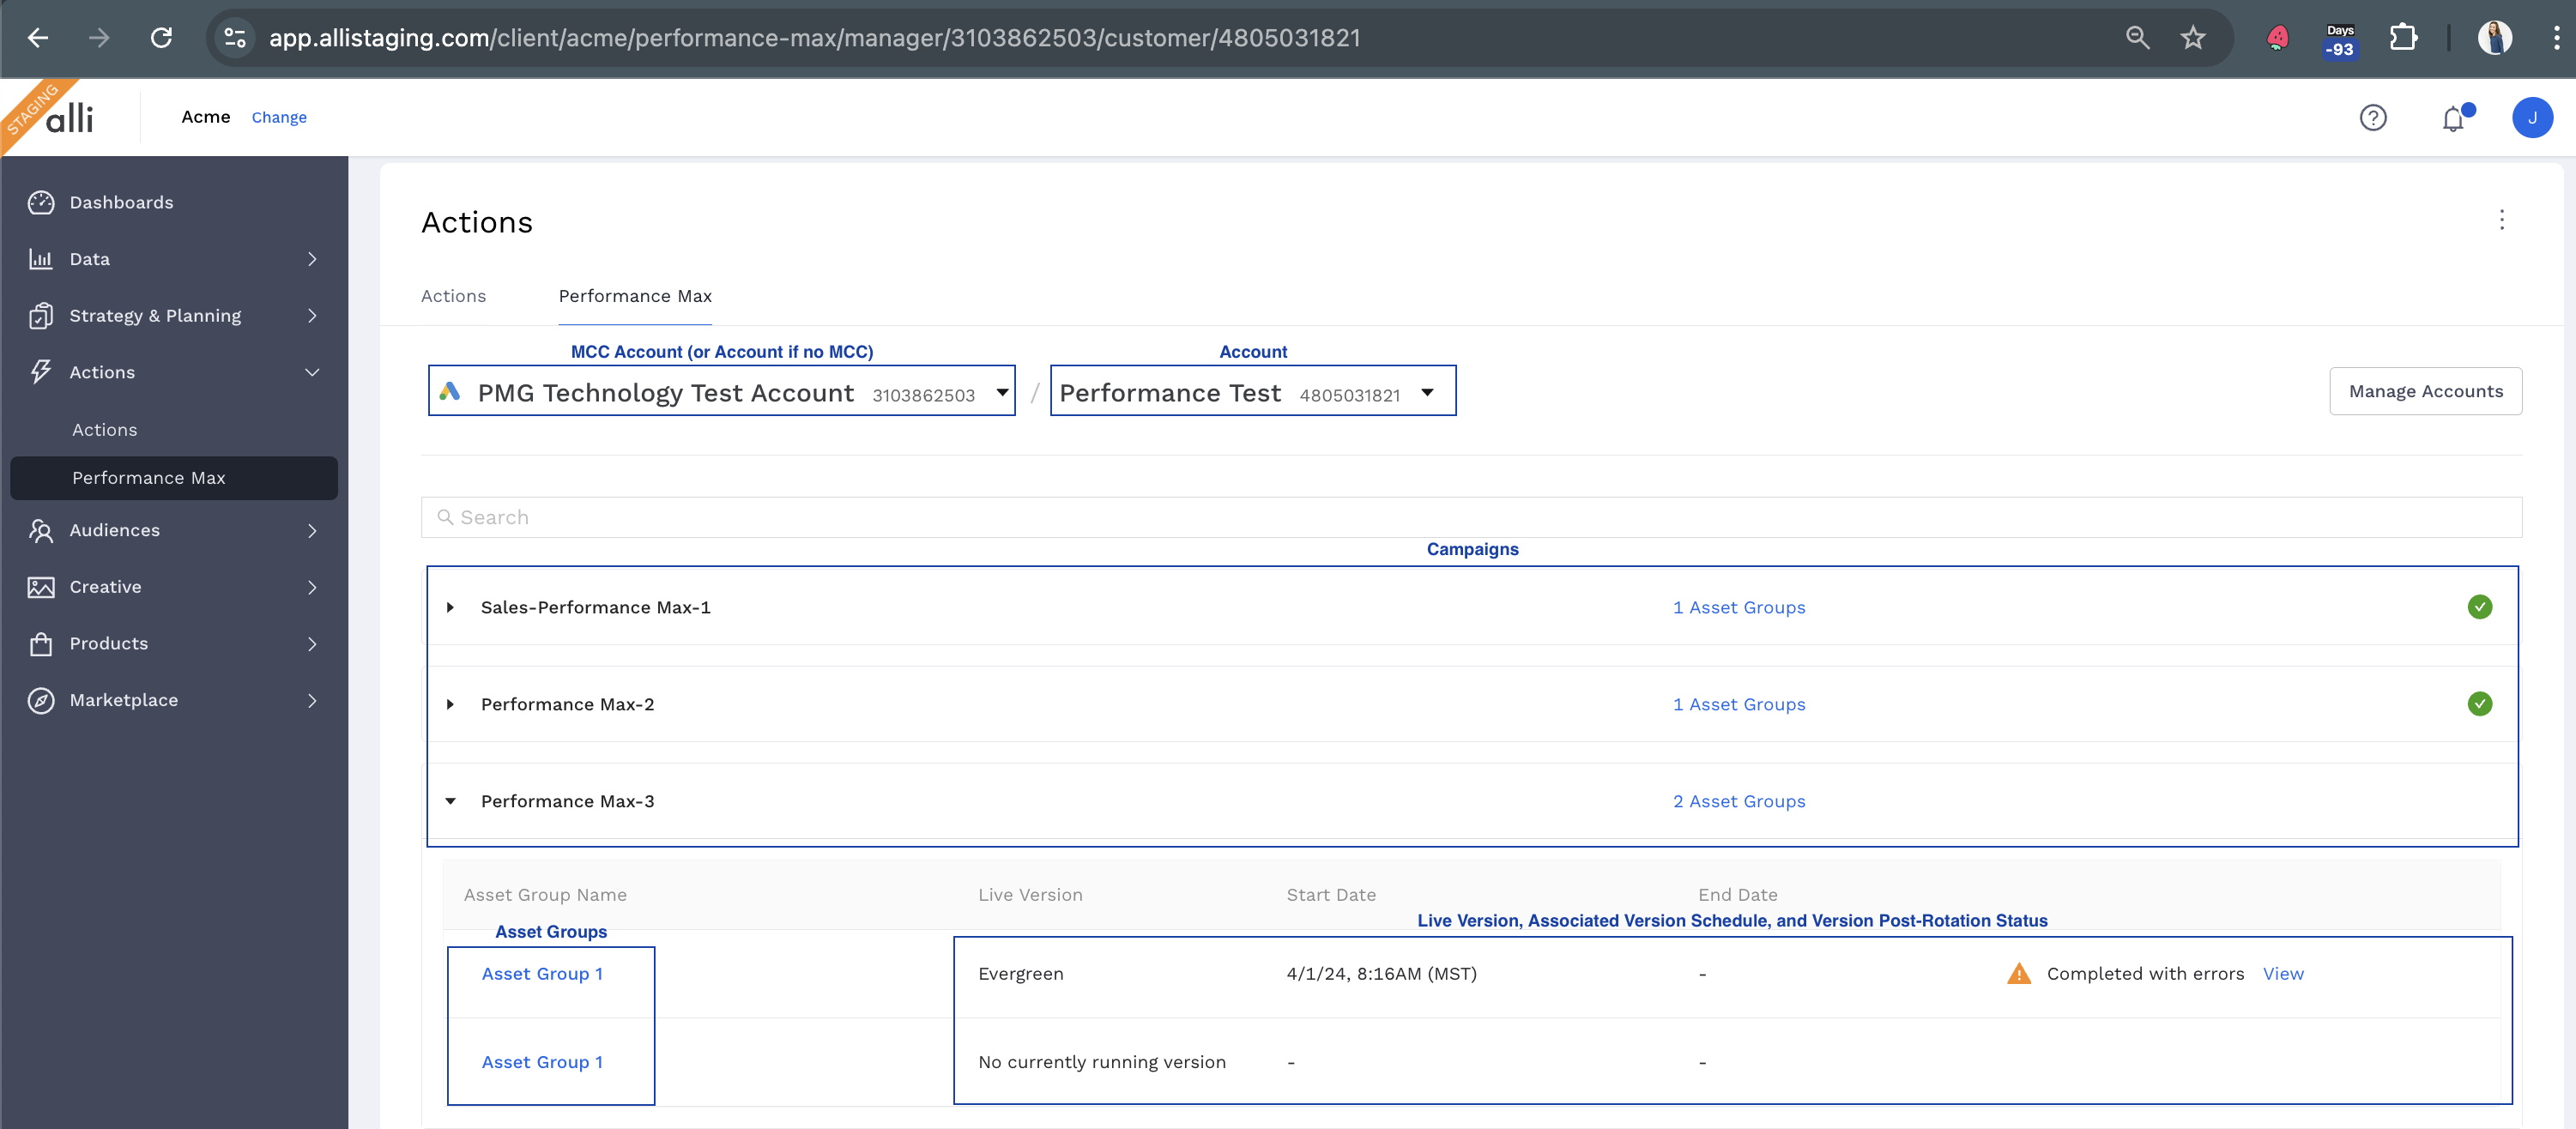
After linking your account, you’ll be redirected to the main Performance Max landing page. Here you can:
-
View all Google Ads accounts you have access to.
-
Select an account to display its Performance Max campaigns and Asset Groups.
-
See details for each Asset Group, including:
-
The currently live version (or No currently running version if none have ran or created yet).
-
The schedule for the current version.
-
The status of last version rotation.
-
Note: If your client uses a Manager Account (MCC), ensure it has access to all accounts you wish to manage.
Anatomy of the Landing Page

Step 4: Set Up Your Evergreen Version
Alli for Performance Max uses versions to manage creative assets such as images, video URLs, headlines, and descriptions. A version is a set of assets designed to align with specific promotional messaging for a selected Asset Group.
The Evergreen Version is the foundation of your Performance Max campaigns. It contains your default brand messaging assets and ensures there’s always active content in your Asset Groups. Anytime no other versions (e.g., promotional or seasonal) are live, the Evergreen Version will automatically rotate in to keep your campaigns running seamlessly.

To begin managing assets:
-
Select an Asset Group from your campaign.
-
Click New Version to begin creating your first Evergreen version
-
Add your assets:
-
Text Assets: Headlines, long headlines, and descriptions.
-
Image Assets: Marketing Image (1.91:1), Square Marketing Image (1:1), Portrait Marketing Image (4:5), Logo (1:1), and Landscape Logo (4:1).
-
Video Assets: Include YouTube links.
-
Final URL: Enter the destination URL.
-
Click Save to finalize your Evergreen Version.
-
If you want the Evergreen Version to go live immediately, click Save and Run Now.
-
FAQ:
I only need to schedule one type of image to flip with my version (ex: only my Square Marketing Images need to swap, I want to keep the other ones with whatever is already in the Asset group)
-
No Images Provided: If you don't supply any image assets, your version will only update the text assets. Any existing images in Google Ads will remain unchanged.
-
Minimum Images Required: For required image types, you must provide at least the minimum number of images specified by Google. Optional image types don't need to be included, but if you leave them out, those images will be cleared when the version runs.
-
Required: Marketing, Square Marketing & Logo Images
-
Optional: Portrait Marketing & Landscape Logo Images
-
-
Summary: Required image types are all or nothing—you must either provide no images or meet Google's minimum requirements.
-
Once your Evergreen Version is created, you can proceed to Step 5 create Scheduled Versions for promotions or seasonal updates.
Step 5: Create Scheduled Versions
Scheduled Versions allow you to define specific timeframes for promotional or seasonal assets to run in your campaigns. These versions override the Evergreen Version during their scheduled time.
To create a scheduled version:
-
Select an Asset Group from your campaign.
-
Click New Version to begin
-
Enter the version name (e.g., “Holiday Promo 2024”).
-
Define the Start Date and End Date for when the version should be live.
-
Add your assets:
-
Text Assets: Headlines, long headlines, and descriptions.
-
Image Assets: Marketing Image (1.91:1), Square Marketing Image (1:1), Portrait Marketing Image (4:5), Logo (1:1), and Landscape Logo (4:1).
-
Video Assets: Include YouTube links.
-
Final URL: Enter the destination URL.
-
-
Click Save to schedule the version.
Key Notes
-
Scheduled Versions take precedence over the Evergreen Version during their active dates.
-
Ensure the schedule does not overlap with other versions, as only one set of assets can be live at any time.
Step 6: Check the Status and Performance of Your Updates
After setting up your Evergreen and Scheduled Versions, monitoring their statuses is key to ensuring your campaigns run smoothly. Alli provides visibility into version statuses directly from the main landing page and the All Versions page.
For a detailed guide to understanding your version status, refer to the How-To: Understanding Version Statuses .
Now that you’re set up, explore these helpful guides to enhance your workflow:
-
FAQs on Performance Max