
Overview
The Advanced Settings for a datasource gives you more control over how your data is being imported into Alli.
Instructions
-
To update the Advanced Settings for a datasource, navigate to the datasource configuration page.

-
Open the Advanced Settings panel and make any changes you need. Click Save in the lower left of the screen to save the changes.
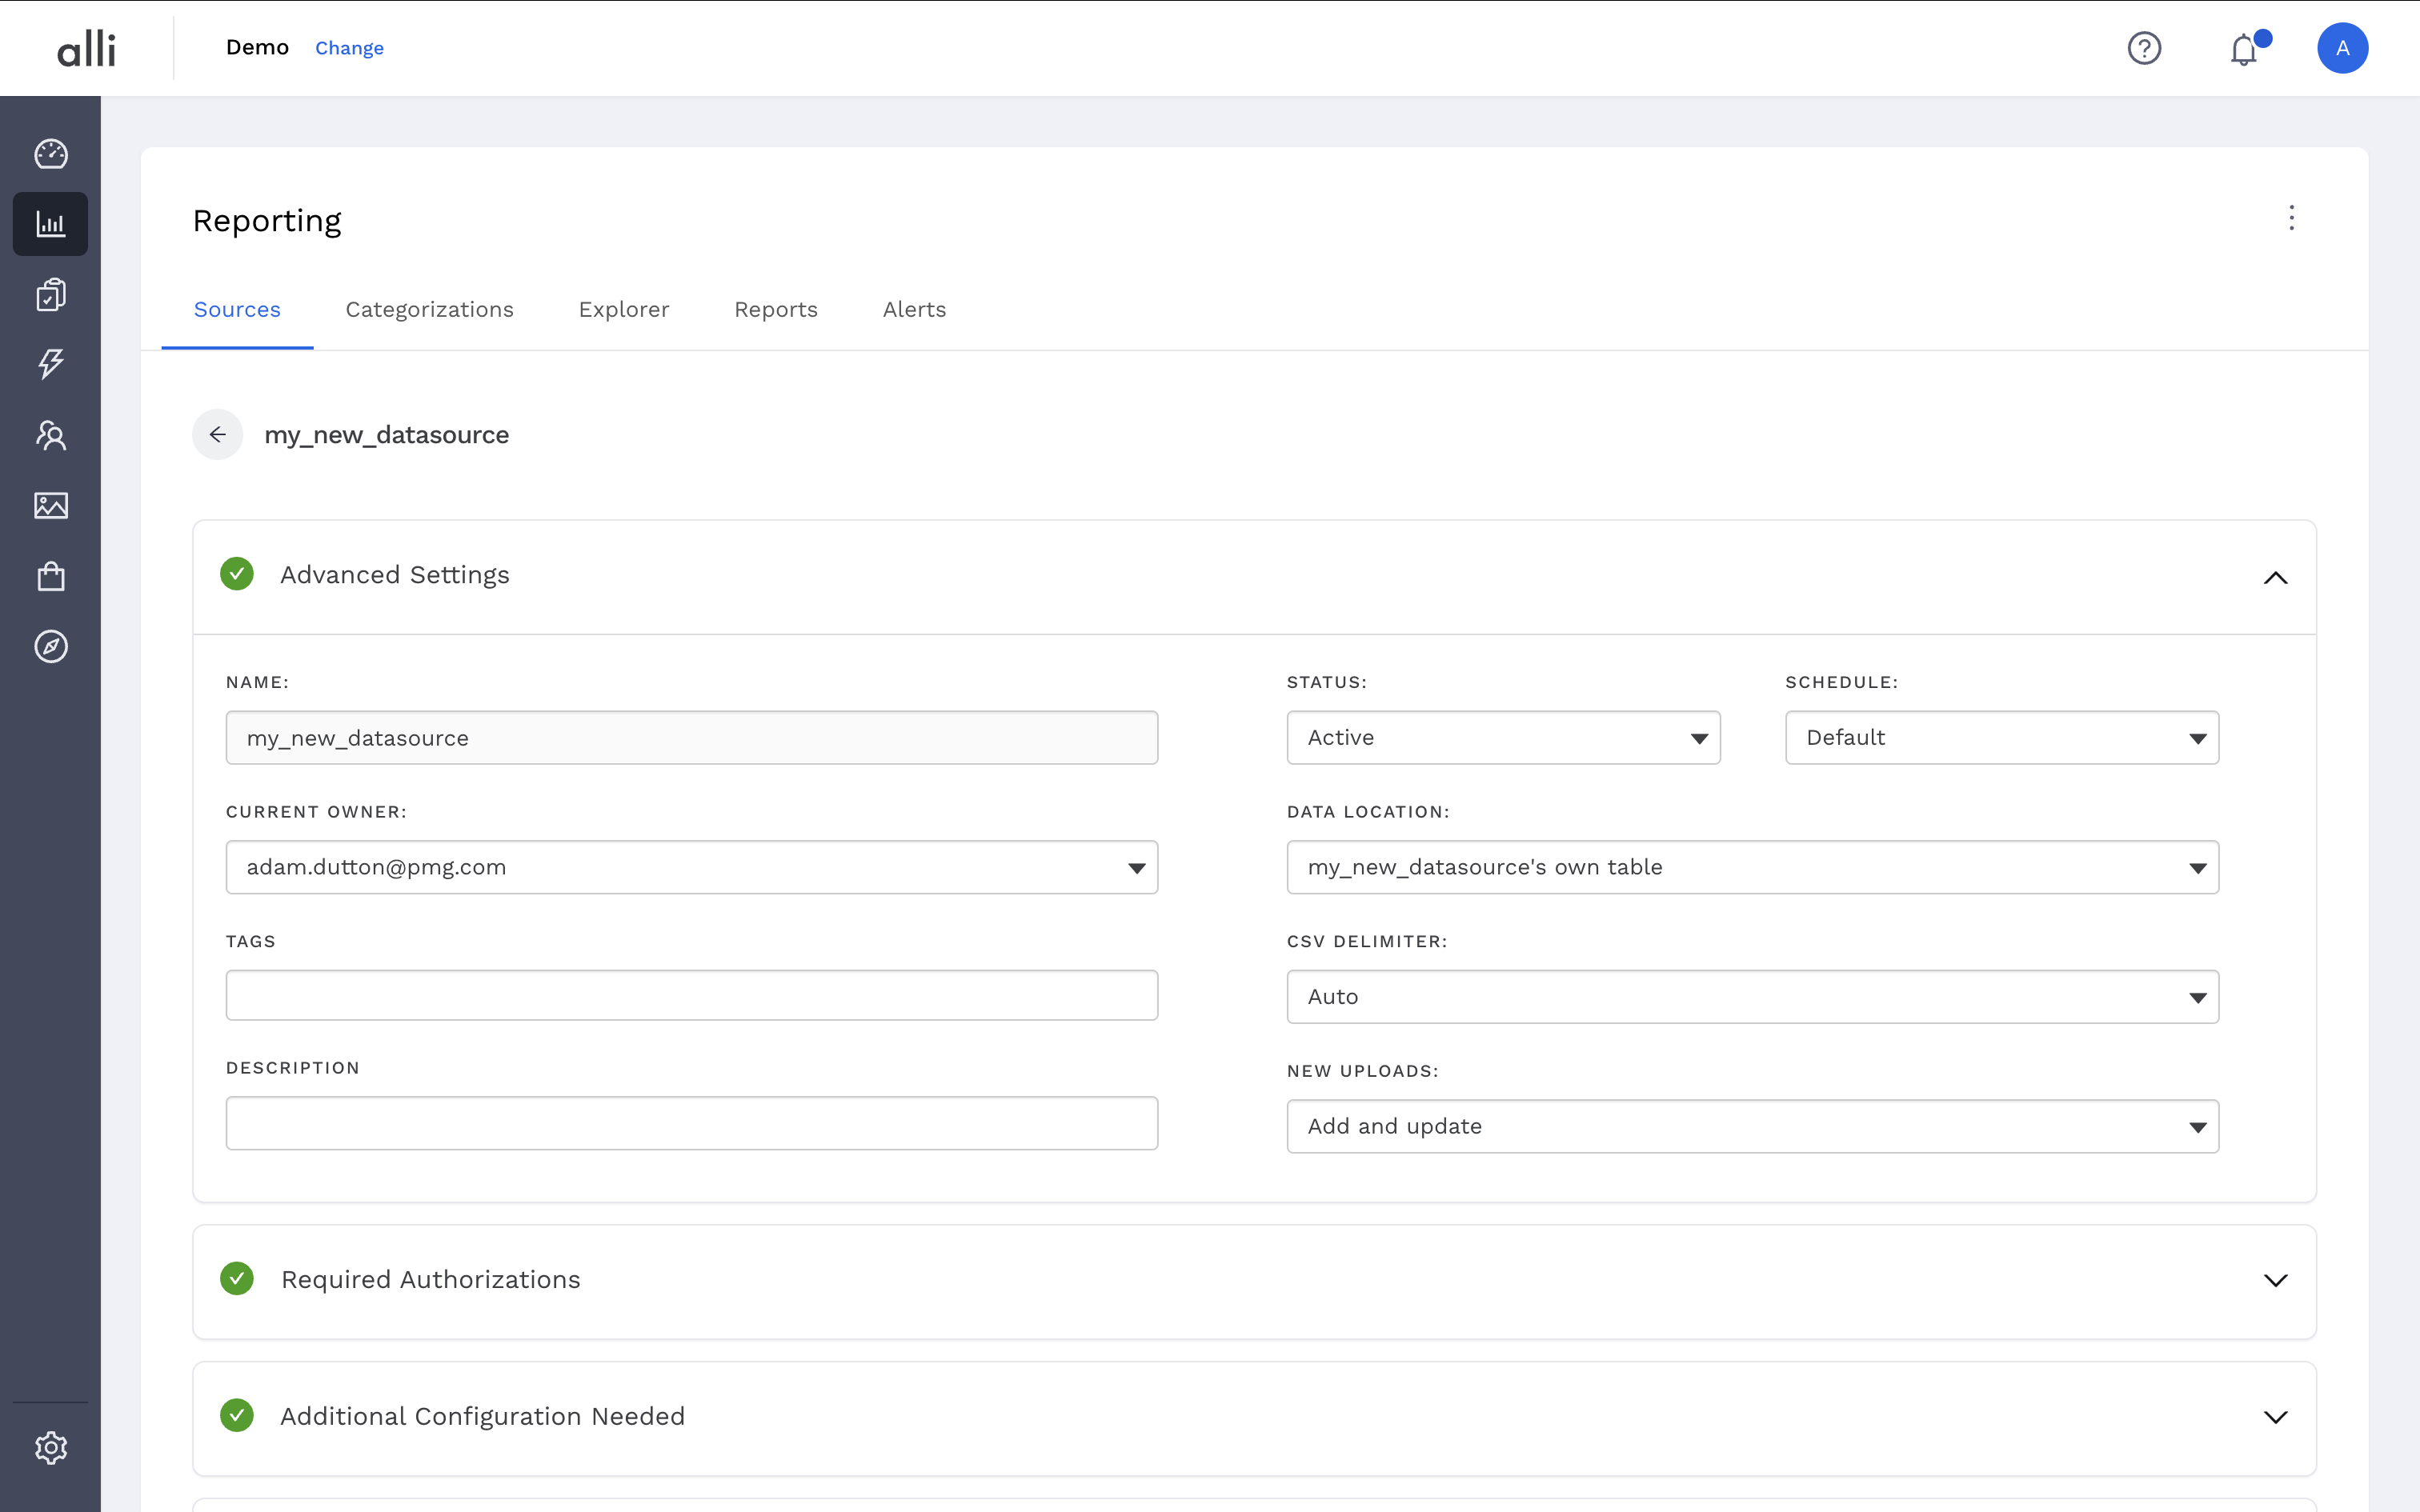
Advanced Settings Configuration Options
-
Current Owner: Indicates who can make updates to the datasource and what email will receive notifications about the datasource.
-
Tags: Indicates which tags are applied to the datasource. More can be added or removed.
-
Description: Indicates what this data is being used for.
-
Status: Indicates the current status of the datasource.
-
Active: The datasource is importing data on the automated schedule.
-
Inactive: The datasource is not importing data on the automated schedule.
-
Deleted: Deletes the datasource from Alli.
-
-
Schedule: Indicates the cadence of data imports.
-
Default: The datasource is importing data on the normal automated schedule.
-
Real Time: The datasource is importing data on an hourly cadence.
-
-
Data Location: The location of where the data is being imported. This can be it’s own table or an existing table.
-
CSV Delimiter: The symbol Alli should use to parse CSV files, if applicable.
-
New Uploads: The mechanism for how Alli will insert data into the Data Location.
-
Add and update: Alli will add any new rows or update any existing rows based on the datasources dimensions and attributes.
-
Replace: Alli will replace the entire existing table’s data with the new data on each import.
-
Replace date range: Alli will delete and replace data for each date within the new data on each import. Requires a date column for the datasource.
-
Related articles
- How-To: Use categorizations within your custom report
- How-to add a new datasource to an existing Data Studio dashboard
- Advanced Guide: Enabling Big Query for a Custom Alert
- How-To: Name Datasource Columns
- How-To: Enable Product Feed Reporting
- How-To: Include Custom DSP Cost in Display Reporting
- How-To: Add a new categorization
- Tutorial: Getting started with Explorer Reports
- How-To: Backfill a datasource
- How-To: Categorize CM360 Conversions
- How-To: Create a new datasource
- How-to Create a Sentiment Dashboard from FB Sentiment
- How-To: Identify Which Platforms and Report Types are Enabled for Reporting
- How-To: Enable Device and Demographic Reporting
- How-To: Manually upload data to an existing datasource