
Overview
When you first set up a datasource, or if a data load is missing or incorrect, you may need to backfill it. Backfilling can be done in two ways:
-
Uploading a file containing the missing data
-
Selecting a date range to backfill using the partner API
Instructions
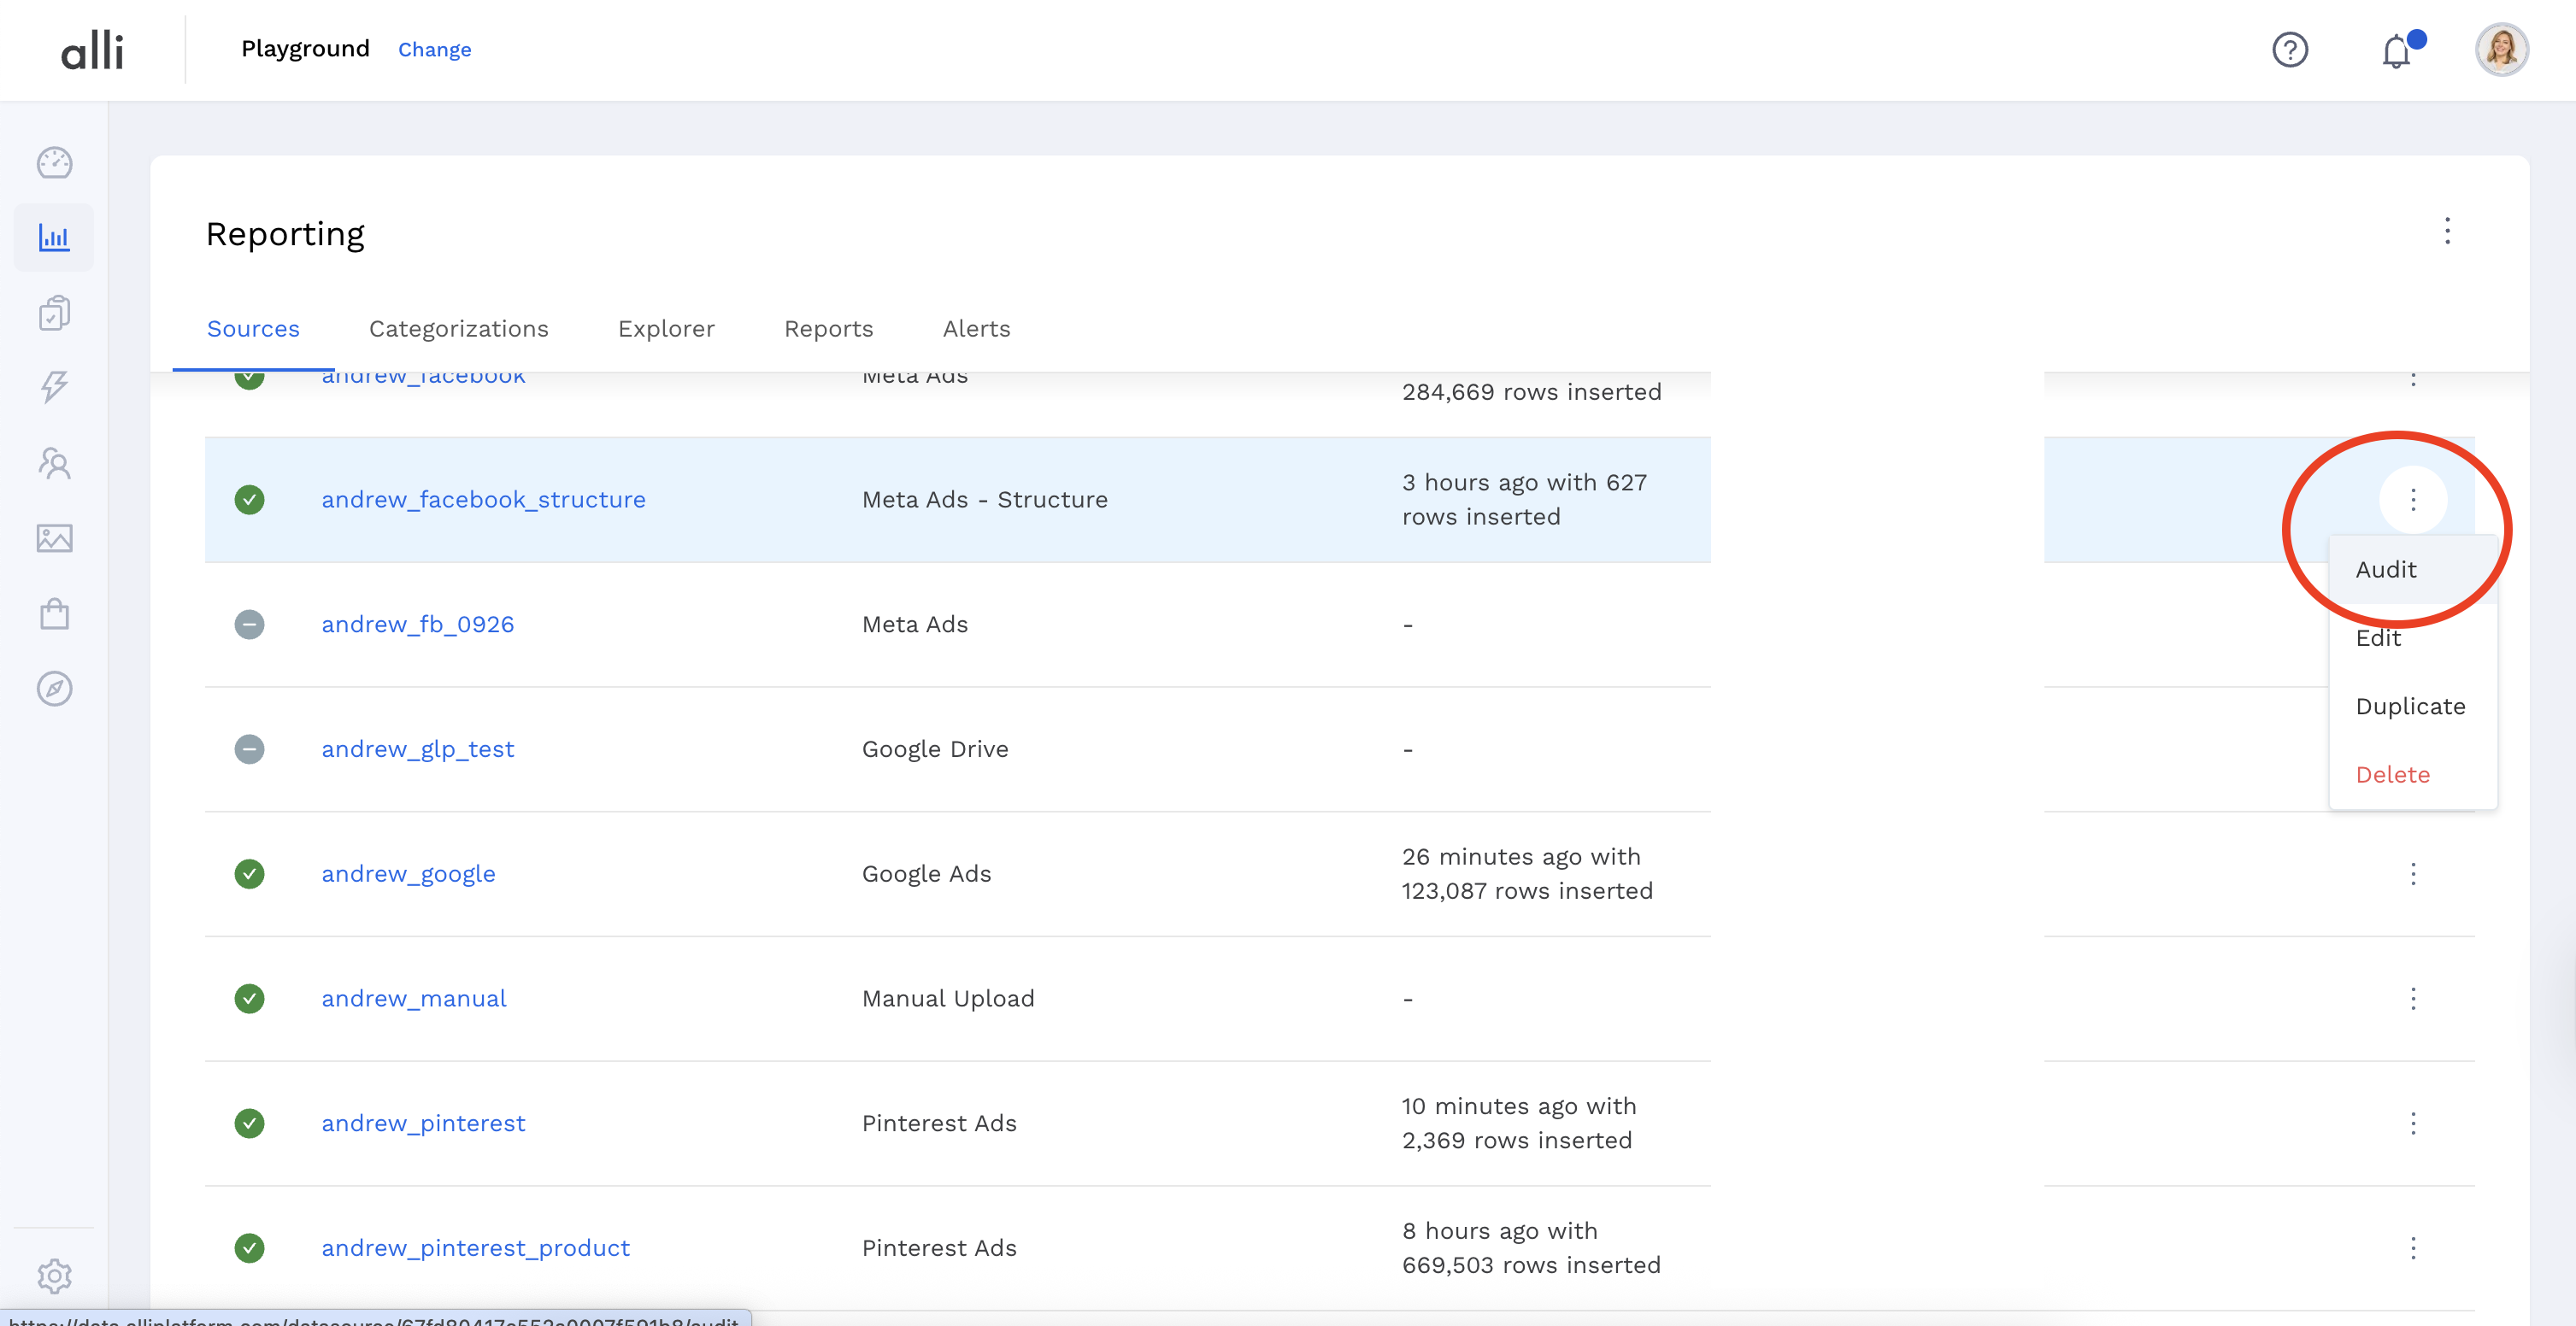
1. Data Deletion (If Needed)
If data already exists in the datasource for the dates you want to backfill, you must delete that data first.
How to delete data:
-
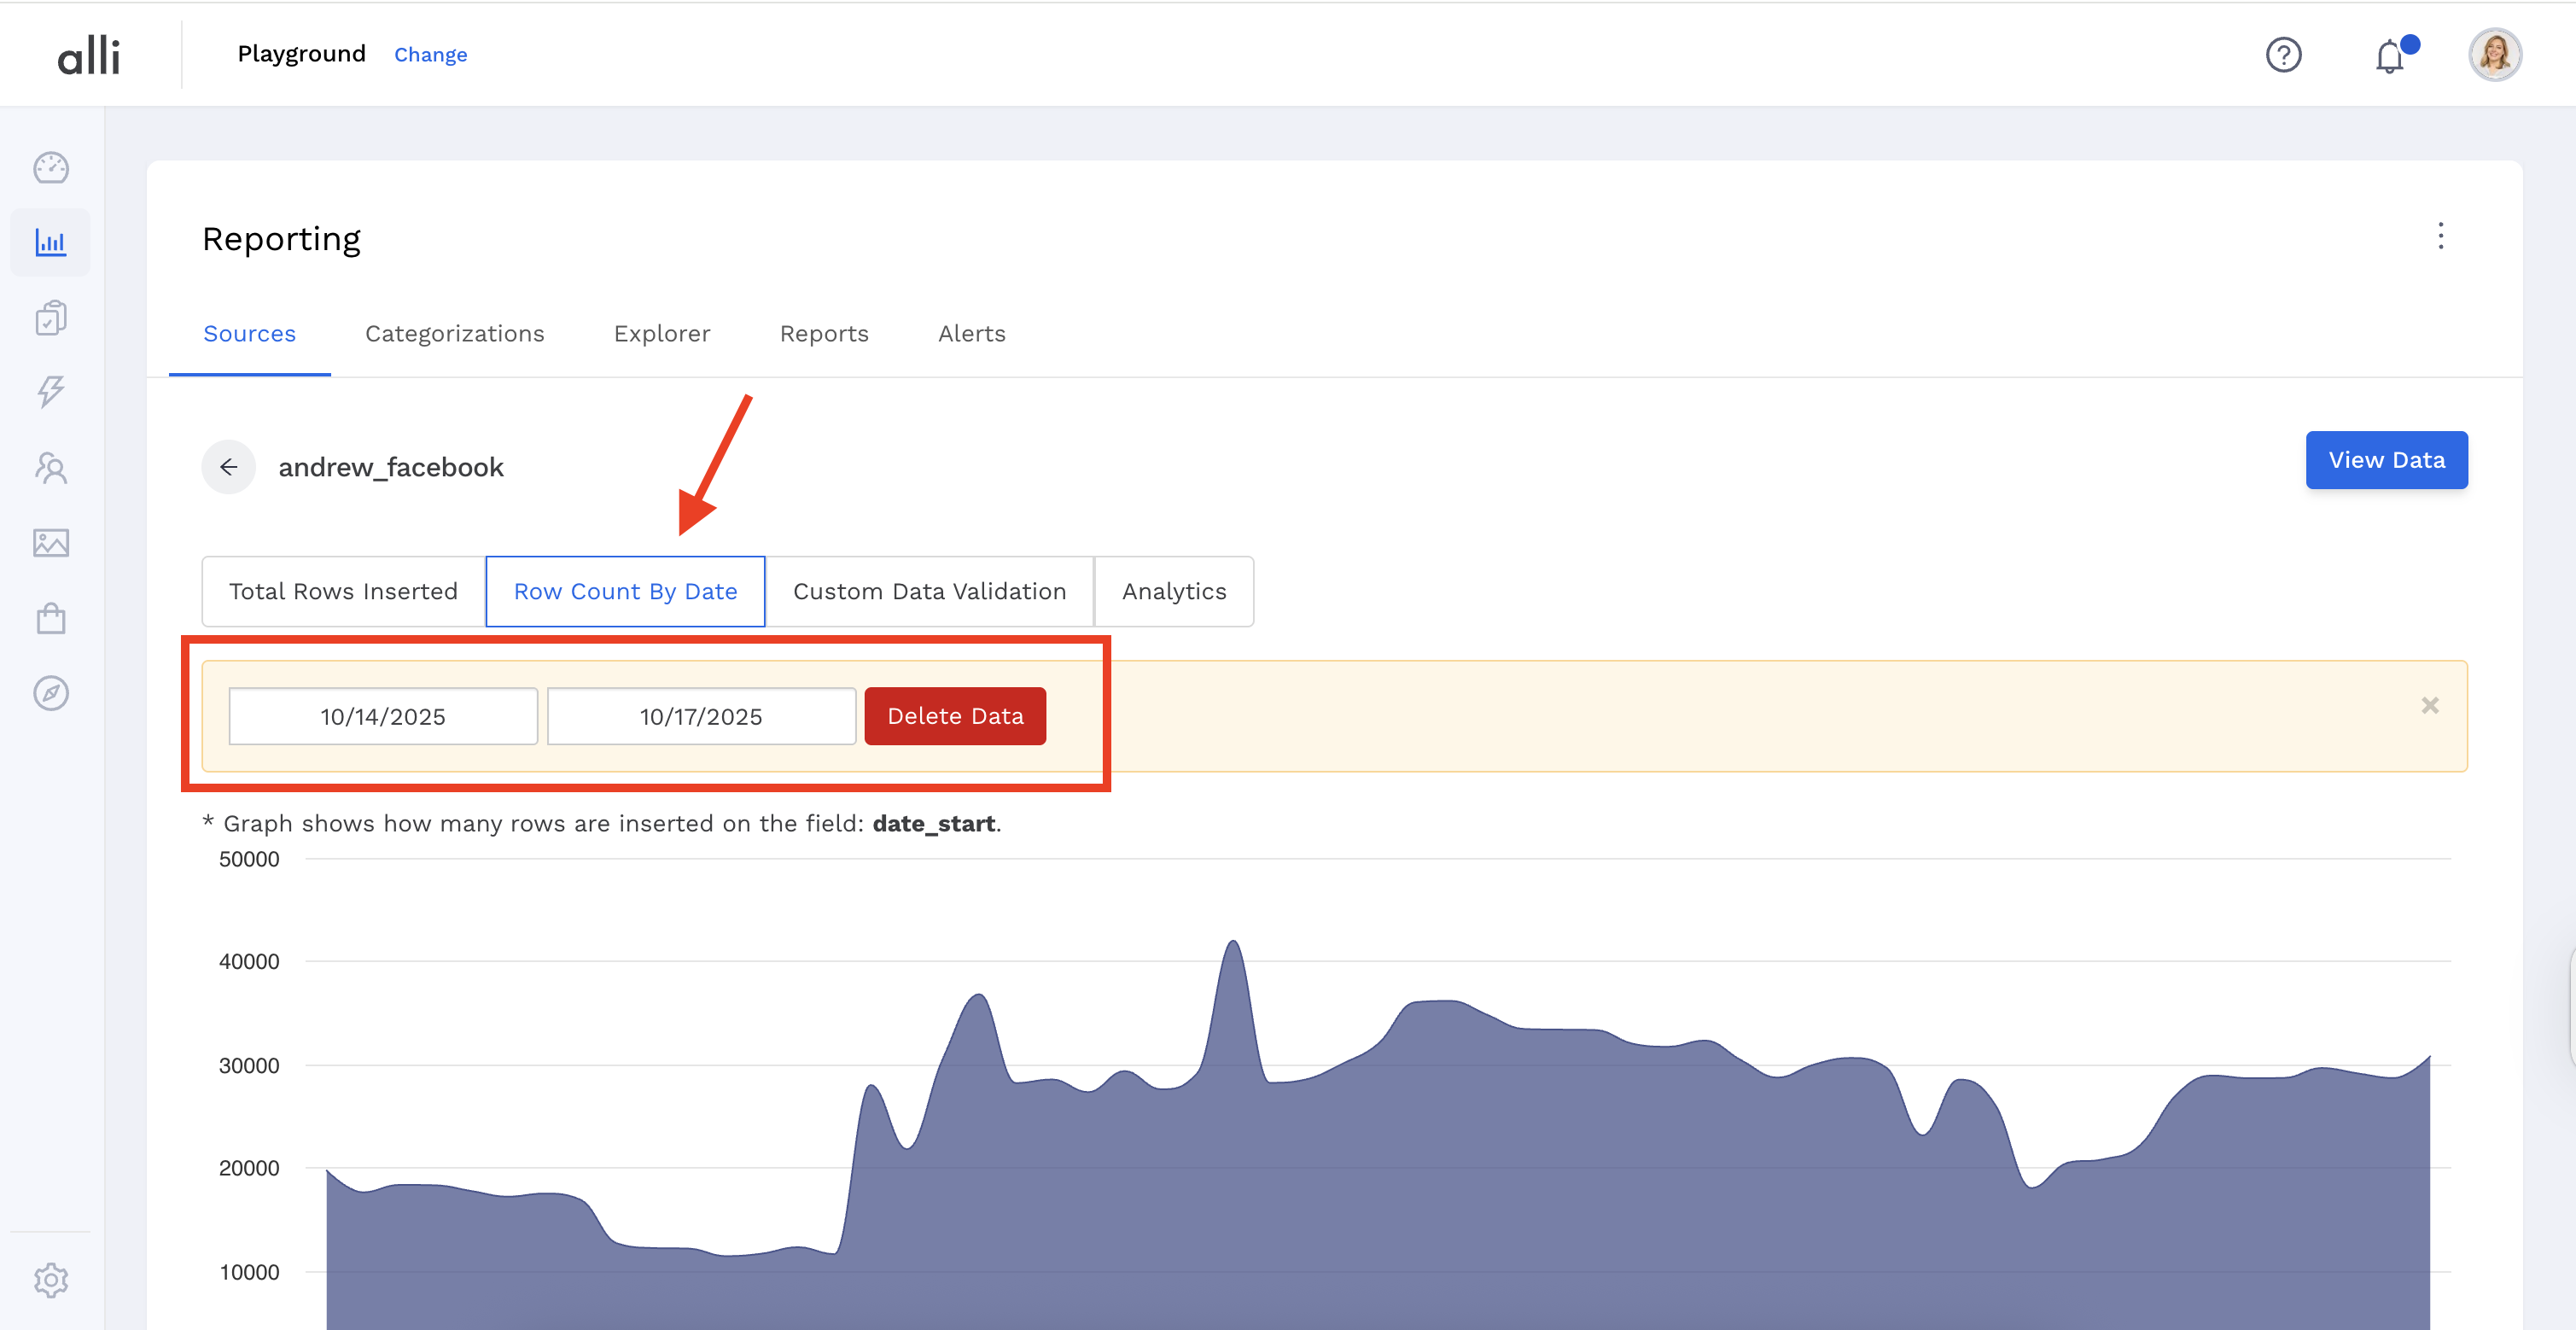
Go to the Audit tab within the datasource.
-
Open the Row Count By Date drop-down.
-
Delete the data for the relevant date range.
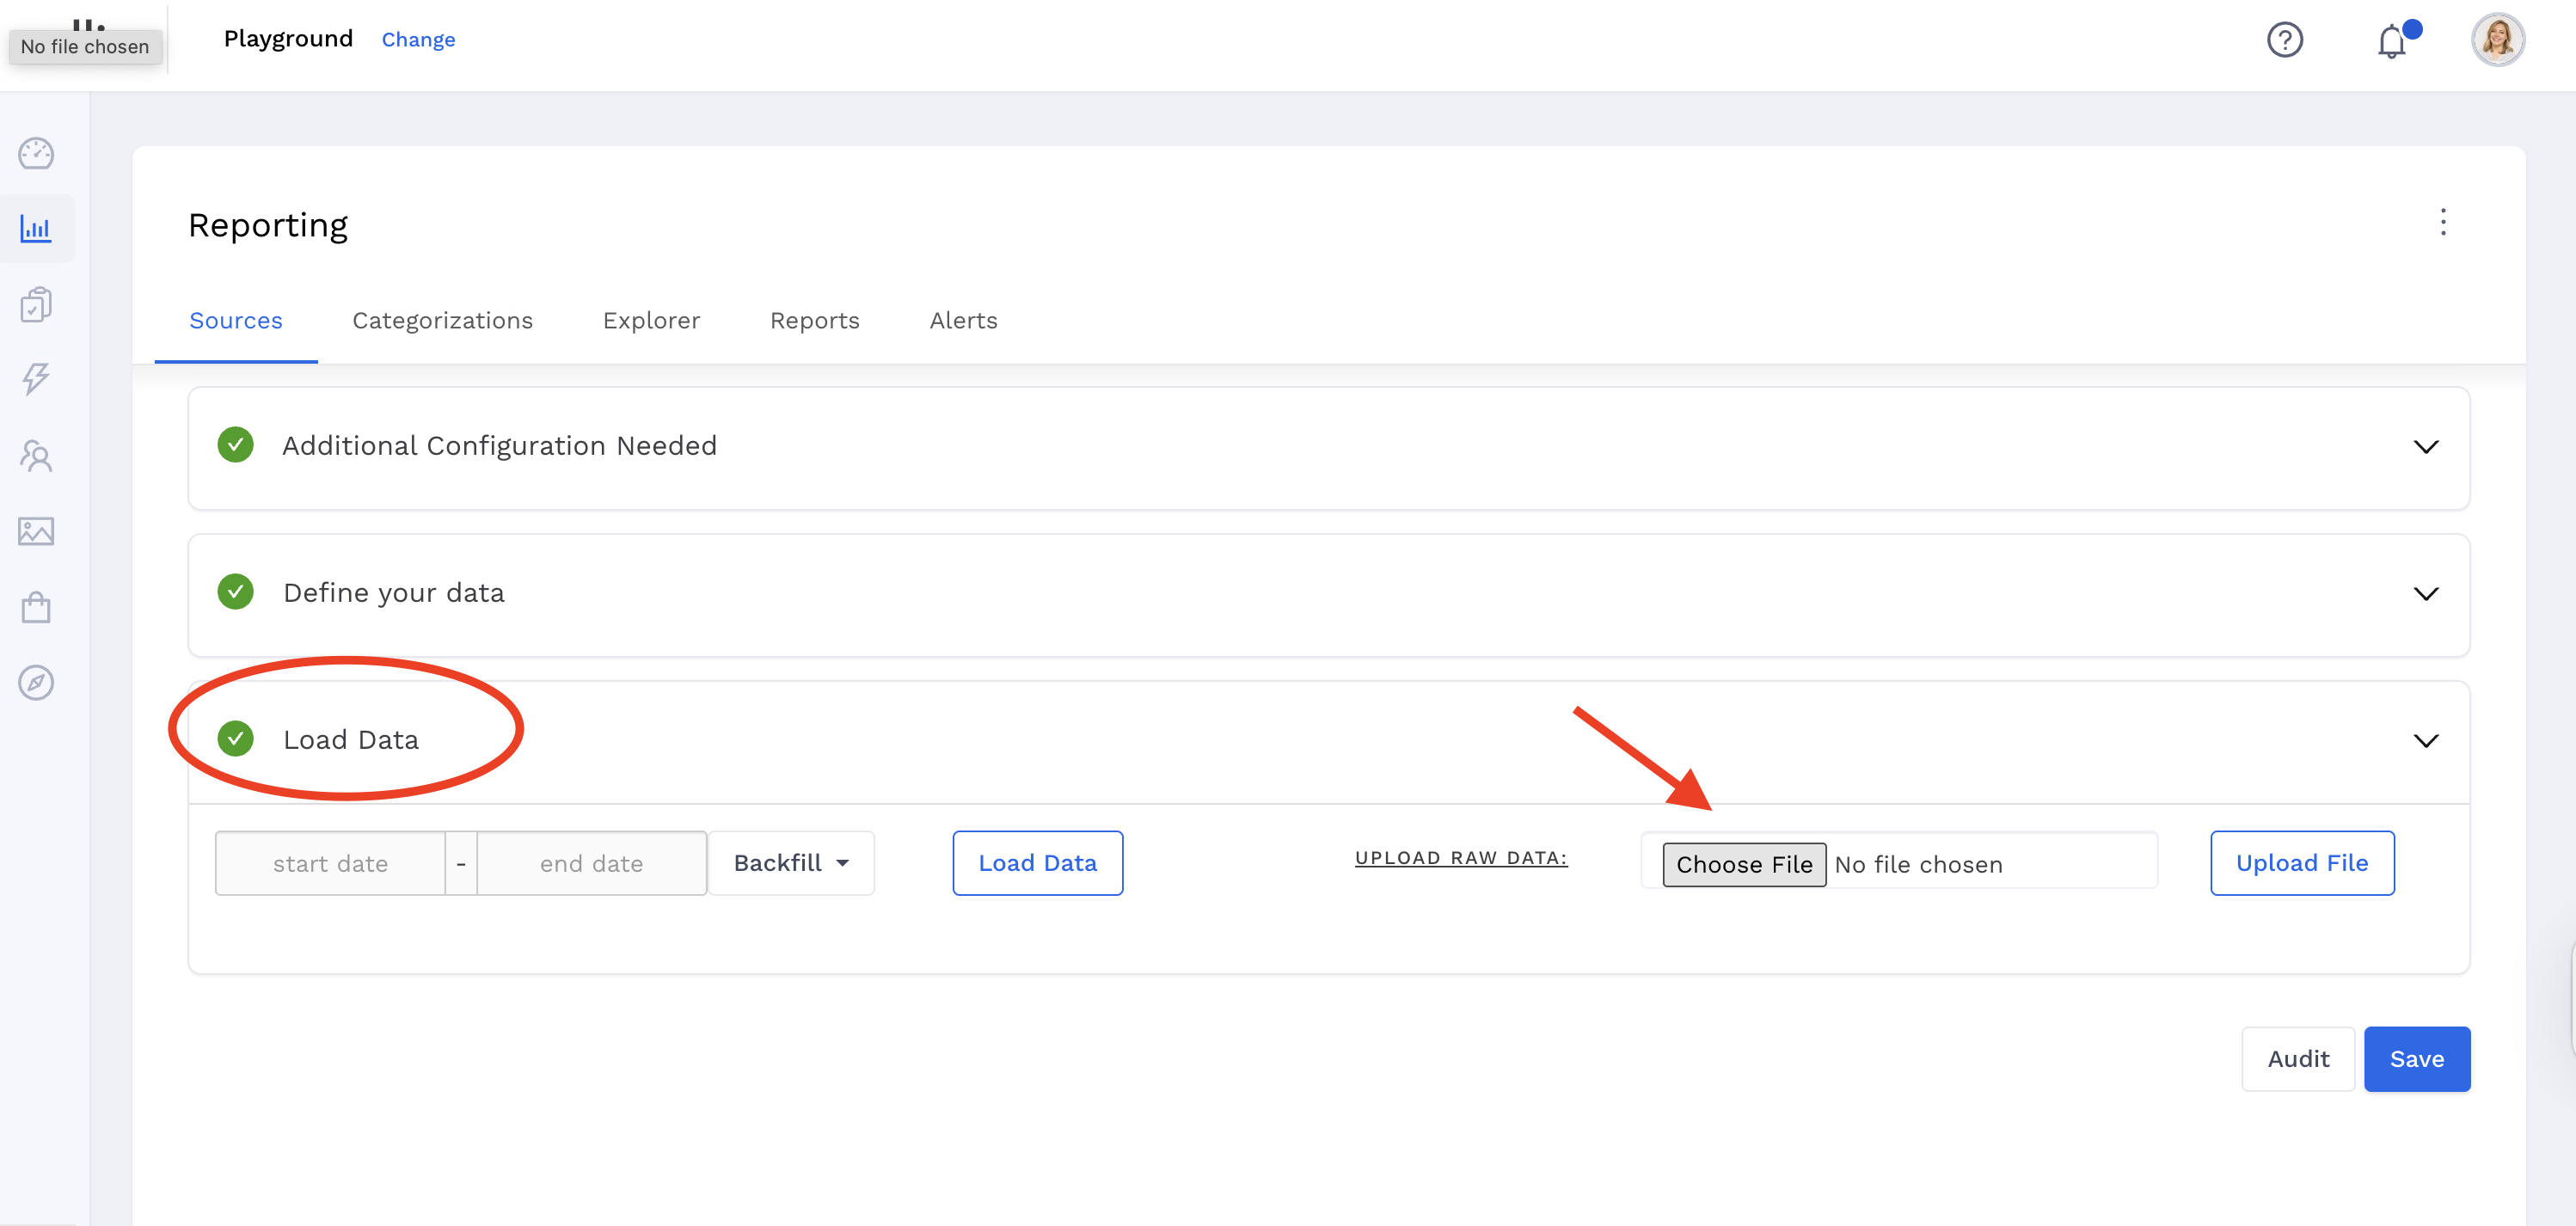
2. Manual Upload
To backfill a manual datasource by uploading a file:
-
Go to the Load Data section.
-
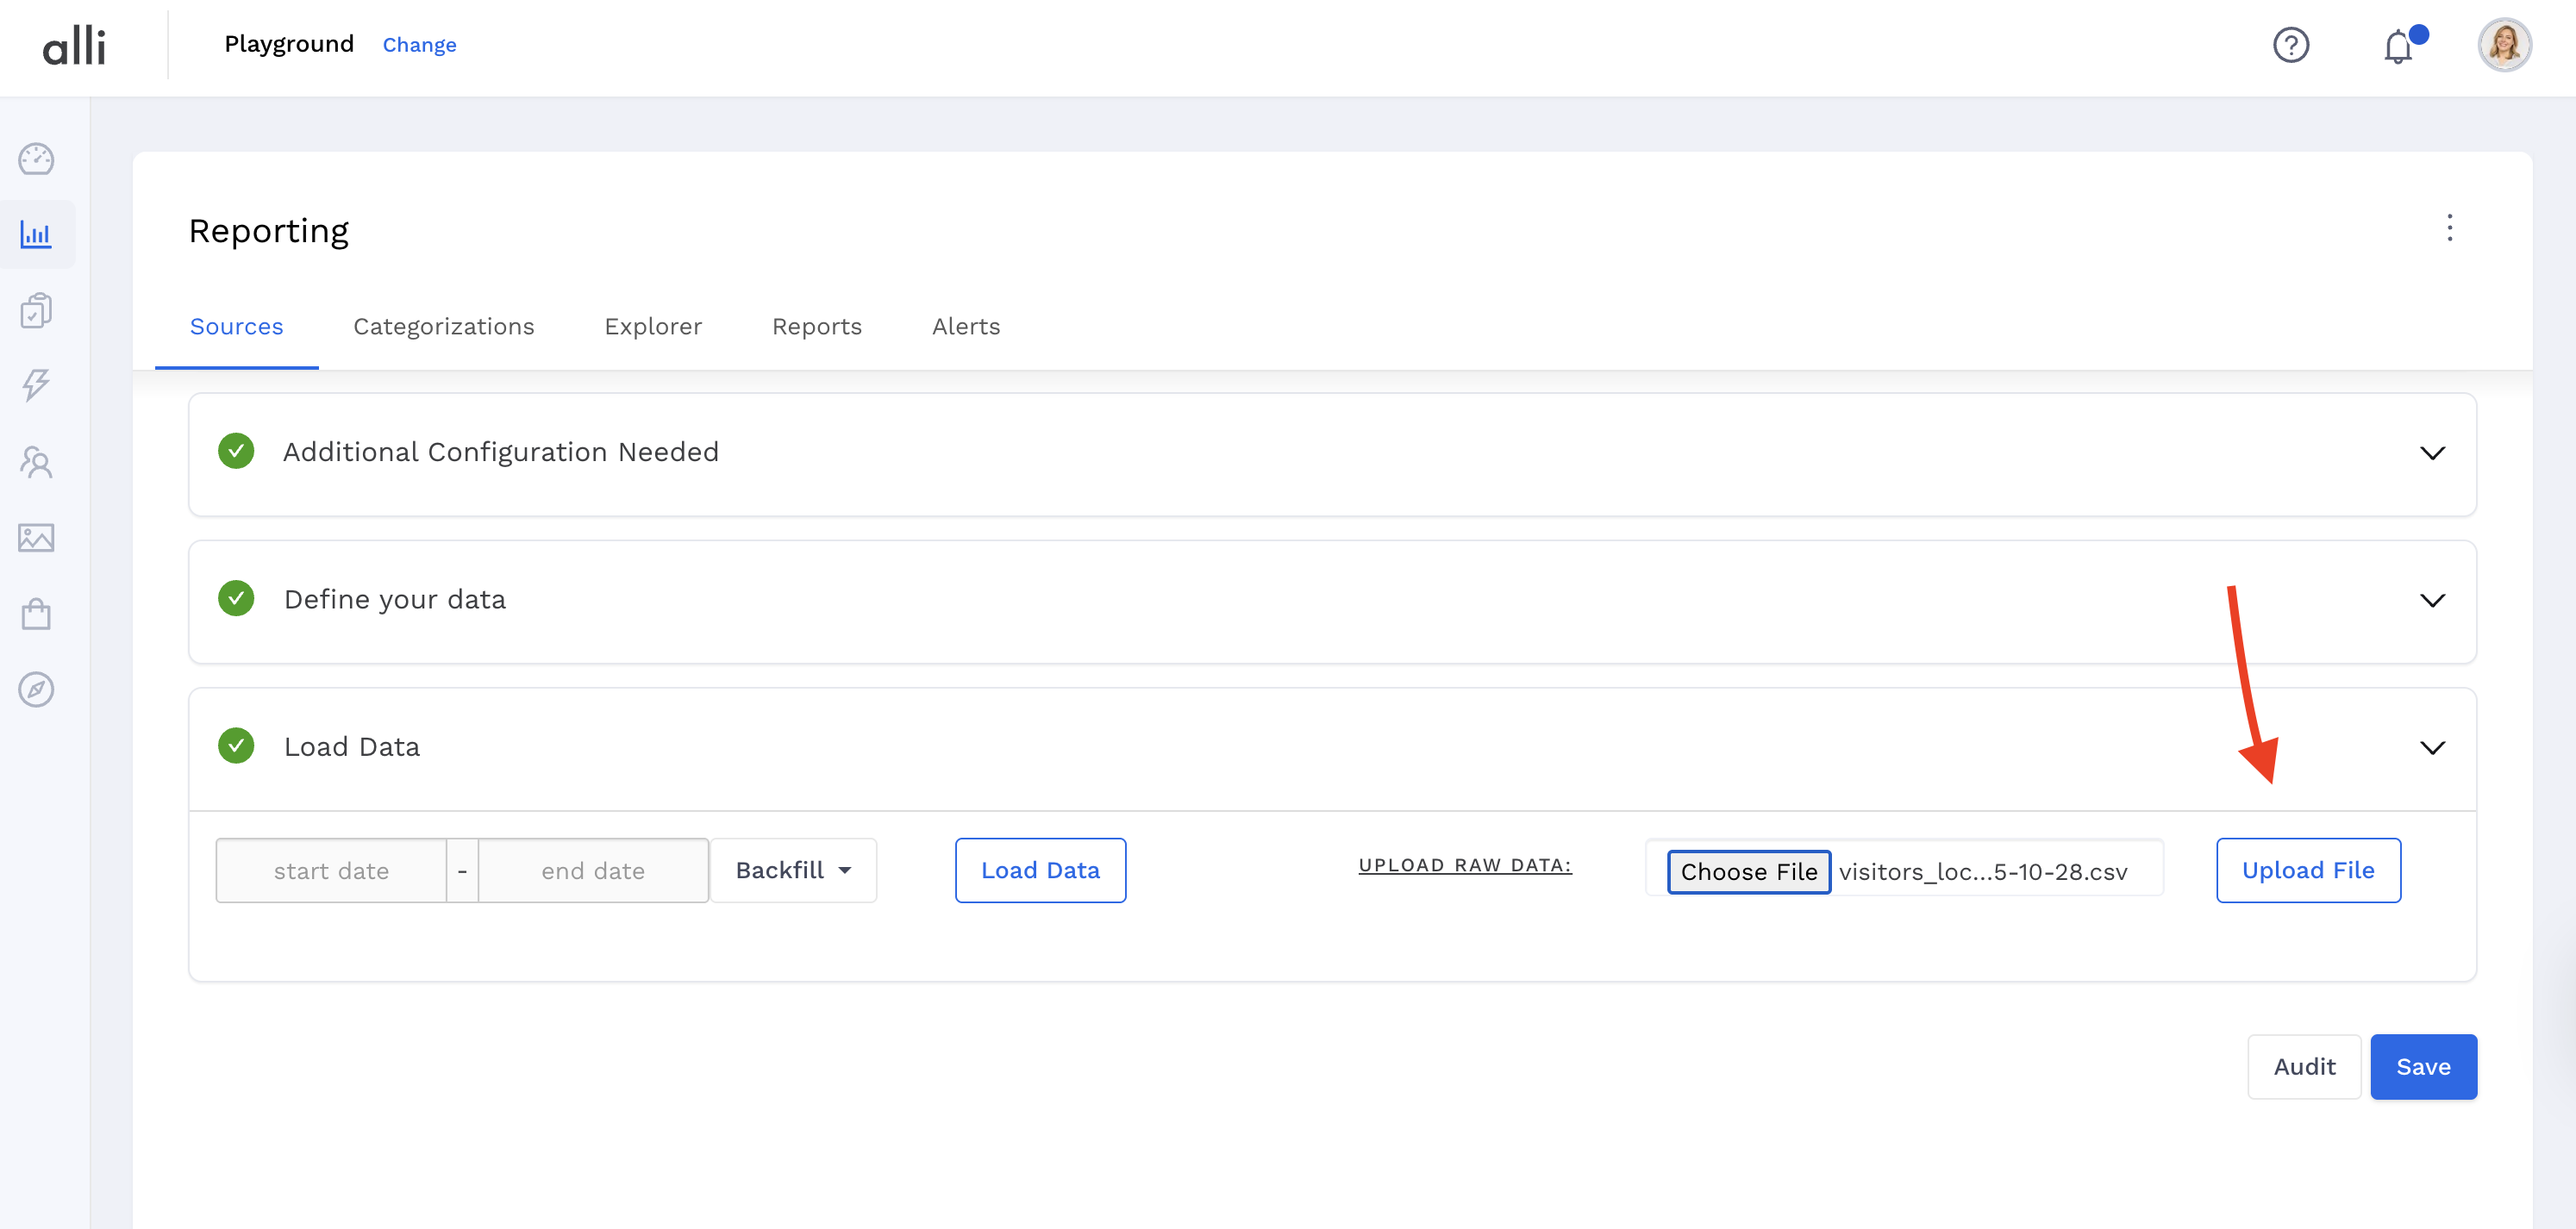
Click Choose File and select your file containing the required date ranges.
-
Click Upload File.
-
After the upload completes, click Save.
3. Backfill from Partner API
To backfill a datasource from a partner (e.g., Facebook):
-
In the Load Data section, select custom Start and End dates, or use the preset ranges under the Backfill button.
-
Click Load Data.
-
A progress bar will appear on the next screen.
-
After processing, a popup will confirm that your job is finished and notify you of any warnings or errors.
-
Backfilling may take several minutes, depending on file size and date range. You will receive an email confirmation once the process is complete.
Related articles
- How-To: Use categorizations within your custom report
- How-to add a new datasource to an existing Data Studio dashboard
- Advanced Guide: Enabling Big Query for a Custom Alert
- How-To: Name Datasource Columns
- How-To: Enable Product Feed Reporting
- How-To: Include Custom DSP Cost in Display Reporting
- How-To: Add a new categorization
- Tutorial: Getting started with Explorer Reports
- How-To: Backfill a datasource
- How-To: Categorize CM360 Conversions
- How-To: Create a new datasource
- How-to Create a Sentiment Dashboard from FB Sentiment
- How-To: Identify Which Platforms and Report Types are Enabled for Reporting
- How-To: Enable Device and Demographic Reporting
- How-To: Manually upload data to an existing datasource