
Overview
This how-to article takes you through how to create a data studio dashboard using the Facebook (Meta) Sentiment datasource
Instructions
-
In Alli create a datasource, Meta (Facebook) Sentiment V2 type, named
fb_sentimentand select all dimensions and metrics available. -
-
In Looker Studio, load this Datasource: https://datastudio.google.com/u/0/datasources/15gLQB8LHNnoUsTi9JOEjSloCqTWpgAUN (Note you must be part of the social@pmg.com alias for you to view this datasource)
-
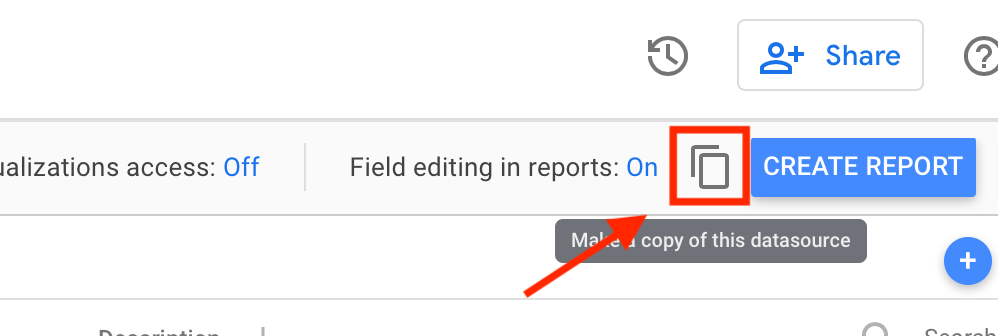
Click the Duplicate button
-
Rename this Datastudio Datasource to your actual client. Ex. “myclient_fb_sentiment”
-
Update the connections for the datasource.
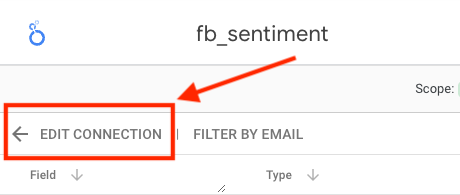
-
Select your client from the list below and select your
fb_sentimentdatasource you created in step 1.-
pmg-datawarehouse → client → fb_sentiment

OPTIONAL: If your client has given PMG the “manage_pages” access, PMG has a way to pull in PAC ads via a Facebook Firehose. This will push both organic and paid ad comments to Alli Data every 3 hours. If you are using this, you will need to use “Custom Query” and insert the following query:
-
FB Sentiment: analytics@pmg.com content access requested in #social_platformaccess
-
Webhook: PMG the “manage_pages” access - is this the business manager?
SQLSELECT id, created_time, message, creative_url, creative_platform, creative_id, creative_title, creative_body, ad_id, ad_name, score, magnitude, like_count, comment_count FROM {client}.fb_sentiment -- Replace {client} with your client/datasource here. (client_name.fb_sentiment) UNION ALL SELECT comment_id, created_time, message, CONCAT('https://facebook.com/',post_id) AS creative_url, 'facebook' AS creative_platform, post_id AS creative_id, '' AS creative_title, '' AS creative_body, '' AS ad_id, 'webhook' AS ad_name, sentimentScore AS score, magnitude, 0 AS like_count, 0 AS comment_count FROM social.sentiment_webhook WHERE page_id = '{page_id}' -- Replace {page_id} with the page_id of your client's page. (page_id = '1234') and comment_id NOT IN (select distinct id from {client}.fb_sentiment) -- Replace {client} with your client/datasource here, client_name.fb_sentiment6b. How to find the {page_id}:

-
-

Navigate to this report: https://datastudio.google.com/u/0/reporting/1uSYMChPd6SczhQthf8WBNoJ_808acPOm/page/WGyIB
-
Click the duplicate button

-
Select your new sentiment datasource you created in step 4.
-
Hit copy report.
-
You can now edit this Data Studio Dashboard or share out to clients as a normal dashboard.
Related articles
- How-To: Use categorizations within your custom report
- How-to add a new datasource to an existing Data Studio dashboard
- Advanced Guide: Enabling Big Query for a Custom Alert
- How-To: Name Datasource Columns
- How-To: Enable Product Feed Reporting
- How-To: Include Custom DSP Cost in Display Reporting
- How-To: Add a new categorization
- Tutorial: Getting started with Explorer Reports
- How-To: Backfill a datasource
- How-To: Categorize CM360 Conversions
- How-To: Create a new datasource
- How-to Create a Sentiment Dashboard from FB Sentiment
- How-To: Identify Which Platforms and Report Types are Enabled for Reporting
- How-To: Enable Device and Demographic Reporting
- How-To: Manually upload data to an existing datasource