
How to add a manual upload datasource
This article walks you through adding manual data to the Alli platform. Some examples of when you may use this include:
A one-off data load
To upload a vendor/partner file that is not supported by other Alli data connections
Instructions
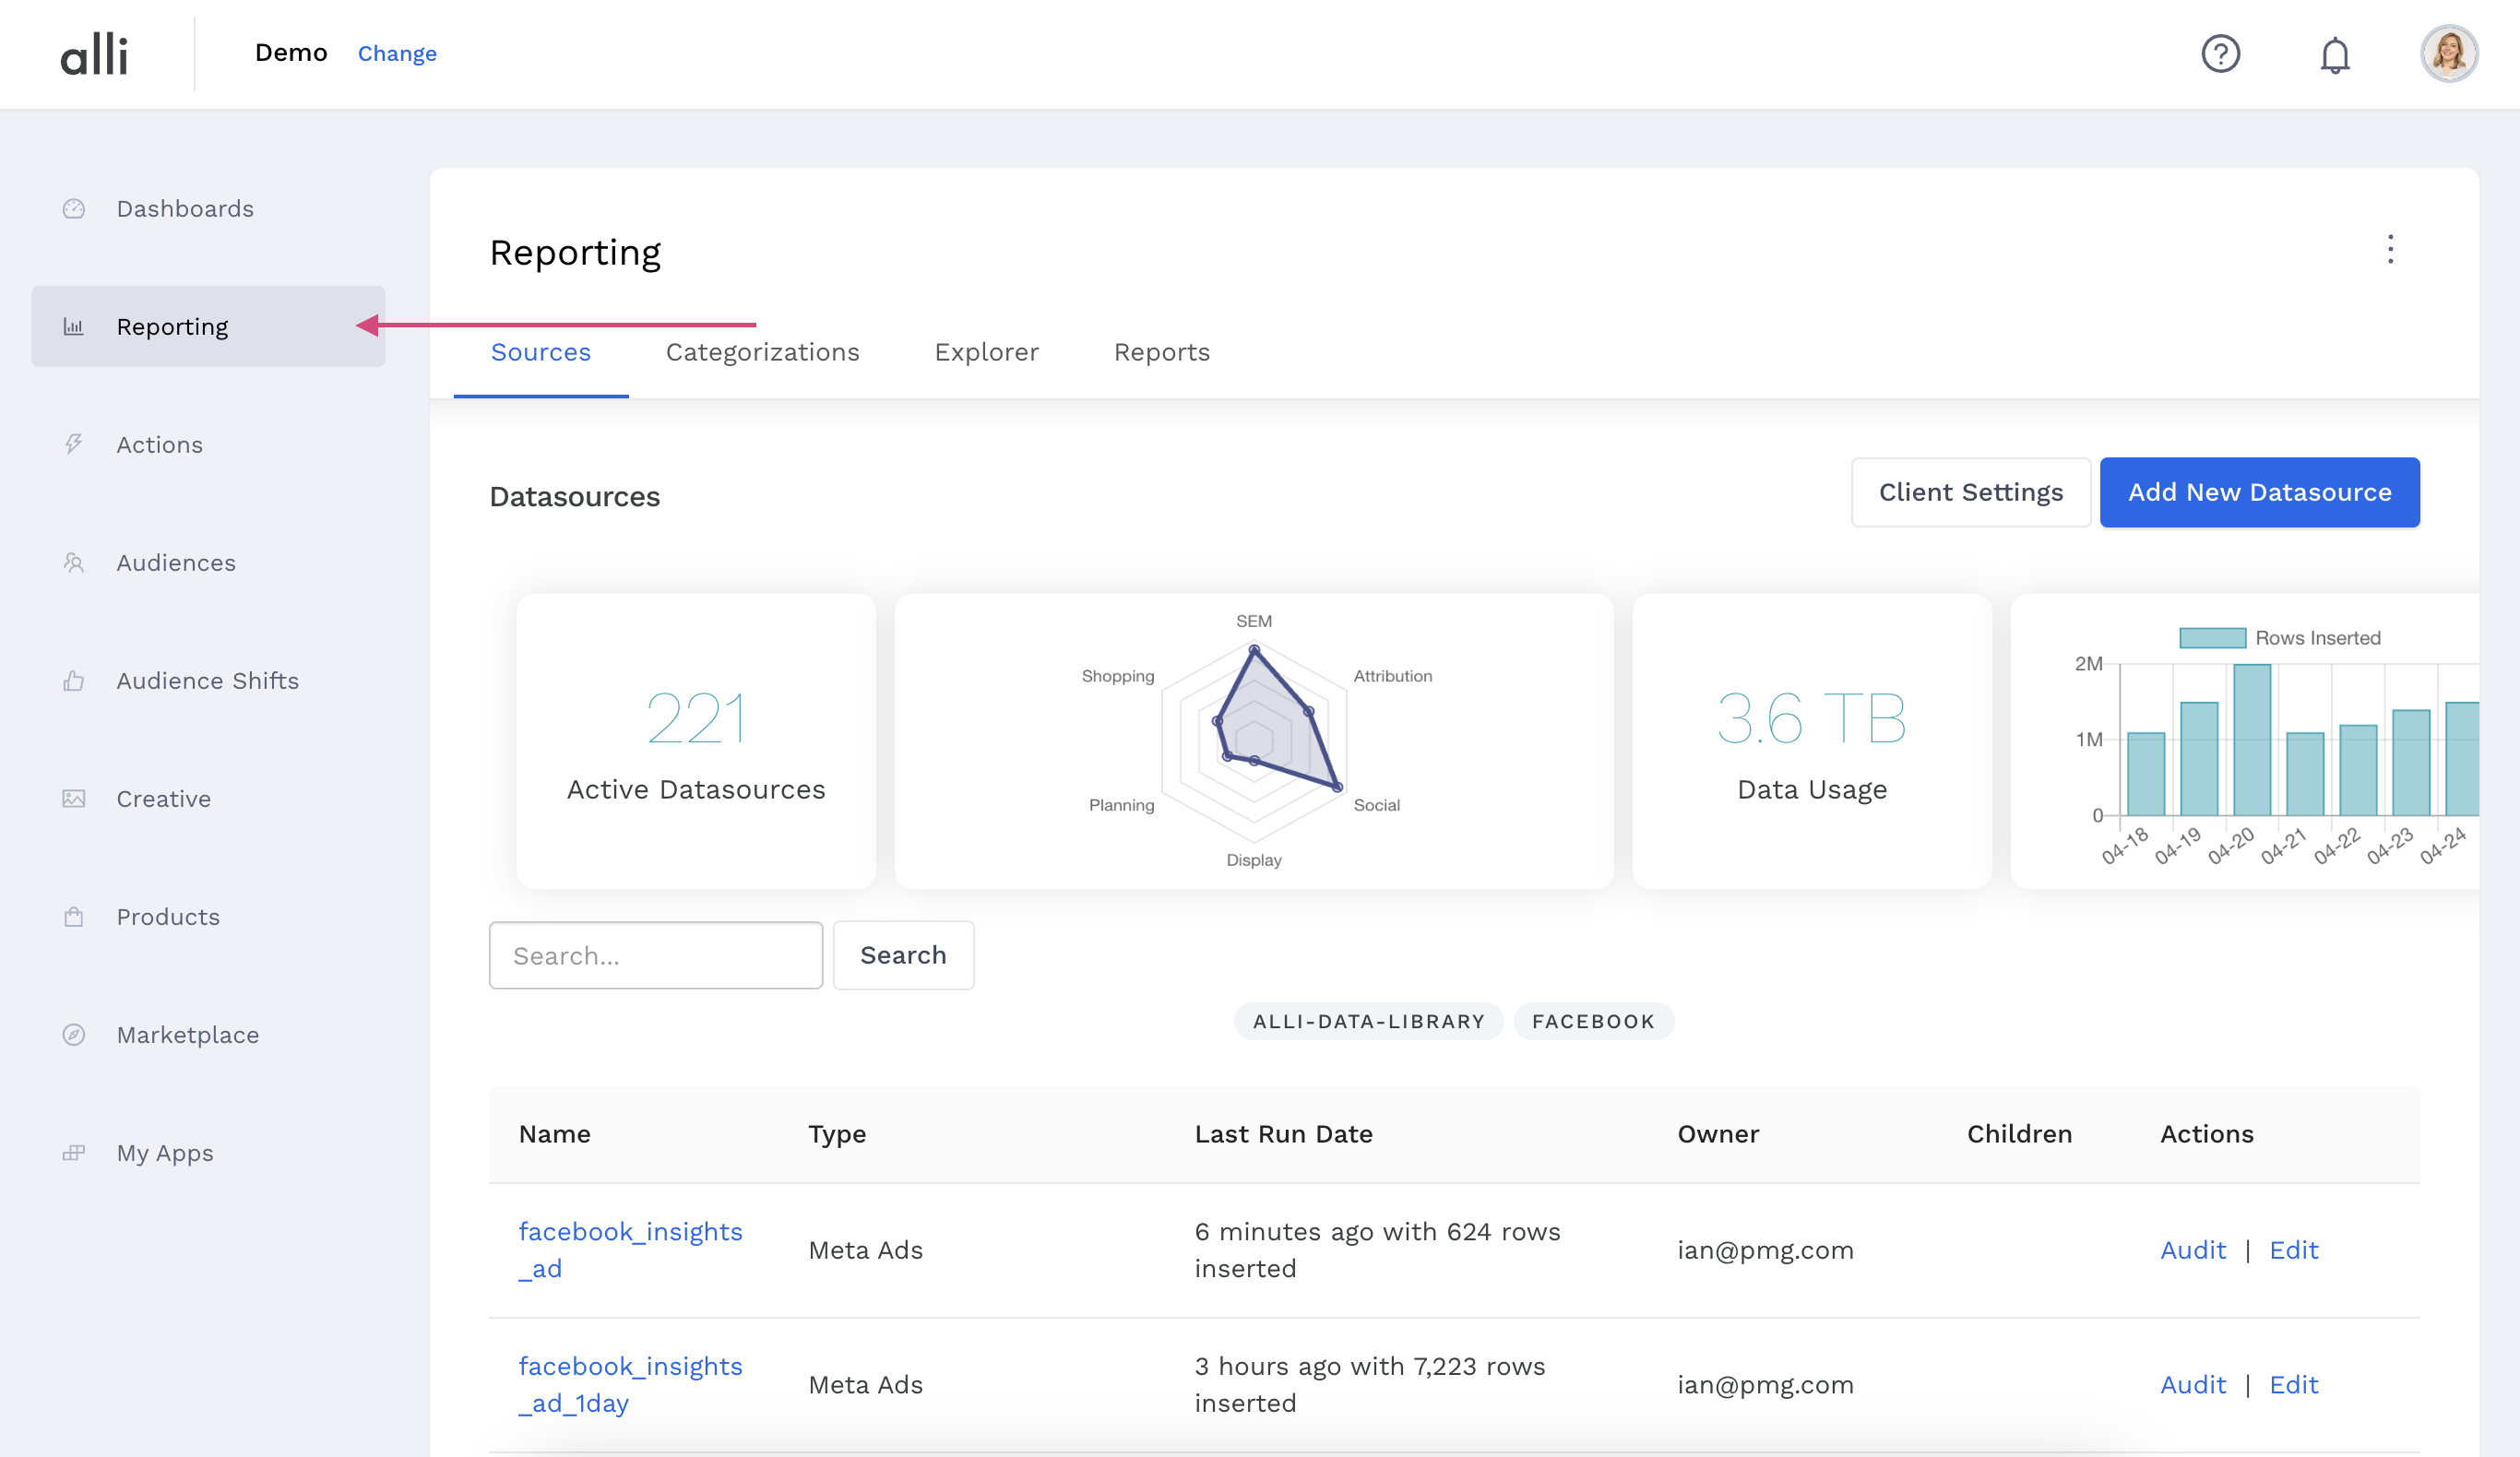
Login to alliplatform.com and navigate to Reporting in the sidebar
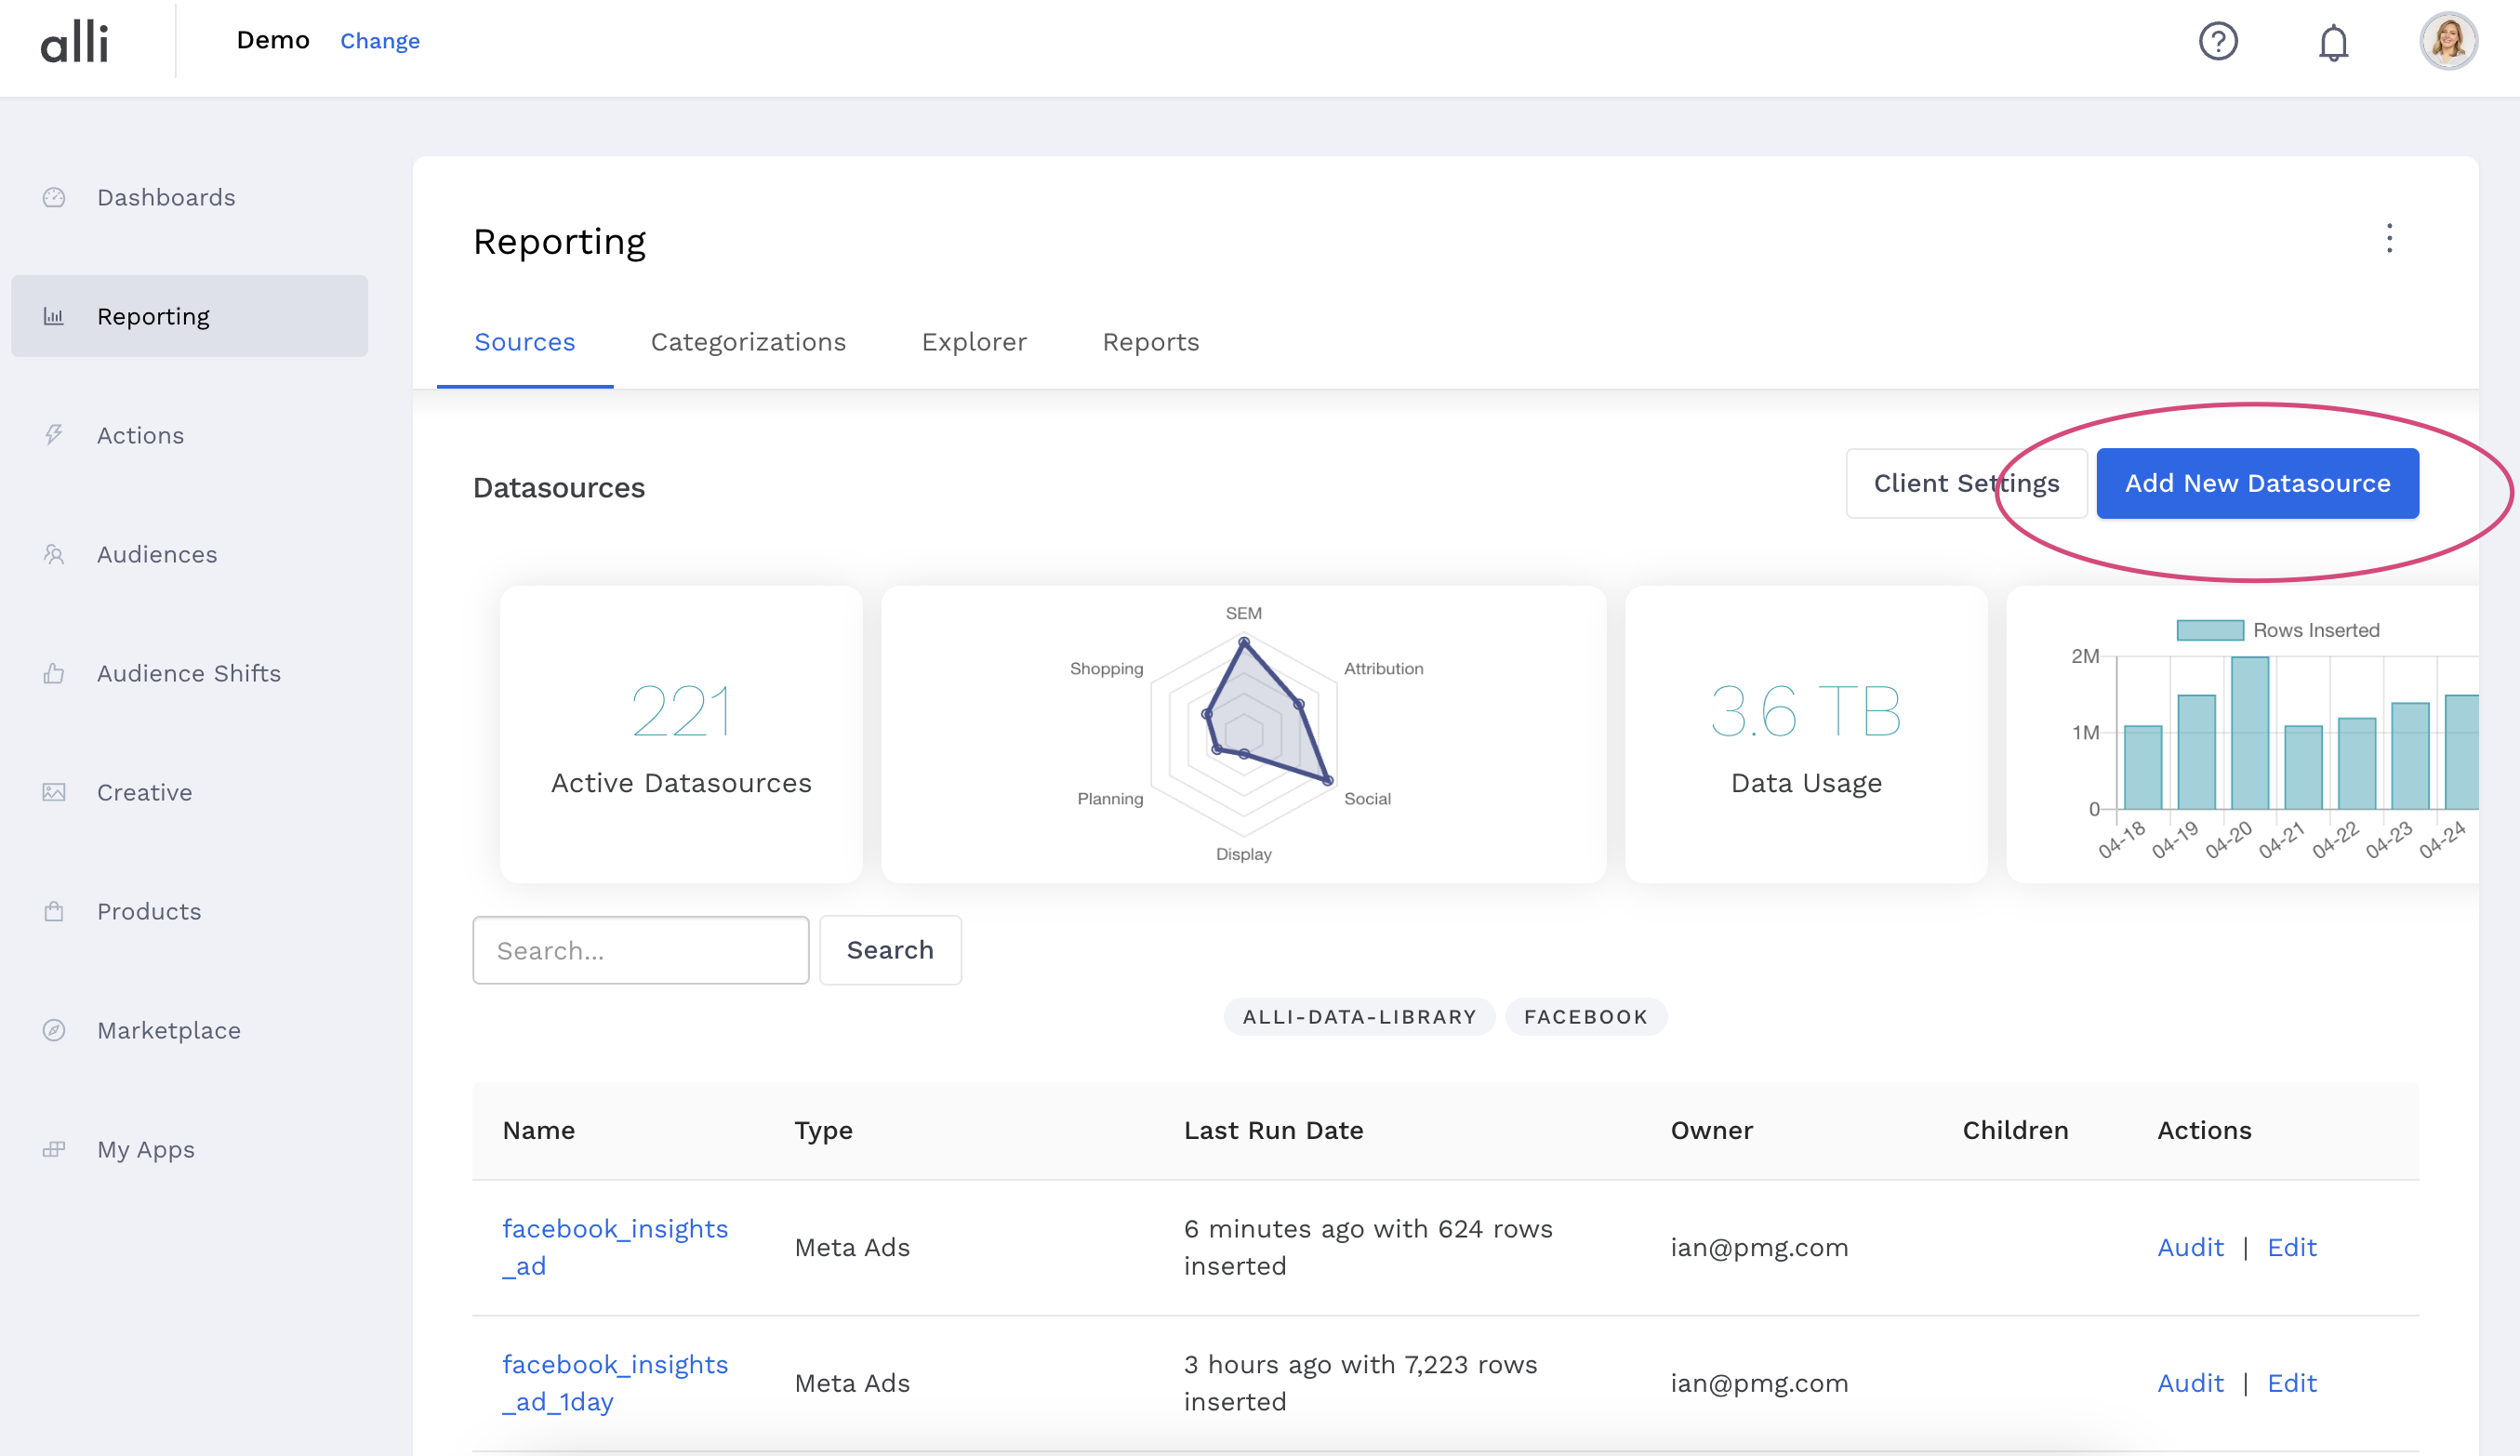
Select the Add New Datasource button
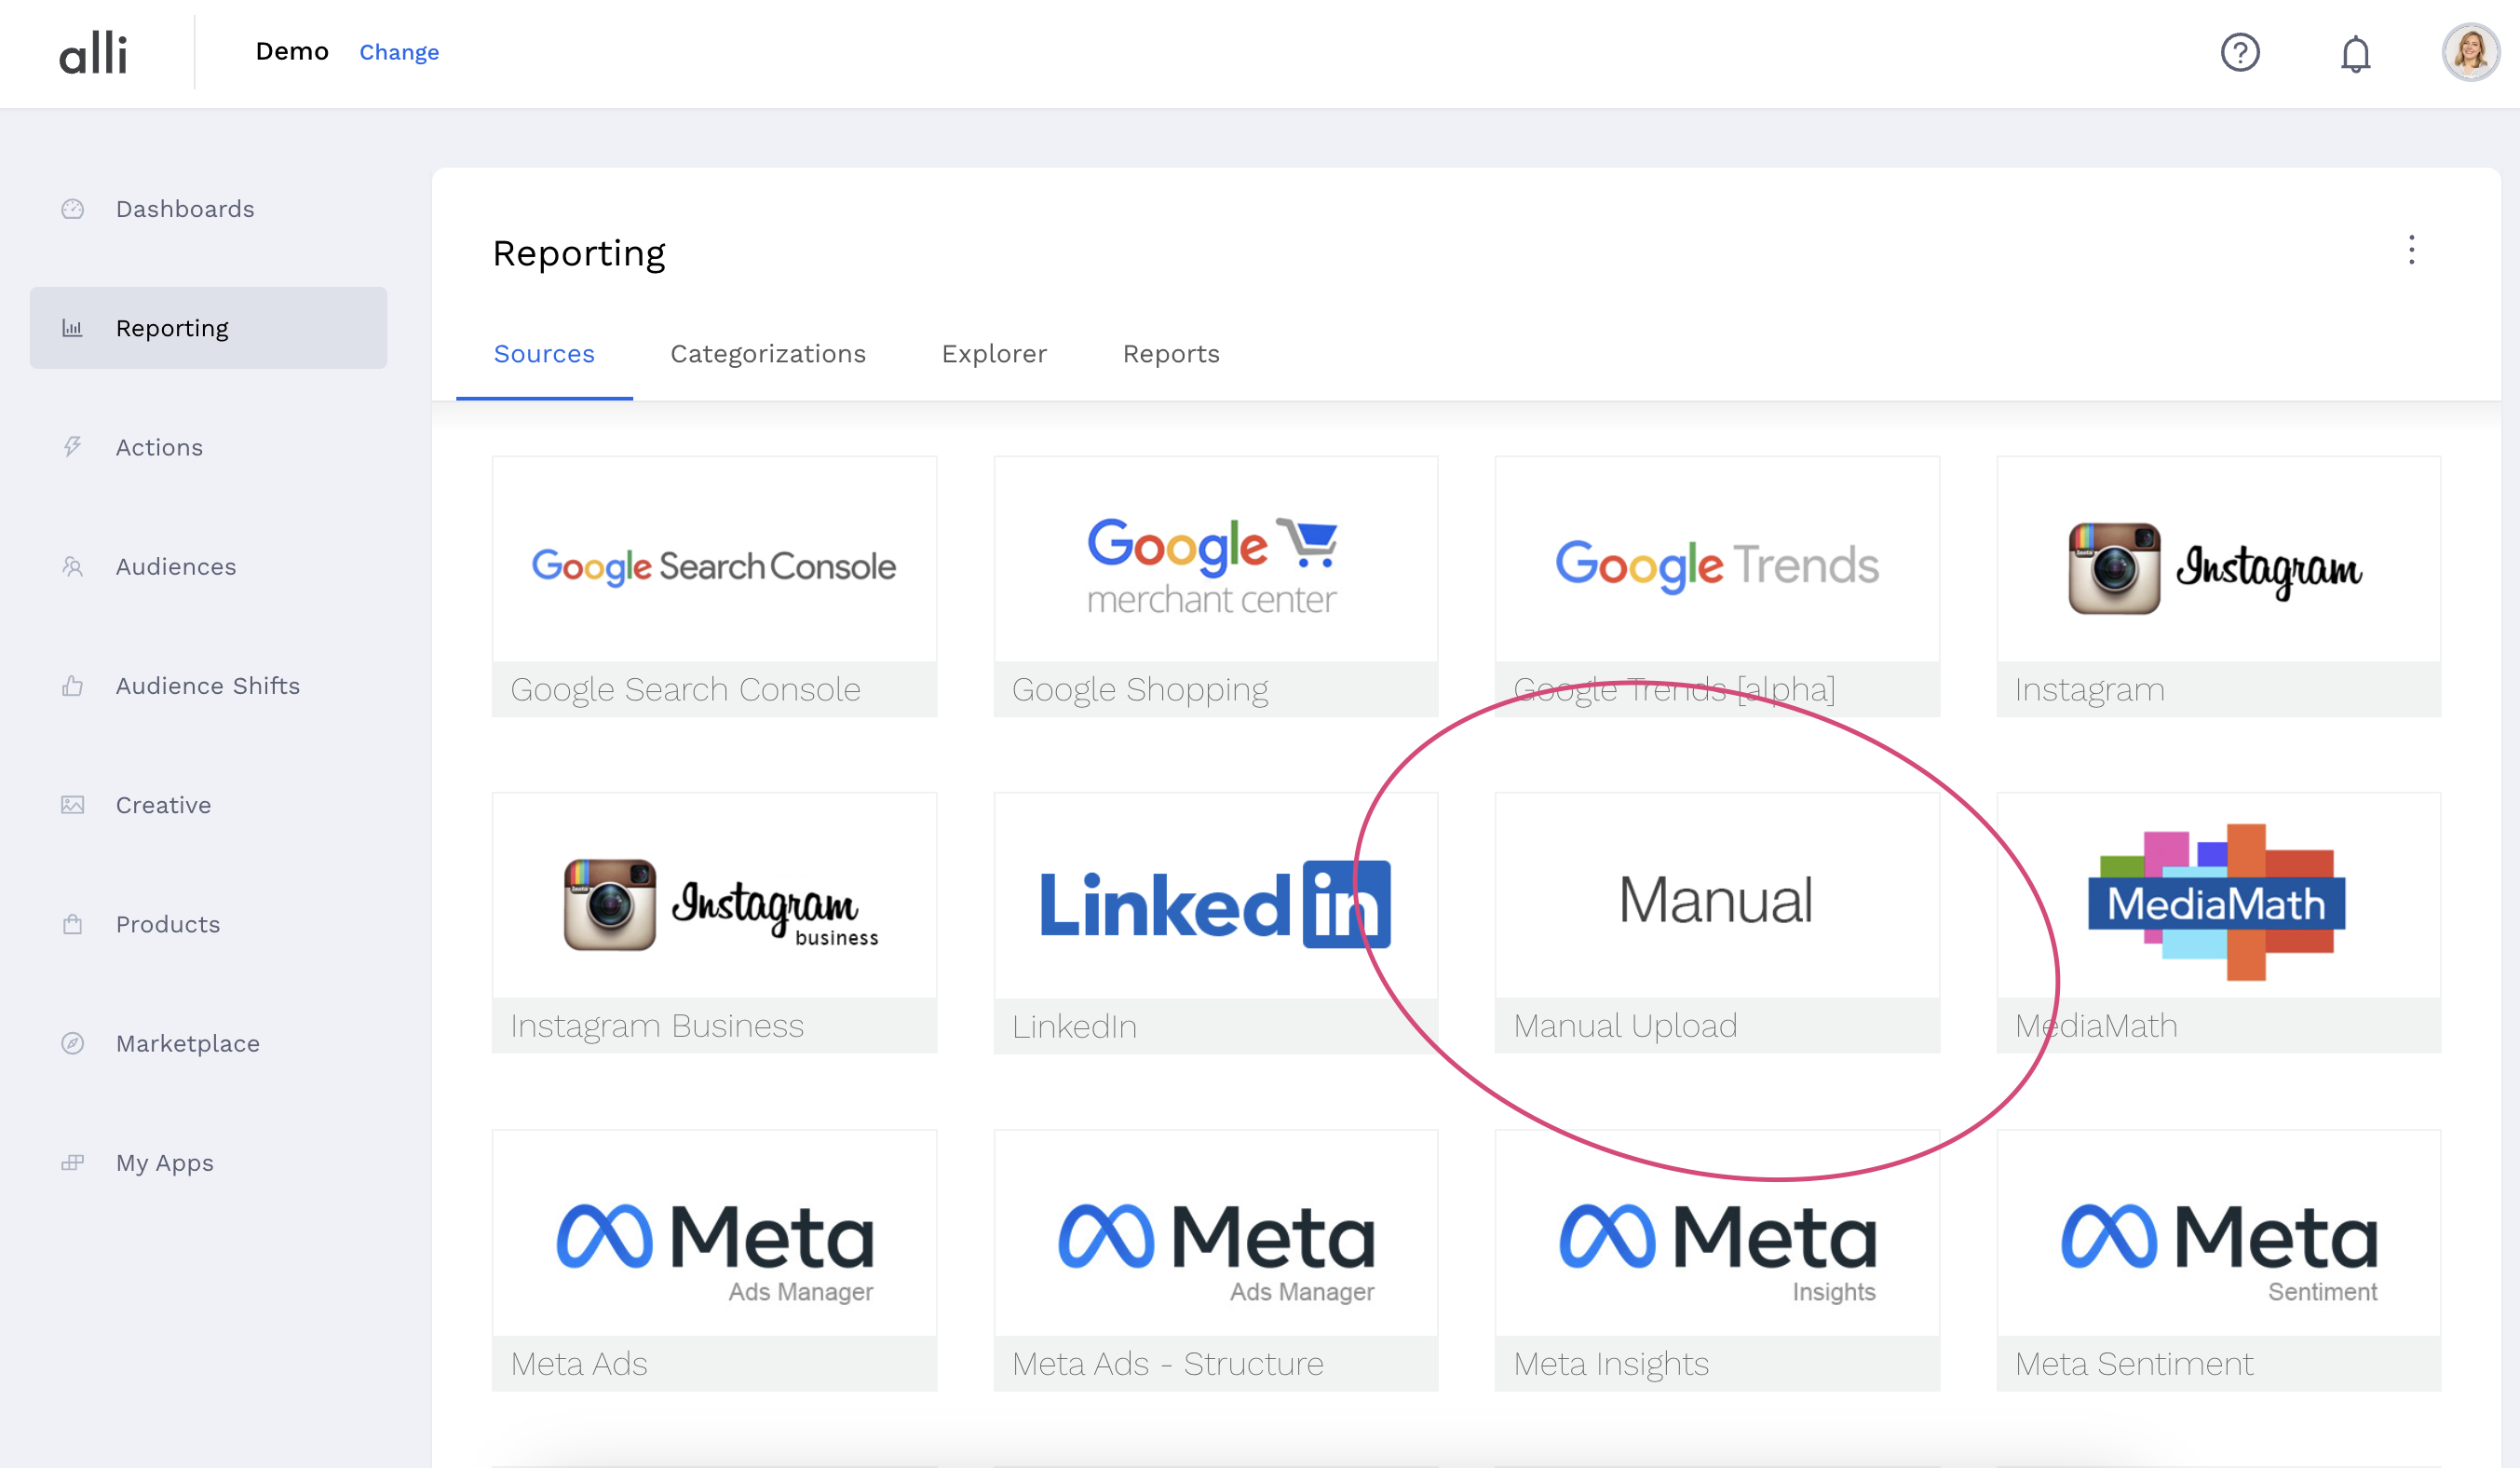
Scroll down and select the Manual Upload data source type and give it a name
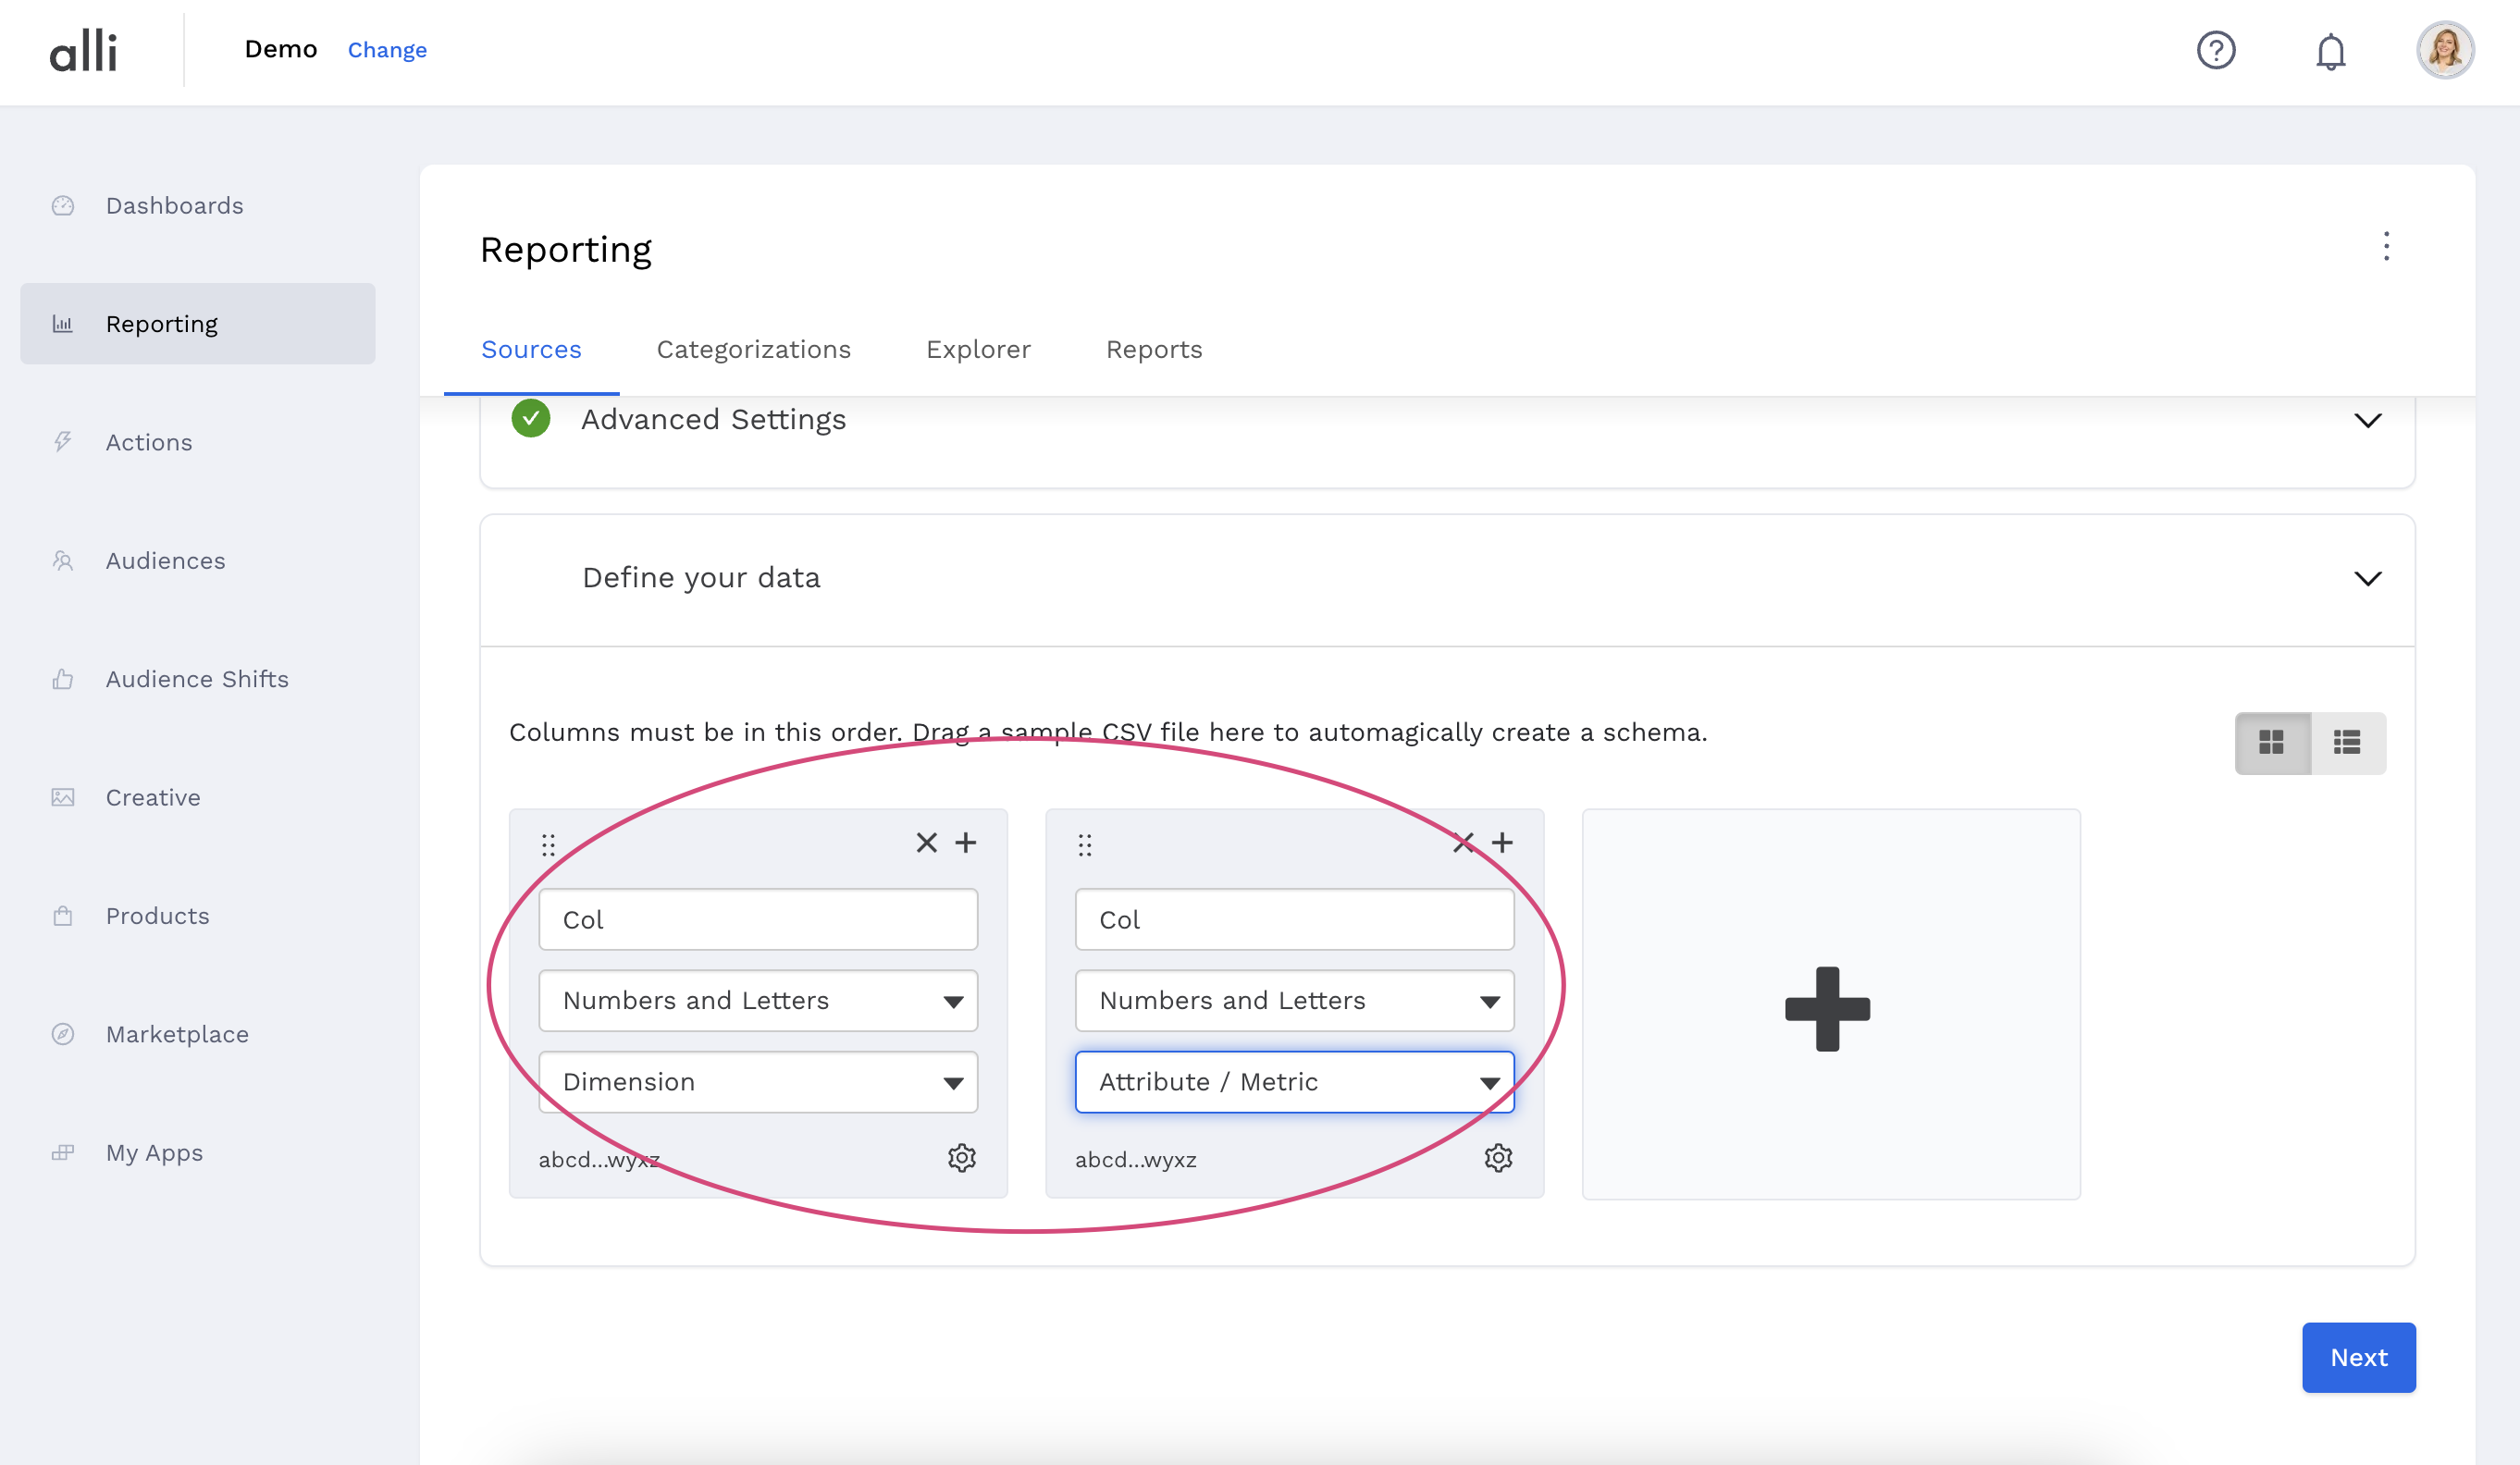
Define your data by adding your columns, ensuring the column header name and data type match what is in your data file
Hit Next to save your columns and enable the Load Data section
Select the Choose File button and browse then select your file
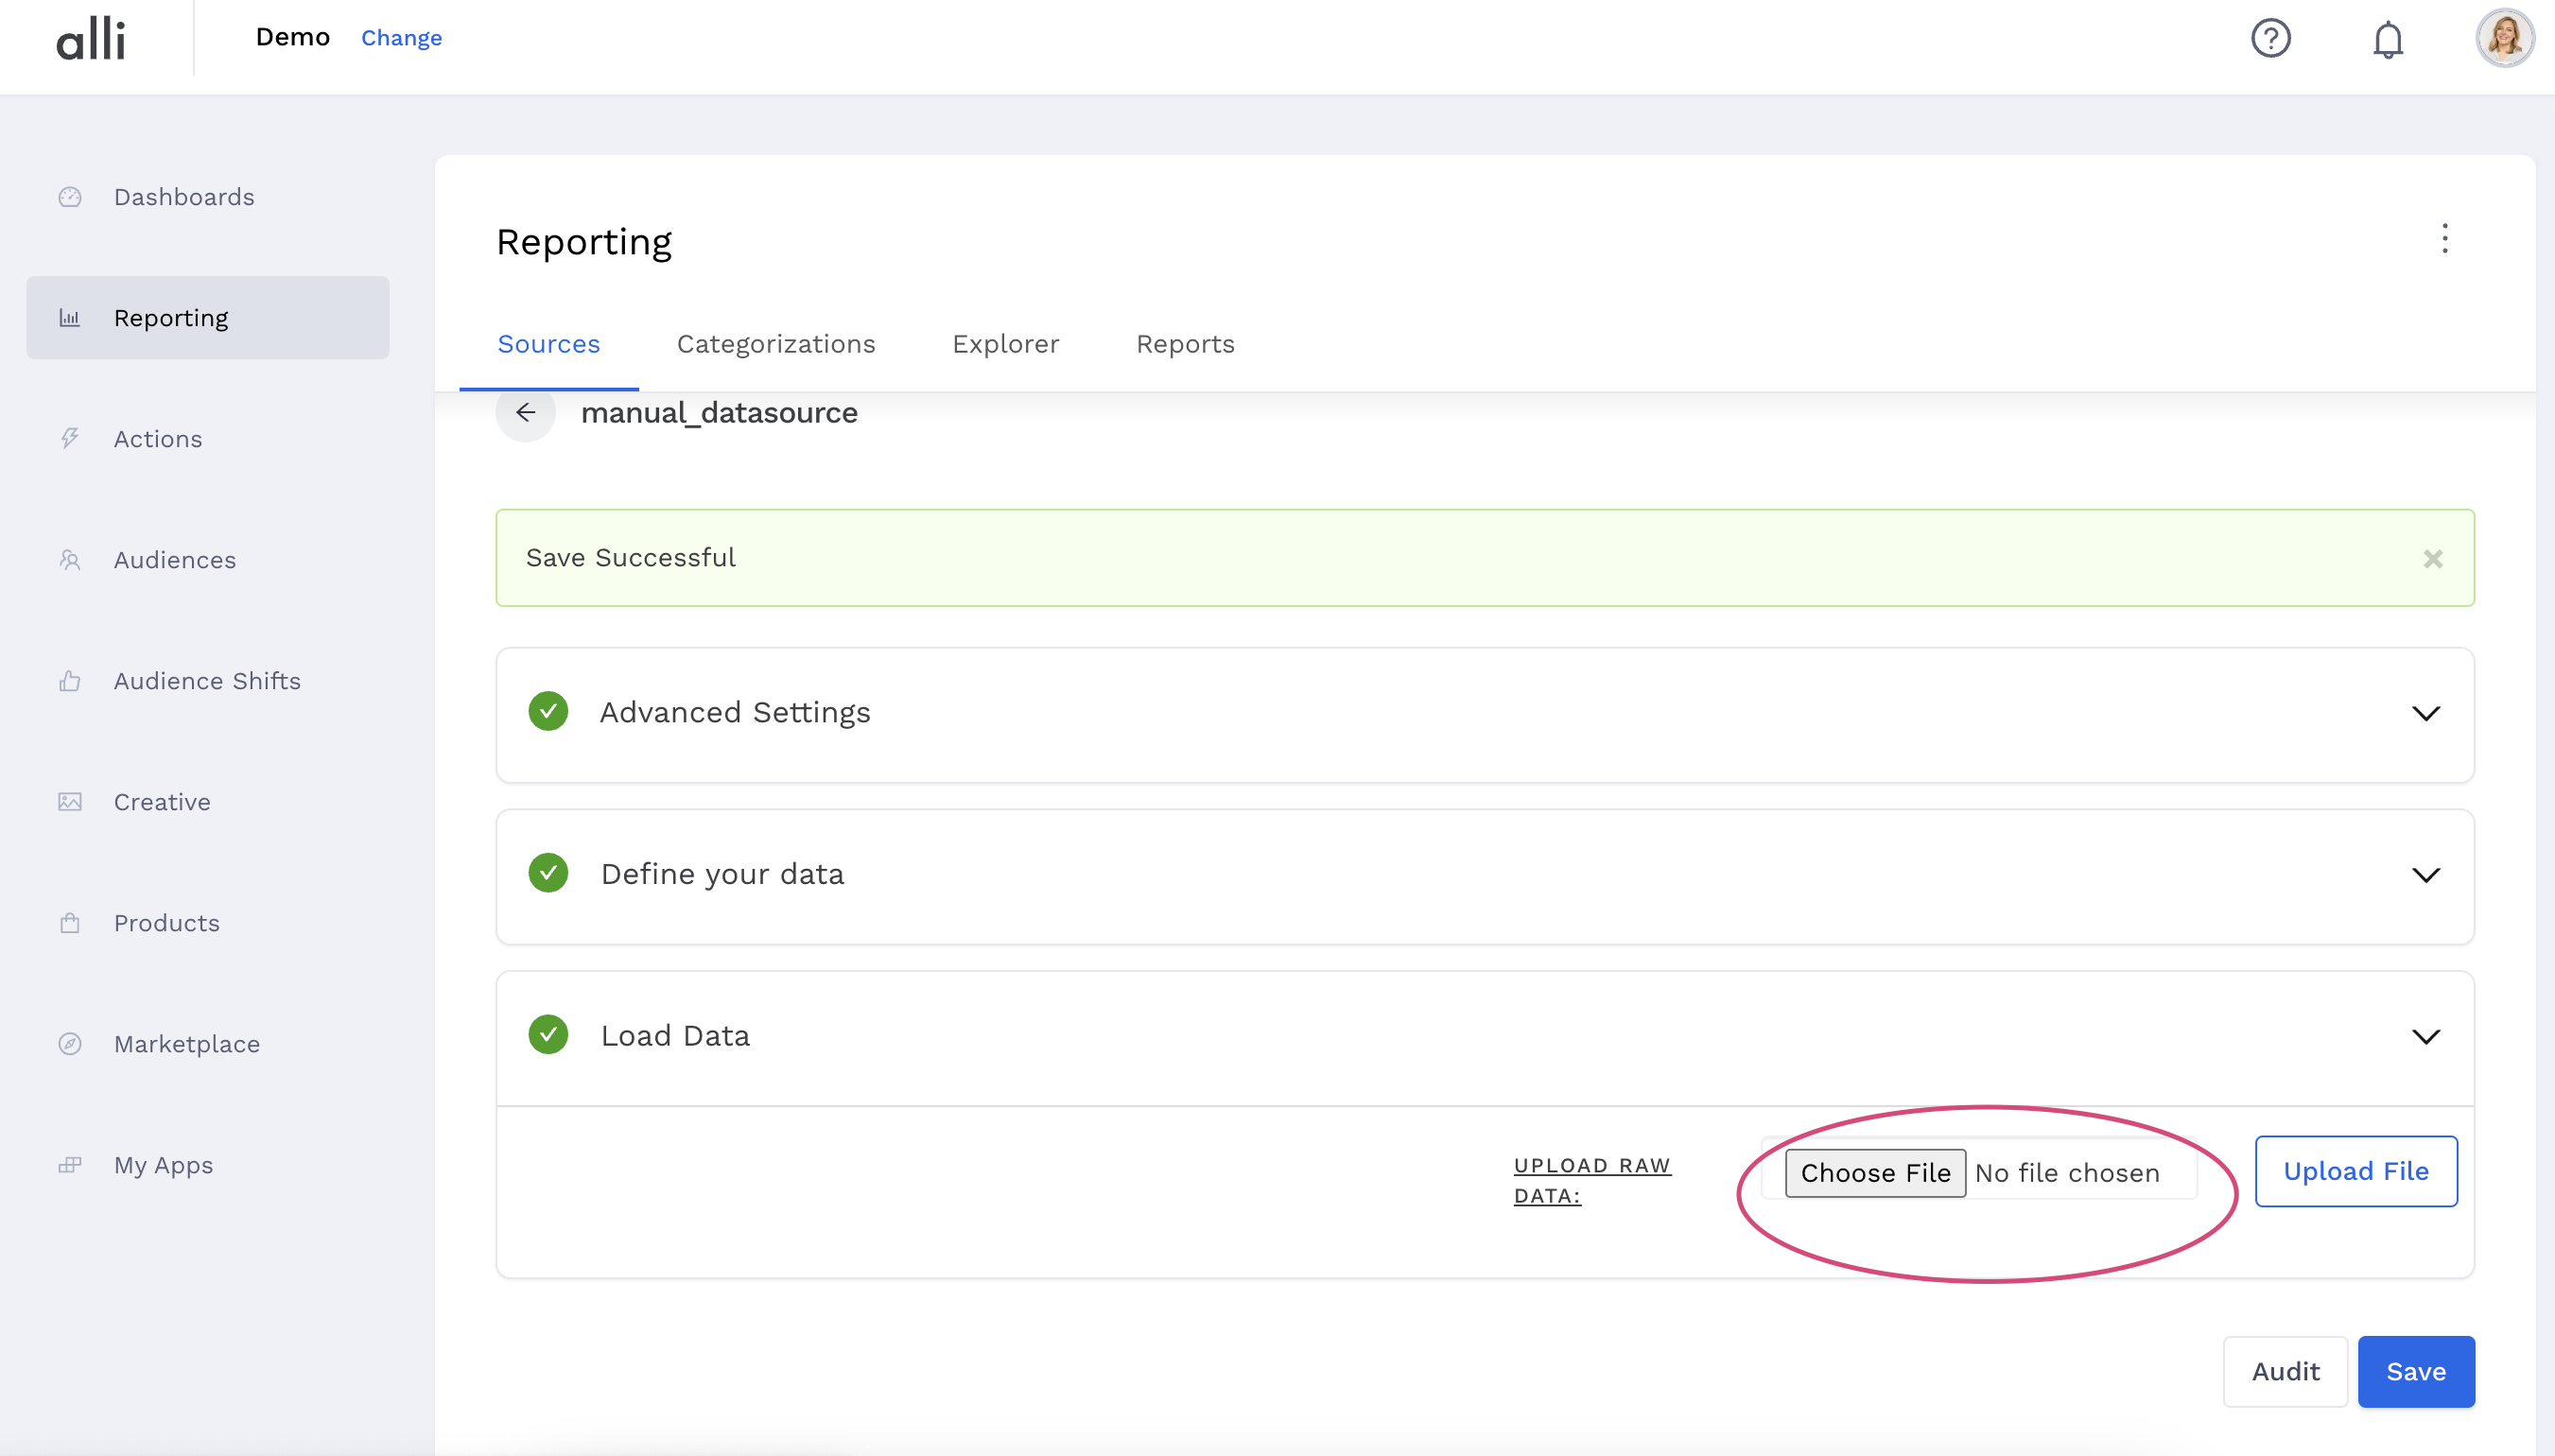
Click Upload File to start your upload
When adding your file schema (column headers & data type) you can drag and drop your data file onto the + to quickly add all columns instead of adding them manually.