
This tutorial article runs you through:
Creating a New Feed
-
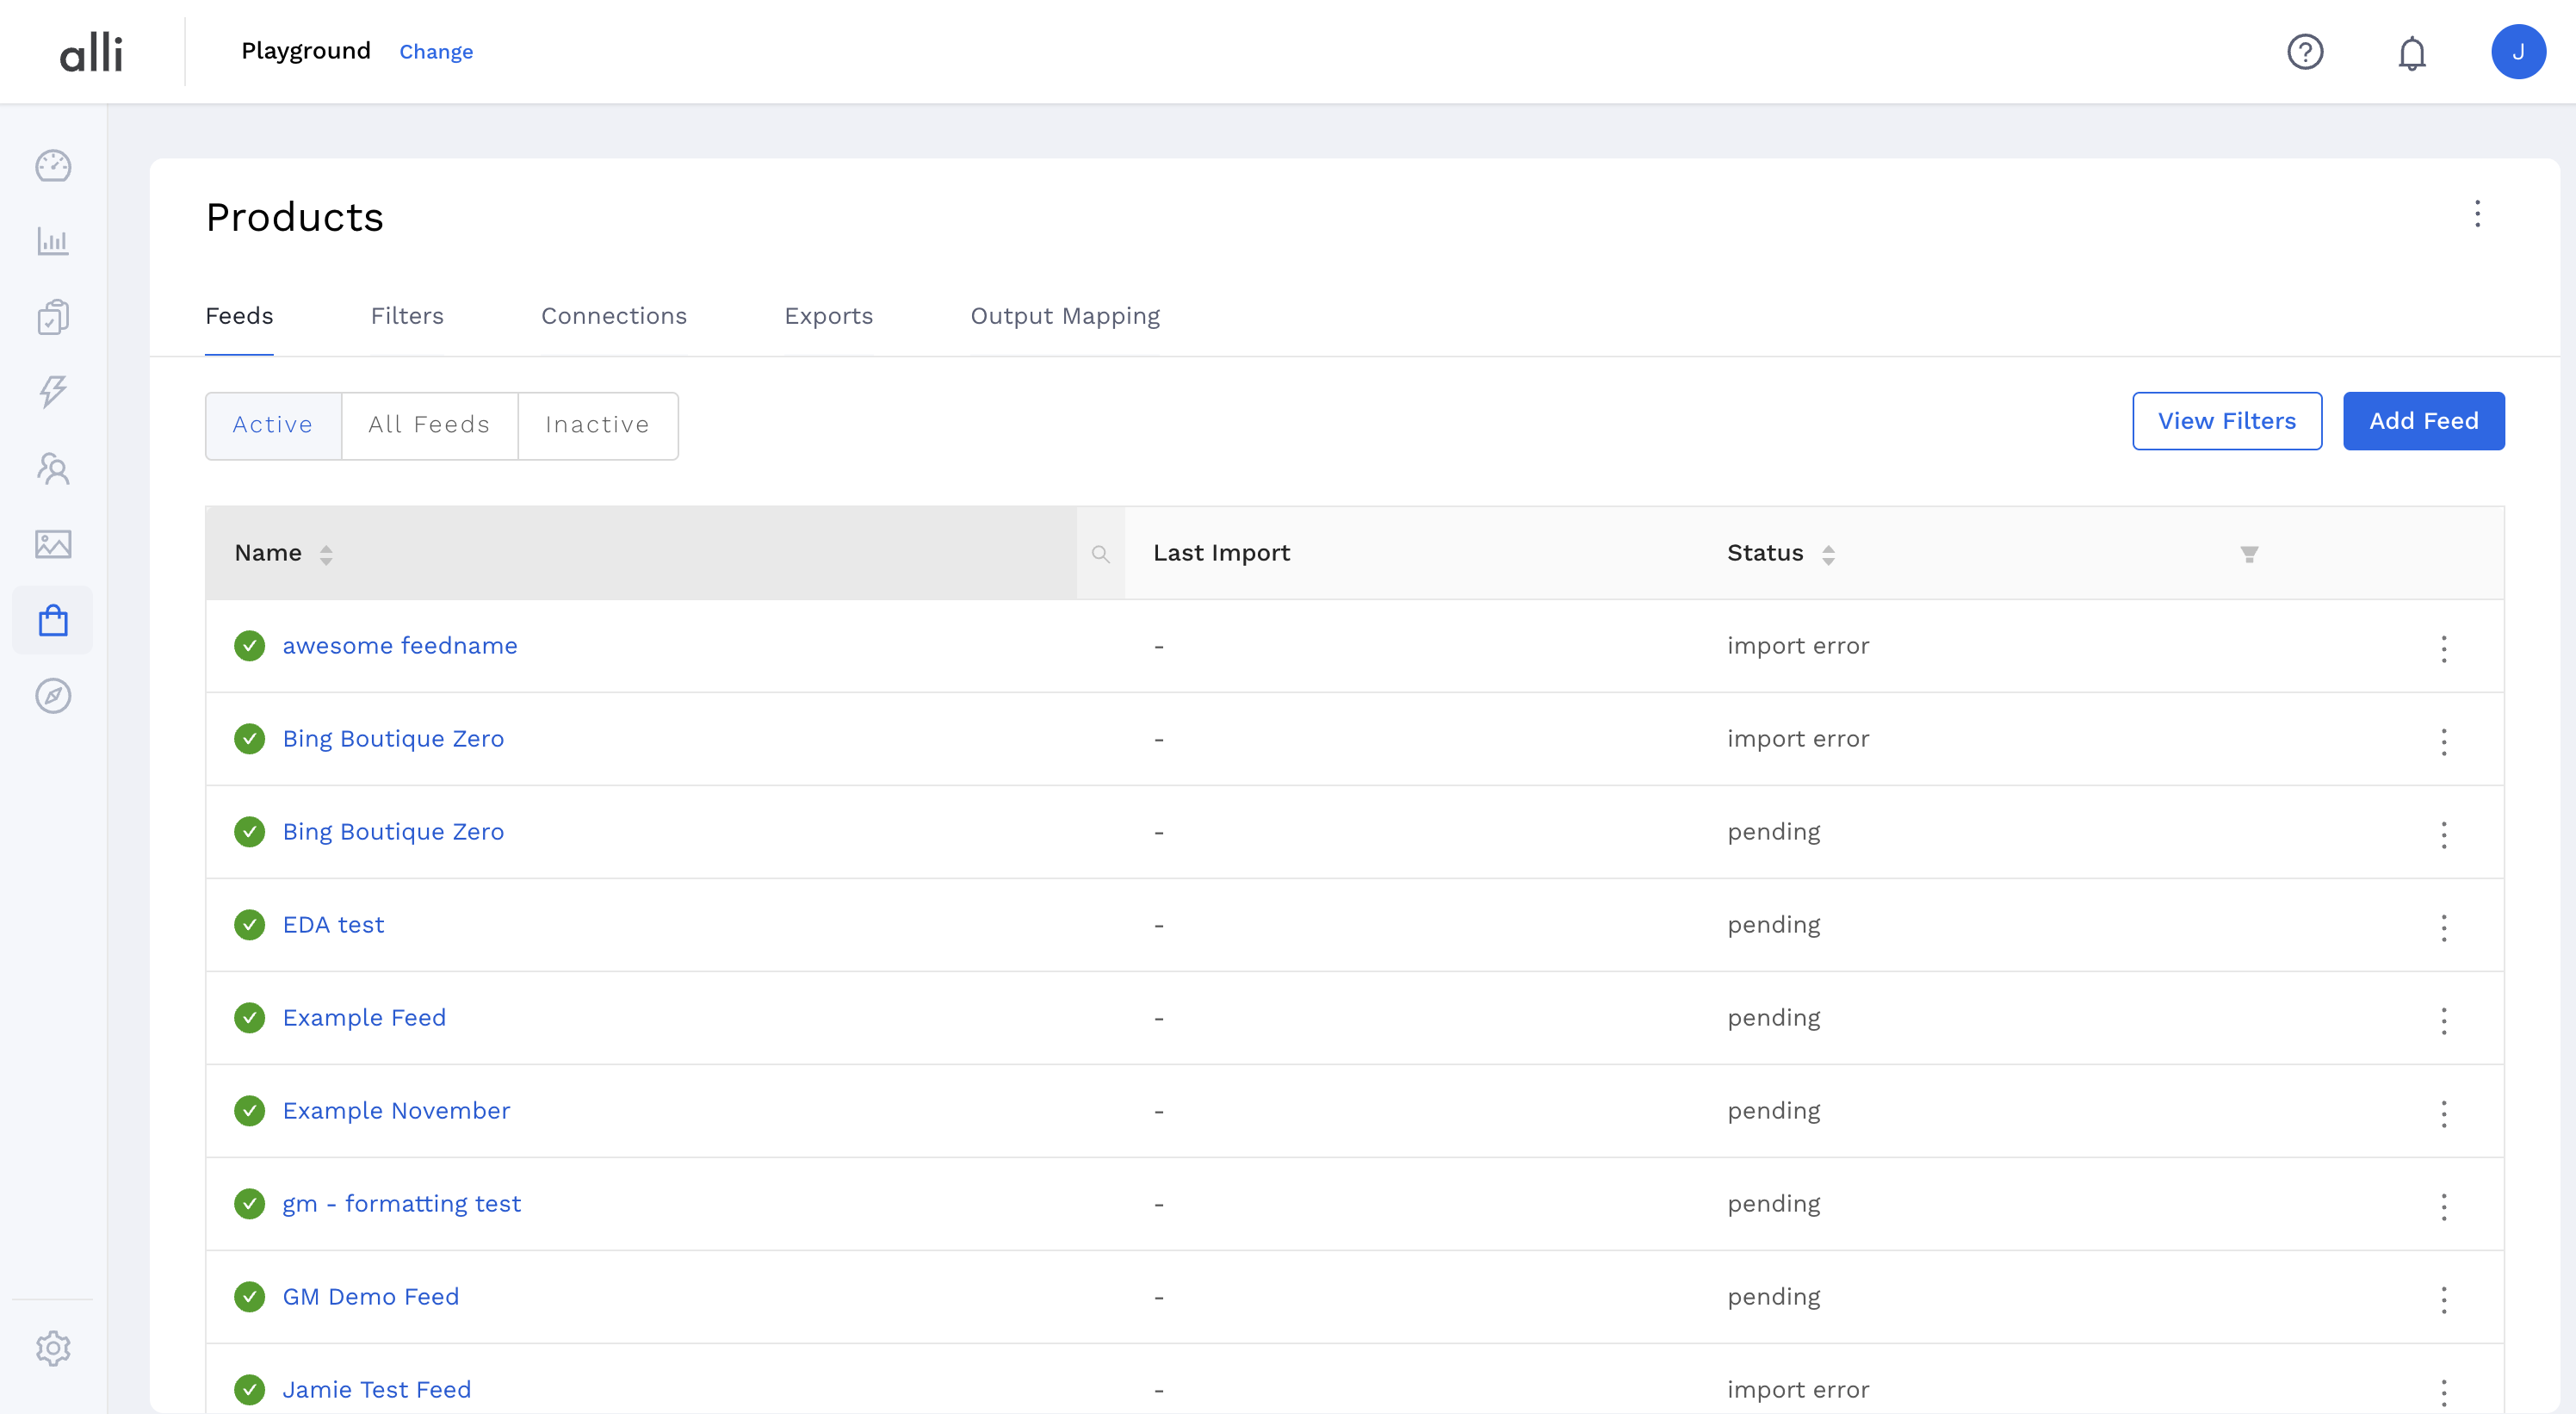
From the left-hand navigation, select Products. This page shows an overview of all Active Feeds, with additional tabs to see All Feeds and Inactive Feeds if needed. To add a new feed, click the blue Add Feed button on the far right side.
-
This page will show a list of necessary Attributes needed for the chosen feed type. Dropdown the Select Template section to choose either a standard template of requirements or to choose and replicate a previously created feed.
-
Name the Feed and Item Name and include Item Images and Item Google Category if applicable. Once all fields are filled in, click the blue Add Feed button.
Adding a New Datasource
-
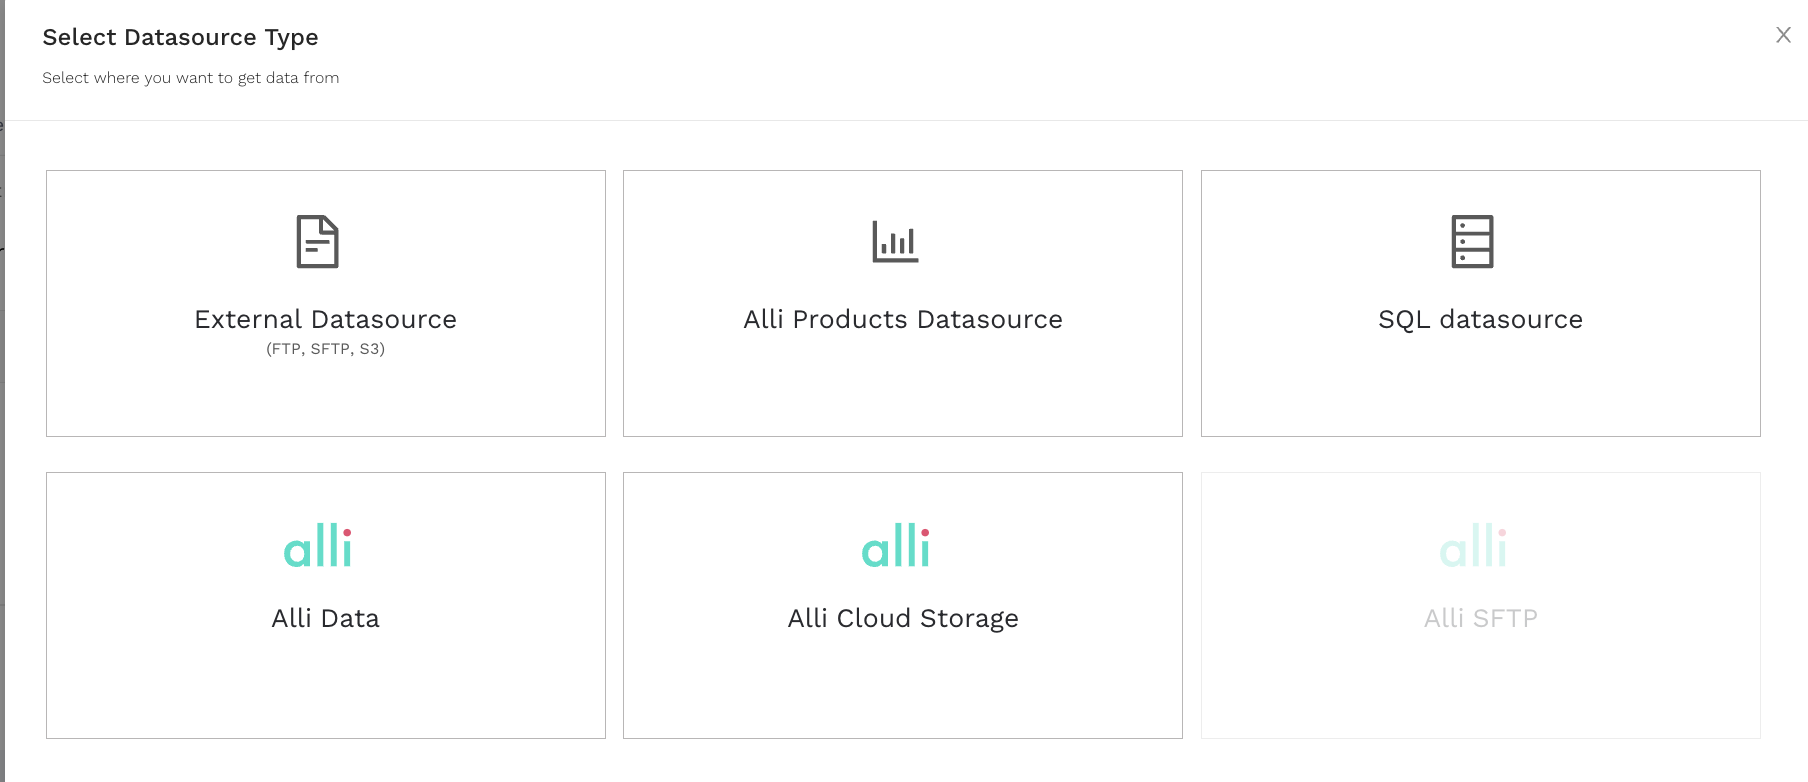
Once you have configured your feed, the typical workflow is to select your Data Source where the feed will come from. Select Data Sources and click the New Datasources button.
-
Select the Data Source where the feed will come from.
-
Assuming that the Data Source is already within Alli, choose Alli Data. Specify what Database Table (or View) to link from. Anytime that datasource is refreshed, the feed will be refreshed as well.
-
The primary attribute will be how multiple datasources are joined together, so this is a required setting.
-
The attributes section is where you map the datsource field names to the field names you set up when configuring the feed. So if you configured the feed with a
sale_priceandpricecolumn, you could map a field in your datasource titledfinal_priceto both -
Press the blue Save button when complete.
-
After clicking save, review your setup, and either use the back arrow next to your datasource name or click the
Datasourcesin the breadcrumbs to navigate back to your datasource setup. -
Now, if needed, you have the ability to add Multiple Data Sources
Create a Import and/or Deploy Schedule
-
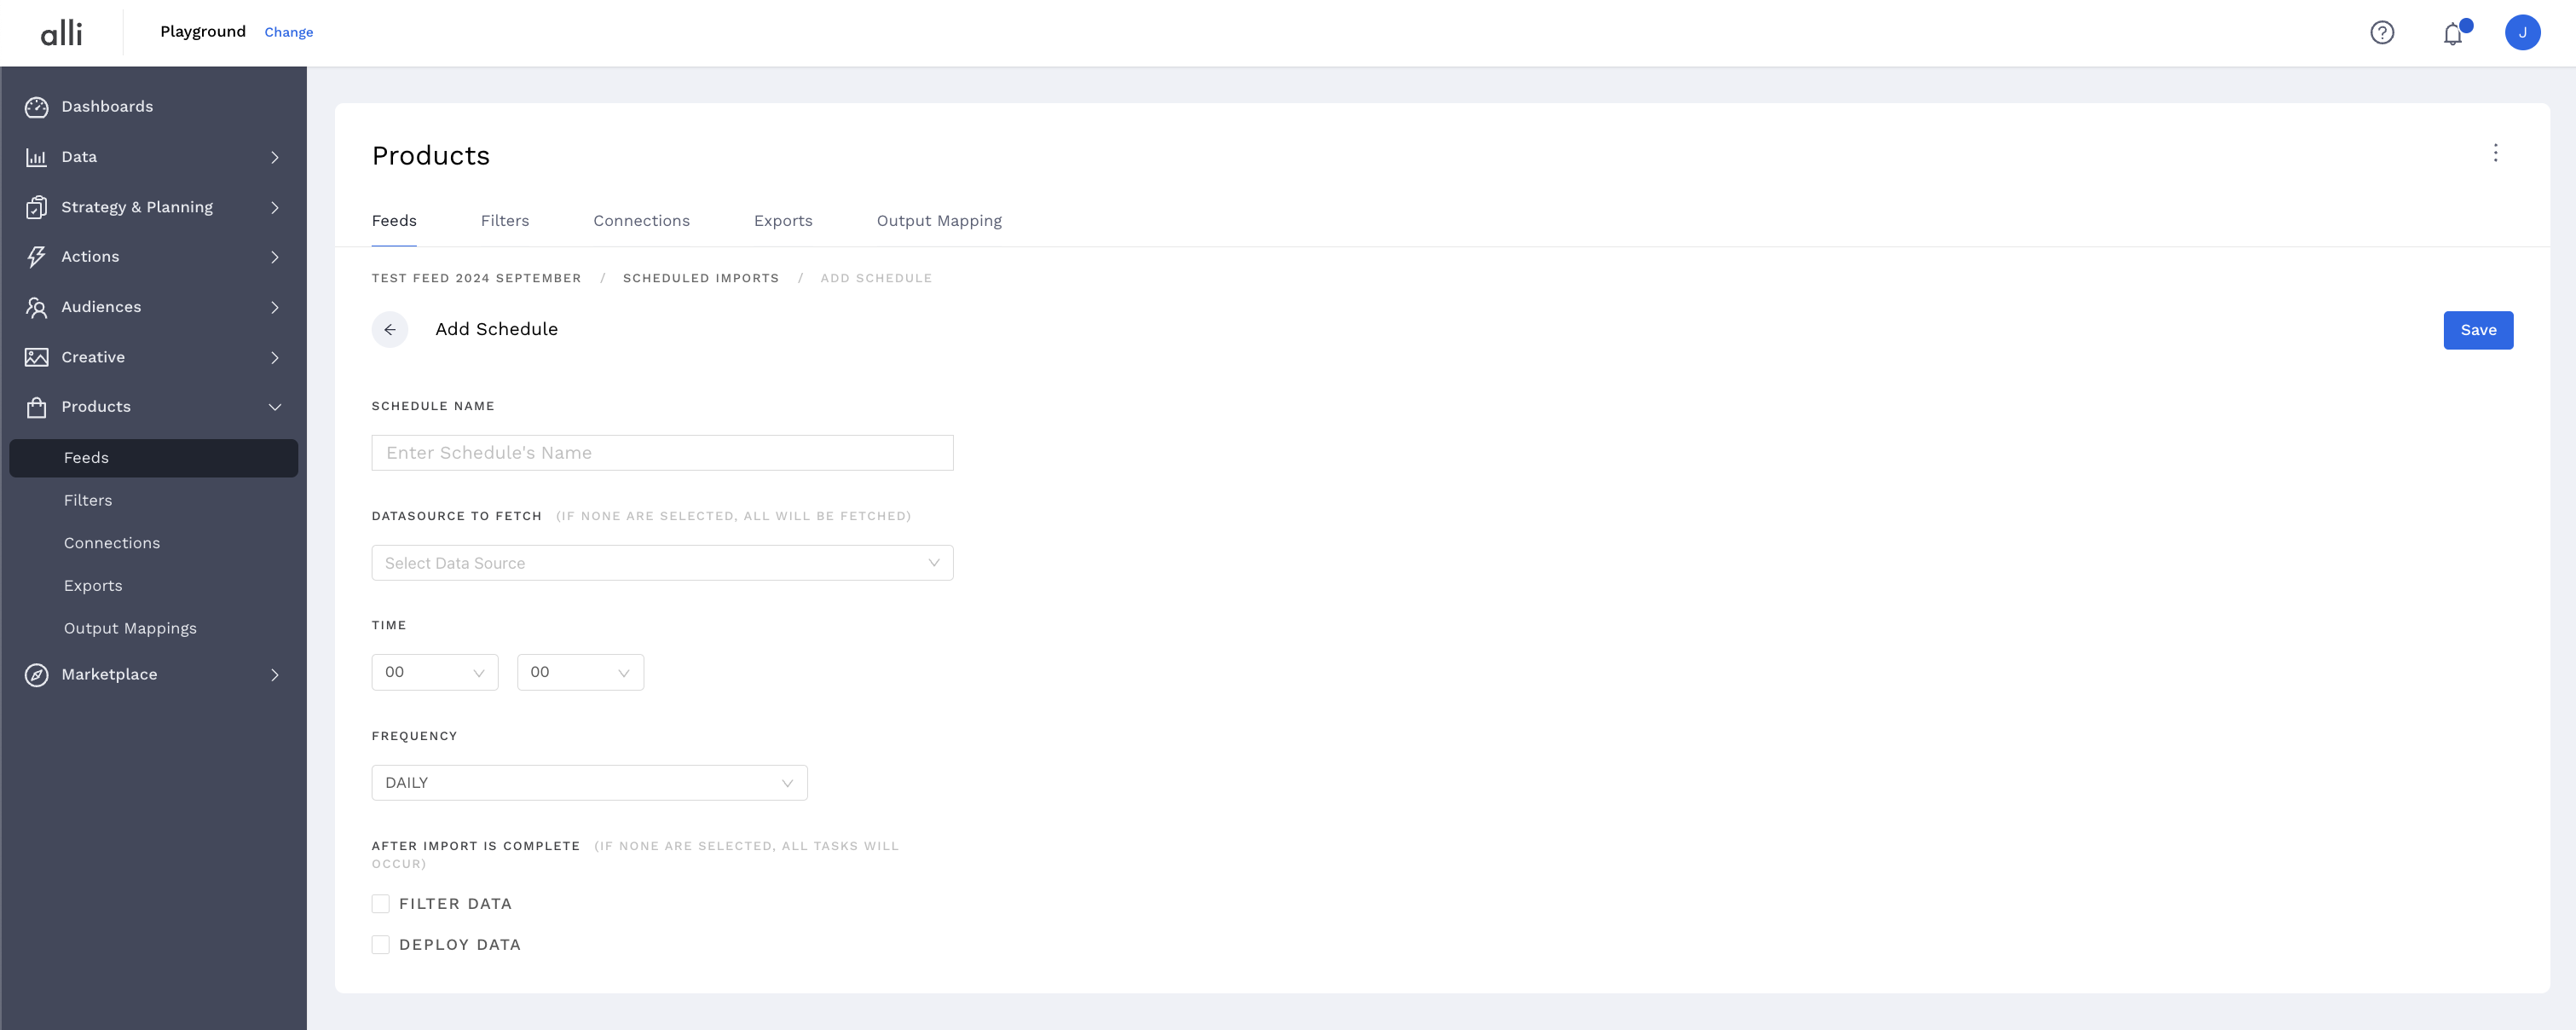
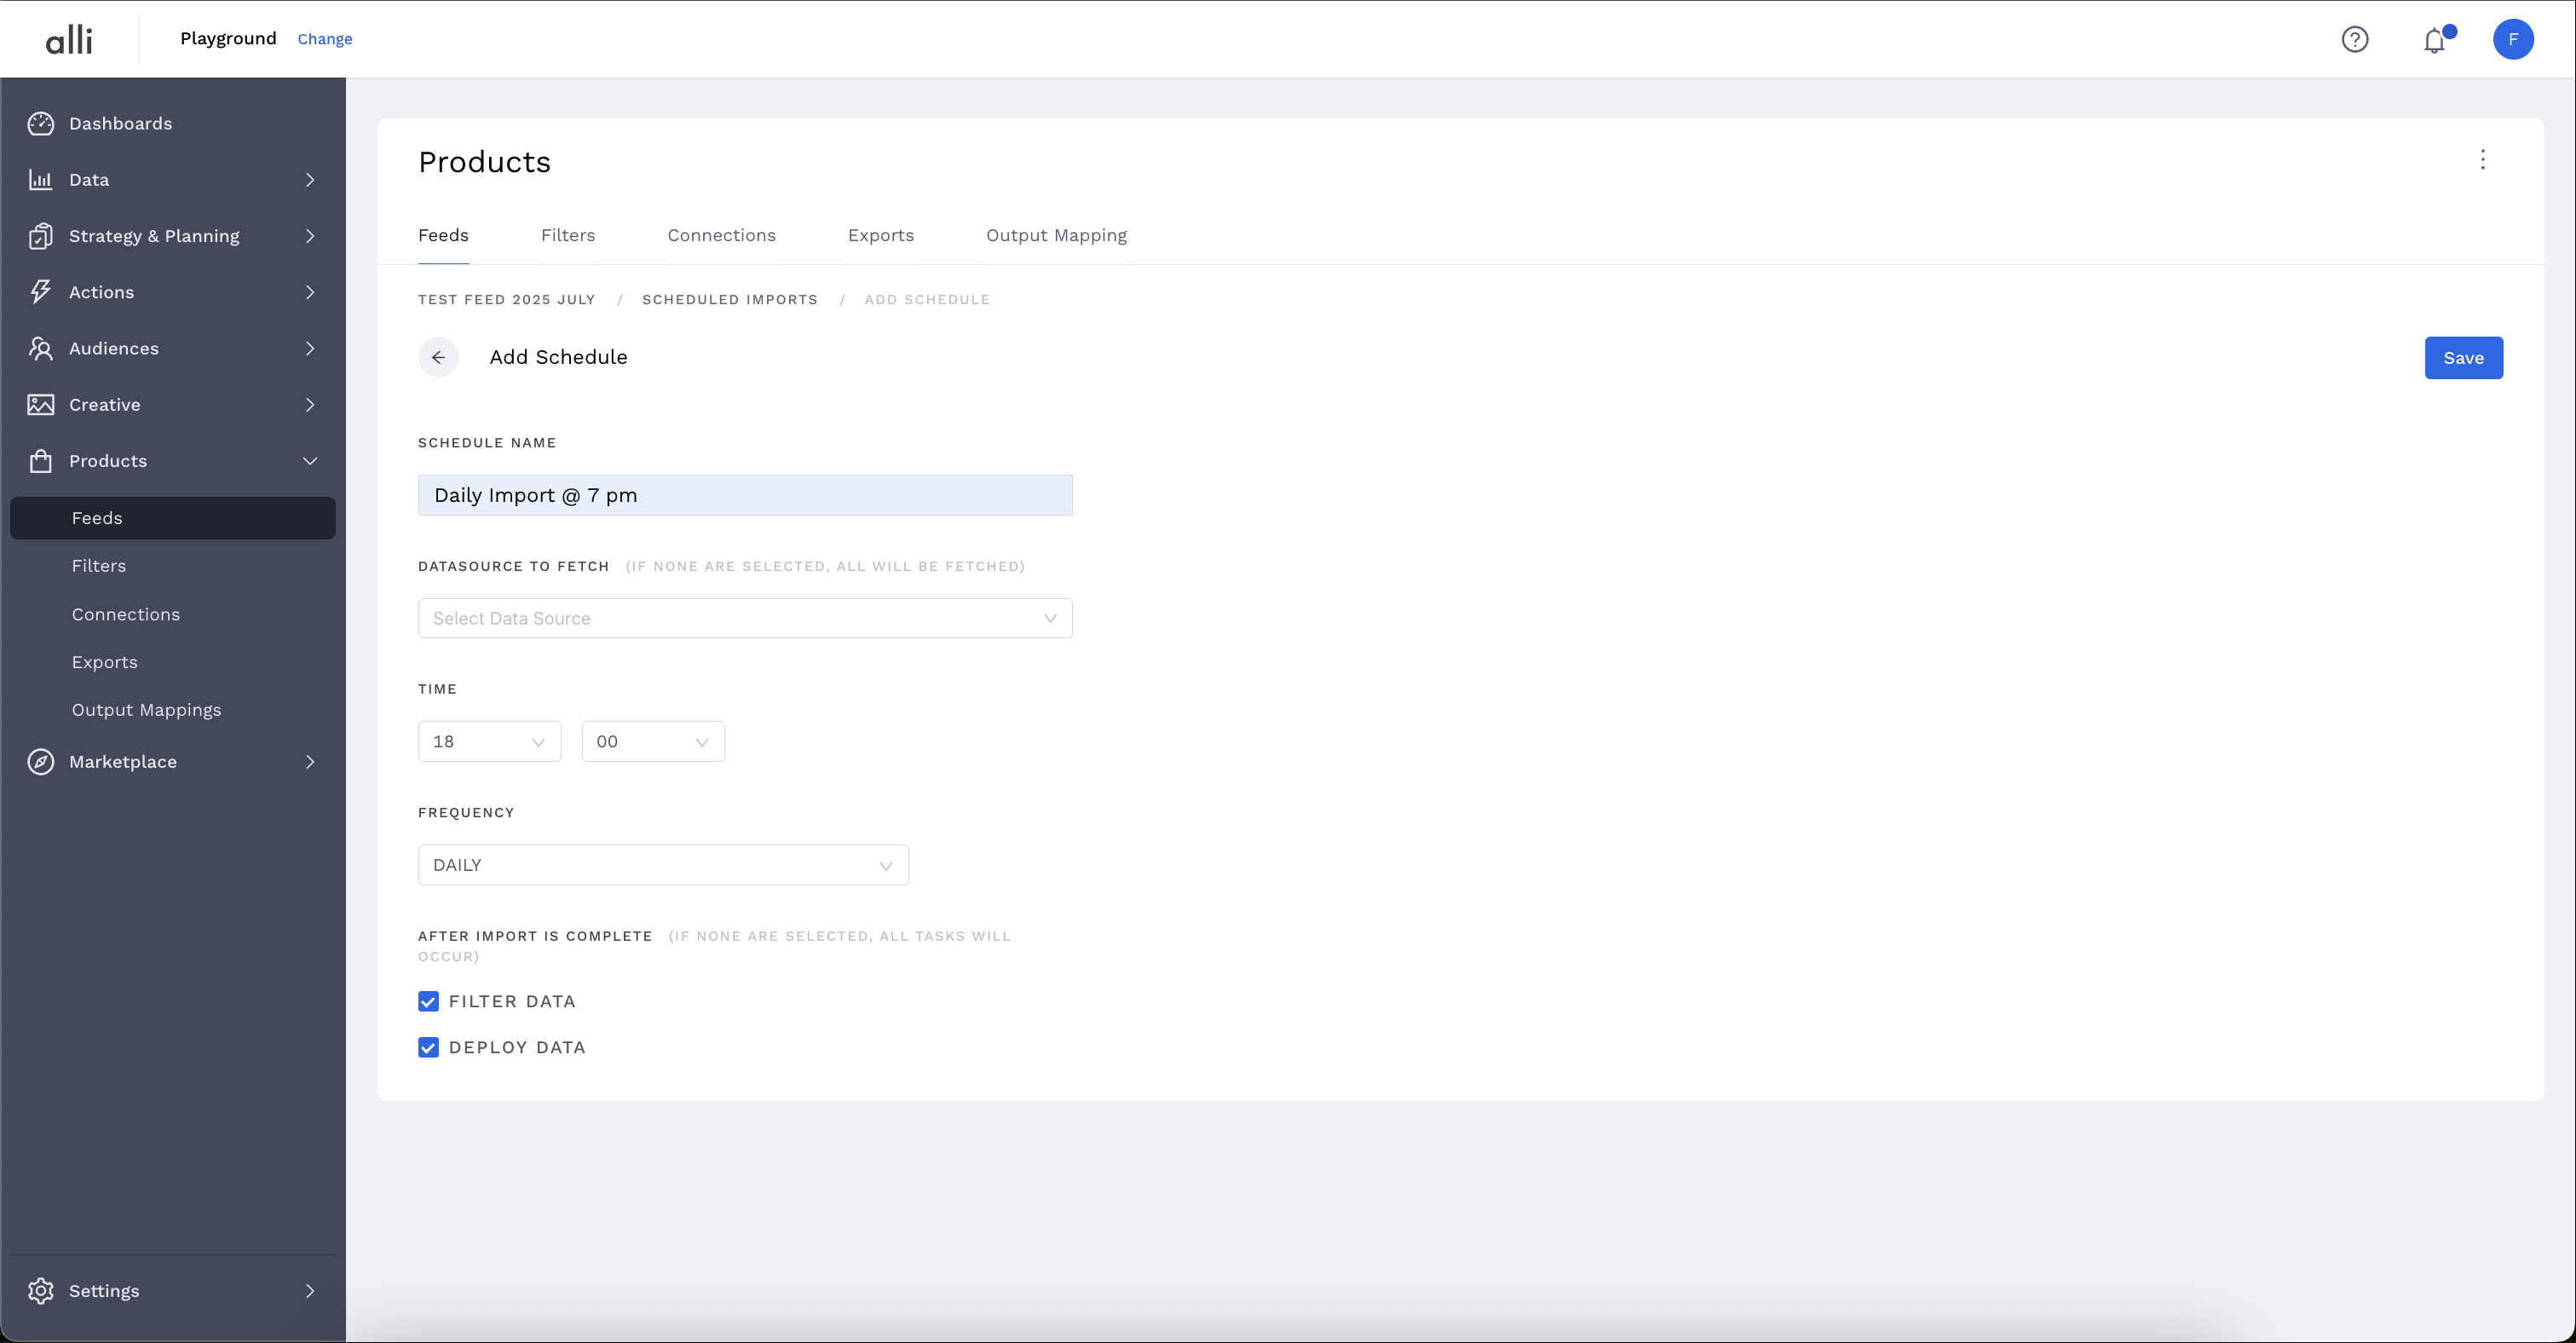
Back at the feed setup page, click into Scheduled Imports to set up the recurring schedule.
-
Name the Fetch Schedule, checkmark the pertinent boxes and schedule the Fetch Times. Press Save when complete.
It is important you read carefully the instructions for DATASOURCE TO FETCH and remember that if none are selected, all tasks will occur
So if you have multiple datasources, you can either
A) select them all from the dropdown or
B) select nothing
If you go with option A, remember that if you add another supplemental datasource later, you will need to update your scheduled import, but if you select option B, you will not
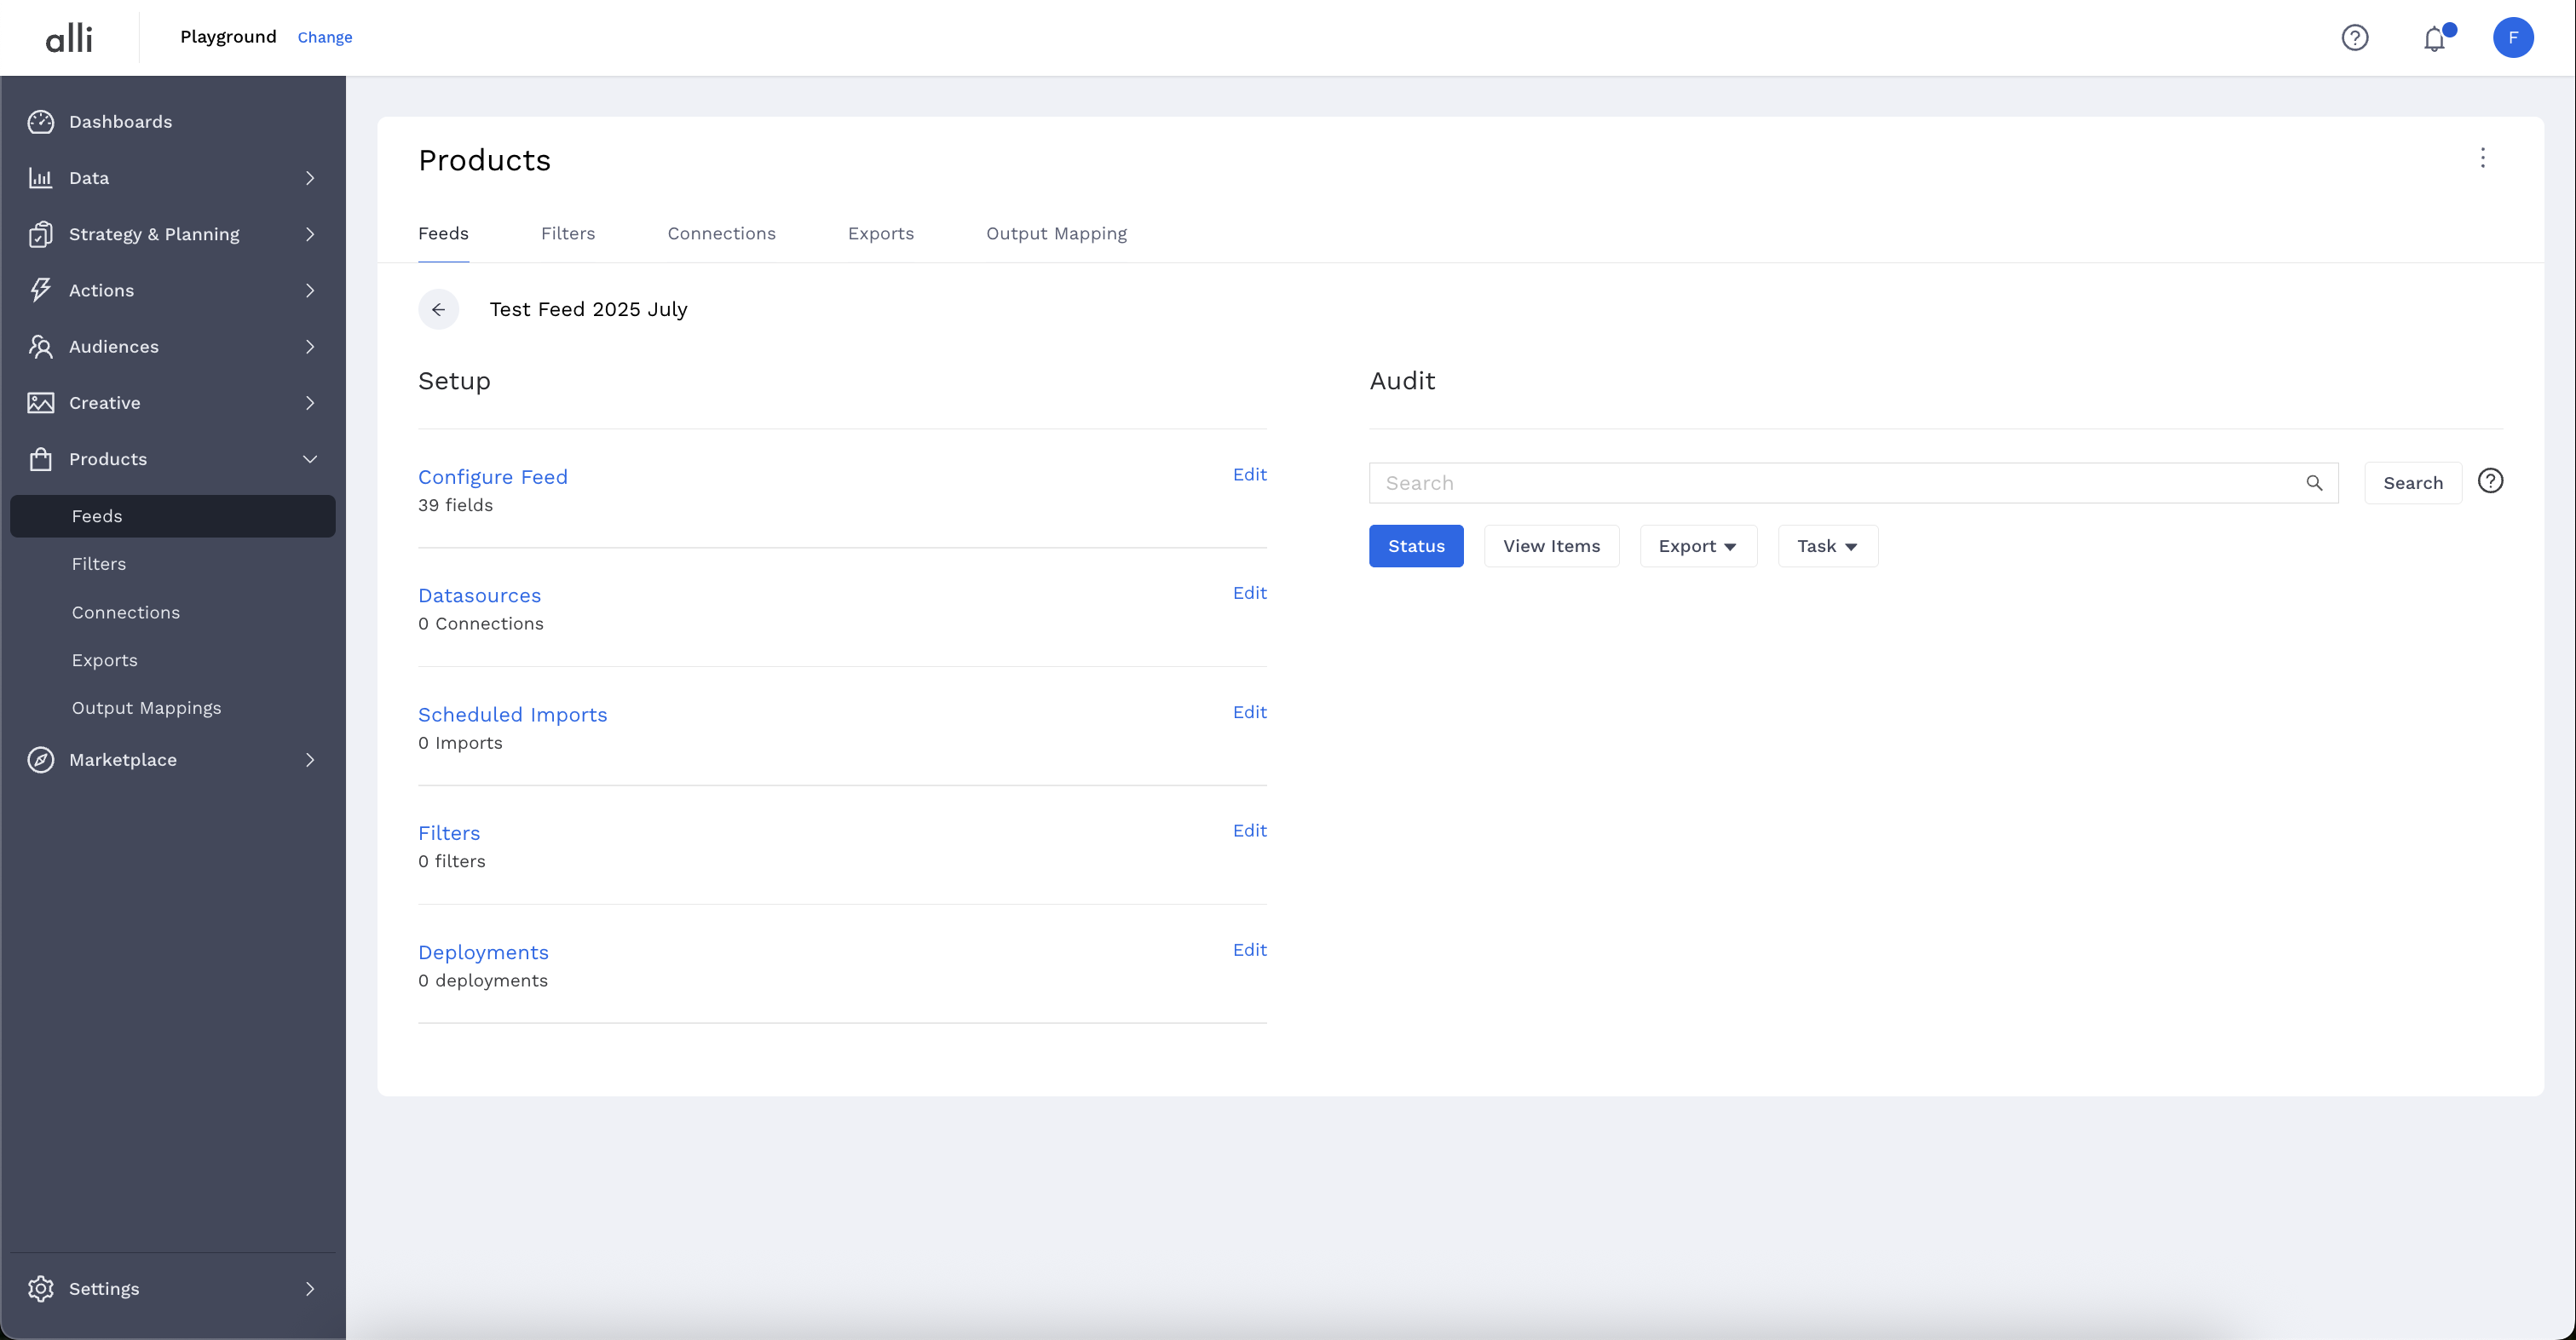
Create a Feed Deployment
-
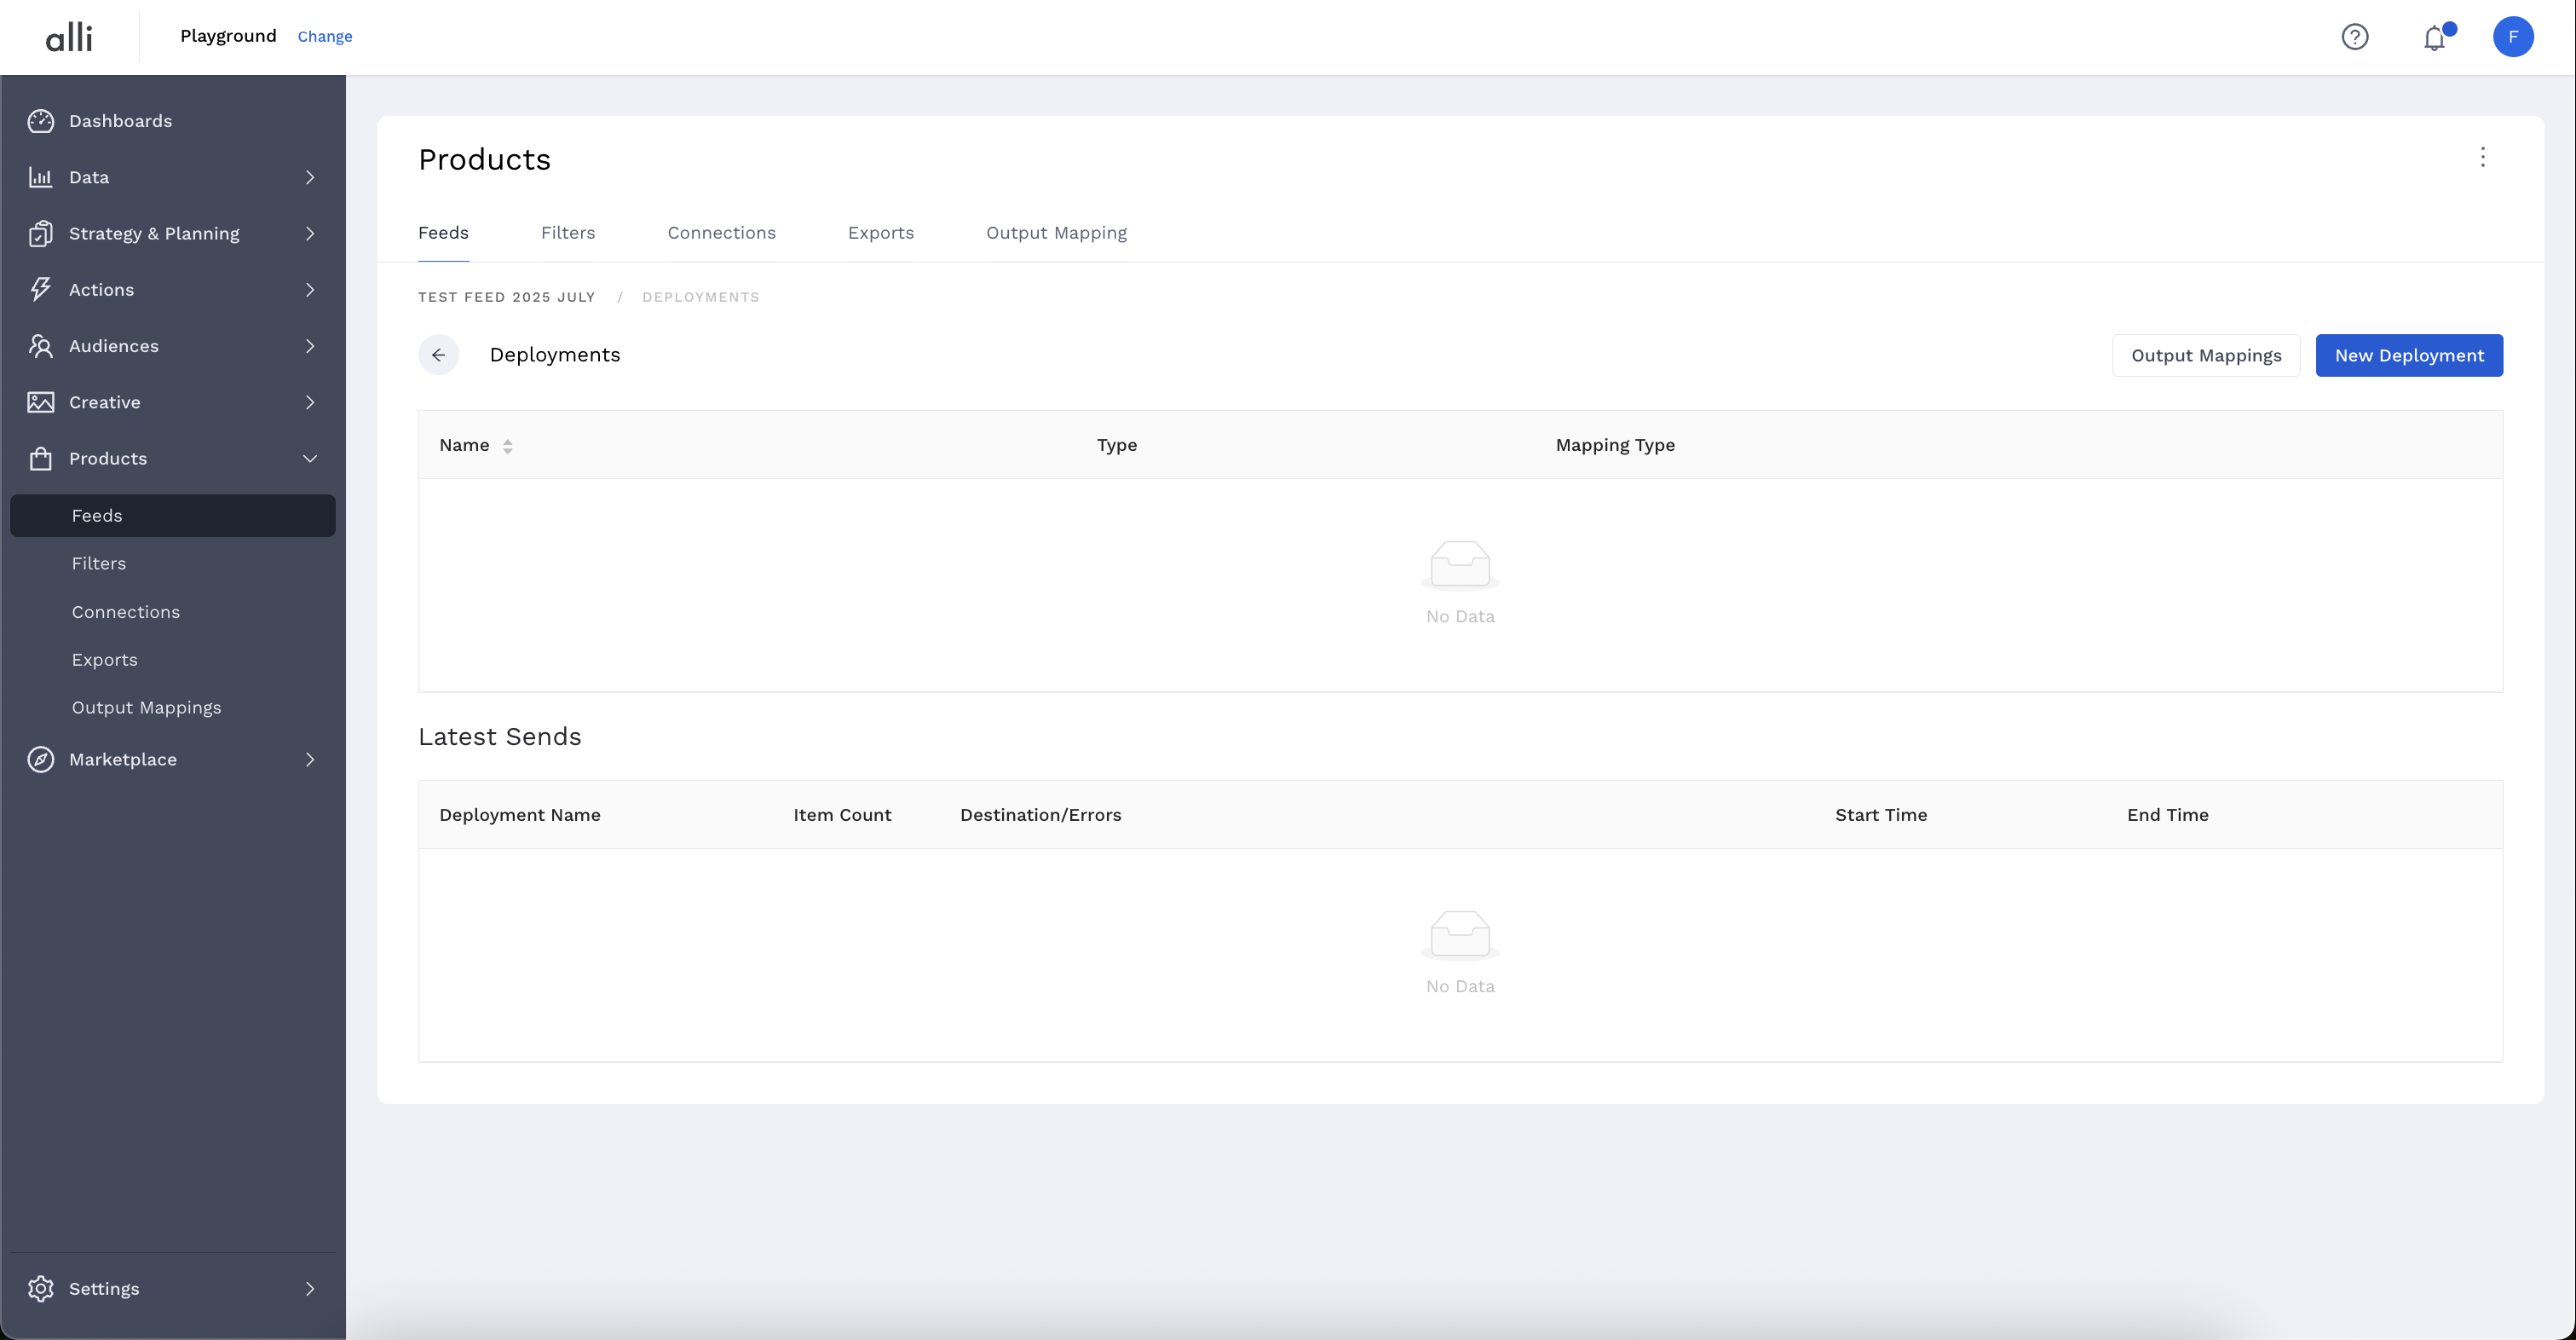
From the setup screen, select Deployments.
-
Click the blue “New Deployment” button
-
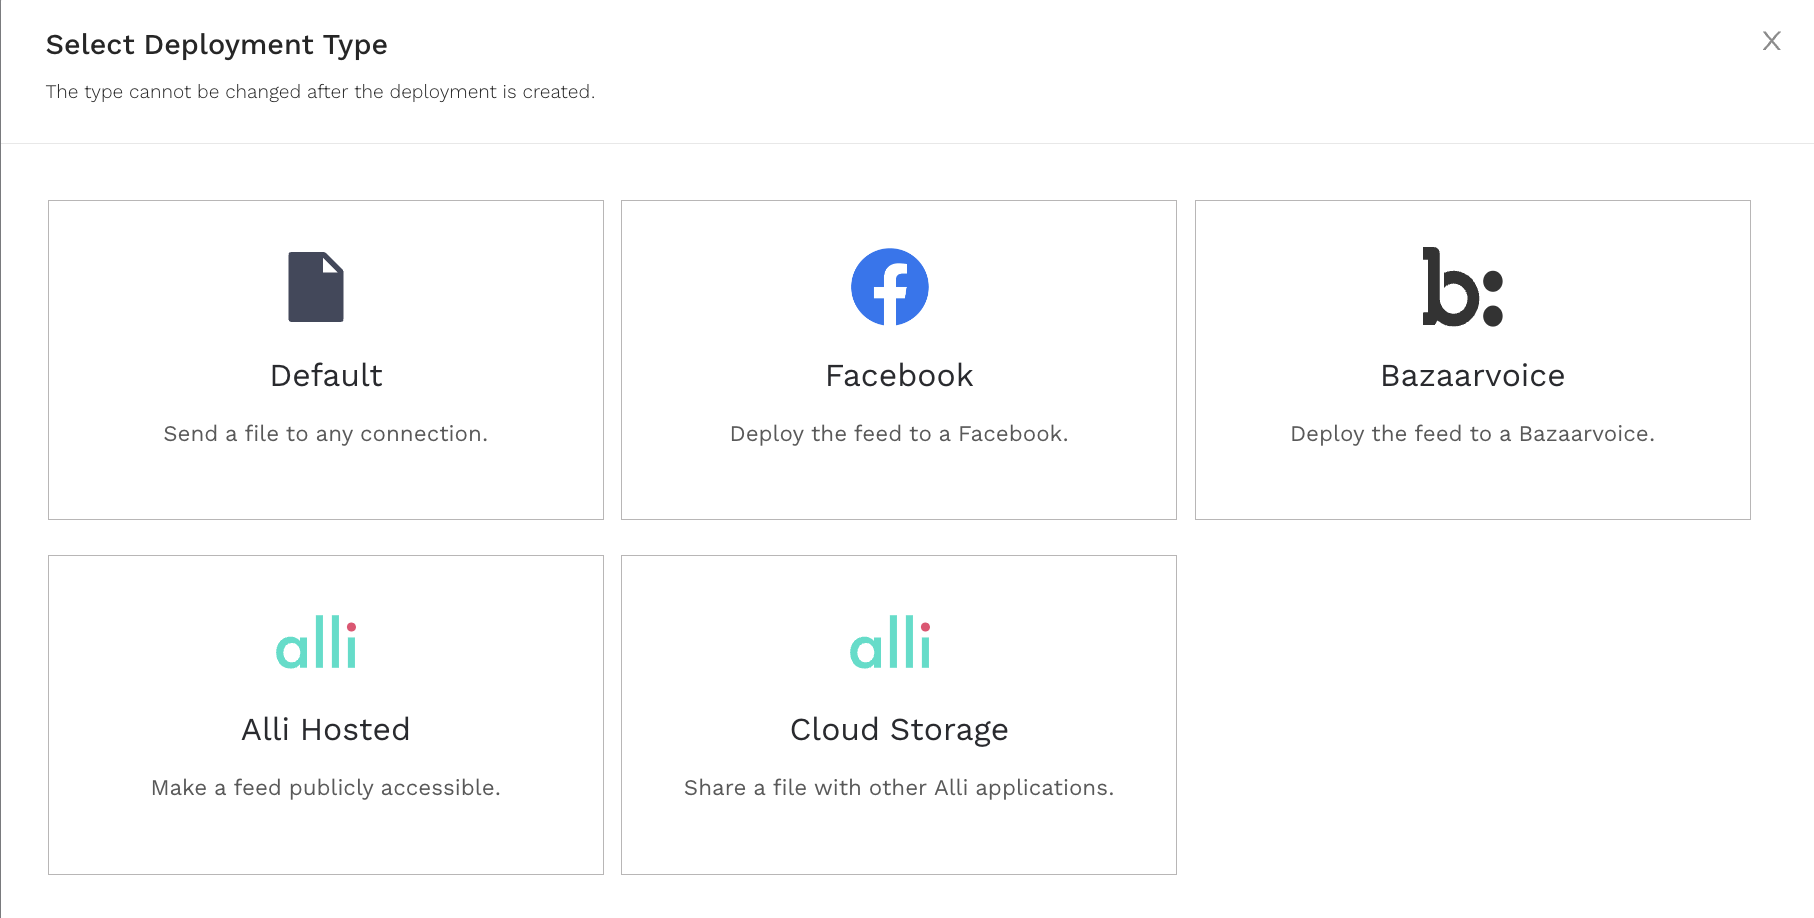
Select the Deployment Type where the feed should be sent.
-
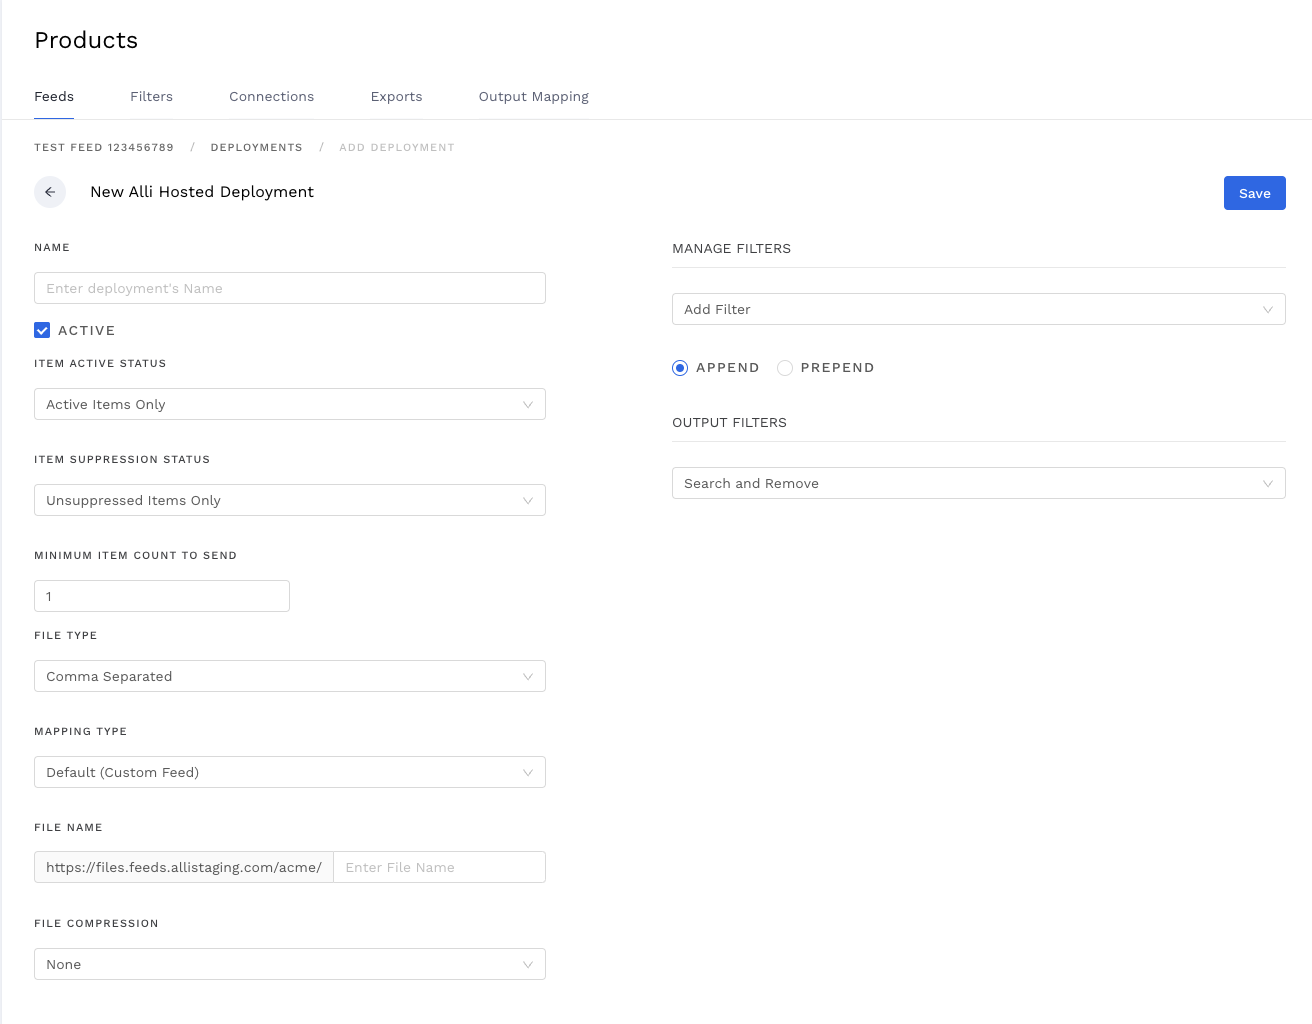
Fill out all the applicable fields
-
Click Save. This will take you back to the feed status page. The feed will activate on the schedule provided or you can click on Deploy under Audit > Tasks to run the feed immediately.