
Overview
This guide explains how to create a Dynamic Creative Report as a Certified Data source, which is utilized for cross-channel Dynamic+ reporting purposes.
Currently, the dynamic_creative_performance report supports only CM360. The platform reports are as follows
CM360:
-
cm360__dynamic_creative_performance
Cross-Channel:
-
dynamic_creative_performance
Prerequisites
-
User creds with access to client CM360 account
A shared [client]_reporting@pmg.com account is preferred over a personal account
-
Creating the Dynamic Creative report in CM360
-
Navigate to CM360 reporting. - using the creds from Prerequisite
-
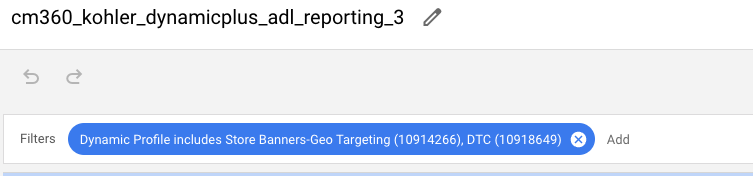
Go to “Reporting and Attribution“ and create a new report under the
Instant Reportingtab. -
Add a filter for
Dynamic Profileand select the client’s template for the report(note: you can select multiple dynamic profiles as required)
-
Add the Dynamic reporting dimensions using the schema provided below.
-
Ensure all the dimensions and metrics are added as shown in the above schema to avoid errors in the ADL report build.
e. Once dimensions and metrics are added, set up the Delivery Schedule to refresh daily and save as with name cm360_{clientname}_dynamicplus_adl_reporting.
Instructions
Creating CM360 Dynamic Creative Datasource in Alli
To enable CM360 Dynamic Creative reporting for a specific client, follow these steps:
-
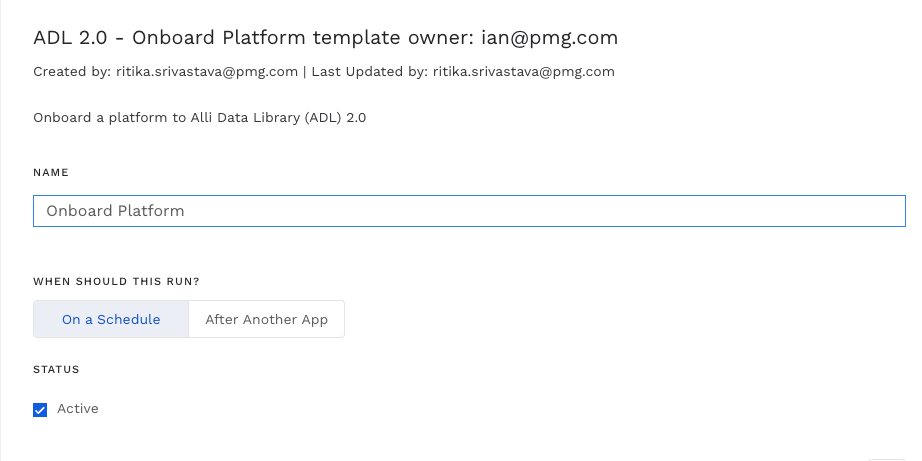
In Alli Marketplace, use the
ADL 2.0 - Onboard Platformapp -
Select the CM360 platform to create
cm360_insights_dynamic_creativesource (refer Tutorial: Onboarding a Platform):

-
Click
Save and Run. After app execution, verify that thecm360_insights_dynamic_creativedata source appears in Alli.

-
Authenticate the data source using the CM360 user creds
-
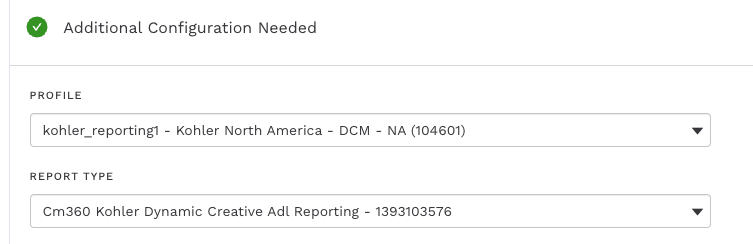
Select the proper CM360 account for
PROFILE, clickNext, then select the report from prerequisites step (2) forREPORT_TYPE, and clickNextagain
-
Ensure all dimensions are selected and match reporting requirements
-
Click save and load data
Refresh app setup
-
To enable Dynamic creative reporting for CM360, follow the below steps
-
Once the data source has pulled in data, navigate to the existing client’s
ADL 2.0 - Refreshapp -
Within the
dbt_varsJSON file, add the following vars and set platform reporting var toTrue, e.g. enablingCM360:
"data_library_cm360_dynamic_creative_reporting_enabled": "True"
-
App Setting:
PLATFORMS = ALL PLATFORMS -
Within the app, set
DEPLOYMENTtoTrue
Tip
If you want to enable dynamic creative reporting for a single platform only, consider selecting the specific platform CM360 within the PLATFORMS_TO_REFRESH drop-down. This will minimize unnecessary refreshes on other platform reports and speed up the deployment of your new Dynamic report.
Just be sure to set this back to All Platforms and hit Save
-
Hit
Save and Runto execute the deployment app -
Set
DEPLOYMENTback toFalseand clickSave -
Once the app completes successfully, you should be able to query the Dynamic Creative reports
select *
from `{client}_core.dynamic_creative_performance`
Related articles
- How-To: Connect your Google Sheet to Actions
- How-To: Disable or Remove an Installed App
- How-To: Set Up a New Workflow
- How-To: Pull Data for TikTok Trends
- How-To: send a deployment to The Trade Desk
- How-To: View Error Messages on an Action That Ran
- How-To: Set Up Brand Media Pacing Datastudio Dashboard
- How-To: Configure a Datasource
- How-To: Use categorizations within your custom report
- How-To: Filter Alli Data Reports by Date to Power Actions - Tips & Tricks
- How-to add a new datasource to an existing Data Studio dashboard
- How-To: Create a new Dashboard Section
- How-To: Check a Feed Import or Deployment Status
- How-To: Understanding Version Statuses
- Advanced Guide: Enabling Big Query for a Custom Alert