Overview
This tutorial explains how to build and/or refresh data for your Certified Datasources.
Important: Before proceeding with the app installation, ensure an instance of the app does not already exist under My Apps ➔ Apps. If it does, utilize it and modify as necessary.
1.) Navigate to Alli Marketplace and search for the ADL 2.0 - Refresh app under My Apps → Browse
2.) Install the app and fill out the required fields below:
TARGET
The data warehouse environment where you wish to build the reports. Current options include Redshift, BigQuery, and Snowflake.
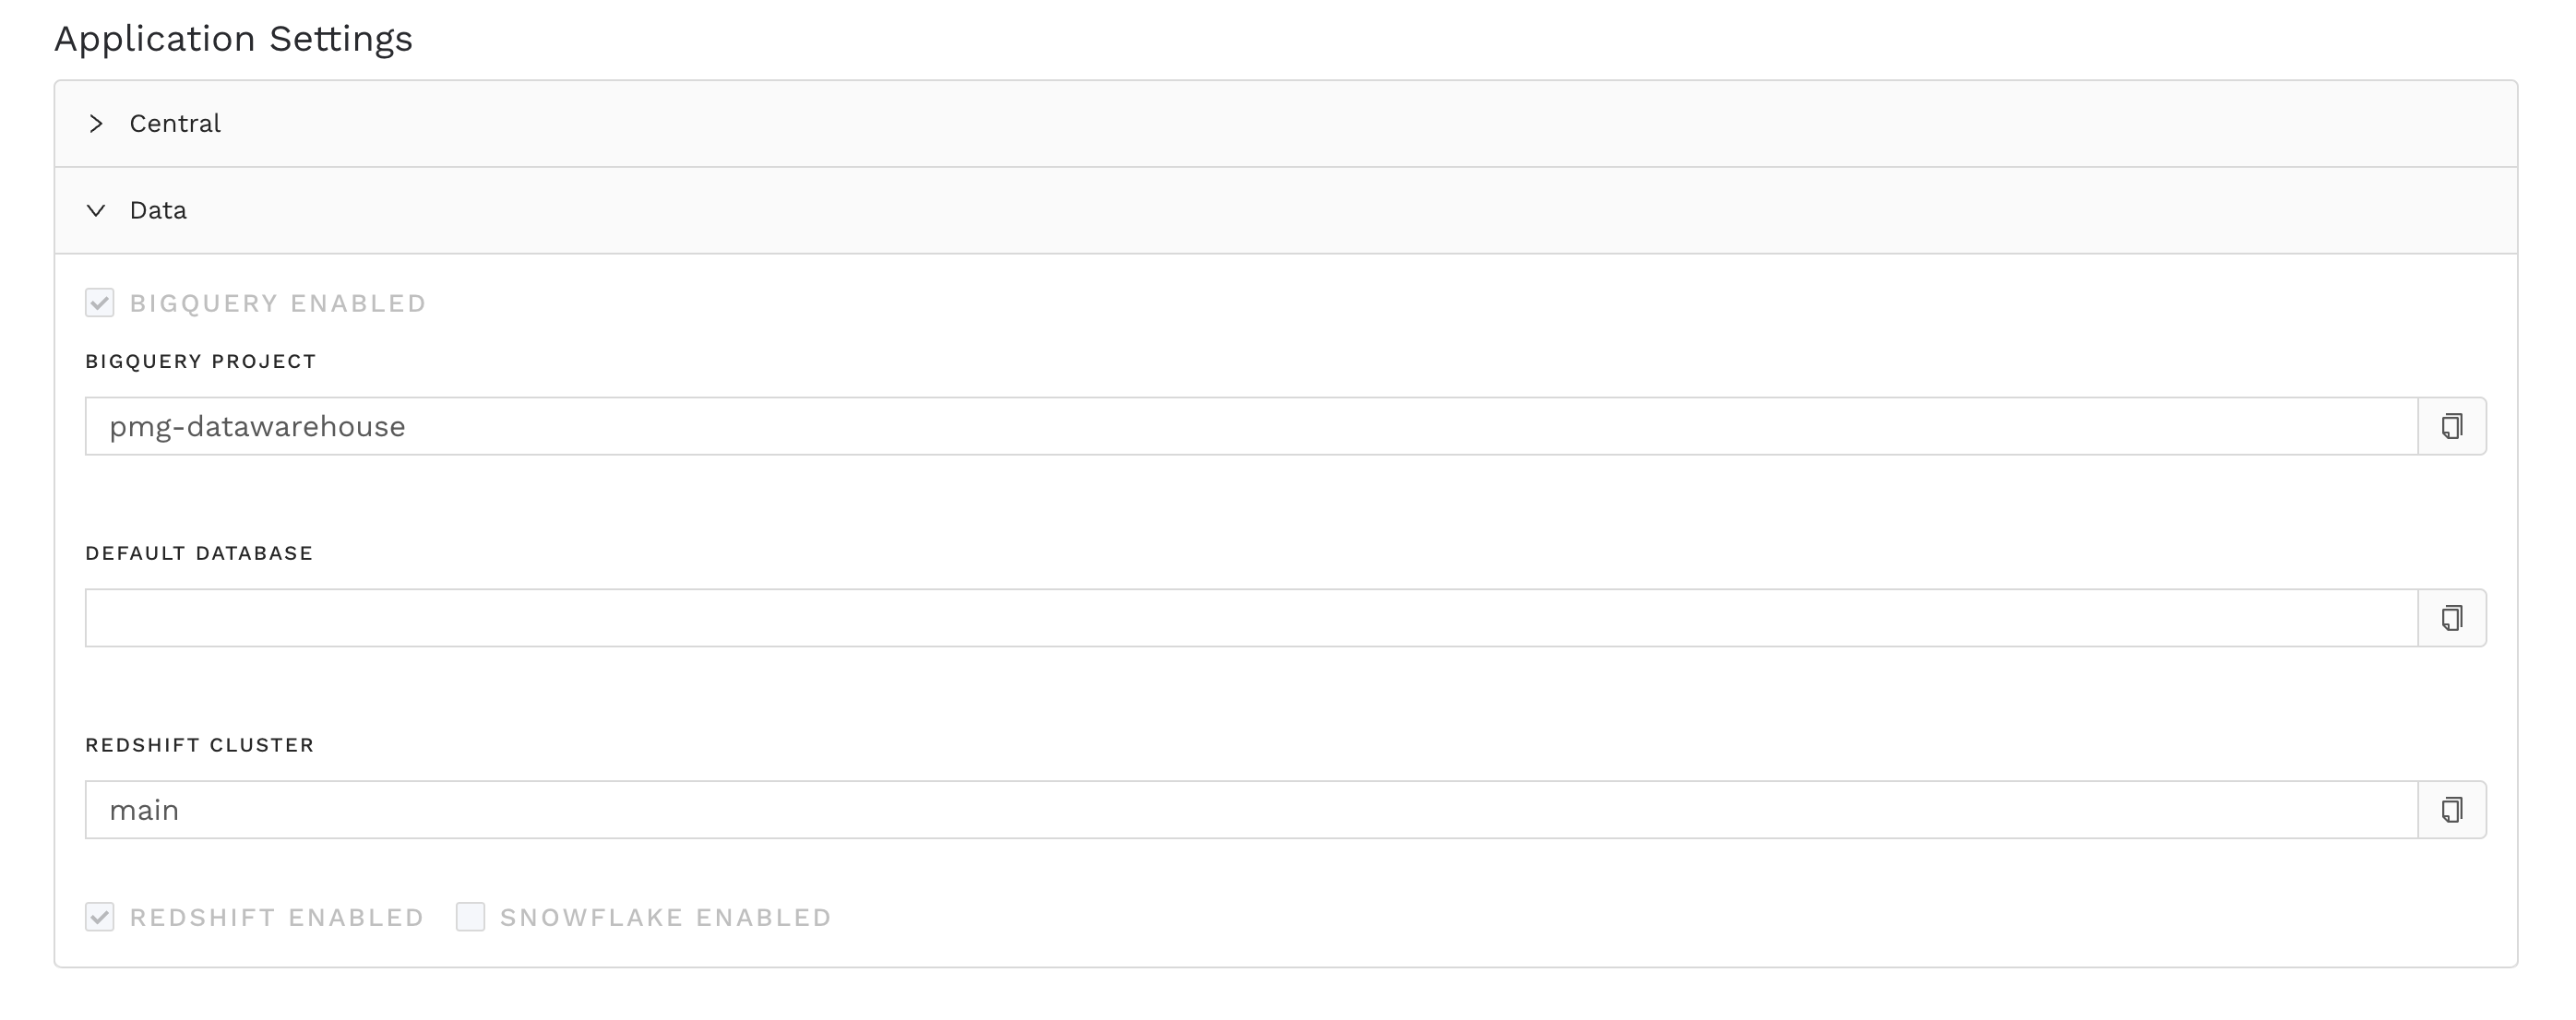
To see which one(s) are enabled for your client:
-
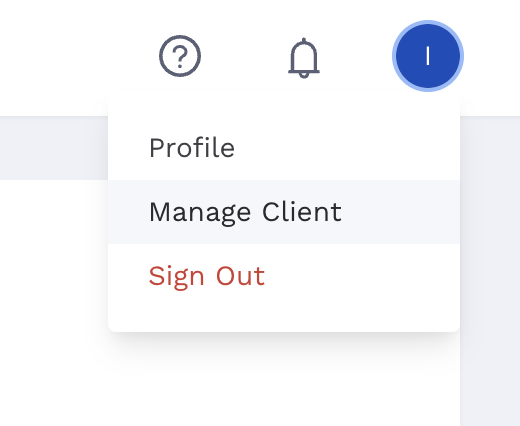
Navigate to Settings ➔ Manage Client, and select the Settings tab.
-
Scroll down to Application Settings, and check the Data drop-down.

If you’re expecting to see models shown on the Data Explorer page, please make sure the ADL apps for the DEFAULT DATABASE from the above screenshot have been created and completed.
For example, when DEFAULT DATABASE = Snowflake, an app with Target = Snowflake needs to be created and run.
When DEFAULT DATABASE is blank, it will be Redshift.
DBT_VARS
A JSON file containing settings that specify which platforms and reports to build for the customer. Follow the instructions below:
Generating the dbt_vars.json file
a.) Copy the contents below and paste it into a text editor:
{
  "alli_client_slug": "{alli_client_slug}",
  "data_library_googleads_enabled": "False",
  "data_library_googleads_searchterm_reporting_enabled": "False",
  "data_library_googleads_productgroup_reporting_enabled": "False",
  "data_library_googleads_inventory_reporting_enabled": "False",
  "data_library_googleads_audience_reporting_enabled": "False",
  "data_library_googleads_geo_reporting_enabled": "False",
  "data_library_googleads_performance_max_reporting_enabled": "False",
  "data_library_googlemerchantcenter_enabled": "False",
  "data_library_googleads_hourly_reporting_enabled": "False",
  "data_library_microsoftads_enabled": "False",
  "data_library_microsoftads_legacy_datasource_reporting_enabled": "False",
  "data_library_microsoftads_searchterm_reporting_enabled": "False",
  "data_library_microsoftads_productgroup_reporting_enabled": "False",
  "data_library_microsoftads_audience_reporting_enabled": "False",
  "data_library_microsoftads_hourly_reporting_enabled": "False",
  "data_library_applesearchads_enabled": "False",
  "data_library_applesearchads_searchterm_reporting_enabled": "False",
  "data_library_cm360_enabled": "False",
  "data_library_cm360_historical_reporting_enabled": "False",
  "data_library_dv360_enabled": "False",
  "data_library_dv360_trueview_reporting_enabled": "False",
  "data_library_dv360_inventory_reporting_enabled": "False",
  "data_library_dv360_geo_reporting_enabled": "False",
  "data_library_tradedesk_enabled": "False",
  "data_library_tradedesk_inventory_reporting_enabled": "False",
  "data_library_tradedesk_geo_reporting_enabled": "False",
  "data_library_yahoodsp_enabled": "False",
  "data_library_yahoodsp_inventory_reporting_enabled": "False",
  "data_library_yahoodsp_geo_reporting_enabled": "False",
  "data_library_amazondsp_enabled": "False",
  "data_library_amazondsp_inventory_reporting_enabled": "False",
  "data_library_bidtellect_enabled": "False",
  "data_library_criteo_enabled": "False",
  "data_library_vistar_enabled": "False",
  "data_library_taboola_enabled": "False",
  "data_library_facebookads_enabled": "False",
  "data_library_facebookads_geo_reporting_enabled": "False",
  "data_library_facebookads_legacy_datasource_reporting_enabled": "False",
  "data_library_facebookads_hourly_reporting_enabled": "False",
  "data_library_linkedinads_enabled": "False",
  "data_library_twitterads_enabled": "False",
  "data_library_pinterestads_enabled": "False",
  "data_library_pinterestads_historic_reporting_enabled": "False",
  "data_library_tiktokads_enabled": "False",
  "data_library_tiktokads_geo_reporting_enabled": "False",
  "data_library_tiktokads_hourly_reporting_enabled": "False",
  "data_library_snapchatads_enabled": "False",
  "data_library_snapchatads_geo_reporting_enabled": "False",
  "data_library_snapchatads_hourly_reporting_enabled": "False",
  "data_library_redditads_enabled": "False",
  "data_library_shopmy_enabled": "False",
  "data_library_partnerize_enabled": "False",
  "data_library_teads_enabled": "False",
  "data_library_teads_geo_reporting_enabled": "False",
  "data_library_teads_inventory_reporting_enabled": "False"
  "data_library_stackadapt_enabled": "False"
}
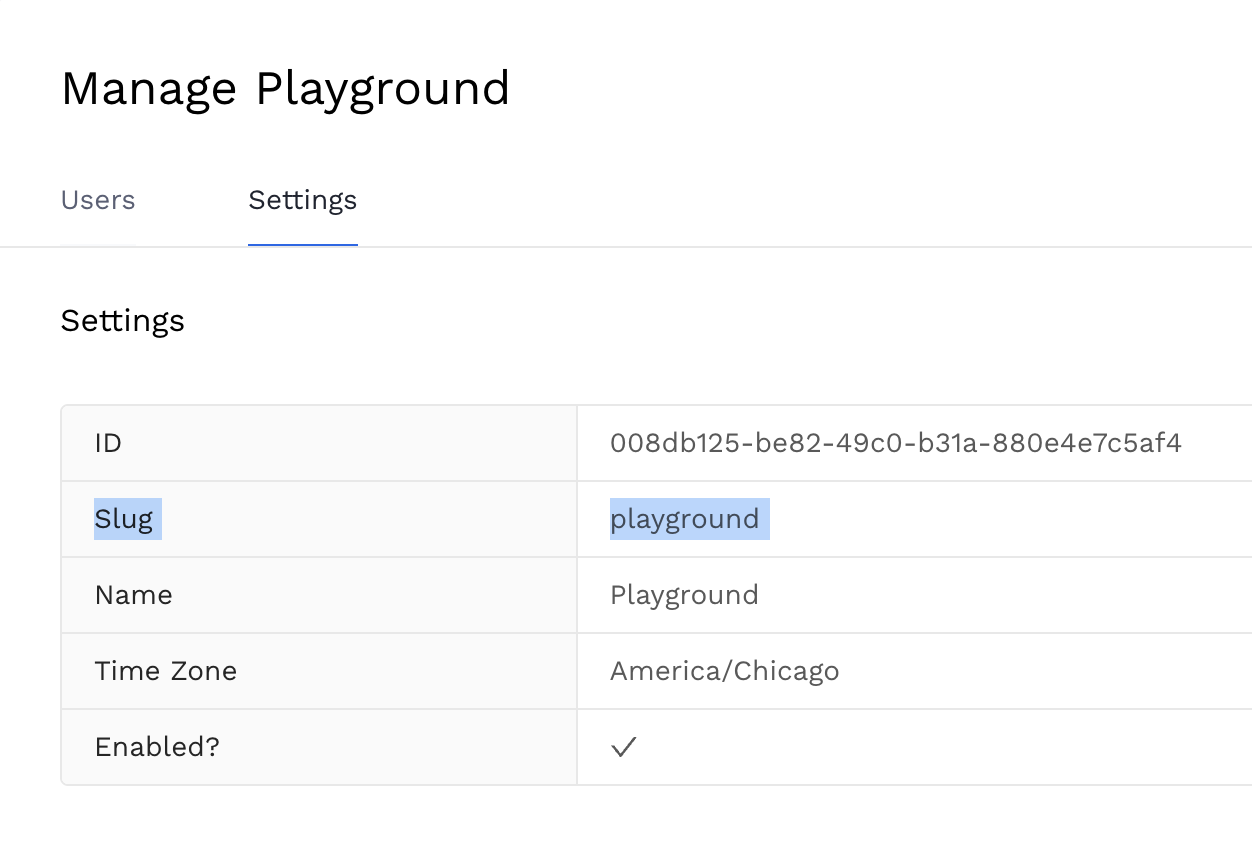
b.) Replace {alli_client_slug} with the Slug of your customer (you can find this by navigating to Manage Client ➔ Settings).


c.) Set the platforms you wish to enable by changing their values to "True". For example, to enable Google Ads, Facebook Ads, and Microsoft Ads, update the corresponding values:
  "data_library_googleads_enabled": "True",
  "data_library_facebookads_enabled": "True",
  "data_library_microsoftads_enabled": "True",
Before enabling a platform, ensure that the data for said platform has been properly onboarded – see Tutorial: Getting started with Certified Datasources | Onboarding a platform to Data Library
d.) Save the file as dbt_vars_{alli_client_slug}.json, replacing {alli_client_slug} with your customer’s slug.
e.) Click Choose File under the DBT_VARS field in the app instance, and select the JSON file you just saved.
VERSION
The version of ADL to be used for the refresh (see https://agencypmg.atlassian.net/wiki/x/mIA0sw)
We recommend selecting the latest version, as it’s the most up-to-date and stable version available. Alli Data Engineering will ensure that all existing customers are upgraded to the latest version as much as possible.
DEPLOYMENT
The DEPLOYMENT flag indicates whether to run a full deployment or just refresh data.
|
Value |
Action |
When to use |
|---|---|---|
|
|
|
|
|
|
|
Starting from ADL Redshift ADL apps still need to be refreshed and ensure you cover the dates backfilled inside |
PLATFORMS_TO_REFRESH
The platform(s) to be refreshed. All Platforms is selected by default and will refresh all platforms and report types enabled via the dbt_vars.json file.
When setting up an ADL app for a new client for the first time, make sure to select Platforms = All Platforms, or the app will error out.
Selecting specific platforms for daily refreshes is not recommended, as it excludes other platforms. Use specific platform selections only for the following scenarios:
-
Updating a platform-level report after additional metrics were added. In this case, set DEPLOYMENT to
Trueand revert it toFalseafter deployment. -
Ad-hoc refreshes to platform-level reports to account for non-schema updates in the raw data caused by actions like backfills or row deletions.
REFRESH_DATE_RANGE
The range of data to be refreshed (default is Last 30 days). This applies to platforms with table-based reports like Google Ads, Microsoft Ads, Facebook Ads, and Pinterest Ads.
All other platforms include view-based reports, so data will always reflect the changes in the raw datasources regardless of the selected date range.
For optimal performance, set the range to the default Last 30 days for daily refreshes, and adjust as necessary.
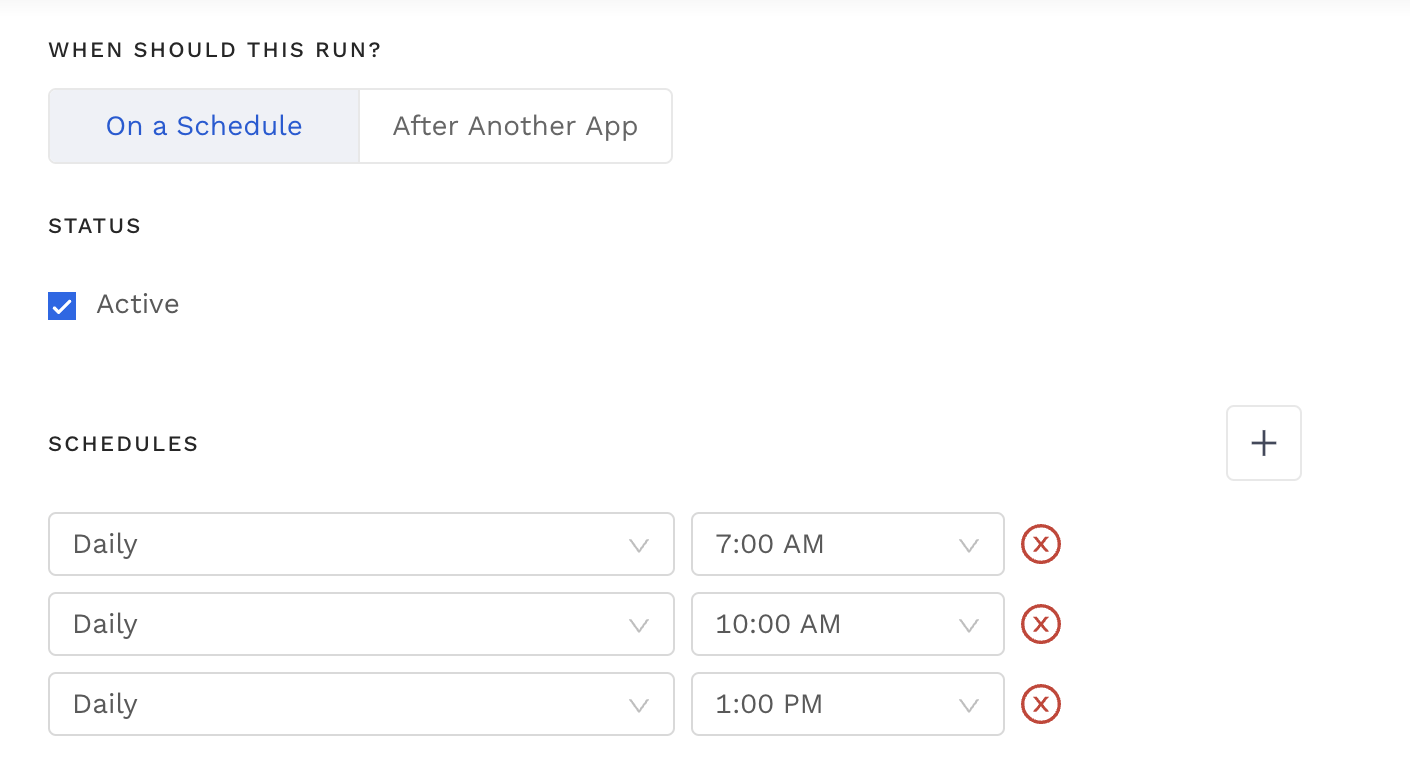
3.) Set the app’s run schedule:
-
Go to SCHEDULES and click the + button.
-
We recommend the following schedule with
DEPLOYMENTset toFalse:

4.) Before saving, name the app using the following format:
Naming the app with this convention is mandatory
ADL 2.0 - Refresh - {Customer} - {Target} - {Platform} - {Cadence}
-
Customer: The name of the customer in Alli.
-
Target: The data warehouse (e.g.,
Redshift). -
Platform: The platforms to refresh (e.g.,
All Platforms). -
Cadence: The refresh schedule (e.g.,
Daily).
Example: ADL 2.0 - Refresh - Best Western - Redshift - All Platforms - Daily

5.) Click Save & Run to run the refresh app
6.) If successful, your Certified Datasources are now built and/or refreshed. To validate, see: How-To: Identify Which Platforms and Report Types are Enabled for Reporting.
Related articles
- Tutorial: Backfilling Data for a Platform
- Core Categorizations
- Tutorial: Onboarding a Platform
- Tutorial: Building and Refreshing Certified Datasources
- How-To: Enable Product Feed Reporting
- Data Library Field Mapping - Demographic Performance
- How-To: Include Custom DSP Cost in Display Reporting
- Onboarding CM360
- Certified Datasource References
- How-To: Categorize CM360 Conversions
- Placement ID methodology
- Onboarding Bidtellect
- Onboarding Vistar DSP
- Report Field Mappings
- How-To: Identify Which Platforms and Report Types are Enabled for Reporting
- ADL FAQs
- Data Library Field Mapping - AdGroup Hourly Performance
- How-To: Enable Device and Demographic Reporting
- Creative ID methodology
- Certified Datasources
- Data Library Field Mapping - Ad Hourly Performance
- How-To: Enable Hourly Reporting
- How-To: Reclassify Media Channel
- Data Library Field Mapping - Platform Device Performance
- Onboarding The Trade Desk
- Tutorial: Getting started with Certified Datasources
- How-To: Add New Accounts for an Existing Platform
- How-To: Locate Source Data Used in Reporting