Overview
This Action allows you to update campaign budgets in Google Ads seamlessly. By providing the required data, you can automate budget adjustments for one or multiple campaigns.
Understand the Data Requirements
Before setting up your Action, ensure you have the following data:
-
budget_id: The unique ID of the budget entity. -
micro_amount: The new budget amount in micros (1,000,000 micros = 1 unit of currency). -
customer_id: Google Ads customer ID. -
login_customer_id: Google Ads MCC Account ID.
Please review before beginning your Action setup!
In the simplest terms, the way Actions works is you (the user) gives data to Actions, and Actions pushes that data to the platform of your choice to make the requested changes.
Actions will “action” on any and all data presented to it - it is crucial, no matter the data source, that any filtering or selection happen before connecting to Actions (so either filtering in Alli Data reports, Google Sheets, etc)
So for example, if you have a Google Sheet with daily budget updates, do not connect the base tab with every date, as it would send all of the rows every day. Instead, create a separate tab that filters that base data. For tips and tricks on this, review these tips & tricks for Google Sheets or these tips & tricks for Alli Data.
Getting Your Campaign Budget IDs
The action type requires the budget IDs not the campaign ID to make updates. If you already have your budget IDs then you can skip this step. But if you want an automated way to pull budget ids so you can connect them to your source (Google Sheets or Alli Data) then continue.
-
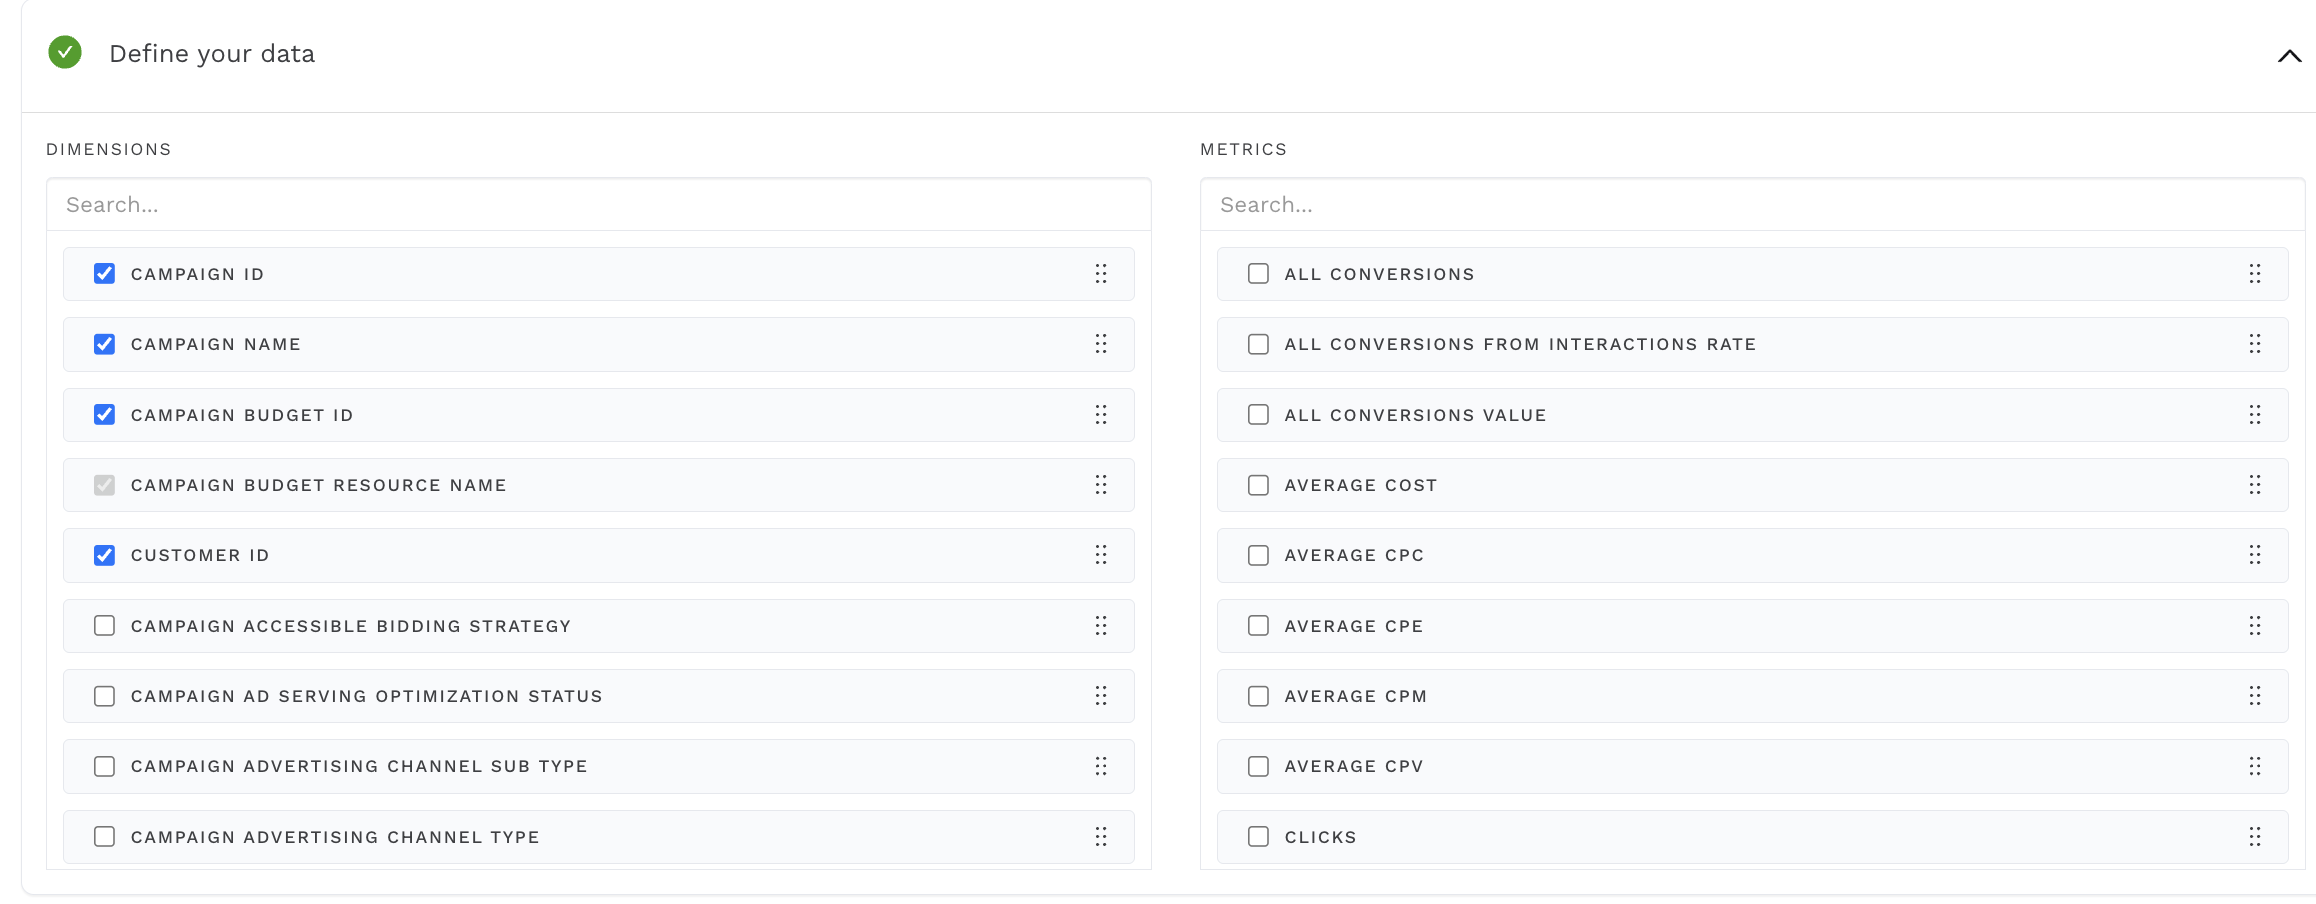
You will need a Google Ads datasource in Alli Data with the
Campaign Budgetreport type selected.
-
Ensure you have
campaign budget id,campaign name,campaign id, andcustomer_iddimensions selected.
-
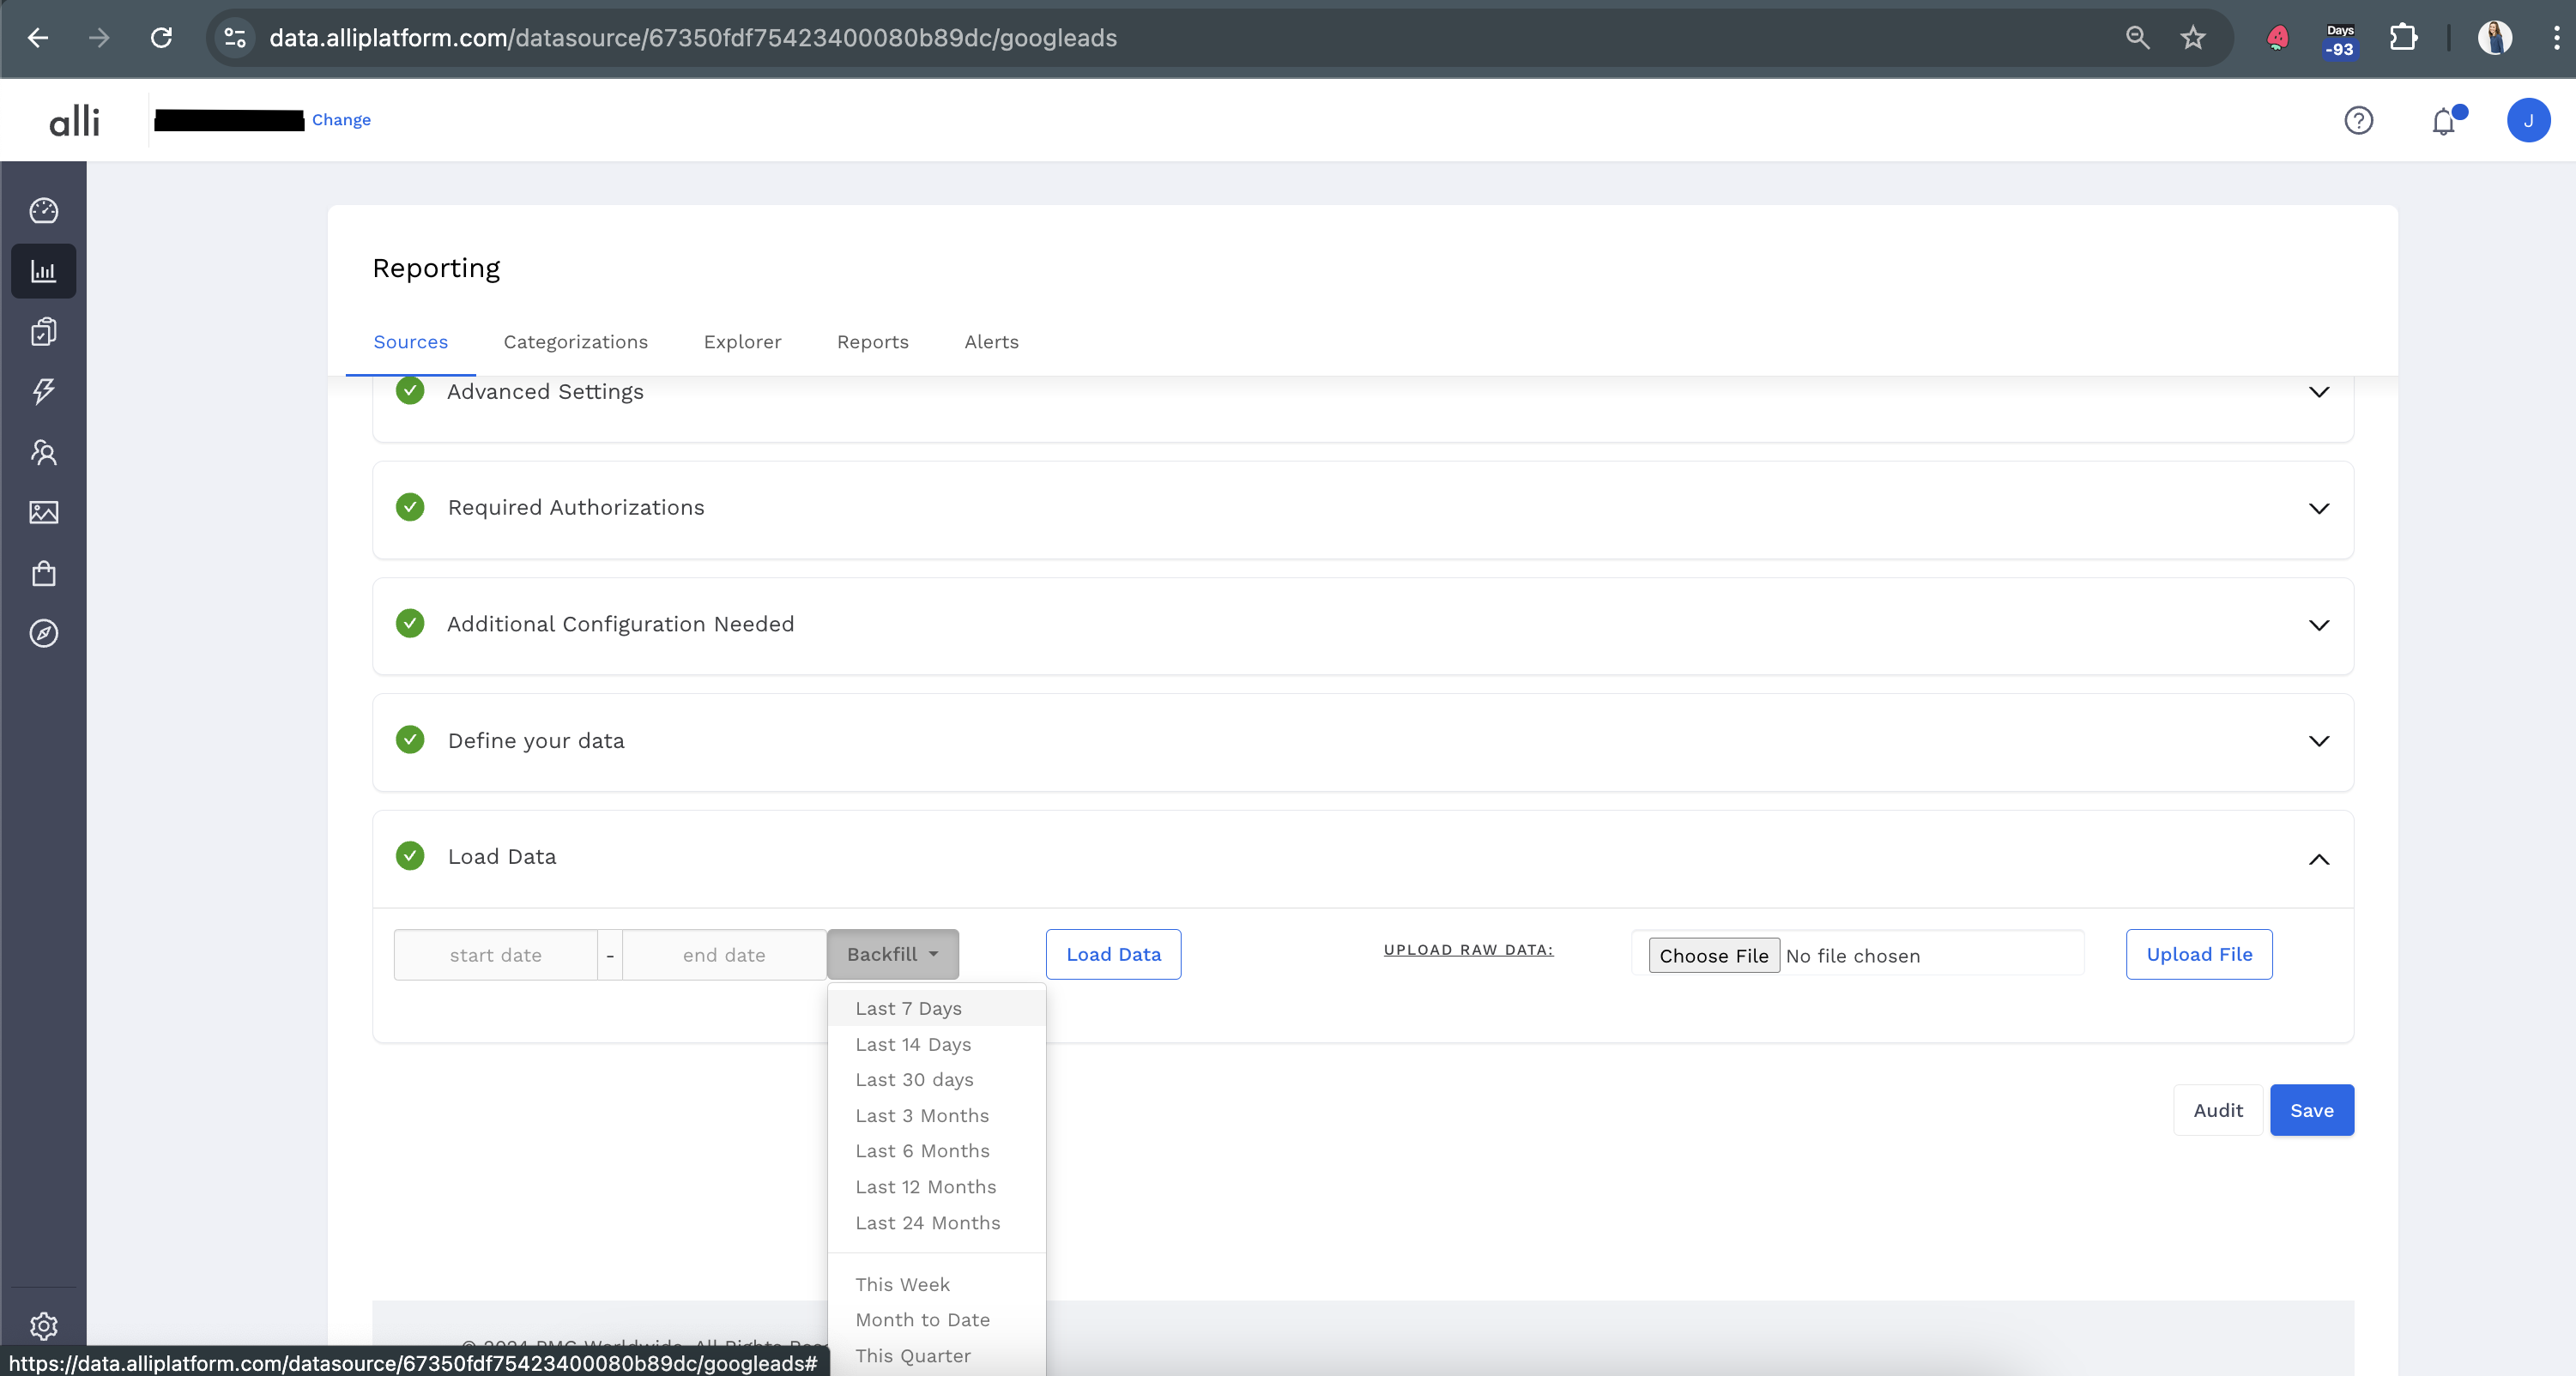
Once you’ve defined your data, save & backfill your datasource.
Last 7 Dayswould be a good place to start.
Determining How You Want to Provide the Data to Actions & Examples
You can provide the required data in multiple ways, but the most common will be through Google Sheets or Alli Data.
Google Sheets
-
Ensure your Google Sheet includes the required fields (
budget_id,micro_amount, etc.). -
Use VLOOKUP to pull
budget_idinto your data source if starting withcampaign_idorcampaign_name. -
To automate:
-
Export data from Alli Data Explorer to your Google Sheet regularly. Use an Alli Data Explorer report and the export feature to automate this.
-
Use this example sheet format as a reference.
-
Once your Google Sheet is setup, you can continue onto creating your Alli Action.
Alli Data
-
Join your
budget_iddatasource with your primary datasource containing other fields. -
Ensure the combined datasource includes all Data Requirements.
-
Confirm you are sending
micro_amountsand not the regular budget ($1000000 vs $1)
-
Create Your New Action
-
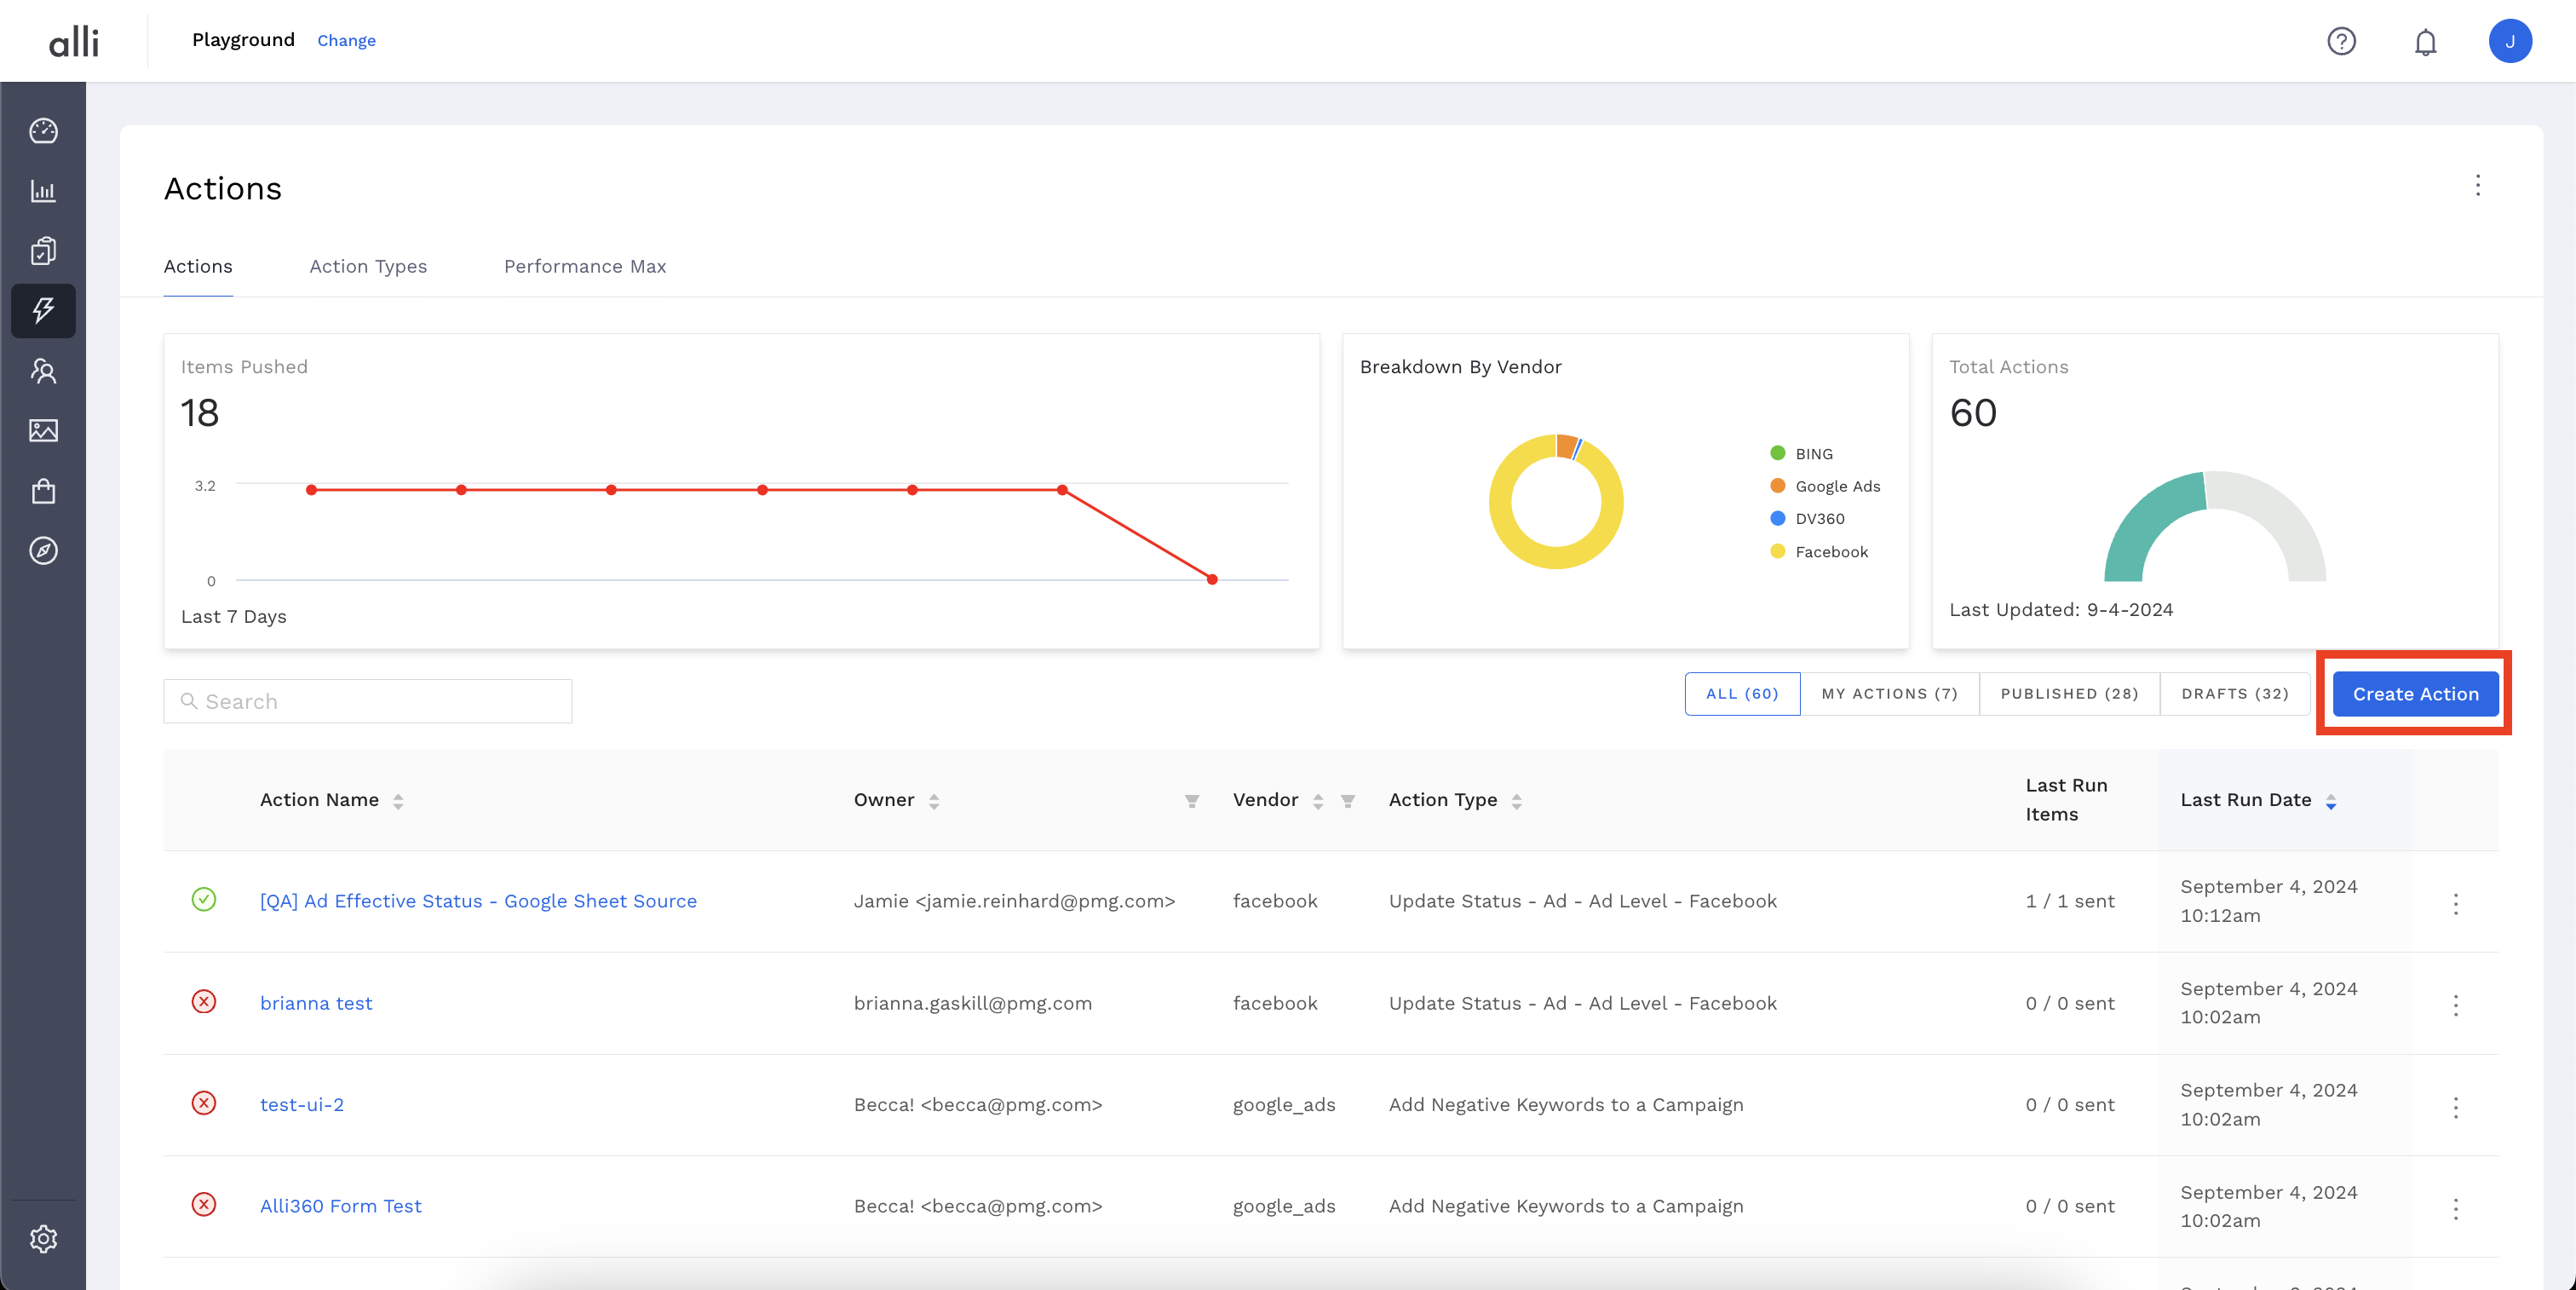
Go to Alli Actions then select Create Action.

-
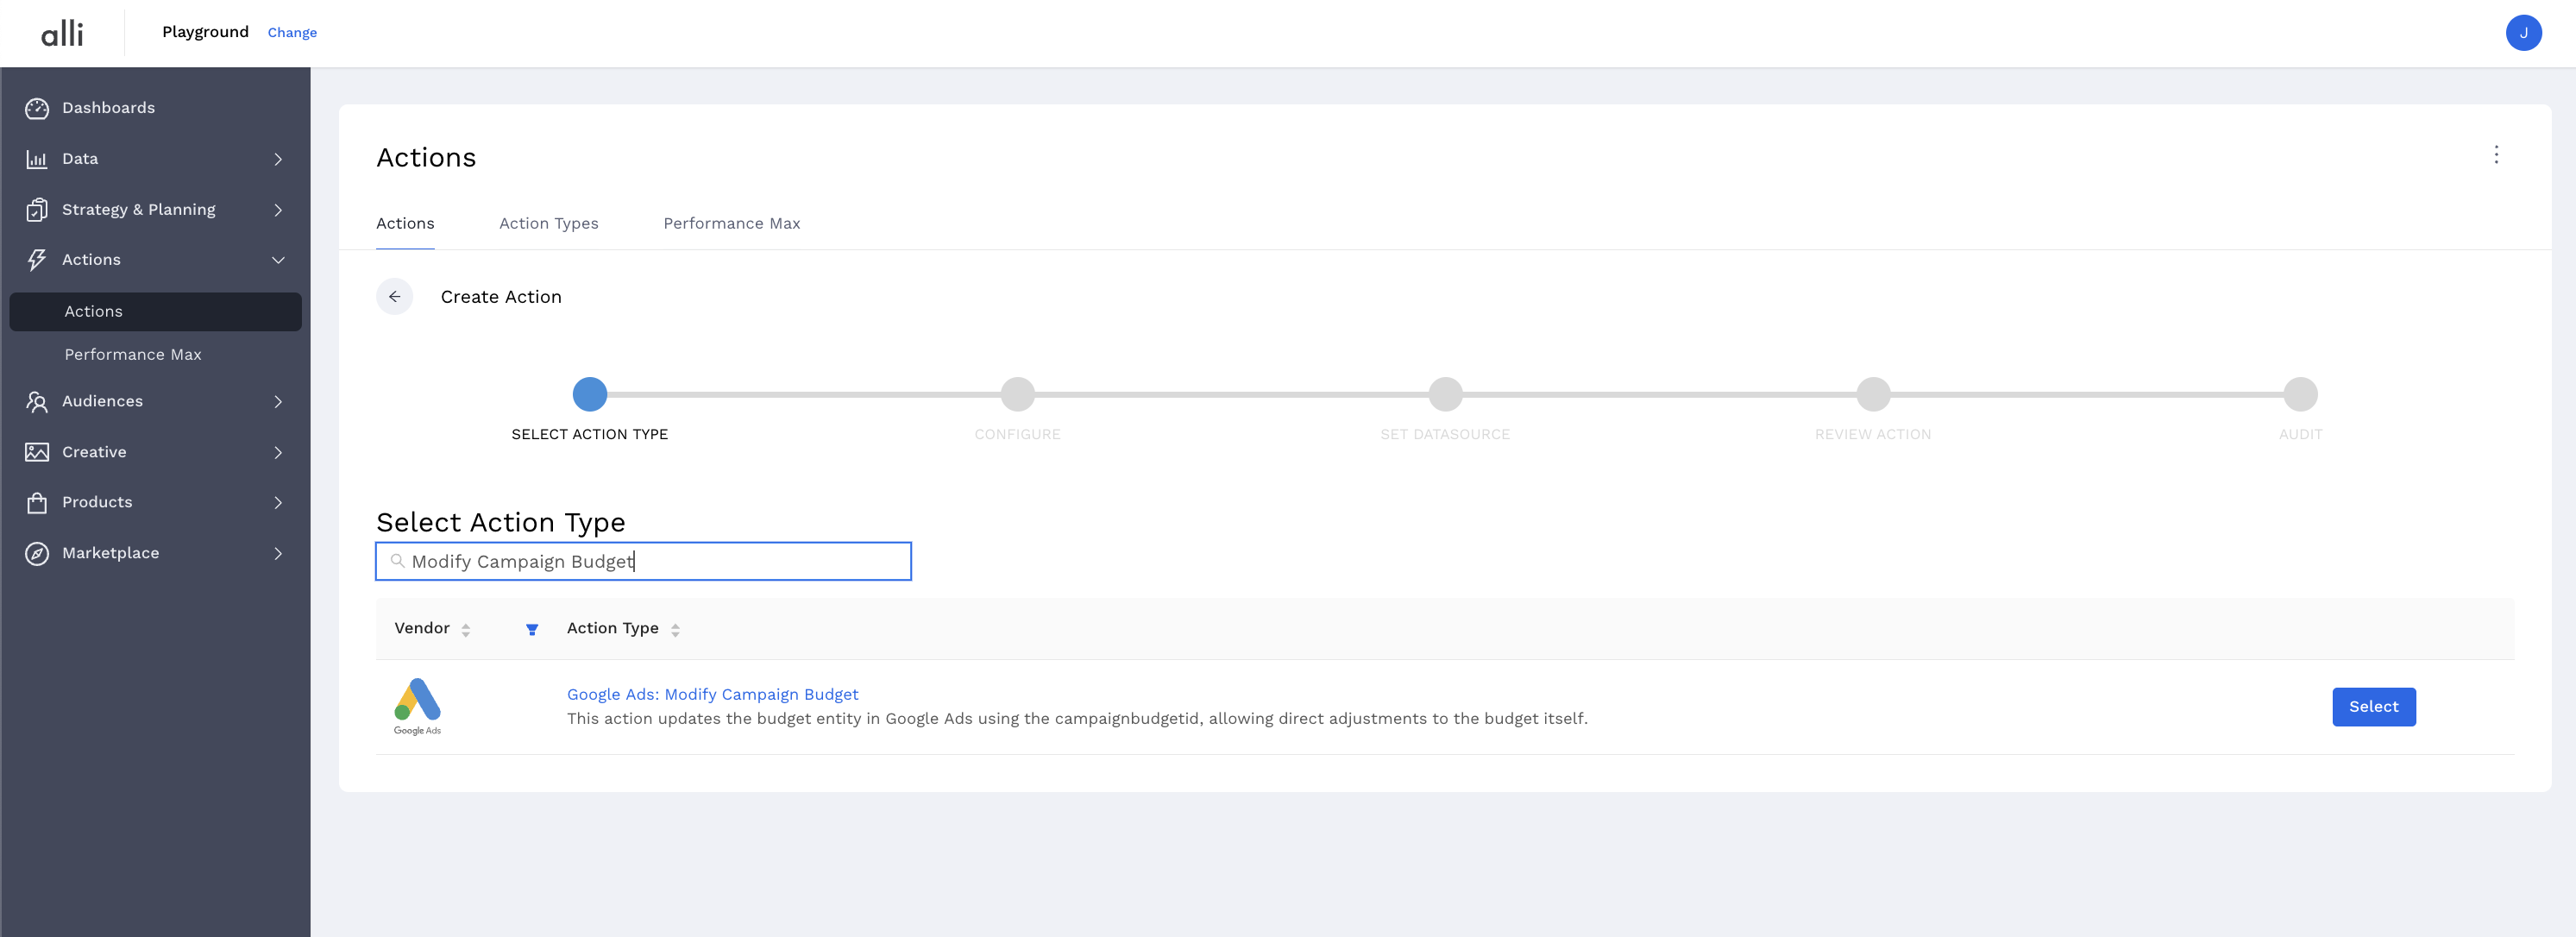
Filter the Vendor column for Google Ads and select the
Google Ads: Modify Campaign BudgetAction Type

-
Name your Action and select the Authenticated Account, the user account you'd like to use for making changes. The user associated with this account should have access to the relevant ad accounts.
-
Start by giving your action a descriptive name that reflects the changes you plan to make.
-
Tip: If your desired user isn't listed, or you need to create a new one, refer to the authentication documentation for instructions on how to authenticate a partner platform.
-
-
Click Next.
-
If you have chosen to provide the data via Google Sheets, select the
Google Sheetsdatasource. For tips and tricks, check out the Google Sheet documentation. -
Ensure you input:
-
[optional] the authenticated account used to access the Google Sheet. This will default to you and if you have access to the sheet, then you are set, but you may adjust to whichever user has the right access.
-
the sheet URL
-
name of the tab within the sheet Actions should pull from

-
-
If you have chose to provide the data via Alli Data, select the
Alli Data datasourceand search for/select the datasource or report name.
-
-
Click Save and review your Action setup.
-
Review Action for accuracy. Set up a schedule for your Action if applicable. Select the blue Publish button.
-
A pop up box will confirm your setup. Click I’m Done to exit.
Related articles
- How-To: Connect your Google Sheet to Actions
- How-To: Disable or Remove an Installed App
- How-To: Set Up a New Workflow
- How-To: Pull Data for TikTok Trends
- How-To: View Error Messages on an Action That Ran
- How-To: Filter Alli Data Reports by Date to Power Actions - Tips & Tricks
- How-To: Understanding Version Statuses
- How-To: Create a Scheduled Version
- How-To: Weather API App
- How-To: Set Up Brand Media Pacing Datastudio Dashboard
- Tutorial: Adding Negative Keywords to Google Ads
- How-To: Test Your Action
- How-To: Using the Execution Log
- How-To: Setup Weather Budget Adjuster
- Tutorial: TheTradeDesk - Brand Safety Alerts
- How-To: Disable or Remove an Action
- How-To: Schedule Your Action to Run
- How-To: QA your app
- How to: Connect to Google Ads
- Tutorial: How to Automatically Delete and Backfill a Datasource on Schedule
- How-To: Write Custom Code Task
- Tutorial: How to Implement a Social Bid Modifier 2.0
- How-To: Browse & Explore Available Solutions
- How-To: Create BigQuery View
- How-To: Use Weather API Connector within Alli
- How-To: Delete a Version
- How-To: Add & Manage Webhook Triggers
- How-To: Onboarding Alli Social Budget Consolidation
- How-To: Schedule an App to Run
- Audience Planner Templates Overview
- How-To: Brand Media Screenshot Calendar Tool
- How-To: Run an Action One-Off with Manual File
- How-To: Handle Common Types of Actions Issues
- How-To: Execute a Webhook Trigger
- How-To: Setup Social Ad Bloat
- How-To: Use/Install A Template
- How-To: Set Up a Manual Upload Action
- How-To: Duplicate Versions
- How-To: Use the ChatGPT “Generate” Function to Create Ad Copy
- How-To: Pull AppsFlyer Reports to Upload into Alli Data
- How-To: Manage Partner Platform Authentication in Actions
- How-To: QA Your Action Runs