Tutorial: Pause or Activate Meta (Facebook) Ads
Overview
In these instructions, we’ll focus on how to create the datasources and sql views to leverage the Alli Actions Ad Effective Status action to pause ads automatically. This can also be leveraged for the Adset Effective Status action to pause adsets, or the Campaign Effective Status action to pause campaigns.
You may set up an Alli Action to accomplish pausing or activating Meta ads, but the recommended path as of holiday 2024 is to onboard Alli Social Consolidation which can manage statuses for Meta, TikTok, Snapchat, and Pinterests simultaneously. To onboard to that solution, reference the onboarding documentation:How-To: Onboarding Alli Social Budget Consolidation
Instructions
Create your reference sheet datasource
In your reference sheet, you need the following columns:
ad_id(best) ORad_name(good)Ensure
ad_idis set to `plain text` and not number formatWe recommend including both or just ad_id, as ad_id is cleaner/simpler, and is required for activating ads
If you select
ad_idyou can skip directly to creating your queryIf you select
ad_nameyou will be using core data{client}_core.social_ador{client}_core.social_adsetor{client}_core.social_campaignin your SQL later on.
date- the date you want the ad to be paused or activatedstatus- the status you want implemented:Options are
Active,Archived,Deleted, orPaused

USING YOUR GOOGLE SHEET TO POWER YOUR ACTION
The benefit of this method is no SQL and no report to manage. After you set this tab up fully, you will not touch it, nor should anyone else. - this is important
Create a new tab, name it appropriately (Recommended
Actions Sheet - DO NOT EDIT).Copy the headers from your first tab here.
Rename your
statuscolumn toeffective_statusRename your
ad_id(or campaign_id, adset_id, etc) column is namedid
In Cell A2, place and update this function
=FILTER(Sheet1!A:D,Sheet1!B:B,Sheet1!B:B=TODAY())Sheet1should be the name of your first sheet
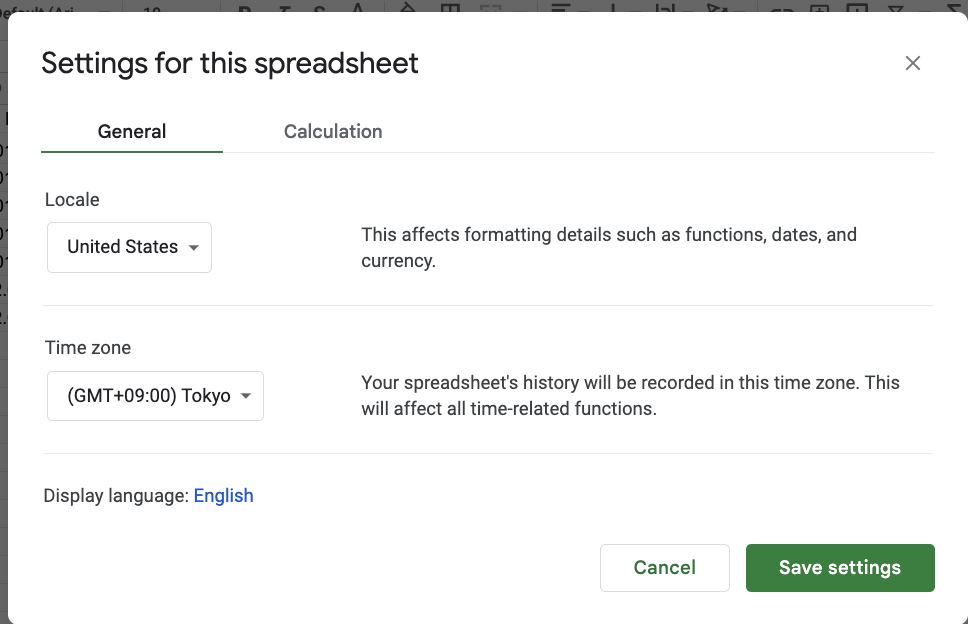
Check your google sheet timezone
this is impactful because
TODAY()gets the current date in the timezone. So if your action runs at 1 am eastern time on 2/10, but your google sheet is in pacific time,TODAY()in pacific time would be 2/9 (at 10 pm). TLDR - make sure your google sheet timezone makes sense with 1) what time & timezone your action will run in, and 2) what date you put in the first tab.File > Settings > Timezone
USING SQL TO POWER YOUR ACTION
Login to Alli Data and select the client you want to create a datasource for
Navigate to Reports, select Add New Datasource, and select the datasource type (Google Sheets, Smartsheet, Airtable, etc). Give your datasource a new name.
In Advanced Settings, ensure you select
Replacefor New Uploads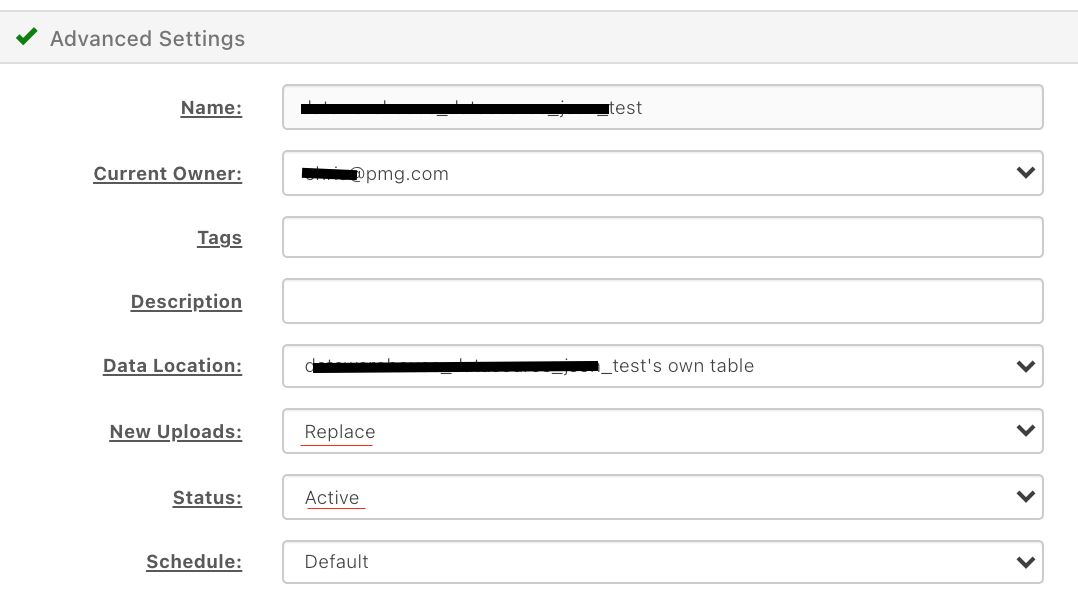
Ensure the
Ad Id/Ad Nameand thestatuscolumns are Numbers & LettersEnsure the
Datecolumn is a Date Timestamp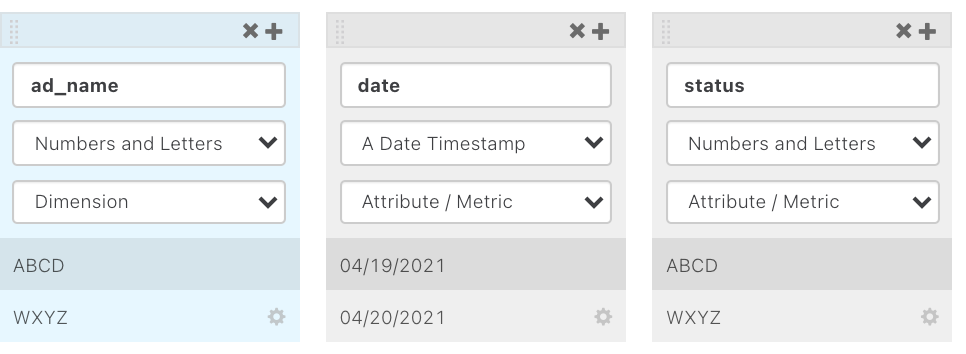
Save your new datasource & select Load Data
Create your SQL view
Set up your Alli Data Explorer Report, referring to the Tutorial: Getting started with Explorer Reports | Custom-SQL Custom SQL instructions
Copy and paste the SQL Example in from below and update anything within and including
{}to match your client settingsOnce your SQL is updated, click Publish to update the query
Click Preview to ensure the output is as expected
Create your Action
Go to Alli Actions then select Create Action.
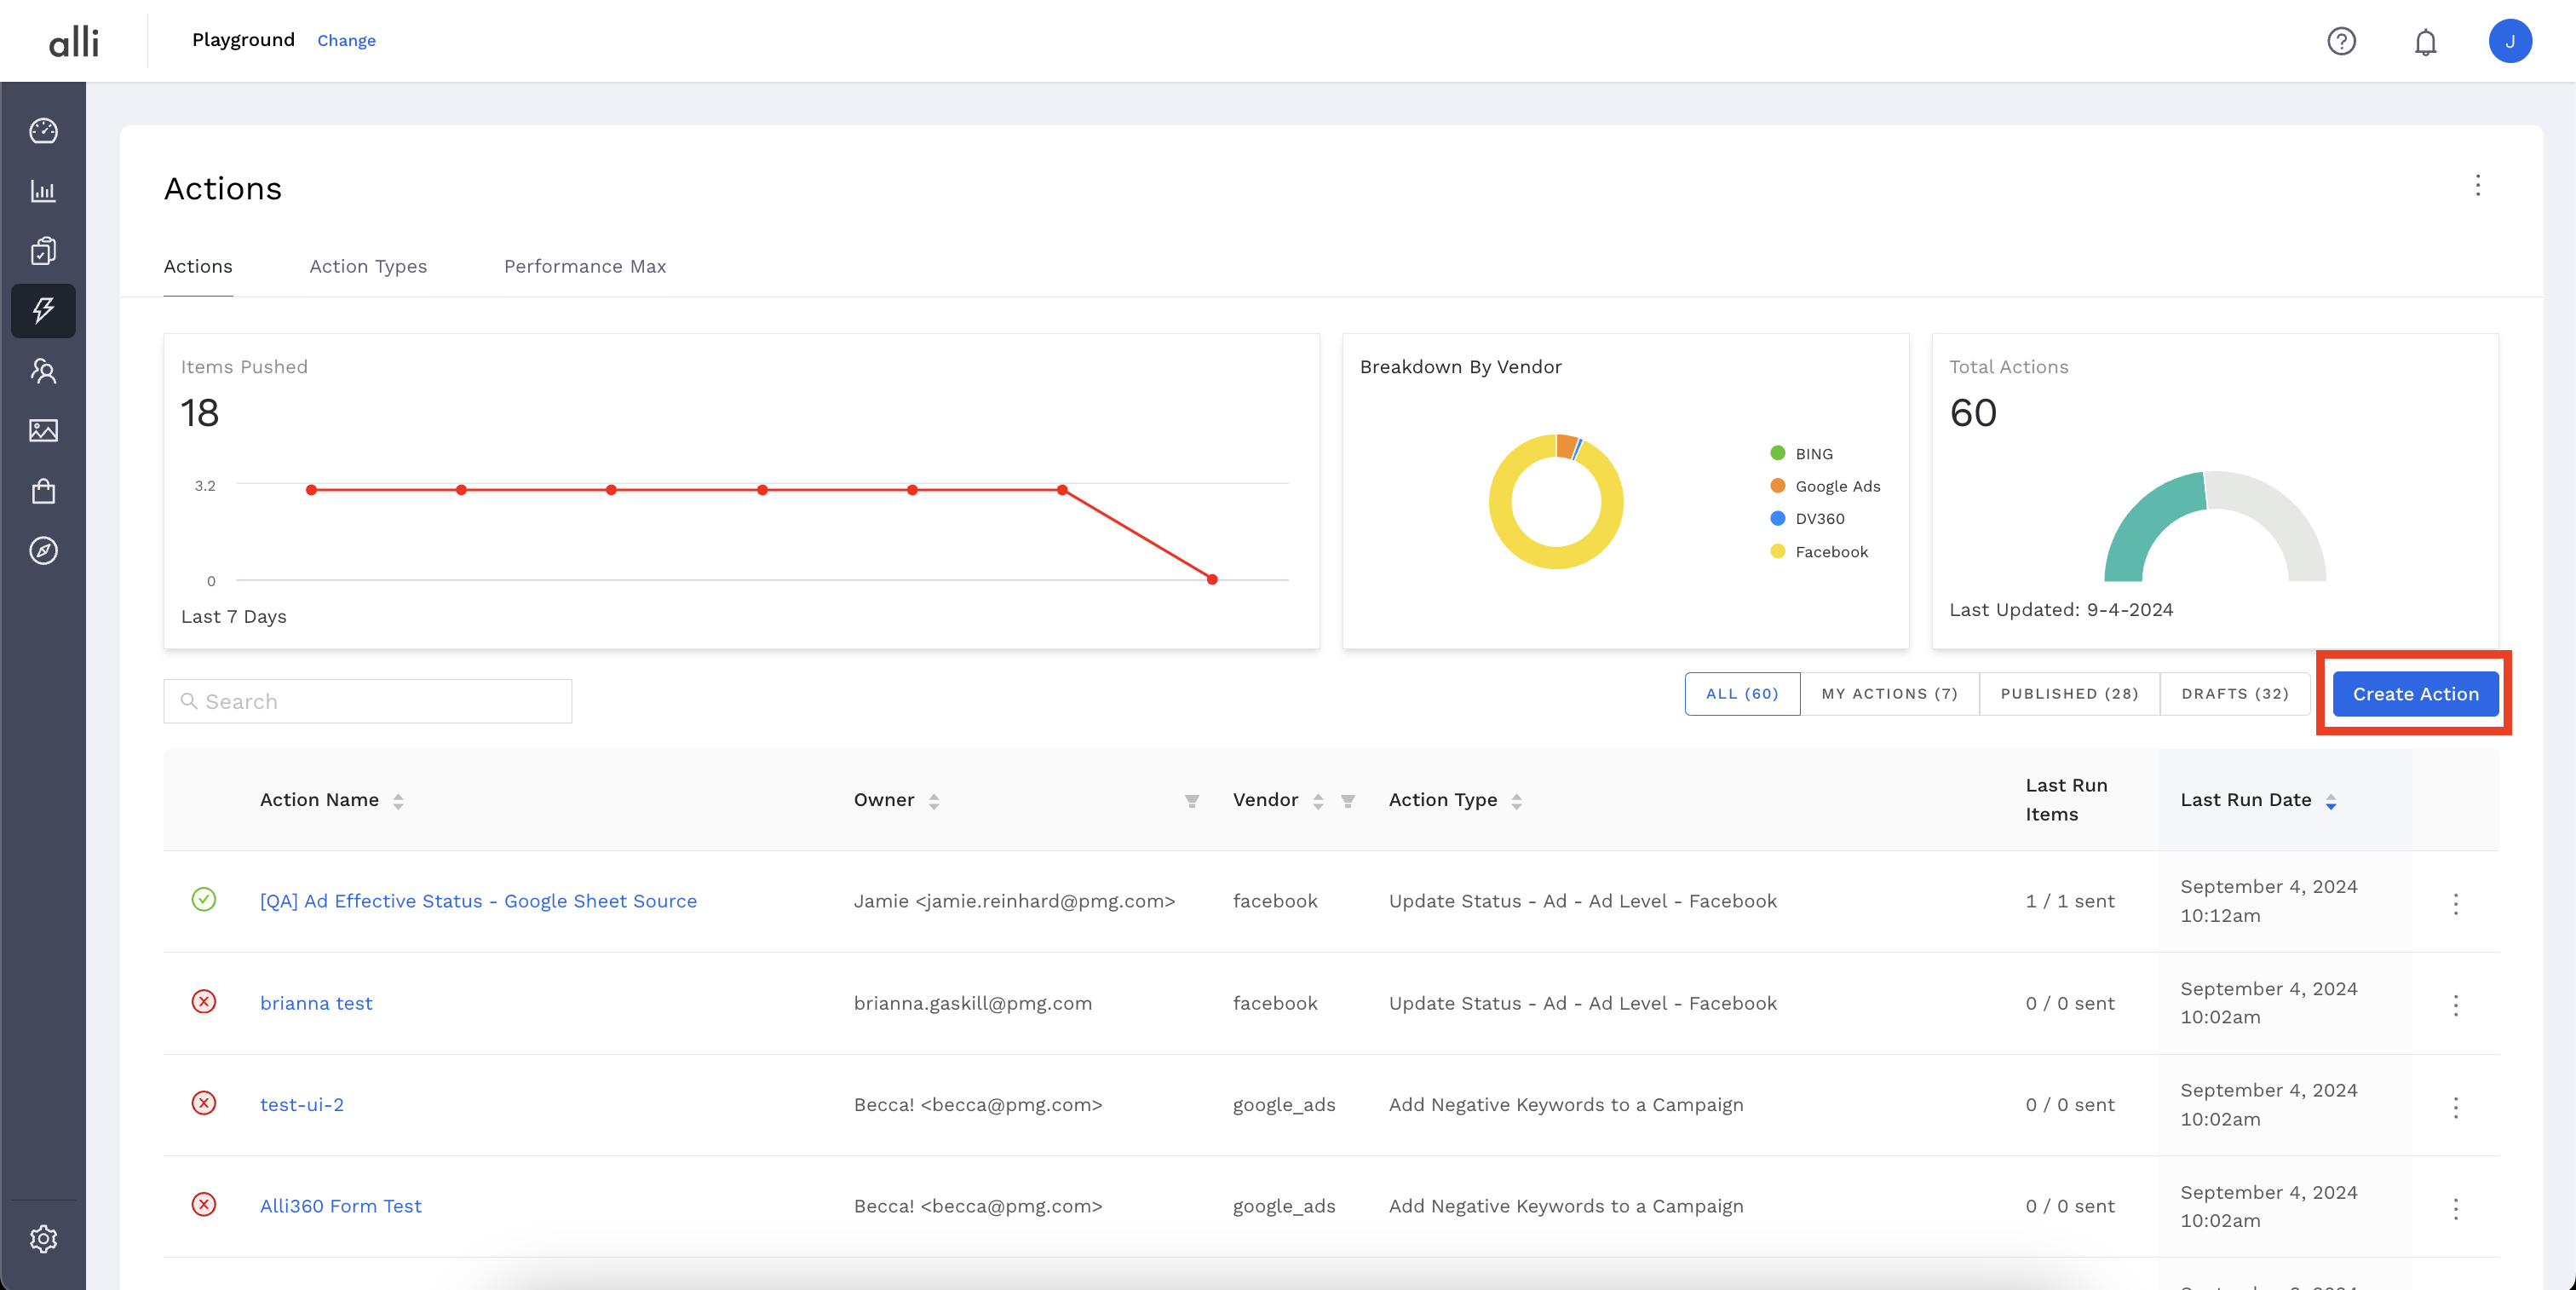
Filter the Vendor column for Facebook Ads and select the Update Status - Ad - Ad Level - Facebook Action Type
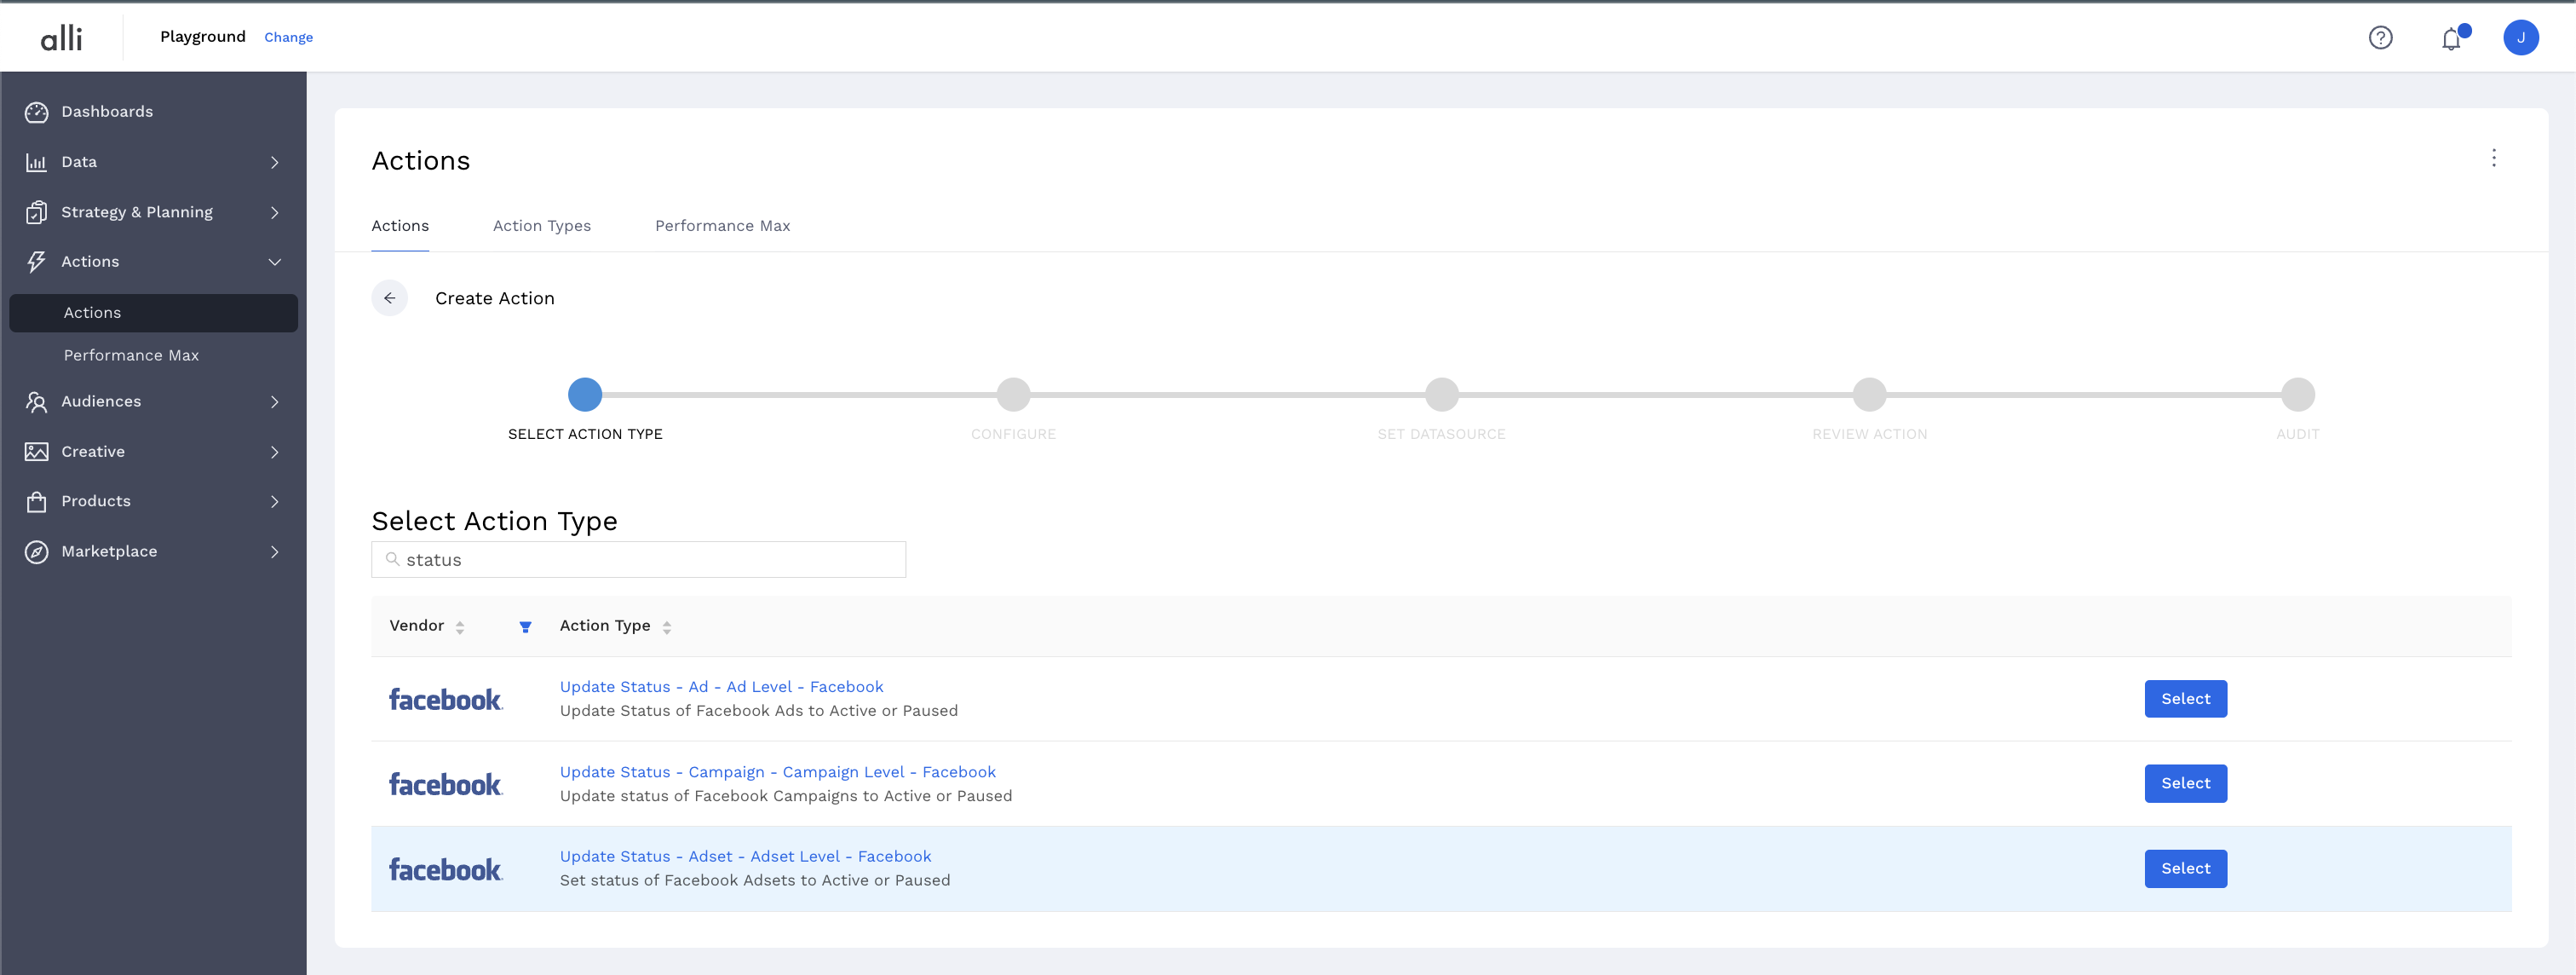
Name your Action and select the Authenticated Account, the user account you'd like to use for making changes. The user associated with this account should have access to the relevant ad accounts.
Start by giving your action a descriptive name that reflects the changes you plan to make.
Tip: If your desired account isn't listed, or you need to create a new one, refer to the authentication documentation for instructions on how to authenticate a partner platform.
Click Next. Select the correct data source where your changes are coming from. Since we have just created an Alli Data report to power this action, that will be Alli Data
Choosing Alli Data will prompt you to click
Select Sourceso you can filter to and select the datasource or report of your choosingClick Save and review your Action setup.
Review Action for accuracy. Set up a schedule for your Action if applicable. Select the blue Publish button.
A pop up box will confirm your setup. Click I’m Done to exit.
SQL Example: ID
replace
{reference}with the datasource you created (ensure you remove the brackets as well)ref.statusshould reference the column name of the status column in your reference datasourceref.dateshould reference the column name of the date column in your reference datasource
Ad Example (assuming your column is named ad_id)
select ref.ad_id::text as id,
      ref.status as effective_status
from {reference} as ref
where ref.date = current_date
Adset Example (assuming your column is named adset_id)
select ref.adset_id::text as id,
      ref.status as effective_status
from {reference} as ref
where ref.date = current_date
Ad Example (assuming your column is named campaign_id)
select ref.campaign_id::text as id,
      ref.status as effective_status
from {reference} as ref
where ref.date = current_date
Filled out example (Pretending my datasource you created in Create your reference sheet datasource is named client.ad_status_google_sheet
select ref.ad_id::text as id,
      ref.status as effective_status
from client.ad_status_google_sheet as ref
where ref.date = current_date
SQL Example: Ad Name (Not recommended, use ad_id if possible)
replace
{reference}with the datasource you createdref.statusshould reference the column name of the status column in your reference datasourceref.ad_nameshould reference the column name of the ad name column in your reference datasourceref.dateshould reference the column name of the date column in your reference datasource
replace
{client}with your client namefb.ad_idshould reference the column name of the ad id within the facebook datasourcefb.ad_nameshould reference the column name of the ad name within the facebook datasource
select distinct(fb.ad_id) as id,
      ref.status as effective_status
from {reference} as ref
left join {client}_core.social_ad as fb
on ref.ad_name = fb.ad_name
where ref.date = current_date
SQL Example: Creating separate queries for activating vs pausing
You can use the same reference sheet for both activating and pausing ads, and if so we recommend leveraging the ad_id column, as new ads (that have not run yet) may not exist in your facebook datasource yet (until they receive impressions or spend)
To use the same reference sheet, if your ads pause and activate at the same time, you don’t need separate sql, but if you activate and pause ads at different times (or just want to keep the queries separate) you can use the below options.
Pausing (using Ad Name)
select distinct(fb.ad_id)::text as id,
      ref.status as effective_status
from {reference} as ref
left join {facebook} as fb
on ref.ad_name = fb.ad_name
where ref.date = current_date
and status = 'Paused'
Pausing (Using Ad Id)
select ref.ad_id::text as id,
      ref.status as effective_status
from {reference} as ref
where ref.date = current_date
and status = 'Paused'
Activating
select ref.ad_id::text as id,
      ref.status as effective_status
from {reference} as ref
where ref.date = current_date
and status = 'Active'
Related articles
- How-To: Handle Common Types of Actions Issues
- How-To: Filter Alli Data Reports by Date to Power Actions - Tips & Tricks
- How-To: Run an Action One-Off with Manual File
- How-To: Connect your Google Sheet to Actions
- How-To: Set Up a Manual Upload Action
- How-To: Test Your Action
- How-To: Schedule Your Action to Run
- How-To: Disable or Remove an Action
- How-To: QA Your Action Runs
- How-To: View Error Messages on an Action That Ran
- How-To: Manage Partner Platform Authentication in Actions
- Tutorial: Adding Negative Keywords to Google Ads
