
Getting started with Alli Data and connecting your first email datasource
This documentation will teach you how to ingest your data sets as well as navigate all the features of Alli Data for each of your clients.
Overview
To begin using Alli Data, you must first either find an existing datasource that was previously created under your customer or create your own datasource.
By the end of this you will be able to:
Instructions
Login to Alli Platform (https://data.alliplatform.com/)
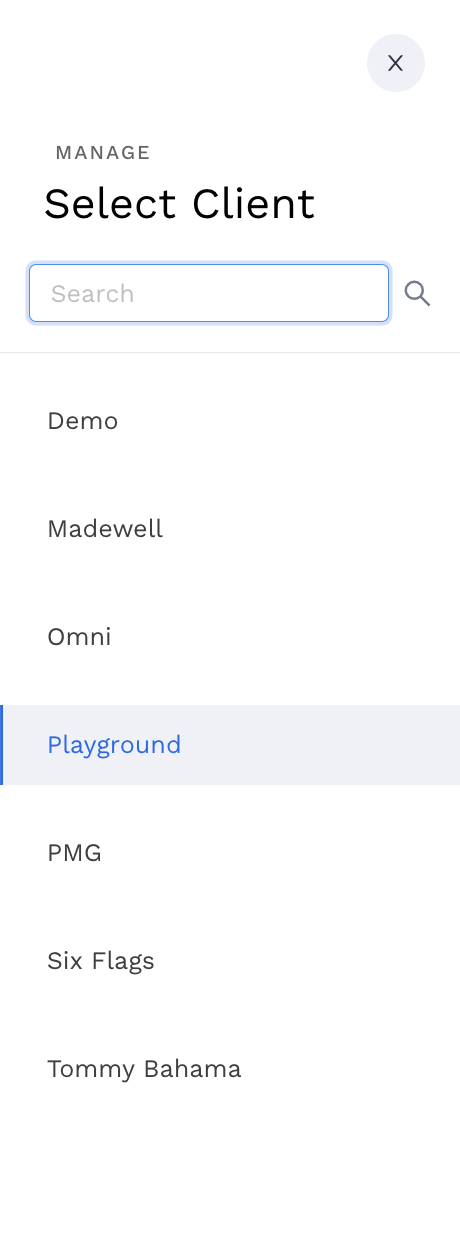
Navigate to the left-hand side of your screen. To the right of the Alli logo, you will see the current client name and the option to change and select a different client.
Let’s get started by creating a new datasource.
Create a new datasource that pulls in performance data from a partner
If you are following along with a practice test datasource, make sure that you have selected ‘Playground’ customer from the list. If you are creating a new datasource for your customer, check to make sure that you have chosen that customer from the list. If you do not have access to the correct customers, please contact the account owner or submit a ticket to Alli Service Desk.
First, find your customer by clicking Change at the very top of the main navigation and searching from the right-side panel drawer. For this tutorial, our customer will be Playground.
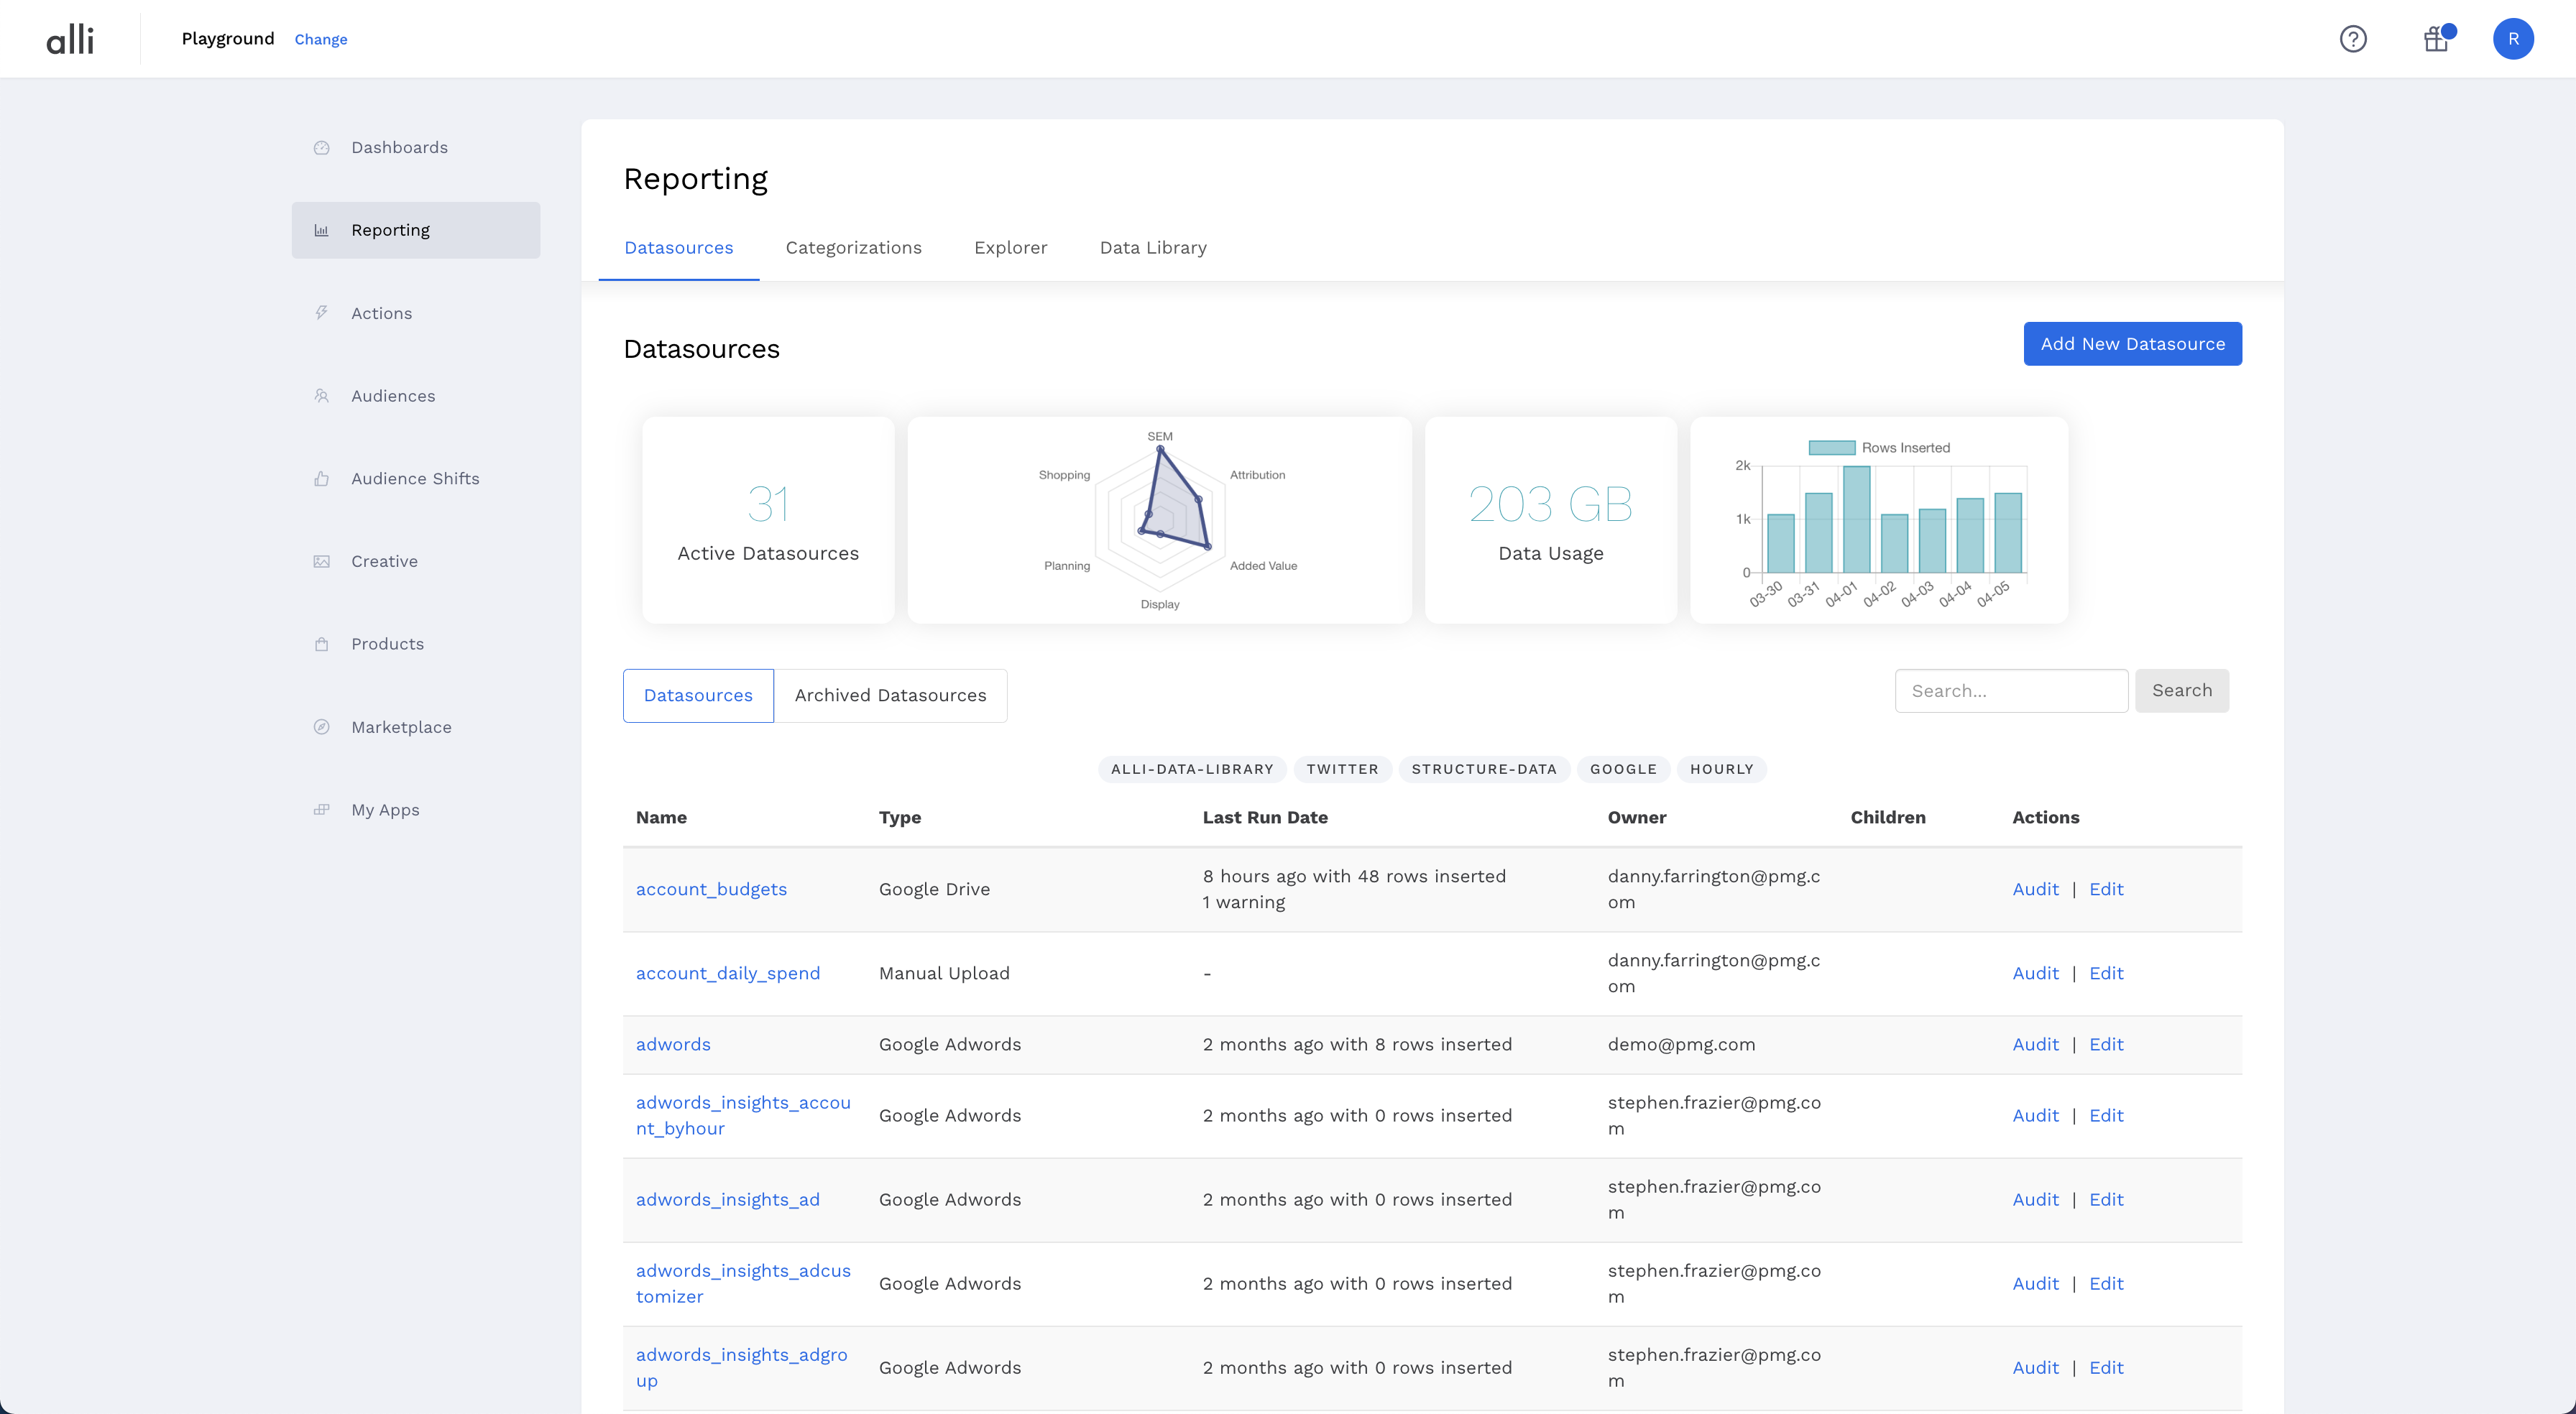
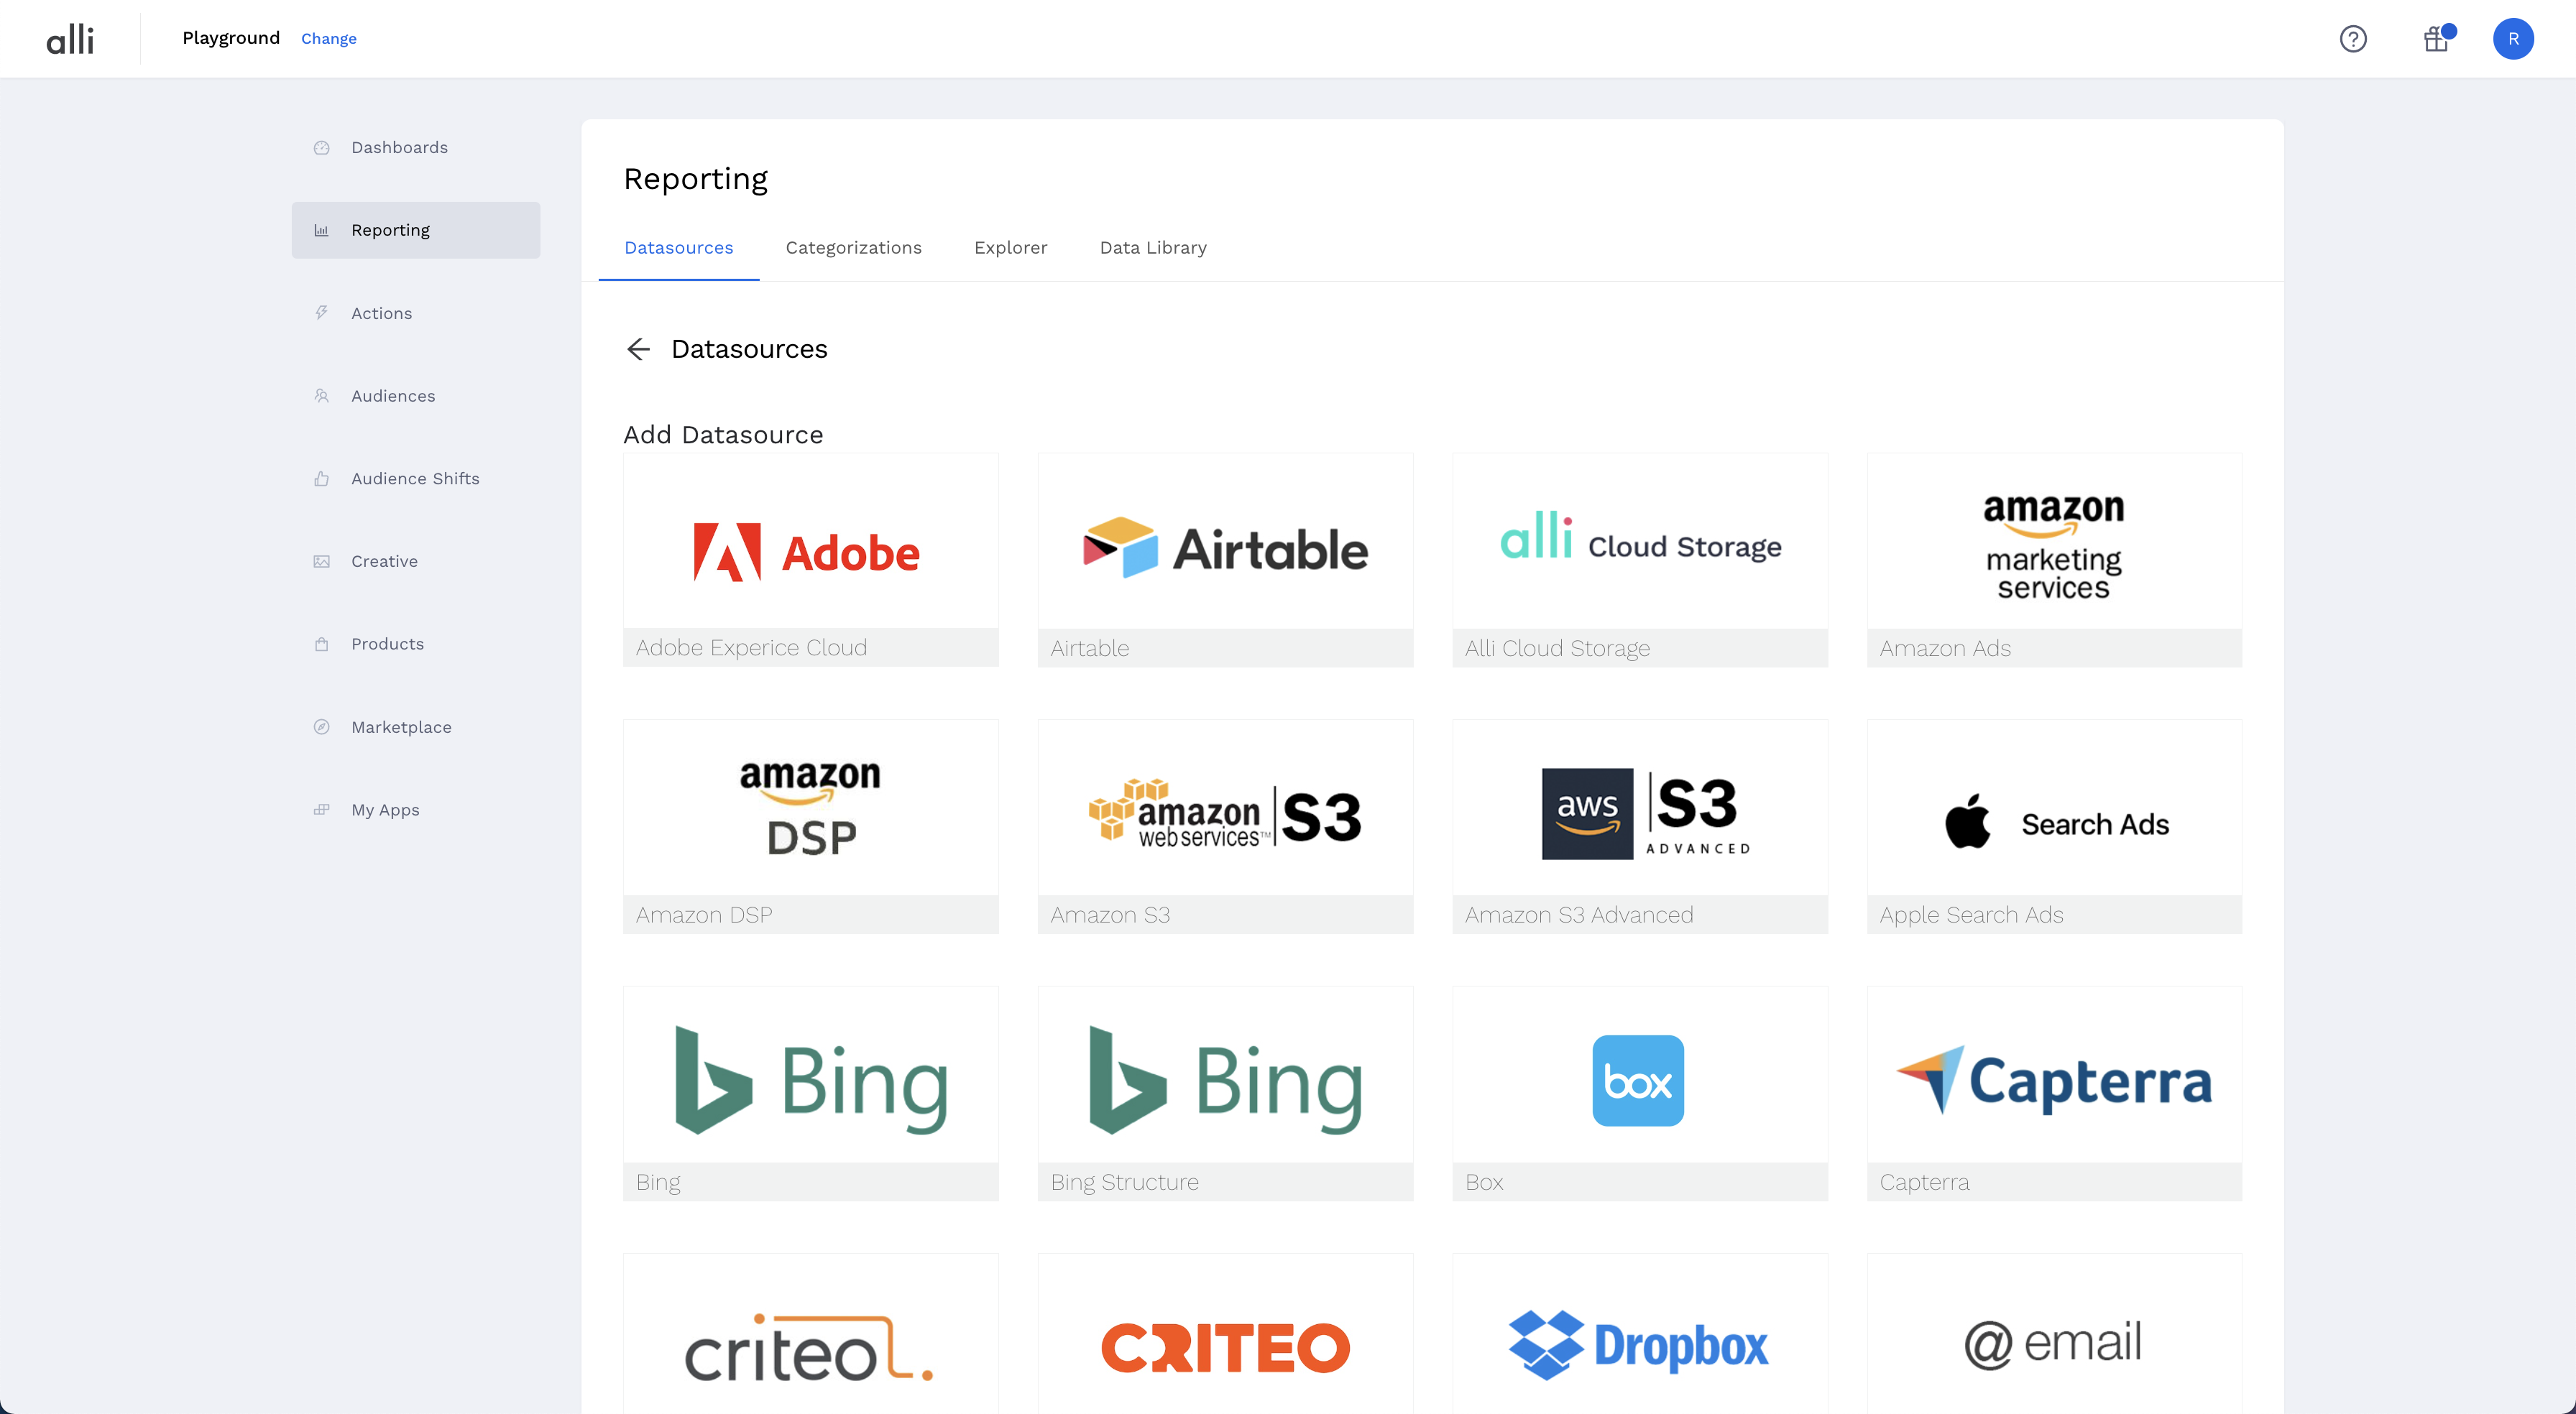
Click on the blue Add New Datasource button in the top right corner. You will see a list of available partners to pull from. If you do not see your partner on this list, then you can choose to upload via email or SFTP.
After clicking on your datasource partner, you will see a pop-up box.
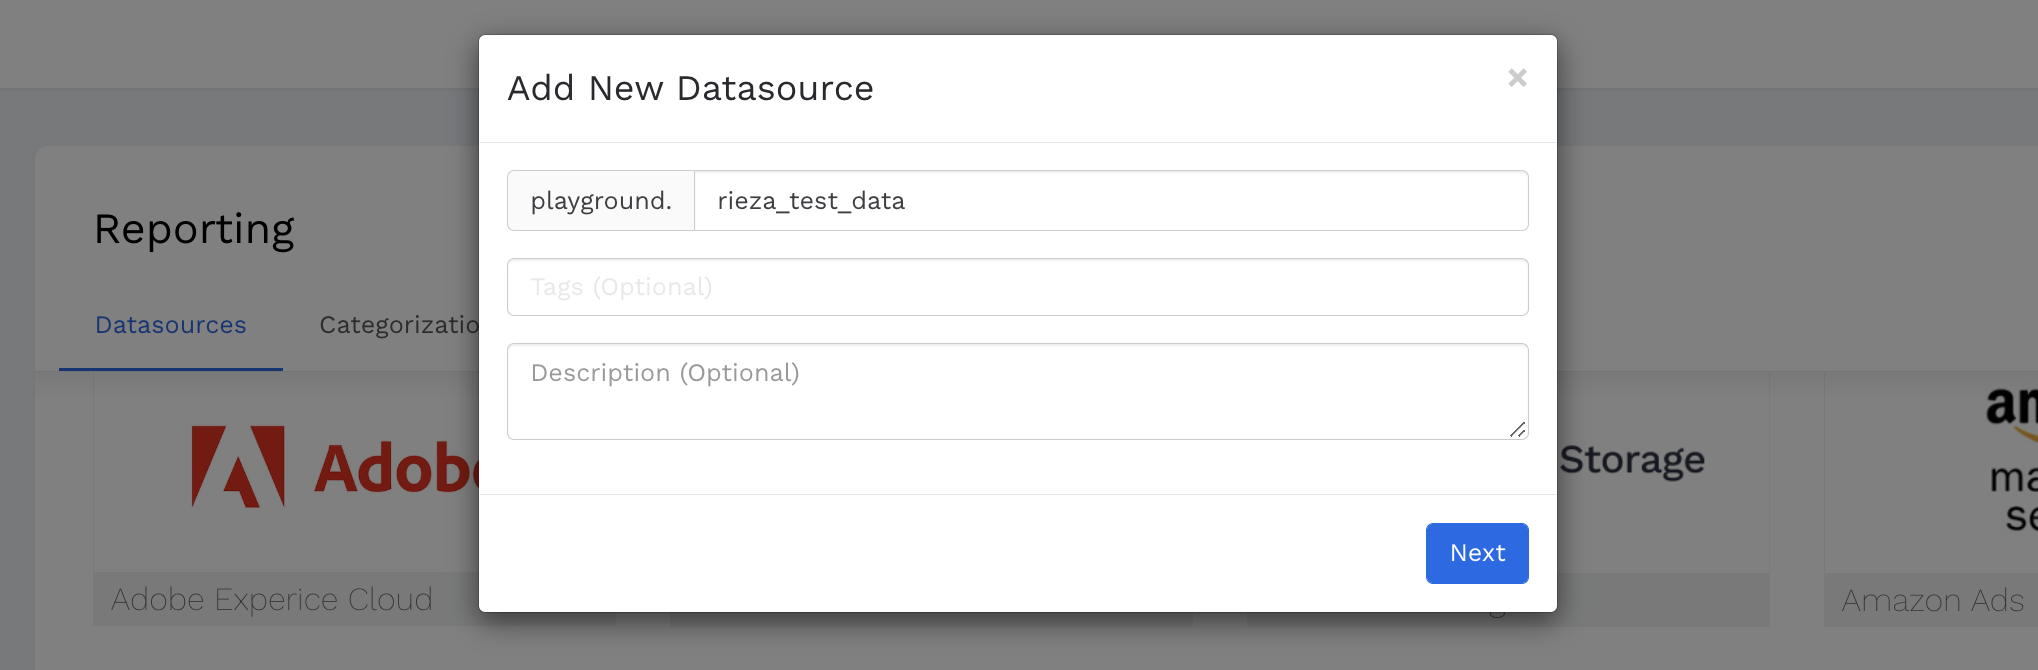
Name your datasource using an underscore _ to separate words in the name. Any periods or other special characters will automatically default to an underscore. Spaces are not allowed in the datasource name.
The name of your datasource is preceded by the name of your customer. In this example, you will see that [rieza_test_data] is preceded by the ‘customer’ name [playground.] This means that the full name of your datasource would be [playground.katie_test_data] for future reference.
You also have the ability to add optional tags and an optional description. These are helpful in differentiating and searching for datasources within the same customer.
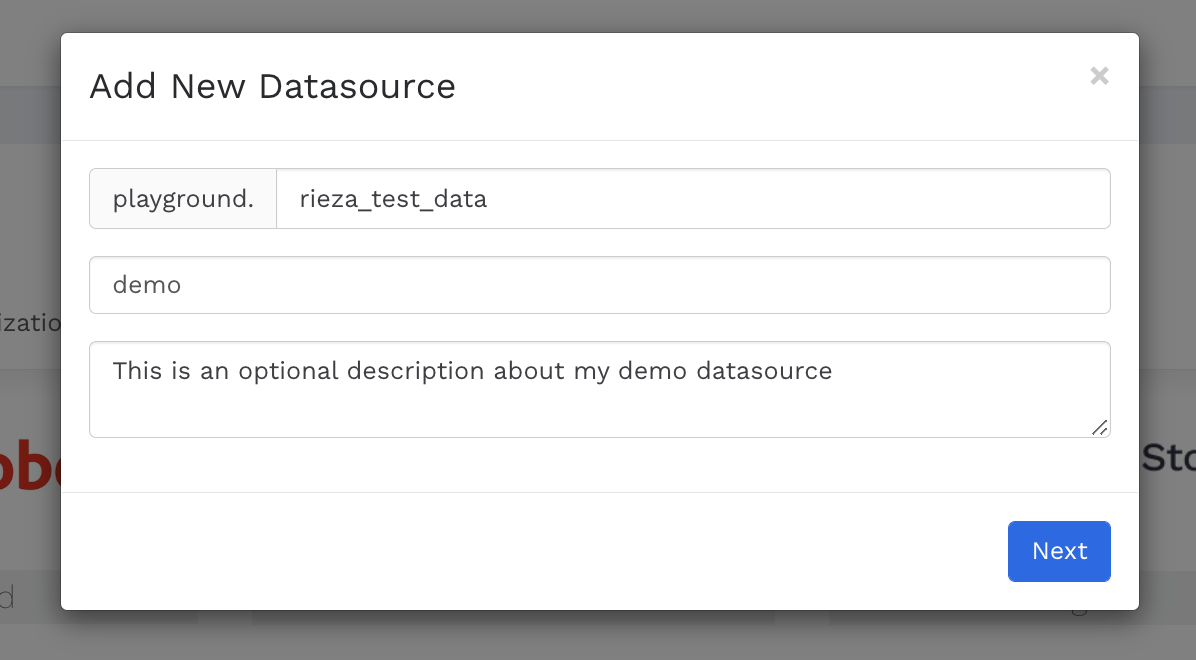
Once you have named your datasource click Next.
Now you will see the settings of your newly created datasource.
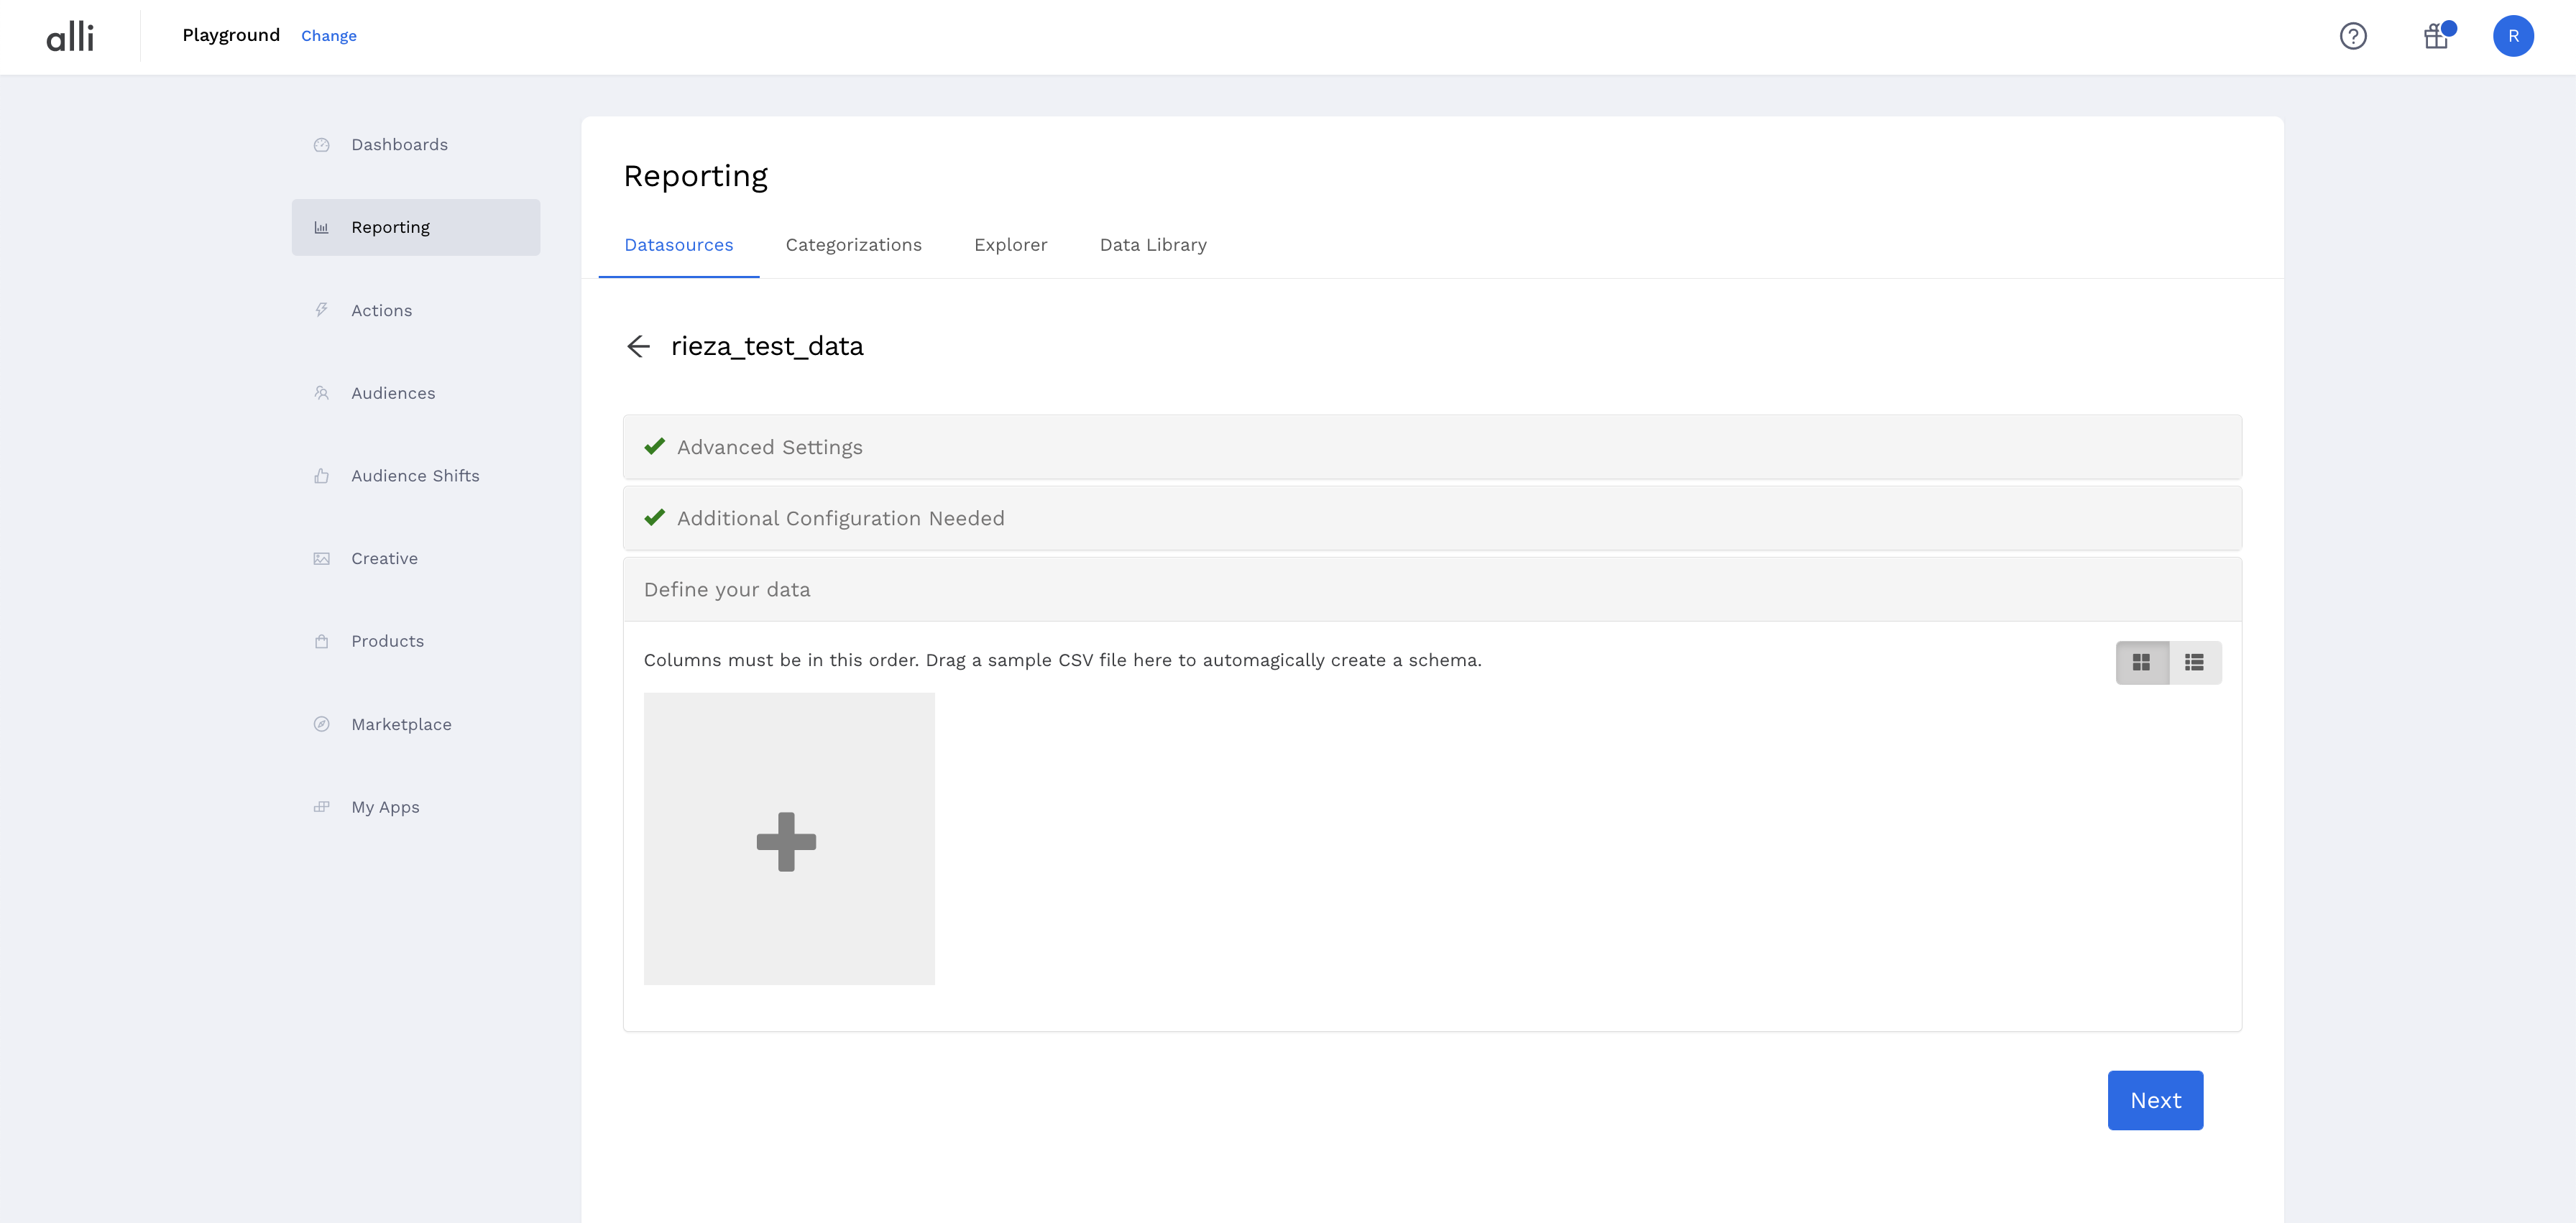
Open up Advanced Settings and check to make sure all fields look correct.
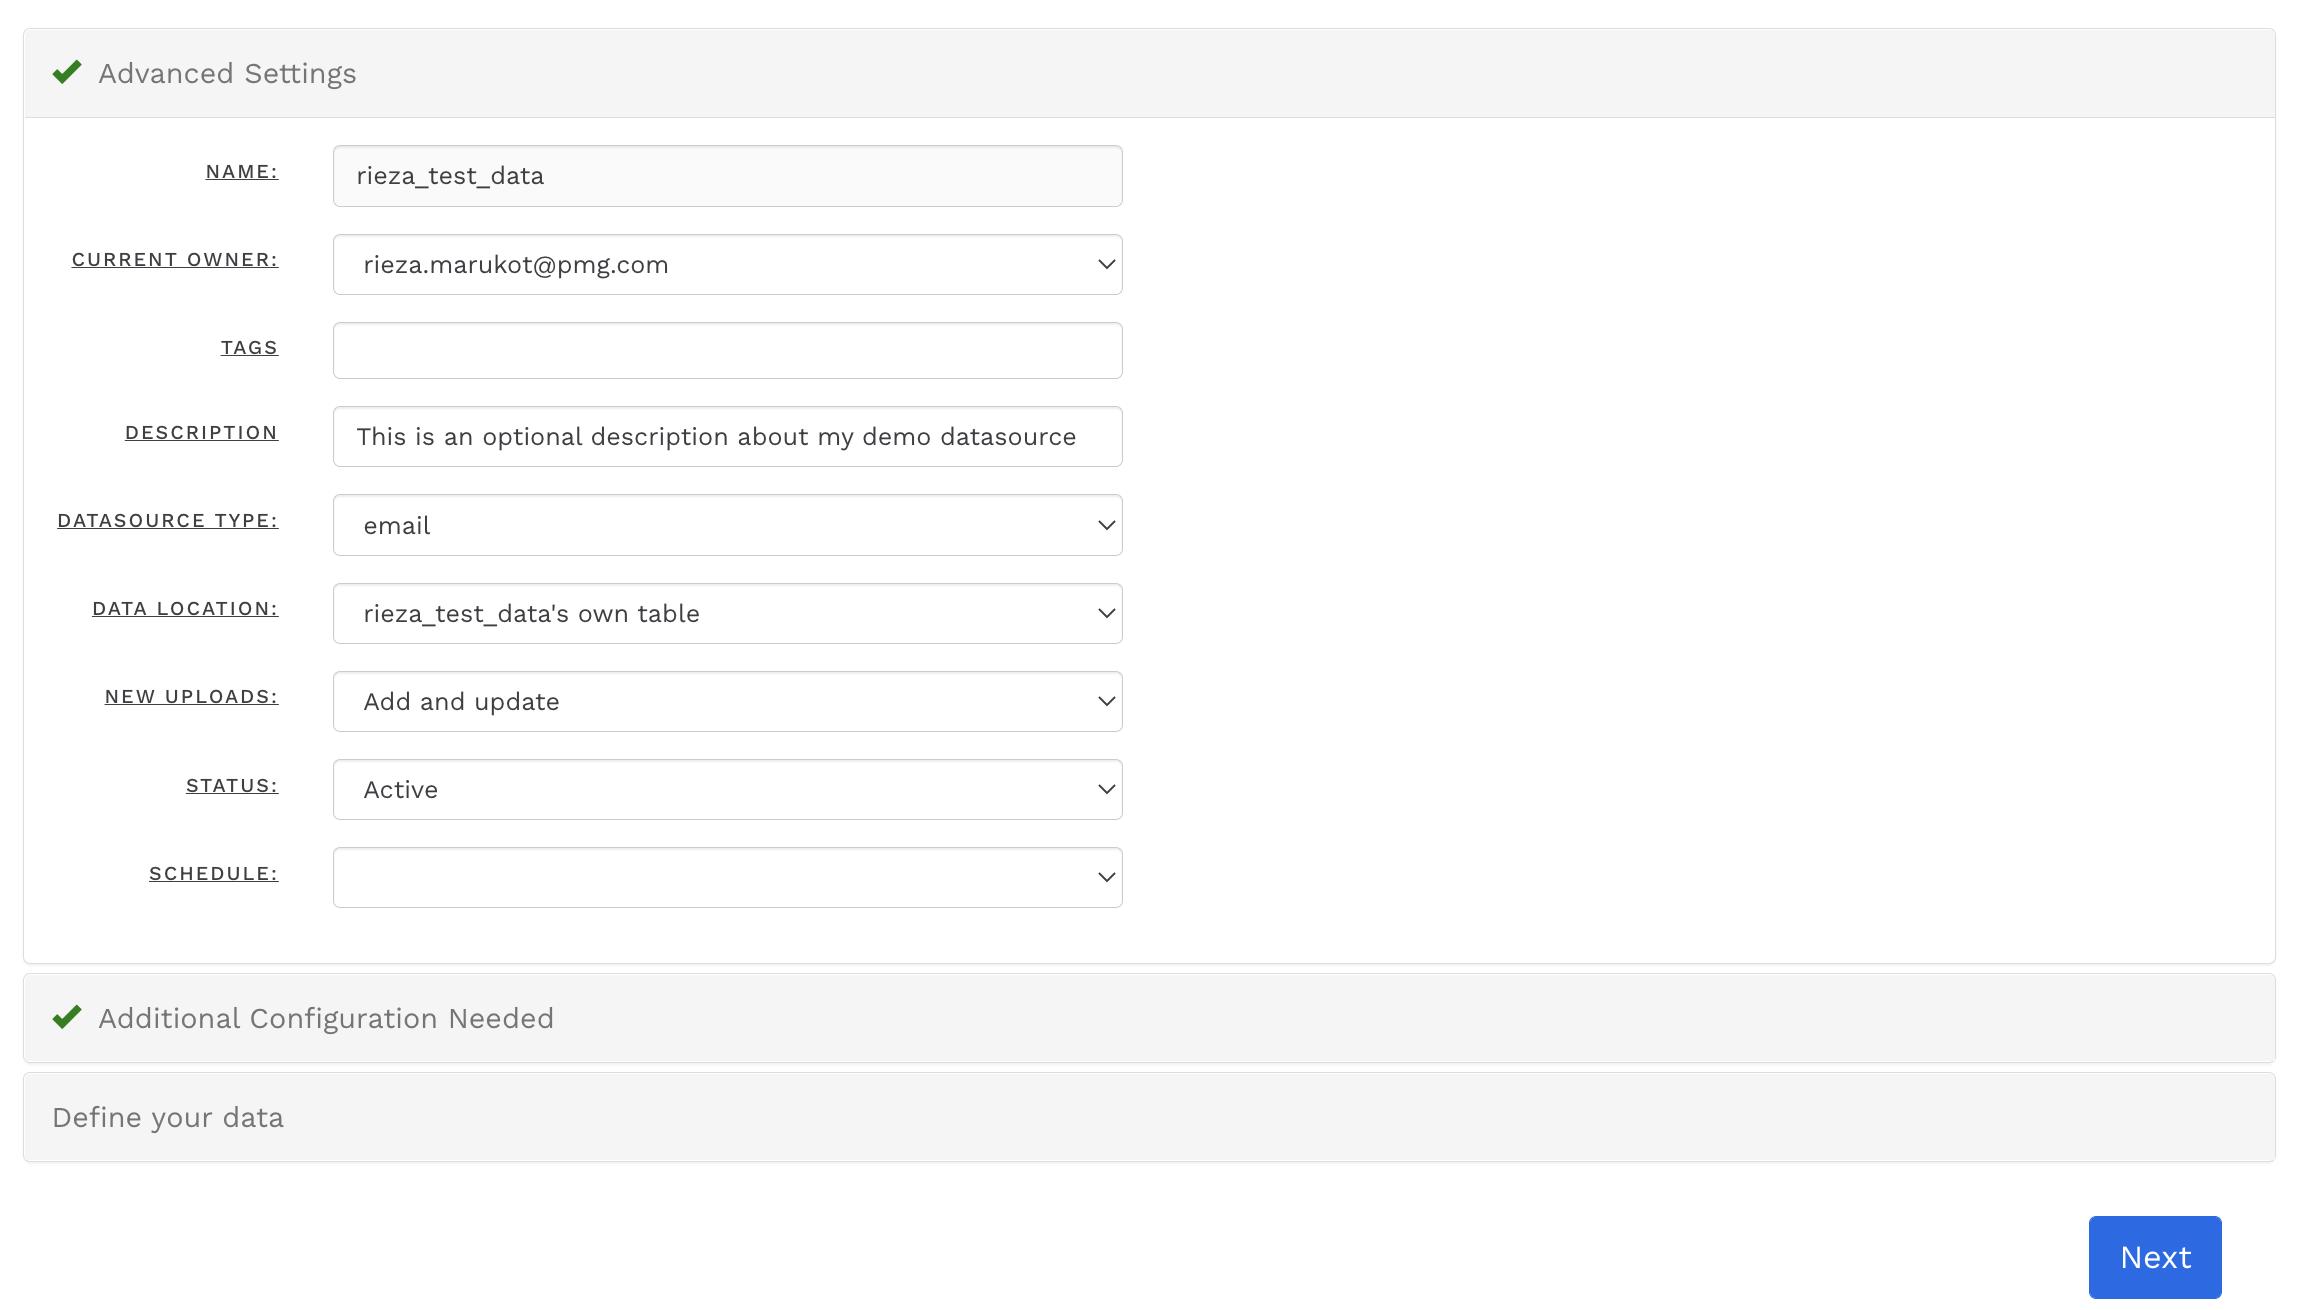
The Current Owner has the power to make changes to the datasource, including assigning a new owner. If you are not the owner of the table, you will not be able to change these fields.
Data Location is where the data source will live. If you have several data sources with all the exact same columns, you can select a different table in order to aggregate several tables together.
Under New Uploads, you will see two choices:
Add and update will be selected as the default which will add and update the existing data that is already in your table.
Replace which would get rid of all data, and replace it with the newest data.
If you are using any dimensions, you will continue with the default Add and Update so that the dimensions can correctly categorize your data.
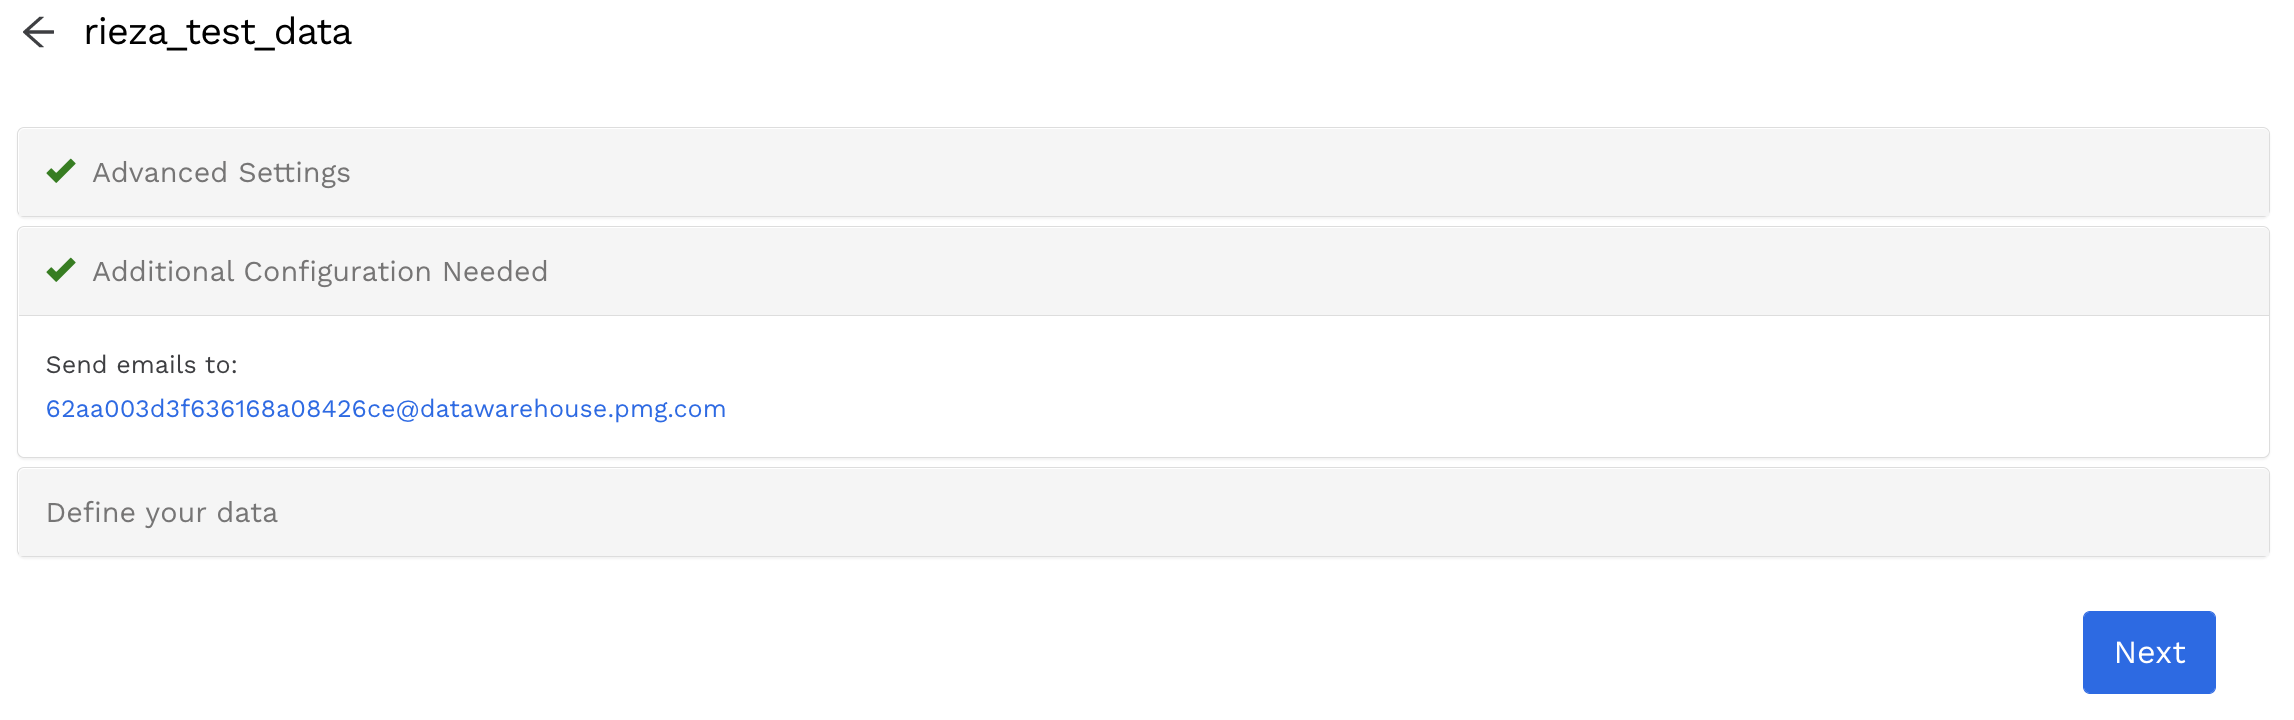
Select Additional Configuration Needed. This will be determined by the type of datasource that you are using. Because we selected ‘email’ as the Datasource Type, you will see the email address where data needs to be emailed as an attachment. In this example, data will be emailed to 62aa003d3f636168a08426ce@datawarehouse.pmg.com.
The data being emailed must be an attachment. If it’s a link inside of the email, it will not work out of the box (reach out to your account owner or in #alli-data for solutions).
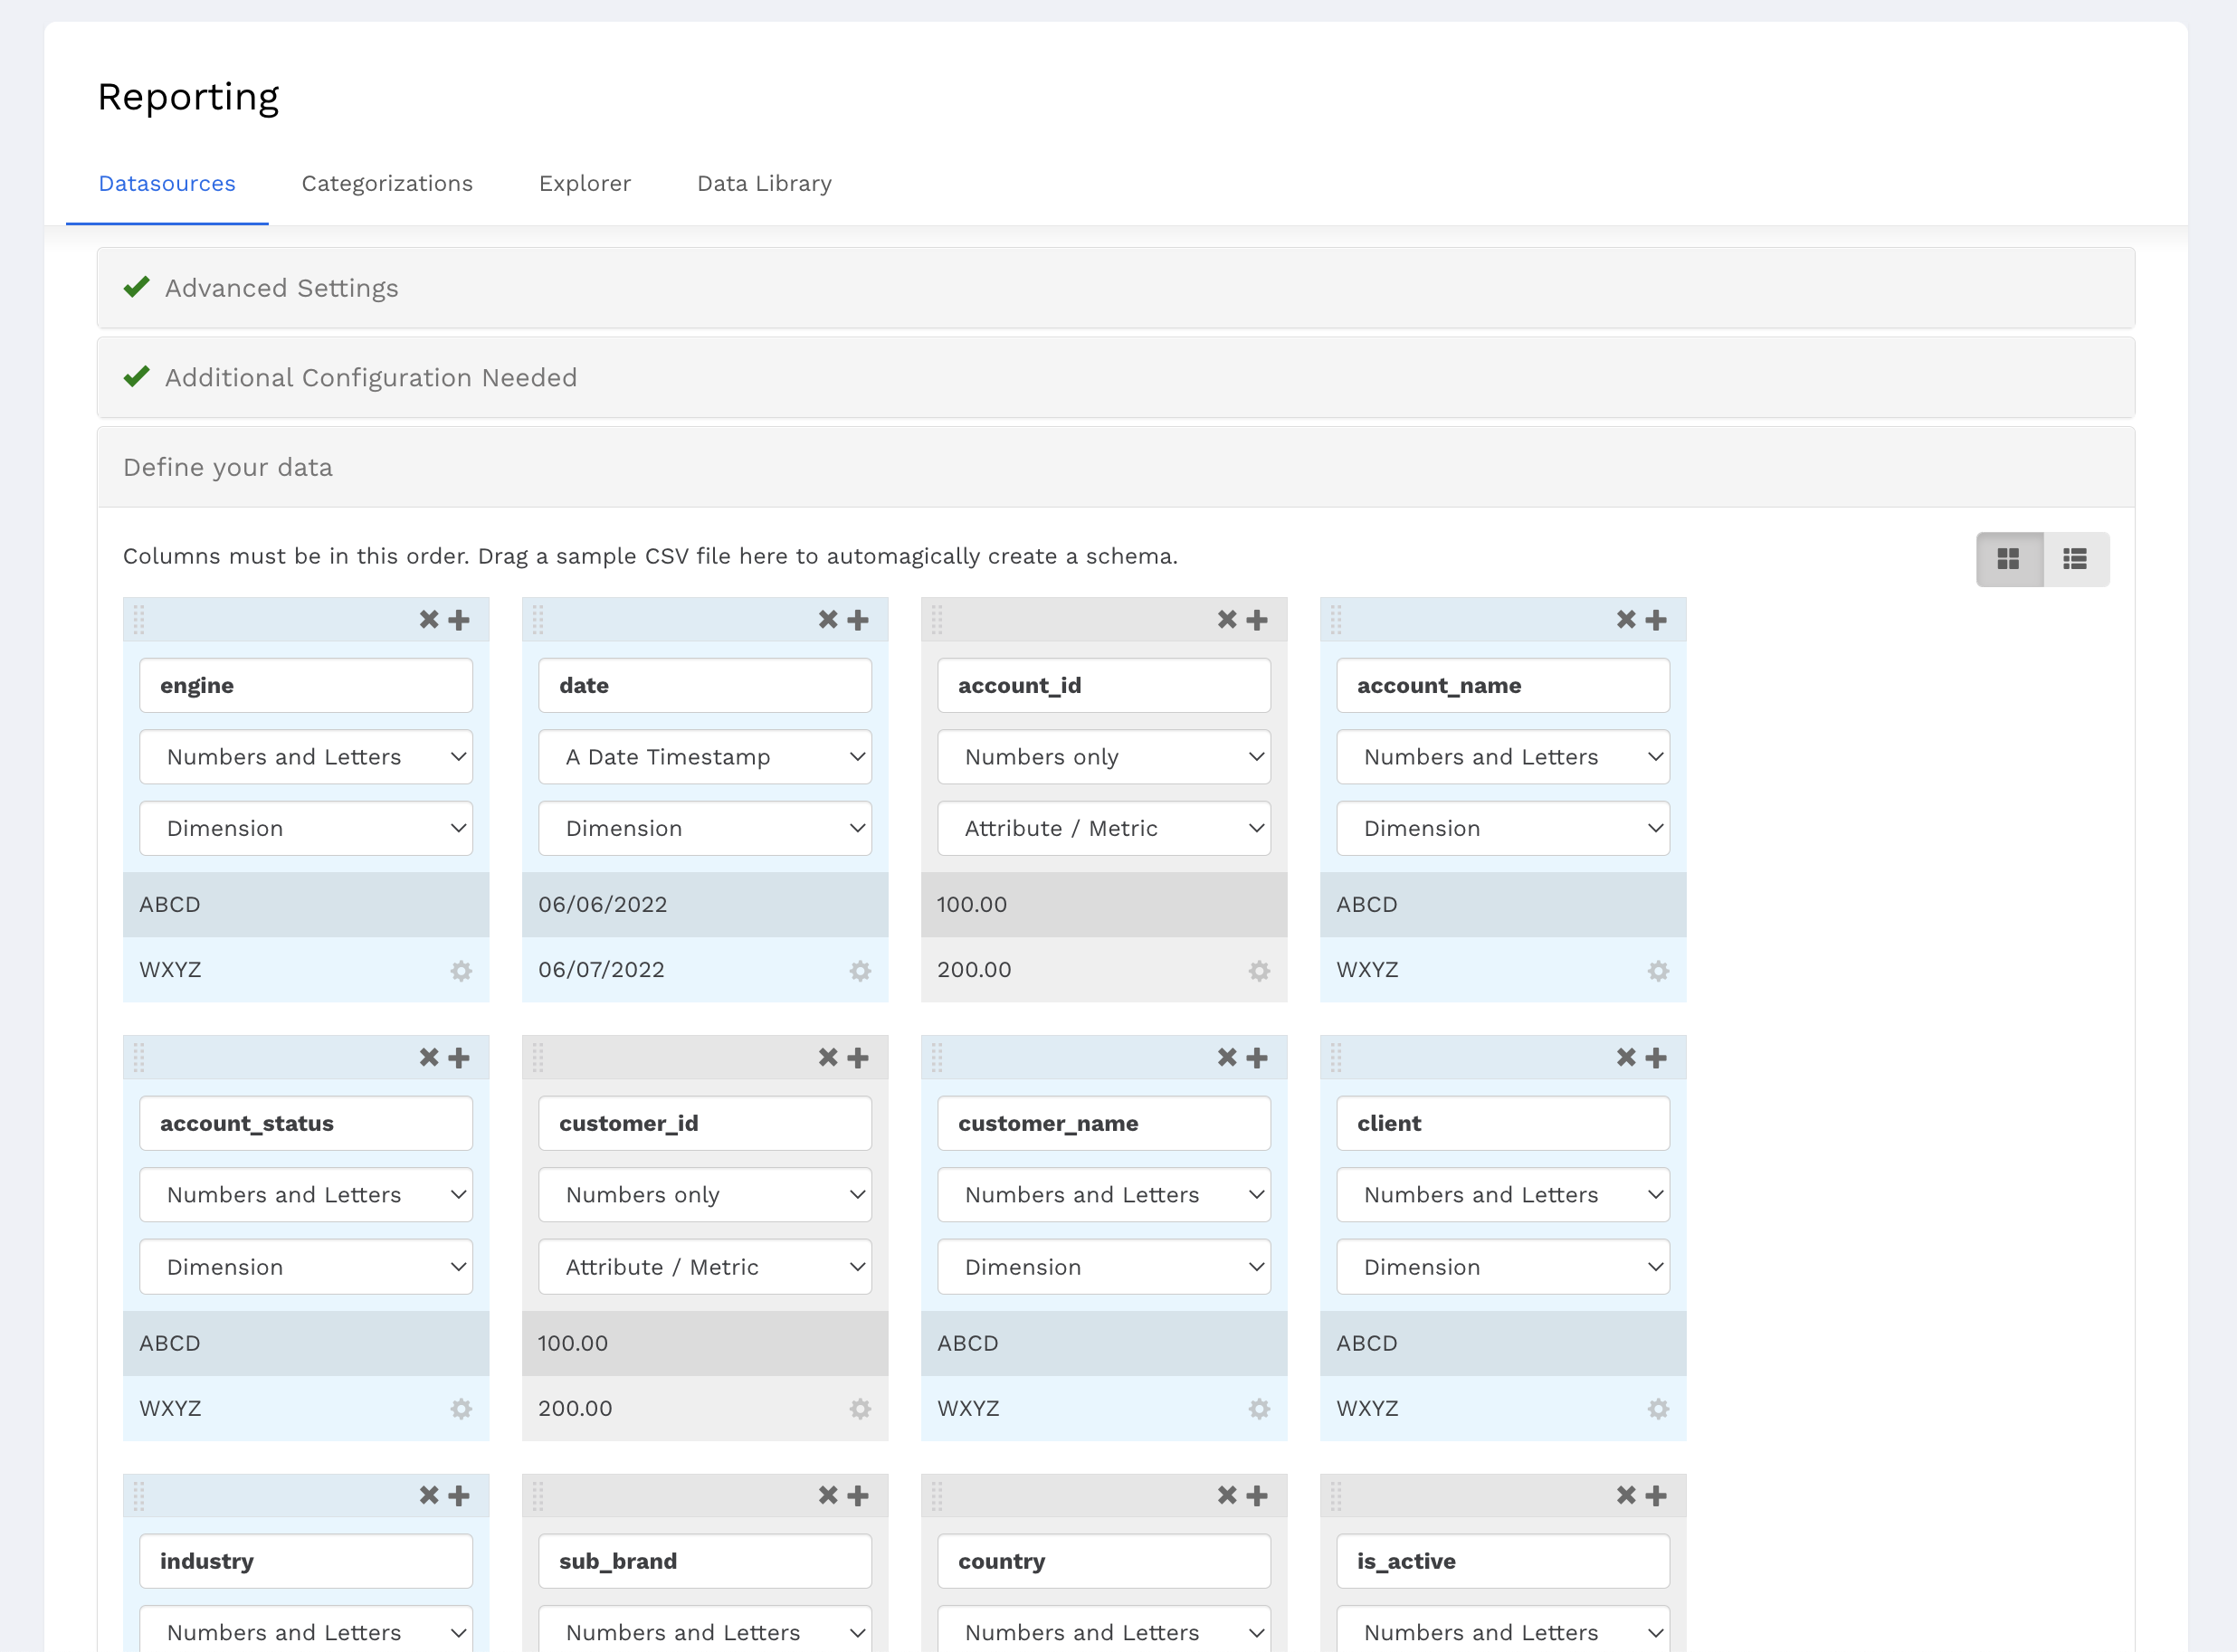
Click Next to continue setting up the datasource. In this last step, you will need to define your data. To automagically create the schema, you can drag a sample CSV file into this section. Click Save to complete the setup.
More information on how to set up custom columns for your datasource can be found below.
How to setup a datasource that requires custom data | Advanced-Setup-Instructions
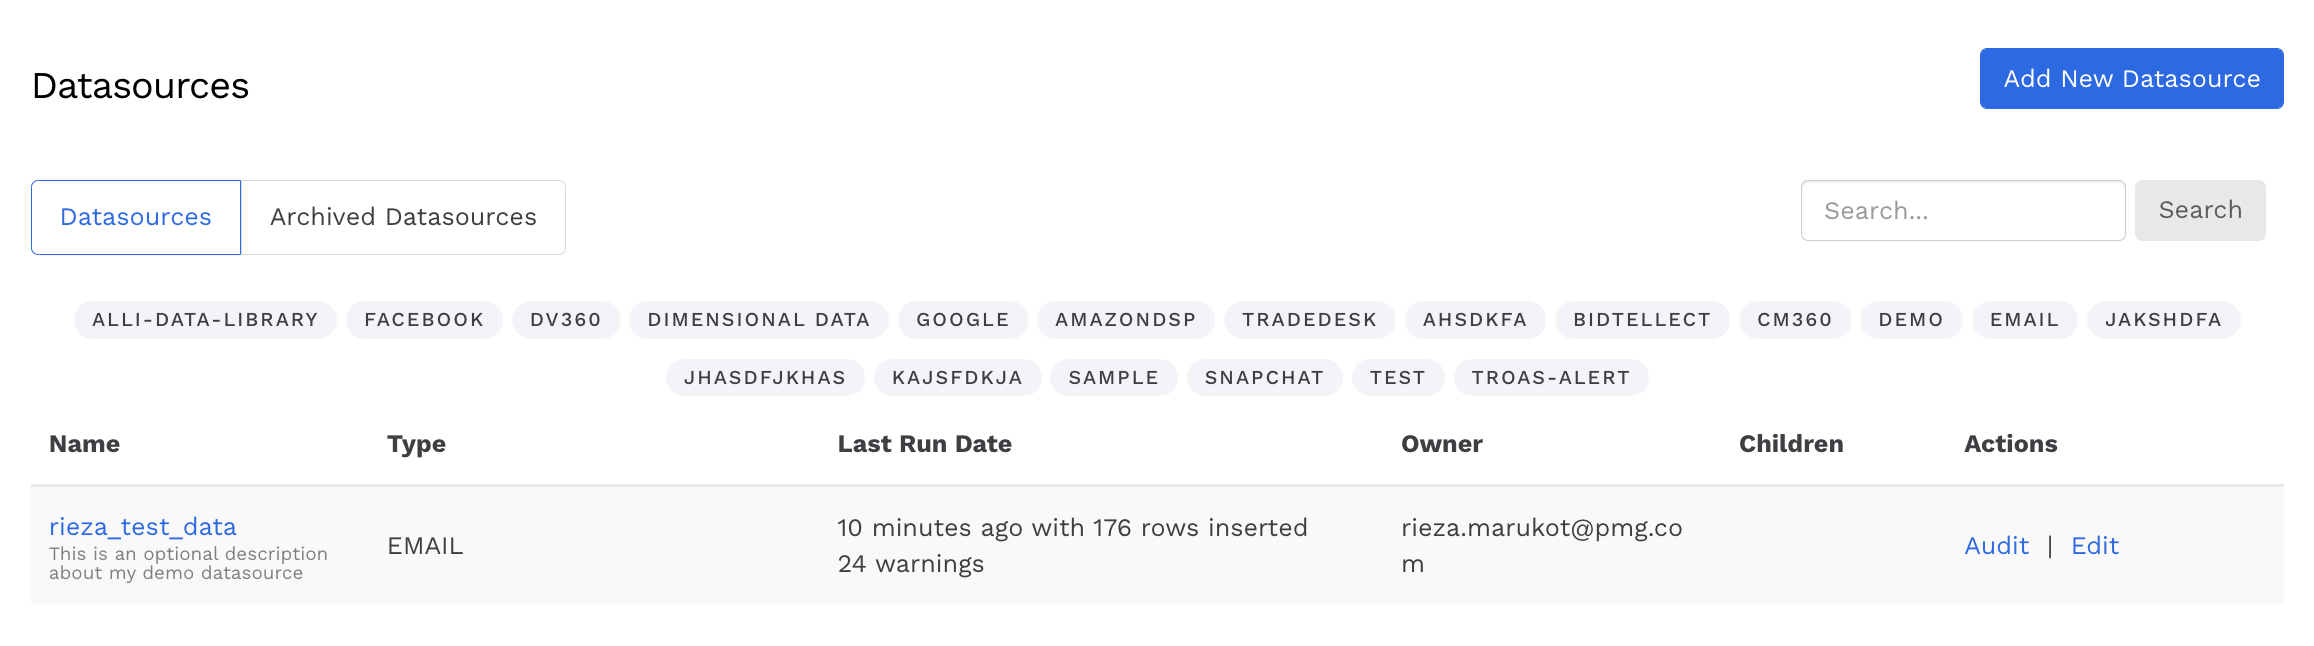
Your datasource will now appear on the Datasources landing page. Once an email is sent to the email address from the configuration, you will see the Last Run Date column updated with the status.
Congratulations, you have successfully created your first Datasource and can now use Explorer to view the data and create a report for future use!
Continued Reading
- How to enable Big Query for a custom alert
- How to name Datasource Columns
- How-to Add A New Slack Workspace to send alerts to
- How to manually upload data to an existing datasource
- How-to Create a Sentiment Dashboard from FB Sentiment
- How to archive and unarchive data sources
- How to create a manual datasource without validations
- How-to add a new datasource to an existing Data Studio dashboard
- How to connect your report to Excel for use in reporting
- How to create a new Dashboard Section
- How to reorganize your dashboards
- Instructions for Adding Location Insights Dashboard in Alli
- Getting started with Explorer Reports
- How to view datasource errors and warnings
- How to add new dashboards and documents