
Overview
Setting Marketplace apps you’ve set up to run on a recurring schedule is a great way to automate tasks you need to accomplish.
Instructions
-
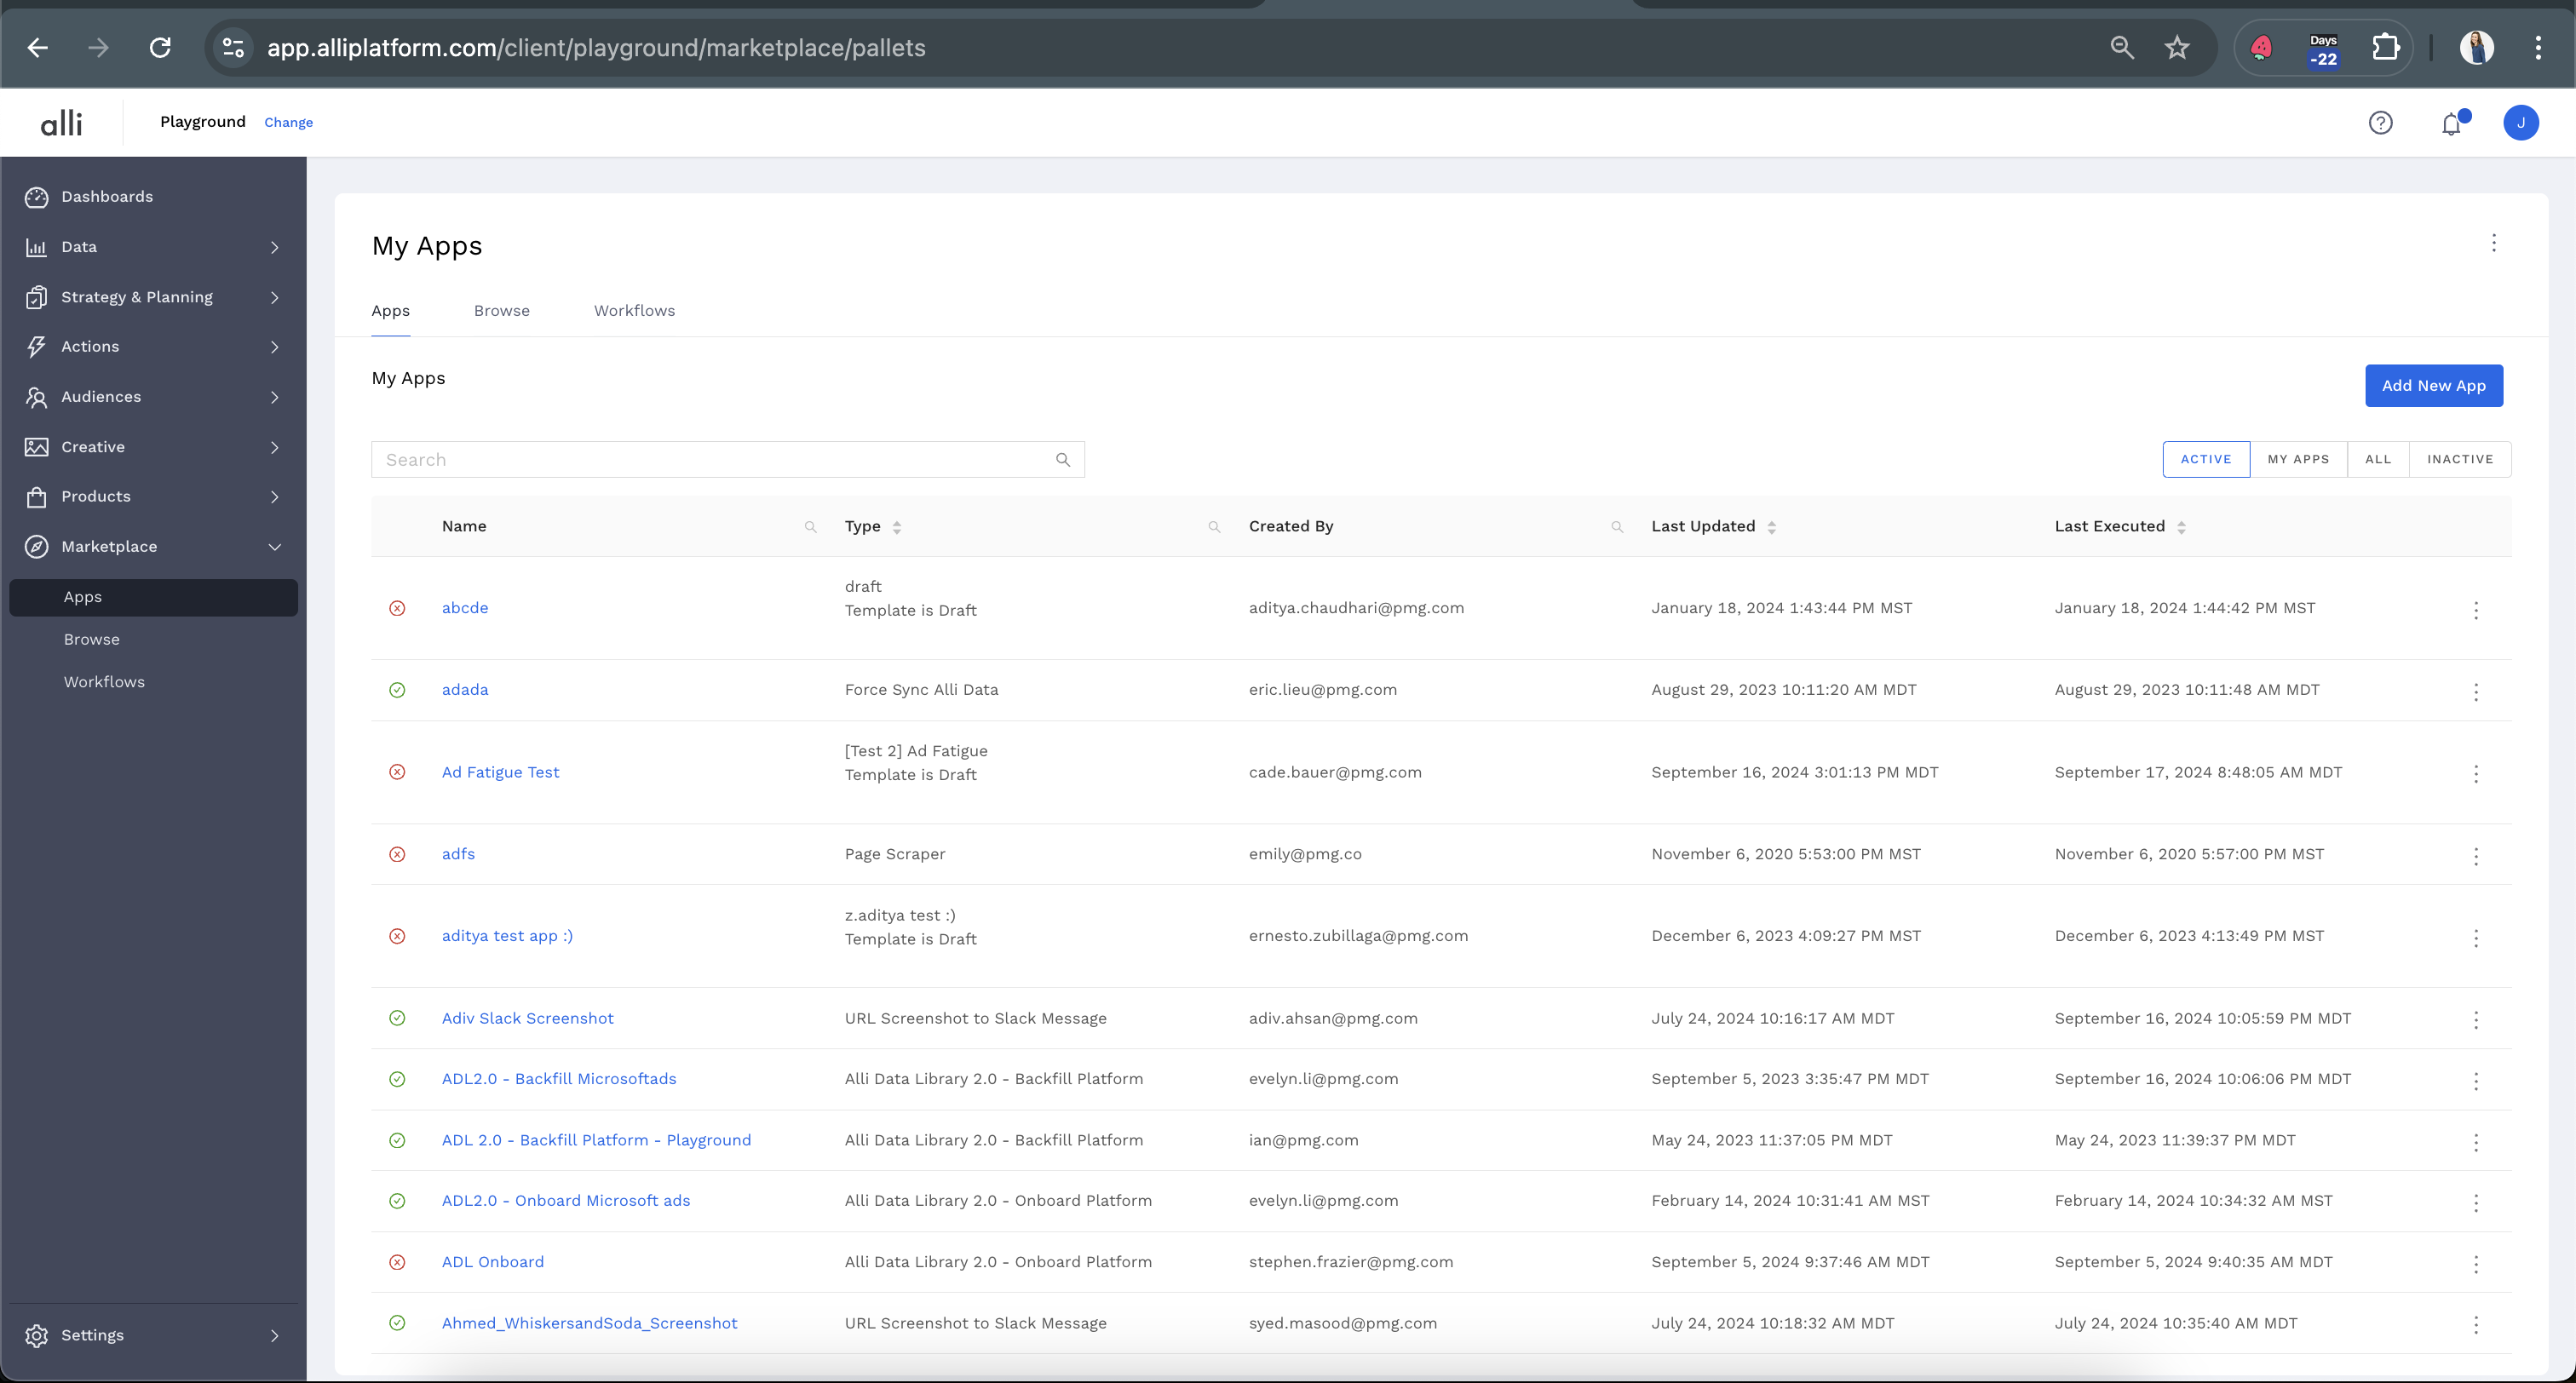
From the left-hand side navigation, select Marketplace. This will show all of the custom apps that are currently set up for the selected customer.
-
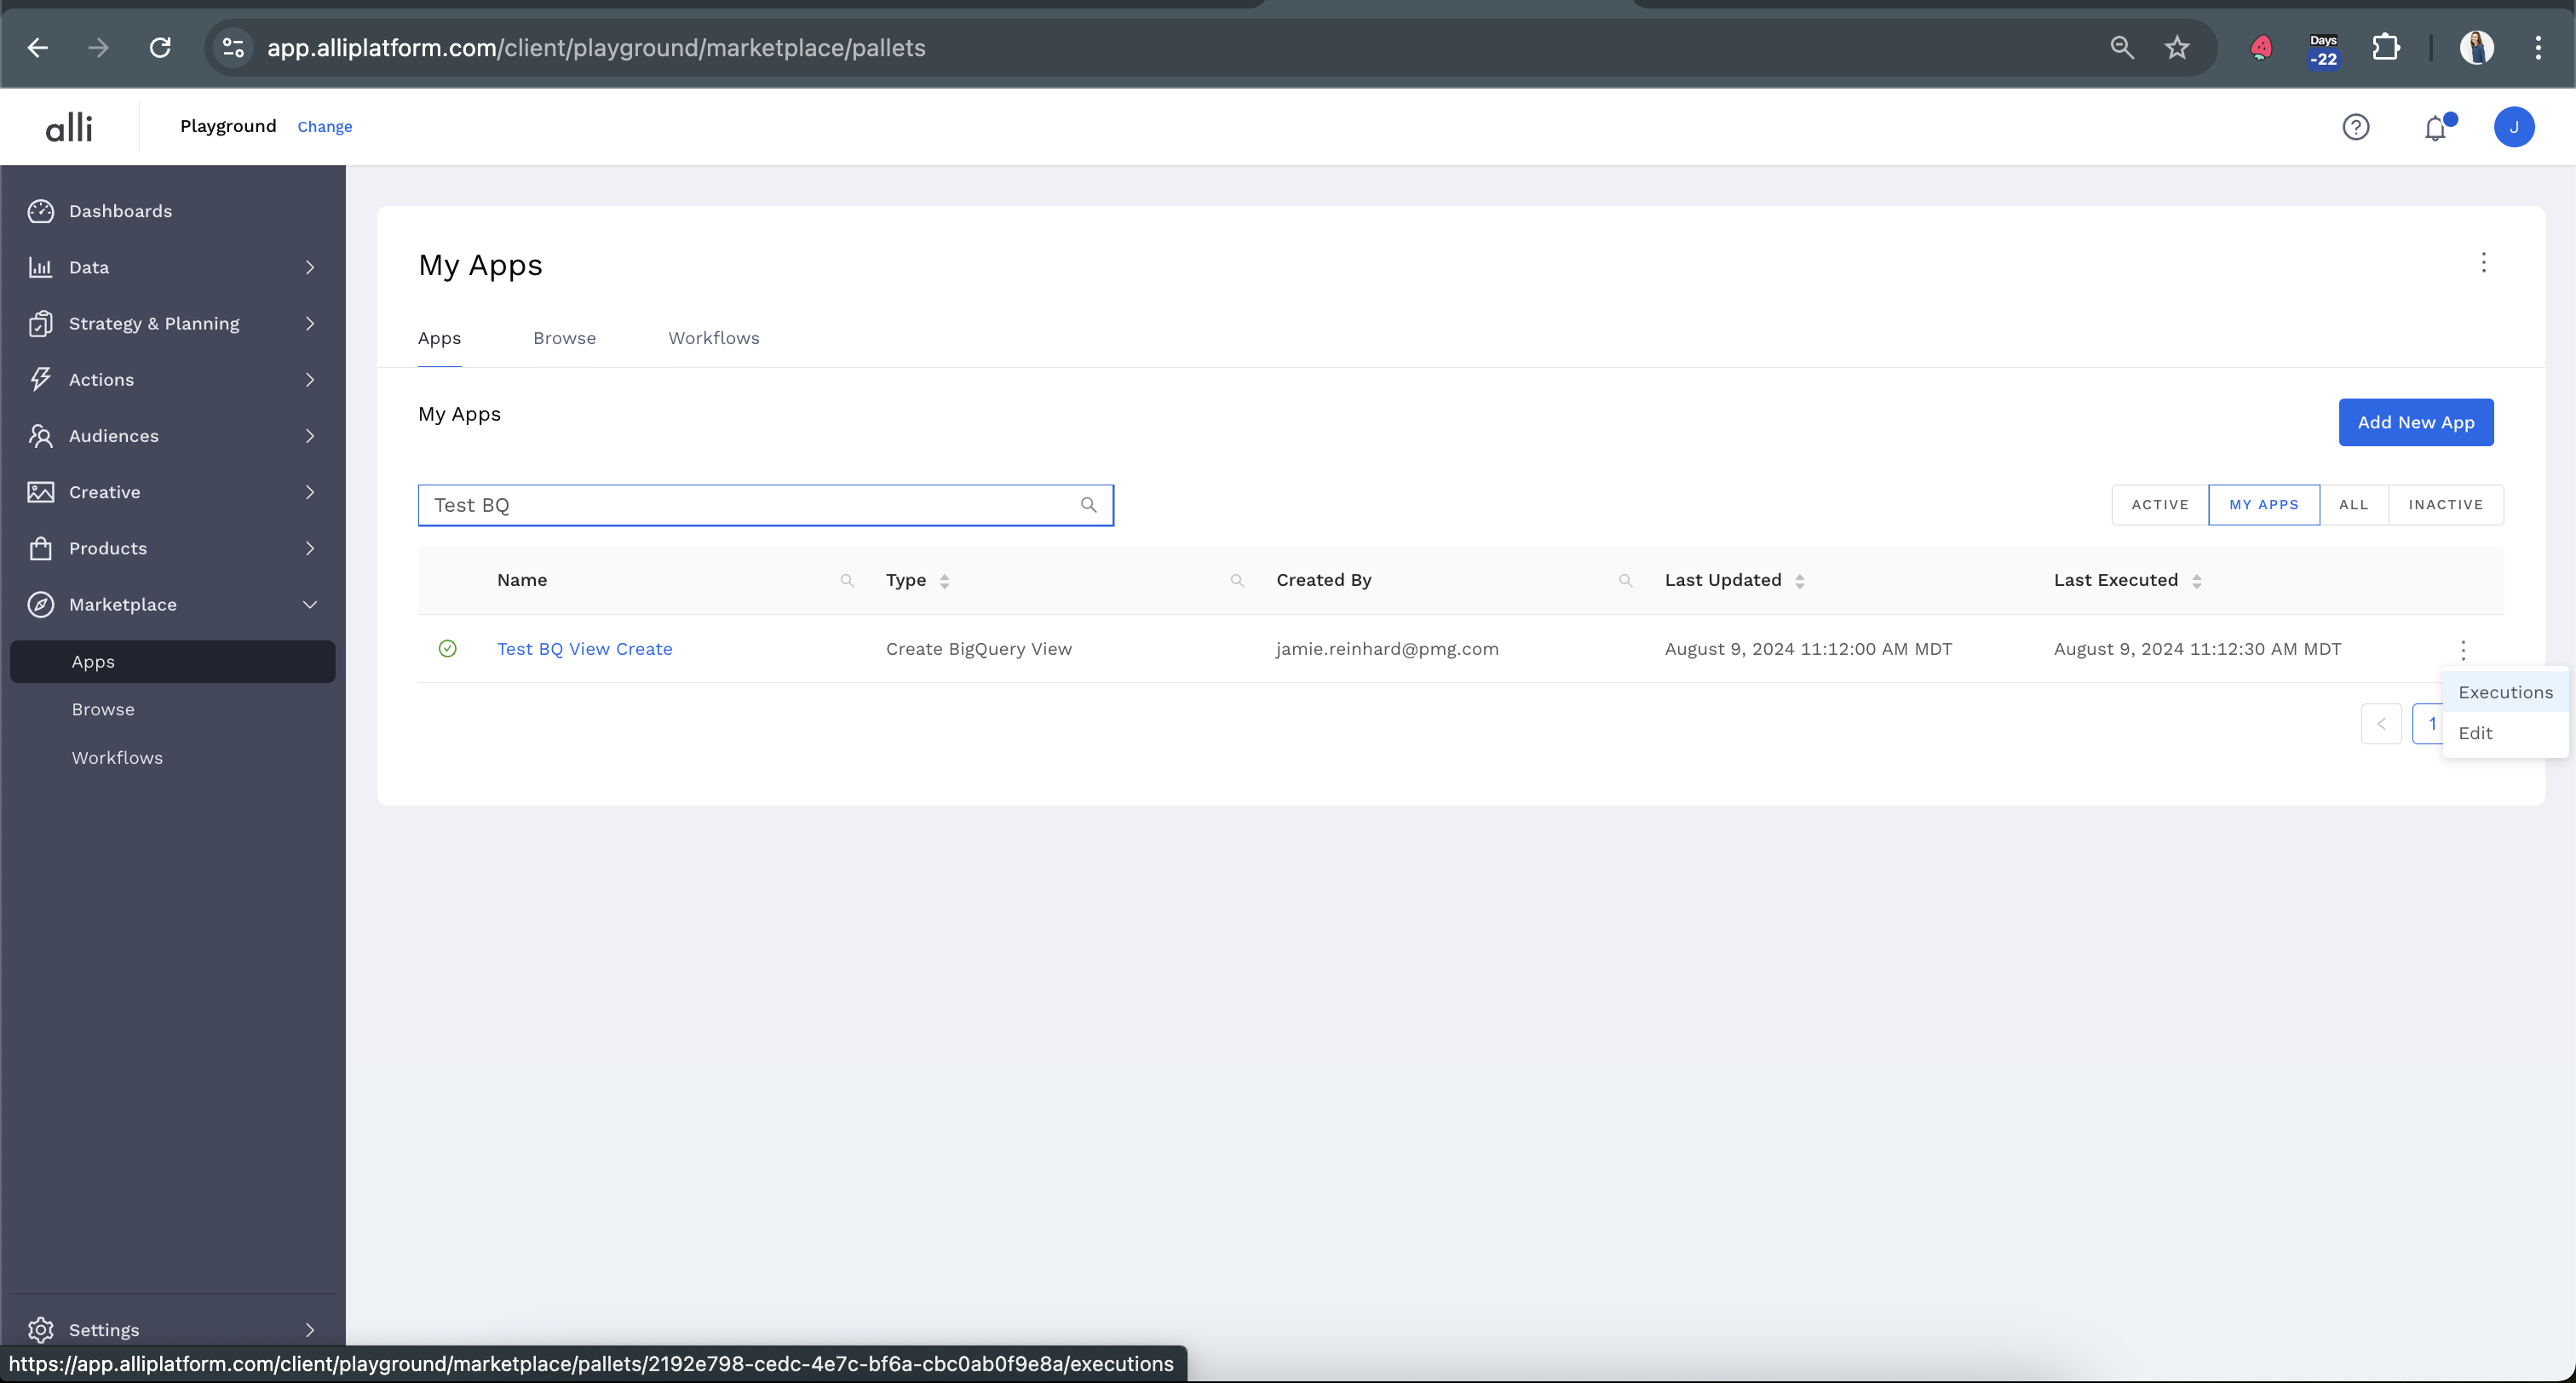
Using the search bar, find the app you would like to adjust the schedule for. From the right-hand side of the App name, under the three dots, choose Executions. Or you can simply click on the name of the app.
-
To add a schedule, click the plus button beneath
On A Schedule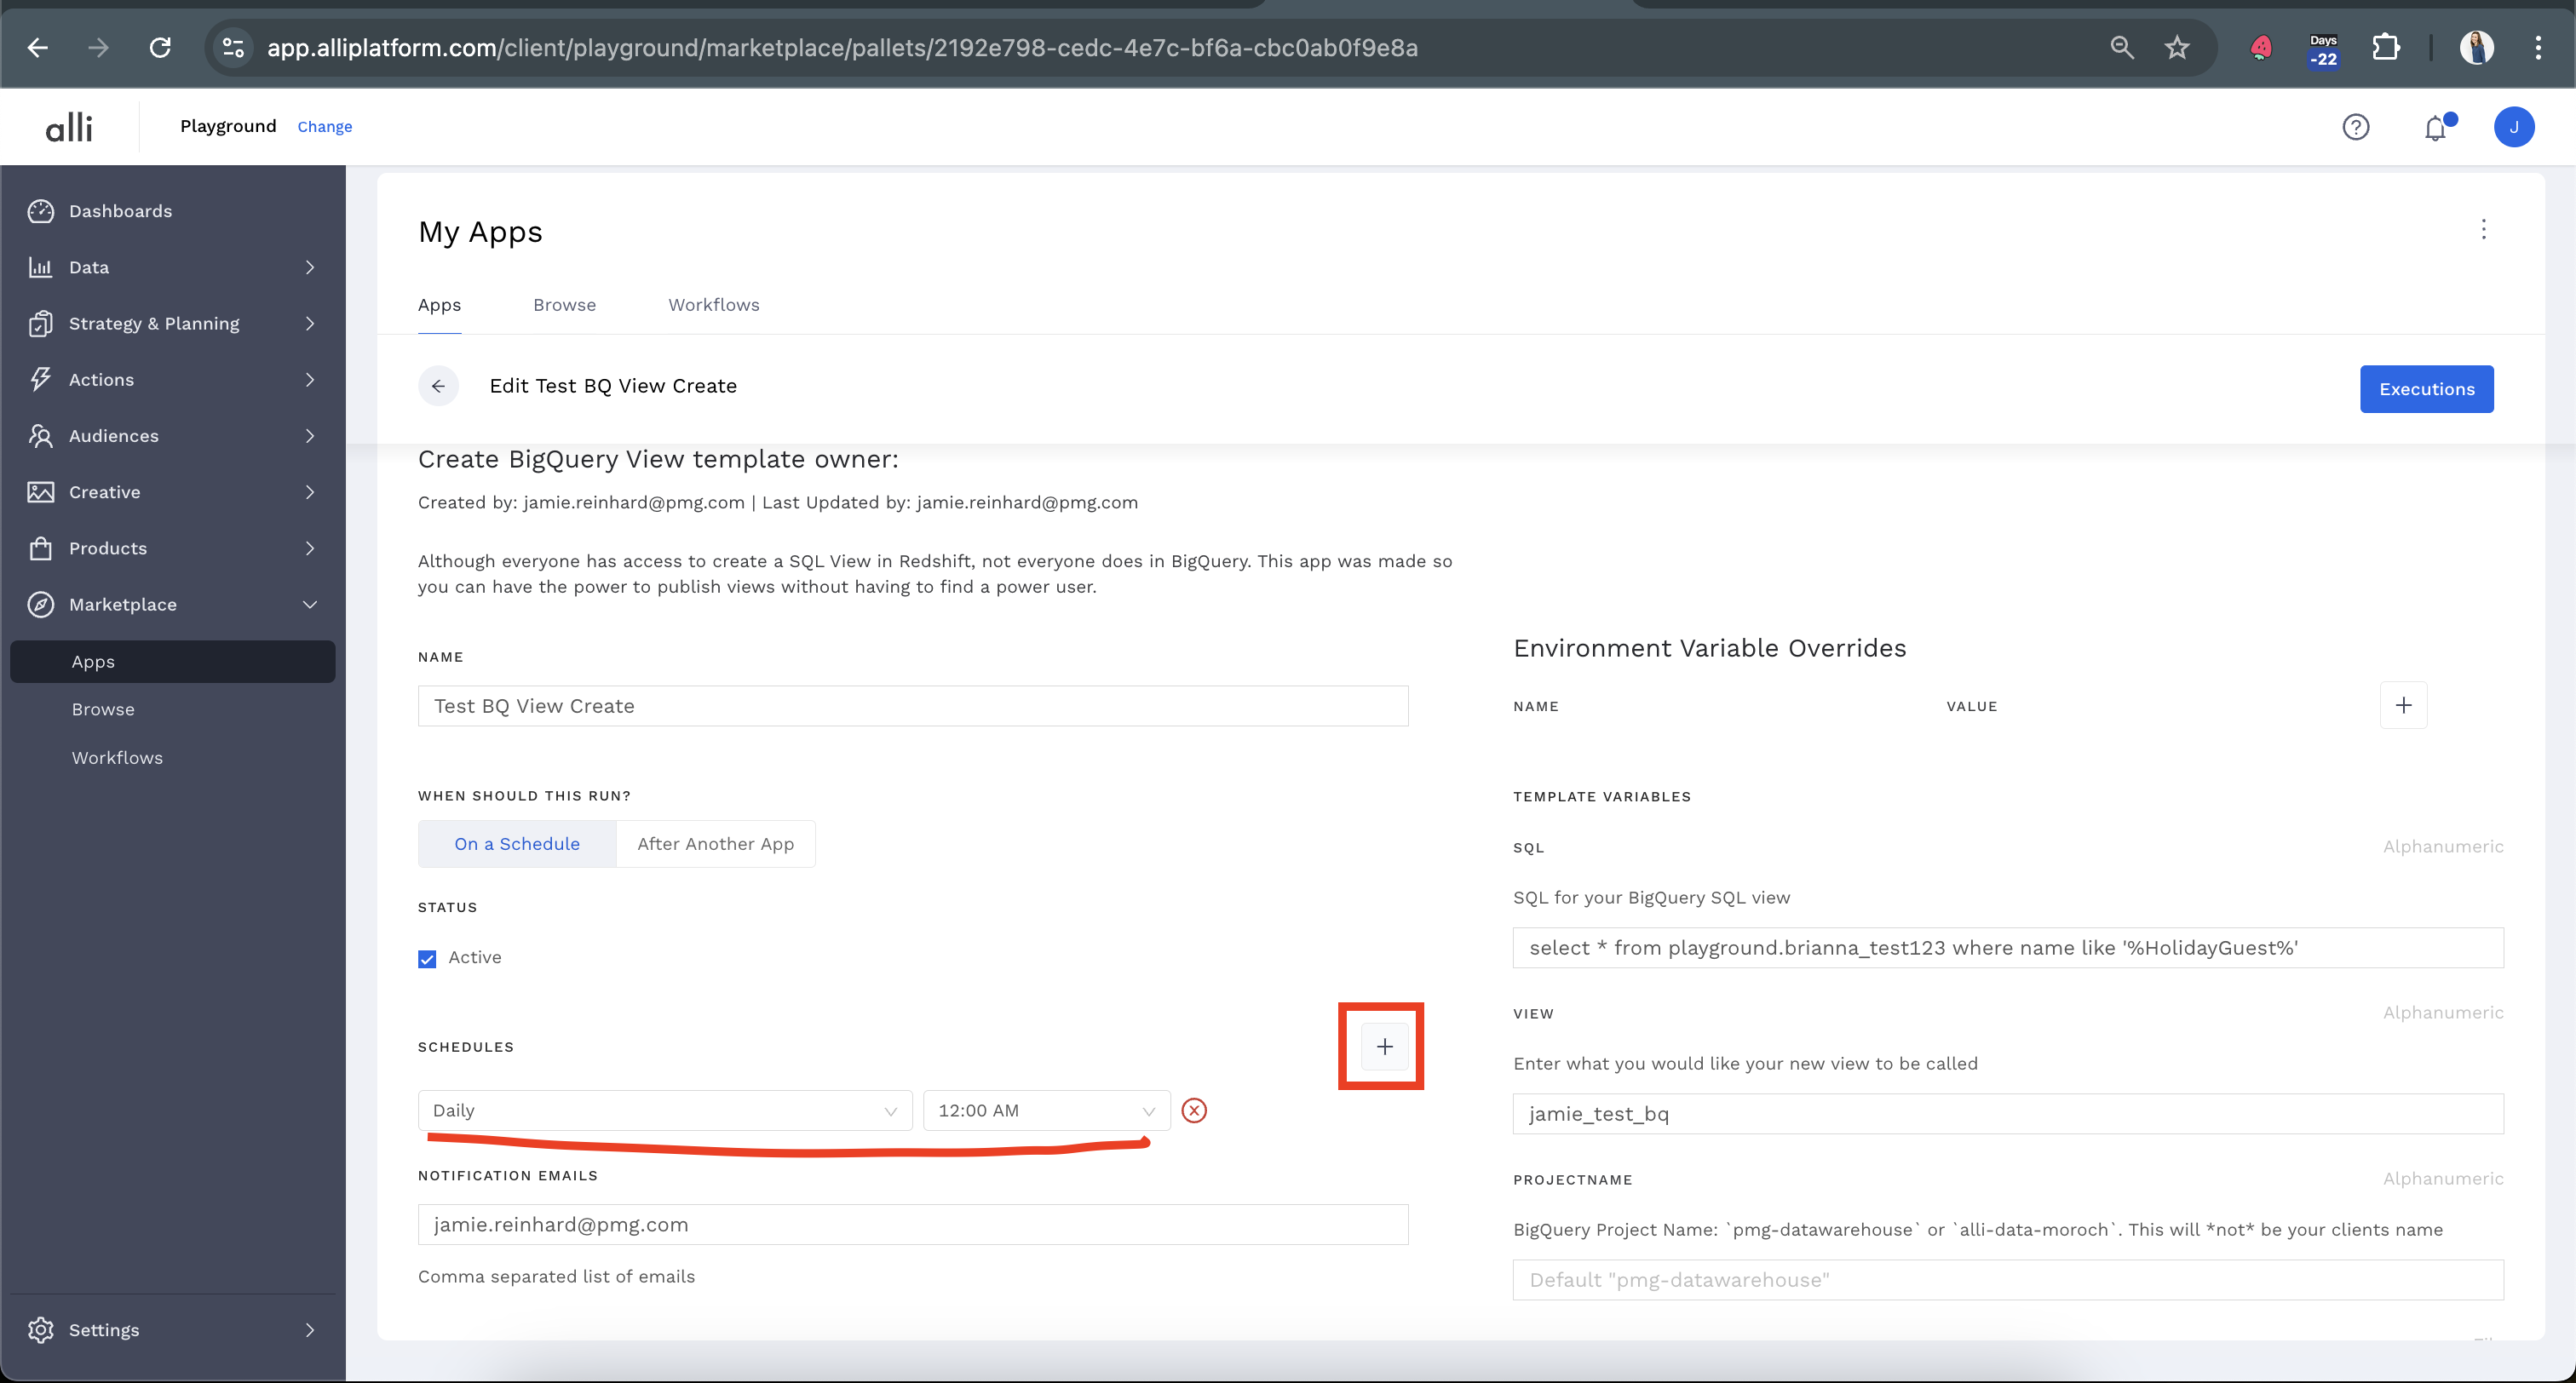
-
You may add as many schedules as you desire, but remember that each individual schedule will continue/run regardless of whether the previous run is complete, so if the app runs should not overlap, try adding just a single schedule and learning how long the app typically takes to run before adding others
-
To use the
After Another Appand create a workflow, refer to the How-To: Set Up a New Workflow documentation. -
Once you have completed your inputs, you can either
SaveorSave and Runyour app.Save and Runwill kick off an immediate execution of the app, and you can QA the app while it is running, or after it is completed using the instructions found in How-To: QA your app, orSavewill save your inputs, and your app will run at the next scheduled time you set up in your schedule.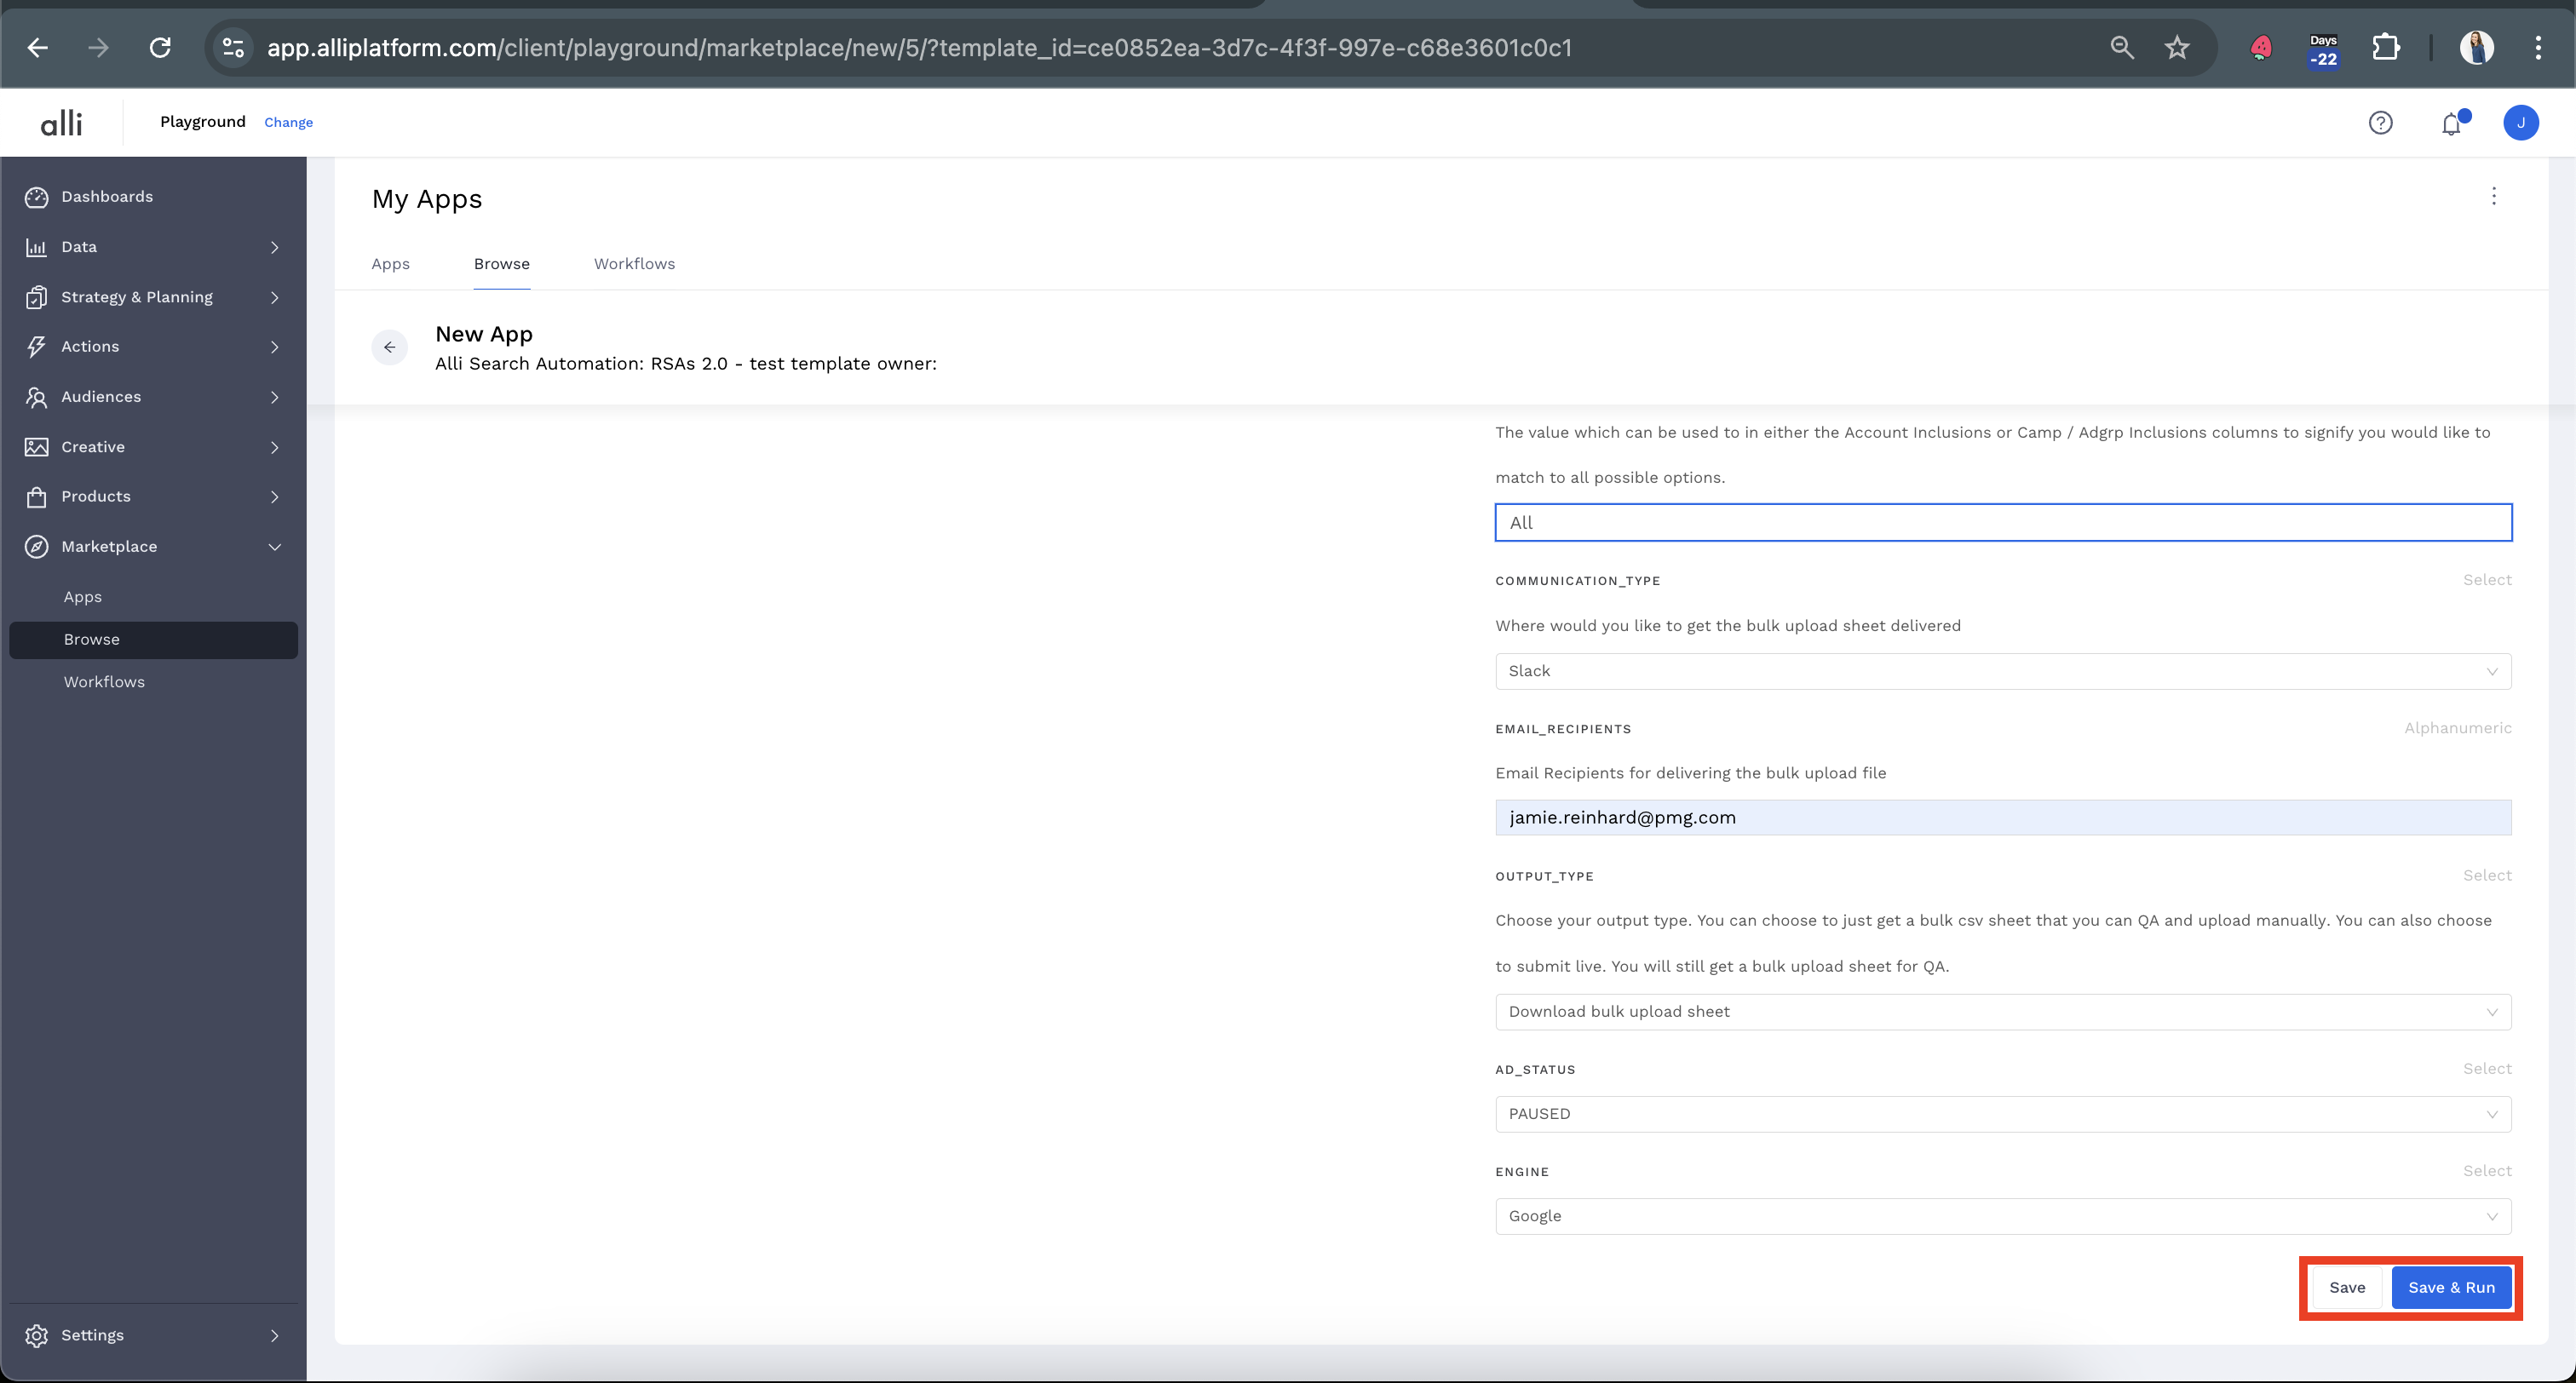
Schedules are based on the client timezone specified in Alli
Related articles
- How-To: Connect your Google Sheet to Actions
- How-To: Disable or Remove an Installed App
- How-To: Set Up a New Workflow
- How-To: Pull Data for TikTok Trends
- How-To: View Error Messages on an Action That Ran
- How-To: Filter Alli Data Reports by Date to Power Actions - Tips & Tricks
- How-To: Understanding Version Statuses
- How-To: Create a Scheduled Version
- How-To: Weather API App
- How-To: Set Up Brand Media Pacing Datastudio Dashboard
- Tutorial: Adding Negative Keywords to Google Ads
- How-To: Test Your Action
- How-To: Using the Execution Log
- How-To: Setup Weather Budget Adjuster
- Tutorial: TheTradeDesk - Brand Safety Alerts