
Overview
Workflows can be shared with teammates using a shareable URL. This makes it easy to pass workflows between colleagues, link them in documentation, or drop them into Slack. When shared, the recipient creates a new copy of the workflow in their account. You can also “share” workflow links with yourself immediately, by opening up a new tab and navigating the the copied shared URL.
Steps
-
Go to the My Workflows tab (or All Workflows tab).
-
Find the Workflow you want to share.
-
Click the three-dot menu next to the Workflow.
-
Select Share.
-
A shareable URL will automatically be copied to your clipboard.
-
You can paste this link into Slack, email, or documentation.
-
If you want to “share” your workflow with yourself on a different client, open up a new tab and copy/paste your shareable URL. You’ll be directed to the next step, ie choosing a client to share your workflow with
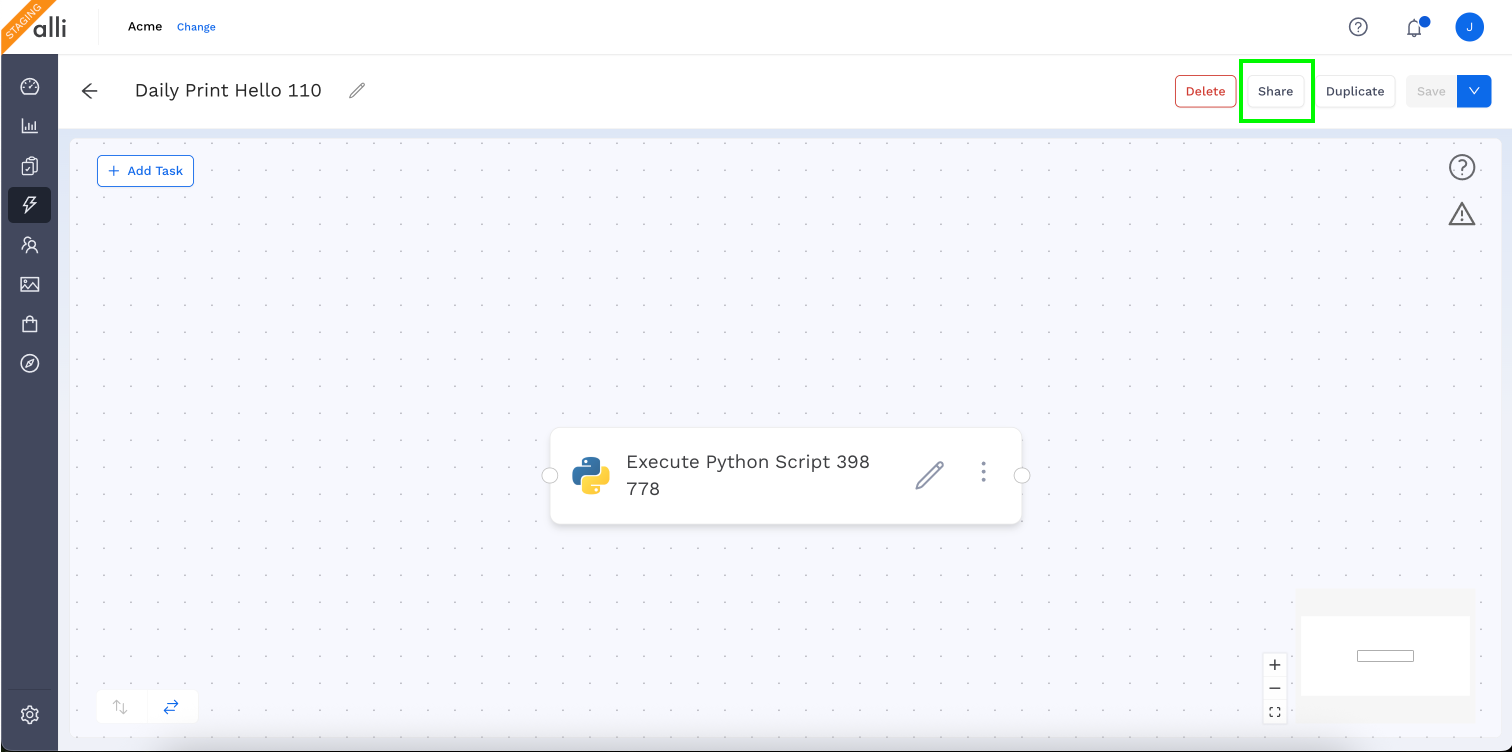
You can also Share from the Workflow Visual Editor (the Workflow building screen) for any saved workflow.
What Happens When Someone Opens the Link
-
The recipient is prompted to select a client from a dropdown.
-
The dropdown only shows clients they already have access to.
-
-
After selecting a client and clicking Okay, a new copy of the Workflow is created in their account.
Important Notes
-
Credentials and environment variables are not copied over for security reasons.
-
Inputs do not carry over. The recipient gets the structure/outline of the workflow and must customize it for their client.
-
Custom code (Python, Bash, Node, etc.) does copy over.
-
It’s critical that no sensitive information (tokens, client data, usernames, passwords) is hardcoded in the code.
-
Always use credentials and environment variables instead of hardcoding.
-
-
The recipient must:
-
Add all required inputs
-
Rename the workflow
-
Save it before use
-